Chortau Dash Cam Manual: Comprehensive Guide
This comprehensive guide details setup‚ features‚ and troubleshooting for your Chortau dash cam‚ ensuring optimal performance and safety on the road.
Welcome! This manual serves as your complete resource for the CHORTAU dash cam‚ designed to provide reliable recording and peace of mind while driving. Whether you’ve chosen a single or dual-camera system (front and rear)‚ this guide will walk you through every step – from initial setup and understanding the interface to utilizing advanced features like parking monitor and GPS data logging.
The CHORTAU dash cam boasts Full HD 1080P recording‚ a wide 170-degree angle lens‚ and a 3-inch LCD screen for clear footage playback. Key features include loop recording‚ a G-sensor for impact detection‚ and enhanced night vision for optimal performance in low-light conditions. This manual‚ referencing models like the B-T002‚ will help you become proficient with your new device‚ ensuring you maximize its capabilities and enjoy a safer driving experience.
Unboxing and Package Contents
Upon receiving your CHORTAU dash cam‚ carefully inspect the package for any signs of damage during transit. A complete package should include the following items: the CHORTAU dash cam unit (front and rear cameras if a dual-camera system was purchased)‚ a car power adapter with a mini-USB cable‚ a suction cup mount for windshield attachment‚ a rear camera cable (for dual-camera setups)‚ a GPS module (if included with your model)‚ cable clips for tidy wiring‚ and this comprehensive user manual.
Verify that all listed components are present. If anything is missing or damaged‚ immediately contact the retailer or CHORTAU customer support. Retain the original packaging for potential returns or warranty claims. Familiarize yourself with each component before proceeding to the installation phase‚ ensuring a smooth and hassle-free setup process.
Setting Up Your Dash Cam
Proper installation and configuration are crucial for optimal dash cam functionality‚ including power connection‚ secure mounting‚ and GPS setup.
Initial Installation & Power Connection
Begin by carefully connecting the Chortau dash cam to a reliable power source within your vehicle. Utilize the provided car charger‚ plugging it into the cigarette lighter or accessory port. Ensure a secure connection to prevent interruptions during recording. For optimal performance‚ route the power cable discreetly along the vehicle’s headliner and down the A-pillar‚ concealing it from view. Avoid obstructing your driving visibility.
The dash cam will automatically power on upon connection. Verify the correct time and date settings are displayed on the LCD screen. If not‚ navigate to the settings menu to adjust them. Some models may require initial SD card formatting before first use; follow the on-screen prompts. A stable power supply is essential for continuous operation‚ especially when utilizing parking monitor features.
Mounting the Dash Cam (Front & Rear)
Securely mount the Chortau dash cam to your vehicle’s windshield using the provided suction cup mount. Ensure the lens has a clear‚ unobstructed view of the road. For the rear camera‚ select a suitable location – typically the rear windshield or near the license plate – and utilize the included adhesive mount. Proper alignment is crucial for capturing comprehensive footage.
Adjust the camera angles for optimal coverage. The front camera should focus on the road ahead‚ while the rear camera should capture the area behind your vehicle. Avoid mounting the cameras in areas that may cause glare or reflections. Regularly check the mount’s stability to prevent the camera from detaching during driving. A firm‚ secure mount is vital for reliable recording.
GPS Functionality & Setup
To enable GPS functionality‚ ensure the Chortau dash cam has a clear view of the sky. Access the settings menu and navigate to the GPS section. Activate the GPS feature and allow the device to acquire a satellite signal – this may take a few minutes initially. The dash cam will then log your speed and location data alongside your recordings.
GPS data enhances your footage with valuable contextual information. During playback‚ you can view your route on a map‚ along with speed and time stamps. Regularly check for GPS signal strength in the settings. A strong signal ensures accurate data logging. Proper GPS setup provides crucial evidence in the event of an incident‚ offering precise location details.
Understanding the Dash Cam Interface
Familiarize yourself with the LCD screen‚ buttons‚ and menu settings for seamless navigation and optimal control of your Chortau dash cam’s features.
LCD Screen Overview
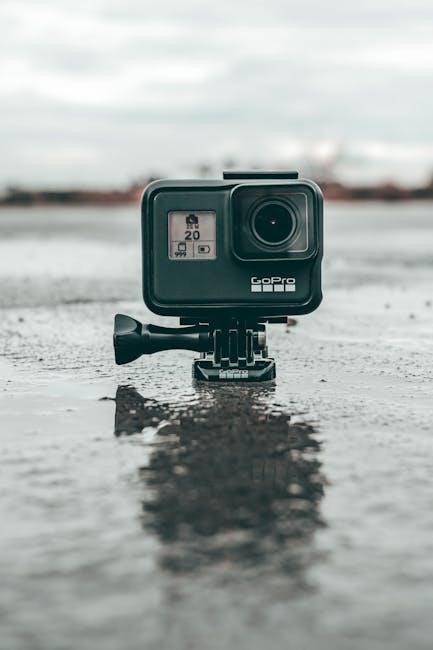
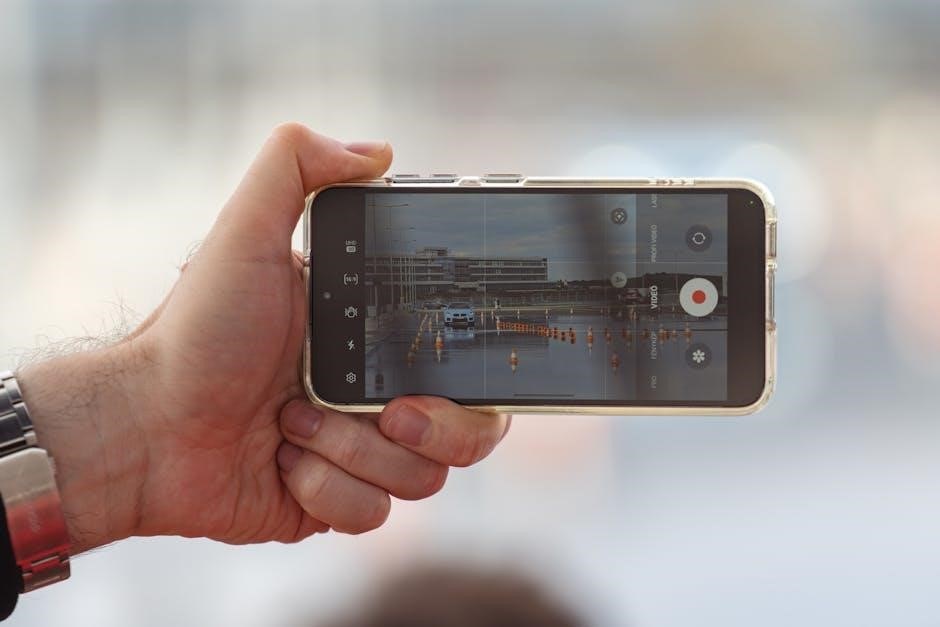
The Chortau dash cam features a 3-inch or 4-inch LCD screen (depending on the model) designed for clear and convenient viewing of recorded footage and camera settings. The display prominently shows the current recording mode – Normal‚ Loop Recording‚ or Parking Monitor.
You’ll find indicators for GPS signal strength‚ recording time‚ and date. A dedicated icon displays whether the G-sensor is active‚ providing impact detection status. The screen also visually confirms if loop recording is enabled‚ preventing the SD card from filling up.
During playback‚ the LCD screen allows you to easily navigate through recorded files‚ view timestamps‚ and adjust volume levels. Brightness controls are typically accessible through the menu‚ ensuring optimal visibility in various lighting conditions. The interface is designed for intuitive operation‚ providing a user-friendly experience.
Button Functions & Navigation
The Chortau dash cam utilizes a set of intuitive buttons for seamless operation. The Power/Menu button initiates recording and accesses the main settings menu. Short presses typically cycle through recording modes. The Up/Down buttons navigate through menu options and adjust settings like resolution and brightness.
A dedicated OK/Confirm button selects menu items and confirms changes. The Playback button allows quick access to recorded footage. Navigation within the menu is straightforward; use the Up/Down buttons to highlight desired options‚ then press OK to select.
To exit any menu or setting‚ press the Power/Menu button again. Understanding these basic functions ensures efficient control over your dash cam’s features and settings‚ allowing for a customized driving experience.
Menu Settings Explained
The Chortau dash cam’s menu offers extensive customization. Resolution adjusts video quality (1080P is recommended). Loop Recording enables continuous recording‚ overwriting older footage. G-Sensor sensitivity controls impact detection for event recording. Adjust Exposure for optimal brightness in varying light conditions.
Date/Time settings ensure accurate timestamps. GPS settings (if applicable) manage location data logging. Parking Monitor configures the camera’s behavior when parked. Volume controls speaker output for voice recordings and alerts. Language allows selection of your preferred display language.
Formatting prepares the SD card for use. Explore each setting to tailor the dash cam to your specific needs and driving environment‚ maximizing its functionality and ensuring reliable performance.
Recording Features
Chortau dash cams offer normal recording‚ loop recording‚ G-sensor impact detection‚ and enhanced night vision for comprehensive footage in all conditions.
Recording Modes (Normal‚ Loop Recording)
Normal Recording Mode: Your Chortau dash cam continuously records video while driving‚ capturing events as they unfold. This mode is ideal for standard driving conditions and provides a straightforward record of your journey. Footage is saved to the SD card until it’s full.
Loop Recording Mode: To ensure continuous recording‚ even when the SD card reaches its capacity‚ the dash cam utilizes loop recording. This function automatically overwrites the oldest footage with new recordings‚ preventing the camera from stopping due to a full memory card. You can typically adjust the segment length (e.g.‚ 1 minute‚ 3 minutes‚ 5 minutes) in the settings menu. This ensures important events are always captured‚ and you don’t have to manually delete files.
Both modes support high-definition recording‚ providing clear and detailed video evidence when needed.
G-Sensor Functionality & Impact Detection
G-Sensor Explained: The built-in G-Sensor (gravity sensor) detects sudden impacts or collisions while driving. This is a crucial safety feature for your Chortau dash cam‚ automatically triggering event recording.
Impact Detection & File Protection: When a collision is detected‚ the G-Sensor immediately locks and saves the current footage‚ along with a short clip before and after the impact. These files are protected from being overwritten by the loop recording function‚ ensuring vital evidence is preserved. Sensitivity levels are adjustable within the dash cam’s menu‚ allowing you to customize the G-Sensor’s responsiveness.
Higher sensitivity detects even minor bumps‚ while lower sensitivity focuses on more significant impacts. Properly configured‚ the G-Sensor provides peace of mind and reliable incident recording.
Night Vision & Low-Light Performance
Optimized for Darkness: Your Chortau dash cam is equipped with advanced night vision technology‚ designed to capture clear footage even in low-light conditions. This utilizes a combination of a wide-angle lens and high-sensitivity image sensor.
How it Works: The camera automatically adjusts exposure settings to maximize brightness and clarity during nighttime recording. While true color representation may be limited in extremely dark environments‚ the dash cam prioritizes capturing details like license plates and road markings.
Tips for Best Results: Ensure the lens is clean and free of obstructions. Avoid aiming directly at bright light sources‚ which can cause glare. Consider ambient lighting conditions; performance is best with some level of external illumination.
Advanced Features
Explore enhanced capabilities like parking mode‚ dual-camera synchronization‚ and detailed GPS data logging for a comprehensive driving safety experience.
Parking Monitor Mode Setup
Activating Parking Monitor mode allows your Chortau dash cam to automatically record any motion or impact while your vehicle is parked and turned off. This feature requires a hardwiring kit (sold separately) to connect the dash cam directly to your car’s battery. Ensure proper installation to avoid draining your vehicle’s battery.
Within the dash cam’s menu settings‚ navigate to the Parking Mode option. You’ll typically find settings for sensitivity levels – adjusting how much motion or impact triggers recording. Lower sensitivity reduces false alarms‚ while higher sensitivity increases detection. Select your preferred settings and save. The dash cam will then enter a low-power state‚ continuously monitoring for activity. Review recorded footage in playback mode to verify functionality.
Dual Camera Recording Configuration
Your Chortau dash cam‚ featuring both front and rear cameras‚ offers enhanced protection by simultaneously recording footage from multiple angles. To configure dual recording‚ ensure the rear camera is properly connected to the front unit via the provided cable. Within the dash cam’s menu‚ locate the “Dual Camera” or “Record Mode” setting.
Enable the dual recording option. You may find settings to adjust the resolution for each camera – typically‚ the front camera records at a higher resolution. Some models allow independent loop recording settings for each camera. Verify both cameras are actively recording by viewing the live feed on the LCD screen. Regularly check the cable connections to ensure continuous operation and comprehensive coverage.
GPS Data Logging & Playback
The integrated GPS functionality of your Chortau dash cam accurately records driving data‚ including speed and location‚ alongside video footage. To activate GPS logging‚ ensure it’s enabled within the dash cam’s menu settings. A clear view of the sky is crucial for optimal GPS signal reception. During playback‚ this data is overlaid onto the video‚ providing valuable context.
Access GPS data through the dash cam’s playback mode or by connecting the SD card to a computer. Specialized player software (often provided) displays the video with speed and location information. This feature is invaluable for incident review and verifying driving routes. Regularly check GPS signal strength for accurate data logging during your journeys.
Playback & File Management
Easily access‚ review‚ delete‚ and format recorded footage directly on the dash cam or via a computer connection using a compatible SD card.
Accessing Recorded Footage
To view recorded footage on your Chortau dash cam‚ navigate to the playback mode using the LCD screen and buttons. The interface allows you to browse files by date and time‚ making it simple to locate specific incidents. You can typically filter recordings based on normal events or those flagged by the G-sensor as potential impacts.
Utilize the playback controls to pause‚ rewind‚ fast-forward‚ and adjust the volume if audio is enabled. Connecting the dash cam to your computer via USB provides another method for accessing files. The device will appear as a removable drive‚ allowing you to copy footage for archiving or sharing. Ensure the dash cam is powered off before disconnecting from your computer to prevent data corruption.
Deleting Files & Formatting the SD Card
Deleting individual files is easily done within the dash cam’s playback mode. Select the desired file and choose the delete option – exercise caution‚ as this action is usually irreversible. For bulk deletion‚ many Chortau models offer options to delete all files‚ or files within a specific date range.
Regularly formatting the SD card is crucial for maintaining optimal performance. Access the formatting option within the dash cam’s menu settings. Warning: Formatting will erase all data on the card! Back up any important footage before proceeding. Formatting ensures the card is optimized for the dash cam’s recording cycle‚ preventing potential errors and maximizing storage capacity.
Connecting to a Computer (USB)
To access recorded footage on your computer‚ connect the Chortau dash cam using the provided USB cable. Ensure the dash cam is powered off before connecting. Your computer should recognize the device as a removable drive‚ allowing you to browse and copy files.
The dash cam may offer different USB connection modes within its settings – typically “Storage” or “PC Camera”. Select “Storage” to access the files. Avoid deleting or modifying files directly on the SD card through your computer unless absolutely necessary‚ as this could potentially cause file system errors. Safely eject the dash cam from your computer before disconnecting the USB cable.
Troubleshooting Common Issues
This section provides solutions for frequent problems like recording failures‚ GPS connectivity issues‚ and file corruption‚ ensuring smooth operation.
Camera Not Recording
If your Chortau dash cam isn’t recording‚ first verify the power connection is secure. Ensure the camera is receiving sufficient power‚ checking both the car adapter and the direct power cable if installed.
Next‚ confirm that a formatted SD card is properly inserted. An unformatted or corrupted SD card will prevent recording. Try formatting the card within the dash cam’s menu settings.
Also‚ check if loop recording is enabled‚ as a full SD card can halt new recordings. Finally‚ examine the menu settings to ensure recording isn’t accidentally disabled or set to a specific event trigger that isn’t occurring.
GPS Signal Issues
Experiencing GPS signal problems with your Chortau dash cam? Begin by ensuring a clear view of the sky. Obstructions like tall buildings‚ trees‚ or even tinted windshields can interfere with signal reception.
Verify that GPS functionality is enabled within the dash cam’s menu settings. Sometimes‚ it may be accidentally disabled. Also‚ check for any firmware updates‚ as these often include improvements to GPS performance and accuracy.
If the issue persists‚ try resetting the GPS module within the settings. A weak GPS signal can also occur during initial startup; allow sufficient time for the camera to acquire a lock.
File Corruption & SD Card Errors
Encountering file corruption or SD card errors with your Chortau dash cam? First‚ ensure you’re using a compatible SD card – a high-endurance card specifically designed for dash cams is crucial. Low-quality cards are prone to failure.
Regularly format the SD card within the dash cam’s menu; do not format it on your computer. This ensures compatibility and optimizes performance. File corruption can also occur due to sudden power loss; consider a dash cam with a built-in supercapacitor.
If errors persist‚ try a different SD card. Check the card for physical damage. Avoid cards nearing their write cycle limit.
Maintenance & Care
Regular cleaning of the lens and timely firmware updates are vital for optimal performance. Use recommended SD cards and replace them periodically.
Cleaning the Lens
Maintaining a pristine lens is crucial for capturing clear and high-quality footage with your Chortau dash cam. Dust‚ fingerprints‚ and smudges can significantly degrade video clarity‚ especially in low-light conditions.
To clean the lens effectively‚ always power off the dash cam first. Use a soft‚ lint-free microfiber cloth – the type commonly used for cleaning eyeglasses or camera lenses. Gently wipe the lens in a circular motion to remove any debris.
Avoid using harsh chemicals‚ abrasive cleaners‚ or paper towels‚ as these can scratch the lens coating. If stubborn smudges persist‚ lightly dampen the microfiber cloth with distilled water. Ensure the lens is completely dry before powering the dash cam back on. Regular lens cleaning will ensure consistently sharp and reliable recordings.
Firmware Updates
Keeping your Chortau dash cam’s firmware up-to-date is essential for optimal performance‚ bug fixes‚ and access to new features. Chortau periodically releases firmware updates to enhance the device’s functionality and stability.
To check for updates‚ visit the official Chortau website and navigate to the support or downloads section specific to your dash cam model. Download the latest firmware file and follow the provided instructions carefully.
Typically‚ this involves transferring the file to an SD card and inserting it into the dash cam‚ then initiating the update process through the device’s menu. Ensure the dash cam remains powered on throughout the entire update process. Do not interrupt the update‚ as this could potentially damage the device.
SD Card Recommendations & Replacement
Your Chortau dash cam requires a microSD card for recording footage. We recommend using a high-endurance microSD card specifically designed for dash cams‚ as these are built to withstand the continuous read/write cycles inherent in dash cam operation.
Capacity-wise‚ 32GB to 128GB is generally sufficient for most users‚ depending on recording resolution and desired recording time. Ensure the SD card is formatted correctly (FAT32) before use.
Over time‚ SD cards can wear out or become corrupted. If you experience recording issues or file errors‚ consider replacing the SD card. Regularly format the card to maintain optimal performance‚ but remember formatting erases all data.