Letter carving, a timeless craft, involves skillfully shaping letters into various materials. Numerous resources, including a pdf guide, detail techniques like chasing, chopping, and stabbing.
Historical Overview of Letter Carving
Letter carving’s roots stretch back millennia, evident in ancient inscriptions on stone monuments and architectural elements. Early examples showcase rudimentary, yet impactful, forms of communication. Throughout history, civilizations like the Egyptians, Greeks, and Romans refined these techniques, establishing foundational styles.
The medieval period witnessed a flourishing of illuminated manuscripts, demanding exquisite lettering skills. Renaissance masters further elevated the art, integrating classical principles with innovative designs. A comprehensive pdf resource reveals how these historical shifts influenced tool development and stylistic evolution. Modern practitioners continue to draw inspiration from these traditions, blending heritage with contemporary expression.
The Significance of Letter Carving in Art and Architecture
Letter carving transcends mere functionality, becoming a powerful artistic element within both art and architecture. Historically, meticulously carved inscriptions conveyed narratives, commemorated events, and honored individuals. In architecture, lettering integrates seamlessly with design, enhancing facades and interior spaces.
The permanence of carved letters imbues them with gravitas and enduring beauty. A detailed pdf guide illustrates how skilled artisans elevate typography to sculptural form. This art form demands precision, aesthetic sensibility, and a deep understanding of letterforms, resulting in timeless works that resonate across generations.
Essential Tools for Letter Carving
Letter carving requires specialized tools – chisels, mallets, and abrasives – for shaping materials. A comprehensive pdf resource details each tool’s purpose and proper usage.
Types of Chisels Used in Letter Carving
Letter carving utilizes a diverse range of chisels, each designed for specific tasks. The skew chisel, crucial for initial outlining and refining letterforms, allows for controlled removal of material. V-tools create crisp, defined lines, ideal for incised lettering and detailing serifs. Tooth chisels efficiently rough out larger areas, quickly removing stone or wood. Wing chisels, with their angled blades, are excellent for shaping curves and creating textured surfaces. A pdf guide dedicated to the art emphasizes selecting high-quality steel for durability and sharpness. Proper chisel maintenance, including regular sharpening, is paramount for achieving clean, precise cuts and extending tool life. Understanding the unique capabilities of each chisel type unlocks greater artistic control and precision in letter carving projects.
Mallets and Their Impact on Carving
Mallets are indispensable tools in letter carving, transmitting force from the hand to the chisel. Different mallet materials – wood, rubber, or nylon – offer varying levels of impact and control. Wooden mallets provide a traditional feel and are suitable for delicate work, while rubber or nylon mallets reduce the risk of damaging the chisel tip. A comprehensive pdf resource on the art highlights the importance of mallet weight; heavier mallets deliver more power for roughing out, while lighter ones offer finesse for detail work. Proper technique involves striking the chisel squarely to maximize efficiency and minimize strain.
Abrasives and Sharpening Tools
Maintaining a razor-sharp chisel is paramount in letter carving, and abrasives are essential for this. Various grits of sharpening stones – from coarse to fine – refine the chisel’s edge. Oil stones or water stones are commonly used, requiring lubrication during sharpening. A pdf guide dedicated to the craft emphasizes the importance of consistent angles. Leather strops, charged with polishing compound, further refine the edge. Regular sharpening ensures clean cuts, reducing effort and improving control. Dull chisels require more force, increasing the risk of slips and inaccurate carving.

Techniques in Stone Letter Carving
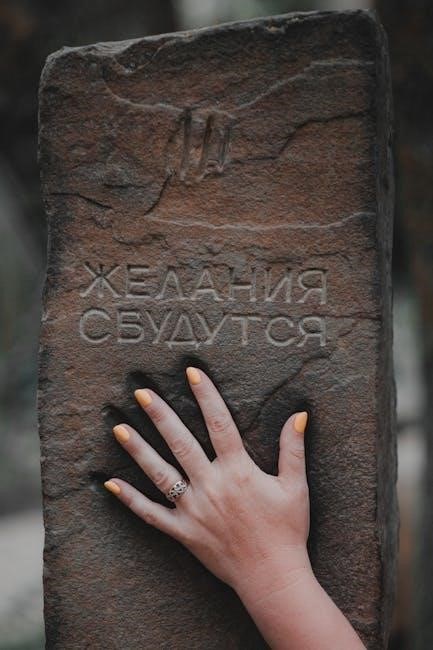
Stone letter carving utilizes methods like chasing, chopping, and stabbing, detailed in many resources, including a comprehensive pdf guide, for precise letter formation.
Chasing Technique Explained
Chasing, a fundamental stone letter carving technique, involves carefully removing small pieces of stone to define the letter form. A sharp chisel, held at a low angle, is skillfully driven with a mallet along the intended lines. This method excels at creating clean, precise edges and is often used for initial outlining and refining the letter’s shape.
Many instructional resources, including detailed pdf guides, emphasize the importance of controlled force and consistent angles when chasing. Mastering this technique requires patience and practice, as it’s crucial for achieving crisp, well-defined letters. It’s often the preferred starting point for beginners due to its relative control and predictability.
Chopping Technique Explained
Chopping, another core letter carving method, utilizes a more forceful impact with the chisel to remove larger volumes of stone quickly. Unlike chasing’s delicate approach, chopping is ideal for roughing out the initial letter form and establishing the basic depth. A heavier mallet and a slightly steeper chisel angle are typically employed.
Pdf guides dedicated to stone carving often caution against overzealous chopping, emphasizing the need for controlled strikes to avoid damaging the surrounding stone. While efficient, it demands precision to prevent going beyond the intended lines. It’s frequently used in conjunction with chasing for a balanced approach to shaping the letters.
Stabbing Technique Explained
The stabbing technique in letter carving involves holding the chisel vertically, or at a very acute angle, and driving it directly into the stone with a mallet. This method excels at creating sharp, defined edges and removing small, controlled amounts of material. It’s particularly useful for refining details and achieving crisp letter forms.
Many pdf resources on stone carving highlight that mastering stabbing requires significant control and a keen understanding of the stone’s grain. Improper execution can lead to chipping or fracturing. It’s often employed after chasing and chopping to finalize the letter’s shape and add intricate features.
Creating Letter Patterns and Designs
Letter carving designs begin with patterns transferred to stone, either freehand or using guides; a pdf can illustrate these methods for precise letter placement.
Methods for Transferring Patterns to Stone
Transferring designs accurately is crucial in letter carving. One common method involves drawing parallel lines – straight or curved – directly onto the stone surface, then sketching the letters freehand within these guidelines. This approach requires a steady hand and a good eye for proportion, eliminating the need for double lines.
Alternatively, patterns can be traced onto the stone using carbon paper or a similar transfer medium. A detailed pdf guide often showcases various techniques, including pricking methods where holes are marked along the pattern lines and then connected on the stone; Careful preparation and precise execution ensure a faithful representation of the intended design, laying the foundation for successful carving.
Freehand Lettering Techniques
Freehand lettering demands practice and a strong understanding of letterforms. Skilled carvers develop the ability to draw directly onto the stone, relying on their eye for proportion and spacing. A comprehensive pdf resource often emphasizes the importance of sketching repeatedly to build muscle memory and refine technique.
This method allows for greater artistic freedom and spontaneity, deviating from rigid patterns. Mastering freehand lettering requires studying classic letter styles and understanding the nuances of each character. It’s about feeling the rhythm and flow of the alphabet, translating that onto the stone with confidence and precision, resulting in unique and expressive carvings.
Understanding Letter Spacing and Kerning
Achieving visual harmony in letter carving hinges on precise spacing and kerning. Consistent letter spacing creates readability, while kerning adjusts the space between specific letter pairs for optimal balance. A detailed pdf guide will illustrate how certain combinations—like “AV” or “To”—require tighter or looser fits.
Ignoring these subtleties results in an uneven, amateurish appearance. Careful consideration of negative space—the areas around the letters—is crucial. Mastering these principles elevates a carving from merely legible to aesthetically pleasing, demonstrating a refined understanding of typographic principles and artistic finesse.

Step-by-Step Letter Carving Process
The process begins with pattern transfer, roughing out the form, and refining with chisels. A comprehensive pdf guide details each stage for successful letter carving.
Preparing the Stone Surface
Preparing the stone surface is paramount for successful letter carving. Initially, ensure the stone is clean and free of debris; a thorough cleaning prevents tool damage and ensures crisp lines. Many pdf guides emphasize the importance of a perfectly level working surface, providing stability during the carving process.

Next, carefully consider the stone’s grain and any natural flaws. These features influence the carving direction and final aesthetic. A smooth, even surface facilitates accurate pattern transfer, crucial for precise letter forms. Some carvers lightly abrade the surface to create a slightly textured key for the pattern, enhancing adhesion. Referencing a detailed pdf resource will provide specific stone preparation techniques.
Initial Roughing Out of the Letter Form
Initial roughing out establishes the basic shape of each letter. Utilizing a wider chisel and mallet, carefully remove excess stone around the transferred letter design, leaving a margin of material. Many pdf guides recommend working from the edges inwards, maintaining control and preventing accidental over-removal.
This stage isn’t about precision; it’s about defining the overall form. Consistent, controlled blows are vital. A pdf tutorial will often demonstrate holding the chisel at a slight angle to facilitate material removal. Regularly check your progress against the pattern, ensuring the basic proportions are accurate before proceeding to finer detailing.
Refining the Letter Shape with Chisels
Refining involves using progressively smaller chisels to sculpt the letter’s form with greater accuracy. A pdf guide emphasizes switching to narrower tools for defining curves and straight edges. Controlled chiseling, combined with careful mallet work, gradually shapes the letter, removing small amounts of material at a time.
Pay close attention to the letter’s details, referencing the original pattern frequently. Many pdf resources highlight the importance of consistent chisel angles for clean lines. This stage demands patience and precision, as it establishes the final aesthetic quality of the carved letter.
Advanced Letter Carving Techniques
Advanced techniques, detailed in a pdf, include relief and incised carving, mastering serifs, and creating dimensional letters for artistic depth.
Relief Carving vs. Incised Carving
Relief carving and incised carving represent fundamental distinctions within the art of letter carving, often explored in comprehensive guides like a detailed pdf resource. Relief carving involves removing the stone around the letters, leaving the letterforms raised from the surface, creating a sculptural, three-dimensional effect. Conversely, incised carving entails cutting into the stone, creating letters that are recessed below the surrounding surface.
The choice between these techniques significantly impacts the final aesthetic. Relief carving offers a bolder, more prominent visual impact, while incised carving provides a subtler, more elegant appearance. Mastering both techniques, as outlined in instructional materials, expands a carver’s artistic capabilities and allows for diverse design expressions.
Carving Serifs and Details
Carving serifs and intricate details elevates letter carving from simple form to refined artistry, a process thoroughly documented in resources like a dedicated pdf guide. Serifs, the small features extending from a letter’s stroke, demand precision and control with specialized chisels. Achieving clean, consistent serifs requires careful angling and delicate removal of material.
Beyond serifs, adding details – such as flourishes or internal shaping – further enhances the letter’s character. These elements necessitate a steady hand and a deep understanding of letterform anatomy. Detailed tutorials, often found within comprehensive guides, demonstrate techniques for achieving these nuanced effects, transforming basic letters into captivating works of art.
Creating Dimensional Letters
Creating dimensional letters moves beyond flat relief, adding depth and a sculptural quality to the carved inscription, a skill often detailed in comprehensive pdf guides. This technique involves carefully removing material to create varying heights within the letterform, resulting in a three-dimensional effect. Mastering this requires a strong understanding of light and shadow, as these play crucial roles in defining the letter’s form.
Resources showcase methods for achieving this, from gradual layering to bold, dramatic projections. Precise chisel work and a keen eye for proportion are essential. Detailed tutorials within these guides illustrate how to plan and execute dimensional carving, transforming simple letters into captivating sculptural elements.

Wood Letter Carving Techniques
Wood letter carving utilizes specialized chisels and gouges; a detailed pdf often illustrates selecting appropriate wood types and finishing methods for lasting beauty.
Choosing the Right Wood for Carving
Selecting wood is crucial for successful letter carving. Softer woods like basswood and butternut are ideal for beginners due to their ease of manipulation with chisels. Hardwoods, such as cherry, walnut, and maple, offer greater durability and a refined finish, though they demand more effort. A comprehensive pdf guide will often detail wood grain direction, impacting carving ease and aesthetic appeal. Consider the project’s intended lifespan; indoor pieces benefit from stability, while outdoor carvings require weather-resistant options like cedar or oak. Wood should be properly seasoned to prevent cracking or warping during and after carving. Always inspect for knots or imperfections that could hinder the process.
Using Wood Carving Chisels and Gouges
Wood carving chisels and gouges are essential tools for shaping letters. A pdf resource on letter carving will illustrate various profiles – straight, skew, V-tools, and gouges – each serving a specific purpose. Straight chisels define flat planes, while skew chisels refine edges. V-tools create crisp lines, and gouges hollow out areas. Maintaining sharpness is paramount; dull tools require excessive force and produce ragged cuts. Proper technique involves controlled strikes with a mallet, following the wood grain. Always secure the workpiece and prioritize safety, utilizing push sticks and gloves when appropriate.
Finishing Techniques for Wood Carved Letters
Finishing wood carved letters enhances their beauty and protects the wood. A comprehensive pdf guide on letter carving details sanding, starting with coarser grits and progressing to finer ones for smoothness. Applying wood conditioners prepares the surface for finishes like oils, waxes, or varnishes. Oils deepen the grain, while waxes provide a soft sheen. Varnishes offer durable protection. Staining can alter the wood’s color, but test first! Consider burnishing for a polished look. Proper finishing preserves the artwork and highlights the carved details.
Resources for Learning Letter Carving
Numerous books and online tutorials, including a detailed pdf, offer guidance. YouTube channels showcase techniques, aiding mastery of this ancient art form.
Recommended Books on Letter Carving
Embarking on the journey of letter carving benefits greatly from established literature. While a comprehensive pdf resource can provide a starting point, dedicated books offer in-depth knowledge. Seek titles focusing on stone carving techniques, specifically those detailing chasing, chopping, and stabbing methods.
Explore volumes that cover pattern transfer, freehand lettering, and crucial aspects like letter spacing and kerning. Books often include detailed illustrations and step-by-step guides, complementing online tutorials. Consider resources that address both relief and incised carving, alongside advanced skills like serif creation. Remember to supplement your learning with practical application and consistent practice.
Online Tutorials and Courses
Numerous online platforms offer valuable resources for aspiring letter carvers, supplementing a foundational pdf guide. YouTube channels dedicated to stone and wood carving showcase practical techniques, including chasing, chopping, and stabbing. These visual tutorials often demonstrate pattern transfer and freehand lettering methods.
Explore structured online courses that delve deeper into letter spacing, kerning, and advanced carving skills. Many instructors offer demonstrations of carving letters with various tools. Remember to critically evaluate the source and prioritize clear, concise instruction. Combine online learning with hands-on practice for optimal results.
YouTube Channels Dedicated to Letter Carving
Several YouTube channels provide excellent visual instruction, complementing a comprehensive pdf guide on the art of letter carving. Channels often demonstrate fundamental techniques like chasing, chopping, and stabbing, alongside more advanced methods for relief and incised carving.
Look for channels showcasing pattern transfer, freehand lettering, and the skillful use of chisels and gouges. Many feature detailed tutorials on carving serifs and dimensional letters. Explore content focused on both stone and wood carving to broaden your skillset. Remember to practice alongside these demonstrations!
Safety Precautions in Letter Carving
Letter carving demands vigilance; always prioritize eye protection and hand safety. Proper tool handling, maintenance, and dust control—detailed in a pdf—are crucial.
Eye Protection and Hand Safety
Letter carving presents inherent risks, making robust safety measures paramount. Always wear appropriate safety glasses or a face shield to shield your eyes from flying stone chips or wood fragments. These projectiles can cause severe, lasting damage.
Protecting your hands is equally vital. Utilize carving gloves to minimize cuts and abrasions, especially when working with sharp chisels. A firm grip and controlled movements are essential, but even experienced carvers can slip.
Consult a comprehensive guide, such as a detailed pdf on the art, for specific recommendations on glove types and additional hand protection strategies. Prioritizing these precautions ensures a safer and more enjoyable carving experience.
Proper Tool Handling and Maintenance
Mastering letter carving demands respect for your tools. Always maintain a firm, controlled grip on chisels and mallets, directing force away from yourself and others; Never leave tools unattended on elevated surfaces. A pdf guide dedicated to the art will illustrate correct handling techniques.
Regular maintenance is crucial for tool longevity and safety. Sharpen chisels frequently to ensure clean cuts and reduce the risk of slipping. Clean tools after each use, removing stone dust or wood shavings.
Proper storage prevents damage and accidents. Consult a detailed pdf resource for specific sharpening and maintenance schedules tailored to different tool types.
Dust Control and Ventilation
Letter carving generates fine dust particles, posing respiratory hazards. Effective dust control is paramount for a safe working environment. Utilize a respirator or dust mask specifically designed for stone or wood dust. A comprehensive pdf guide on the art emphasizes this crucial safety aspect.
Work in a well-ventilated area, ideally with a dust extraction system. Regularly vacuum the workspace, avoiding sweeping which stirs up dust.
Consider wet-carving techniques to suppress dust, though this requires appropriate stone selection. Detailed pdf resources will outline best practices for dust mitigation and ventilation strategies.