Troy-Bilt 2700 PSI Pressure Washer Owners Manual: Article Plan
This comprehensive guide details operation‚ maintenance‚ and troubleshooting for the Troy-Bilt 2700 PSI pressure washer‚ referencing the GCV160 engine.
It covers safety‚ component identification‚ setup‚ nozzle usage‚ and parts replacement‚ alongside warranty details and support resources.
Users will find instructions for winterizing‚ cleaning‚ and maximizing cleaning effectiveness‚ understanding PSI/GPM‚ and proper storage.
Welcome to powerful cleaning! This Troy-Bilt 2700 PSI pressure washer is engineered for tackling diverse outdoor tasks‚ from revitalizing decks to cleaning vehicles. This manual serves as your guide‚ ensuring safe and effective operation.
Understanding its capabilities‚ as detailed within‚ will maximize performance and longevity. The unit features a robust GCV160 engine‚ delivering substantial cleaning power. Proper maintenance‚ outlined in subsequent sections‚ is crucial.

This manual provides step-by-step instructions‚ safety precautions‚ and troubleshooting tips. Refer to it frequently for optimal results and to maintain your Troy-Bilt investment.
Understanding Your Pressure Washer
Familiarize yourself with the core components of your Troy-Bilt 2700 PSI pressure washer. This includes the high-pressure hose‚ wand‚ nozzles‚ trigger gun‚ and the GCV160 engine powering the system. Understanding each part’s function is vital for safe and efficient operation.
The pressure washer generates high-velocity water‚ effectively removing dirt‚ grime‚ and mildew. PSI (pounds per square inch) measures the water’s force‚ while GPM (gallons per minute) indicates water flow.
This manual details nozzle selection‚ influencing spray pattern and cleaning intensity. Always prioritize safety and refer to the guidelines within before operation.
Safety Precautions
Prioritize safety when operating your Troy-Bilt 2700 PSI pressure washer. Never point the wand at yourself or others. Wear safety glasses to protect your eyes from debris. Avoid spraying electrical components or outlets. Ensure a stable footing during operation to prevent falls.
Always disconnect the power source before servicing or changing nozzles. Never modify the pressure washer or use incompatible parts. Keep children and pets away from the operating area. Read and understand this manual thoroughly before use.
Follow all warnings and instructions.
General Safety Rules
Always wear appropriate personal protective equipment (PPE)‚ including safety glasses and closed-toe shoes. Never operate the pressure washer when fatigued or under the influence of drugs or alcohol. Inspect the hose for damage before each use‚ replacing it if necessary. Maintain a safe distance from the spray pattern.
Avoid spraying flammable liquids or materials. Be aware of your surroundings and potential hazards. Never leave the pressure washer unattended while running. Ensure adequate ventilation when operating indoors; Follow all local safety regulations.
Specific Pressure Washer Safety
Never point the wand at yourself or others. The high-pressure stream can cause serious injury. Always release pressure before disconnecting the hose or nozzles. Avoid spraying electrical components or outlets. Ensure the power cord is properly grounded and protected from damage. Do not modify the pressure washer in any way.
Be cautious when cleaning surfaces‚ as the pressure can damage delicate materials. Always test a small‚ inconspicuous area first. Never bypass any safety devices. Follow the nozzle selection guide for appropriate pressure settings.
Components and Features
The Troy-Bilt 2700 PSI pressure washer boasts a robust GCV160 engine‚ delivering reliable power. Key components include a high-pressure hose‚ various quick-connect nozzles‚ and a detergent tank for applying cleaning solutions. The unit features an ergonomic handle and wheels for easy maneuverability. A trigger gun controls the water flow‚ while the onboard storage keeps accessories organized.
The pressure washer’s frame is constructed for durability. It includes essential safety features and a clear‚ user-friendly control panel. Understanding these features ensures optimal performance and longevity.
Nozzle Selection Guide
The Troy-Bilt 2700 PSI pressure washer includes multiple quick-connect nozzles‚ each designed for specific cleaning tasks. A 0-degree nozzle delivers a concentrated stream for stubborn dirt‚ use cautiously! The 25-degree nozzle is ideal for general cleaning‚ like siding and driveways. A 40-degree nozzle offers a wider spray pattern for delicate surfaces.
Soap nozzles create a foamy solution for applying detergents. Always select the appropriate nozzle to prevent damage and achieve optimal results. Refer to the manual for detailed application guidelines.
Hose and Wand Assembly
Proper hose and wand assembly is crucial for safe and effective operation of your Troy-Bilt 2700 PSI pressure washer. First‚ firmly connect the high-pressure hose to the pump outlet‚ ensuring a secure‚ leak-proof fit. Next‚ attach the wand to the hose‚ again verifying a tight connection.
Always inspect the hose for any cracks or damage before each use. Never attempt to modify or repair the hose yourself; contact Troy-Bilt support for replacements. Ensure all connections are properly tightened before starting the engine.
Setting Up Your Pressure Washer
Before initial use‚ carefully prepare your Troy-Bilt 2700 PSI pressure washer. Begin by ensuring the unit is on a level surface‚ away from potential hazards. Next‚ connect a standard garden hose to the water inlet‚ ensuring it’s securely fastened. Verify the water supply is fully turned on before starting the pressure washer.
Crucially‚ check for any leaks at the hose connections. Then‚ prepare the power source‚ ensuring it matches the washer’s requirements. Refer to the manual for specific electrical guidelines.
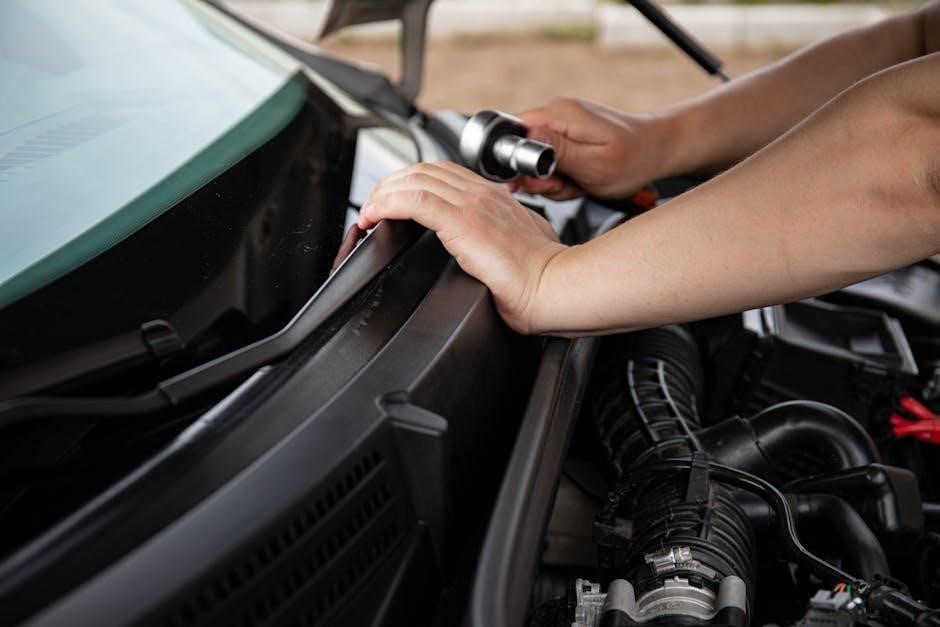
Connecting the Water Supply
Proper water supply connection is vital for optimal performance; Attach a standard garden hose to the water inlet fitting on the pressure washer‚ tightening securely with your hand. Avoid using pliers‚ as this can damage the fitting. Ensure the hose is free of kinks and obstructions to maintain consistent water flow.
Fully open the water supply valve before starting the engine. The manual emphasizes checking for leaks at the connection point. Low water pressure can affect cleaning effectiveness‚ so a strong‚ steady supply is crucial.
Connecting the Power Source
The Troy-Bilt 2700 PSI pressure washer utilizes a standard electrical outlet. Ensure the outlet is properly grounded and matches the voltage requirements specified in the manual. Avoid using extension cords if possible; if necessary‚ use a heavy-duty‚ outdoor-rated cord of the correct gauge.
Before plugging in‚ inspect the power cord for any damage. Never operate the pressure washer with a damaged cord. Protect the cord from water and sharp objects during operation. Confirm the power switch is in the ‘OFF’ position before connecting.
Operating Instructions
Before starting‚ verify all connections – water supply and power source – are secure. Ensure the nozzle is properly attached and pointed in a safe direction. Turn the power switch to the ‘ON’ position and‚ if equipped‚ engage the choke. Pull the starter cord firmly and repeatedly until the engine ignites.
Allow the engine to warm up briefly before adjusting pressure settings. Gradually increase the throttle to achieve the desired cleaning power. Always operate within safe pressure limits‚ considering the surface being cleaned.
Starting the Engine
Prior to initial startup‚ confirm adequate oil levels as per the GCV160 engine specifications. Ensure the fuel tank contains fresh gasoline. Turn the power switch to the ‘ON’ position. If the engine is cold‚ engage the choke lever. Grip the starter cord handle firmly and pull briskly‚ allowing the cord to retract slowly.
Repeat this process several times‚ gradually reducing choke application as the engine attempts to ignite. Once running‚ slowly disengage the choke. Allow the engine to warm up for a few minutes before applying full pressure.
Adjusting Pressure Settings
The Troy-Bilt 2700 PSI pressure washer features an adjustable pressure regulator. This allows you to tailor the cleaning force to the specific surface. Locate the pressure adjustment knob‚ typically positioned near the trigger gun. Turning the knob clockwise increases pressure‚ while counterclockwise decreases it.
Begin with the lowest pressure setting and gradually increase it‚ testing on an inconspicuous area first. Avoid using maximum pressure on delicate surfaces like painted wood or vehicles. Always prioritize safety and surface compatibility when adjusting pressure.
Using Different Nozzles

Your Troy-Bilt 2700 PSI pressure washer includes multiple nozzles for varied cleaning tasks. Each nozzle delivers a different spray pattern and intensity. Quick-connect nozzles easily attach to the wand. A 0-degree nozzle provides a concentrated‚ powerful stream for stubborn dirt‚ but use cautiously to avoid damage.
A 25-degree nozzle offers a wider spray for general cleaning. Experiment with different nozzles to find the optimal setting for each surface. Always point the nozzle away from yourself and others.
0-Degree Nozzle Applications
The 0-degree nozzle delivers an extremely concentrated‚ powerful spray. Use this nozzle cautiously‚ as it can easily damage surfaces. Ideal applications include removing stubborn‚ caked-on dirt‚ grime‚ or paint from concrete. It’s effective for cleaning between pavers or breaking apart tough stains.
Avoid using on wood‚ vinyl siding‚ or car paint. Maintain a safe distance and test in an inconspicuous area first. Always wear safety glasses when using this high-intensity nozzle. Incorrect use can cause injury or damage.
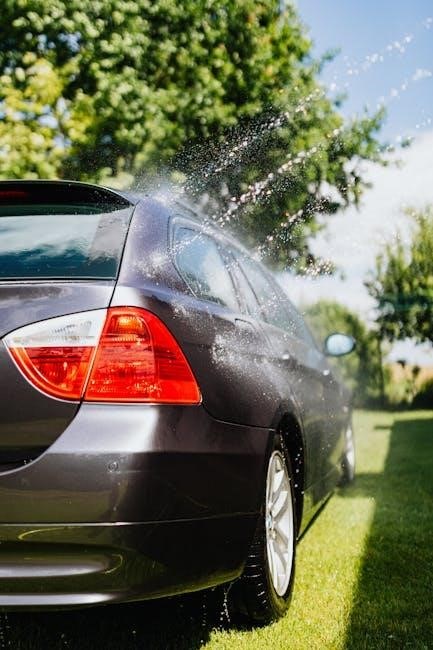
25-Degree Nozzle Applications
The 25-degree nozzle provides a wider spray pattern than the 0-degree nozzle‚ offering versatility for various cleaning tasks. It’s suitable for cleaning siding‚ fences‚ decks‚ and patio furniture. This nozzle effectively removes dirt‚ mildew‚ and algae without causing significant damage.
It’s a good all-purpose nozzle for general cleaning around the home. Maintain a consistent distance for even cleaning. Always test on a small‚ hidden area first to ensure compatibility with the surface. Use caution and wear appropriate safety gear.
Maintenance and Care

Regular maintenance ensures optimal performance and extends the lifespan of your Troy-Bilt 2700 PSI pressure washer. After each use‚ thoroughly flush the system with clean water to remove detergent and debris. Inspect the hose for cracks or leaks‚ and the nozzles for clogs.
Periodically clean the exterior with a mild detergent. Proper storage is crucial‚ especially during winter months. Refer to the winterizing section for detailed instructions to prevent freeze damage. Always consult the manual for specific maintenance schedules.
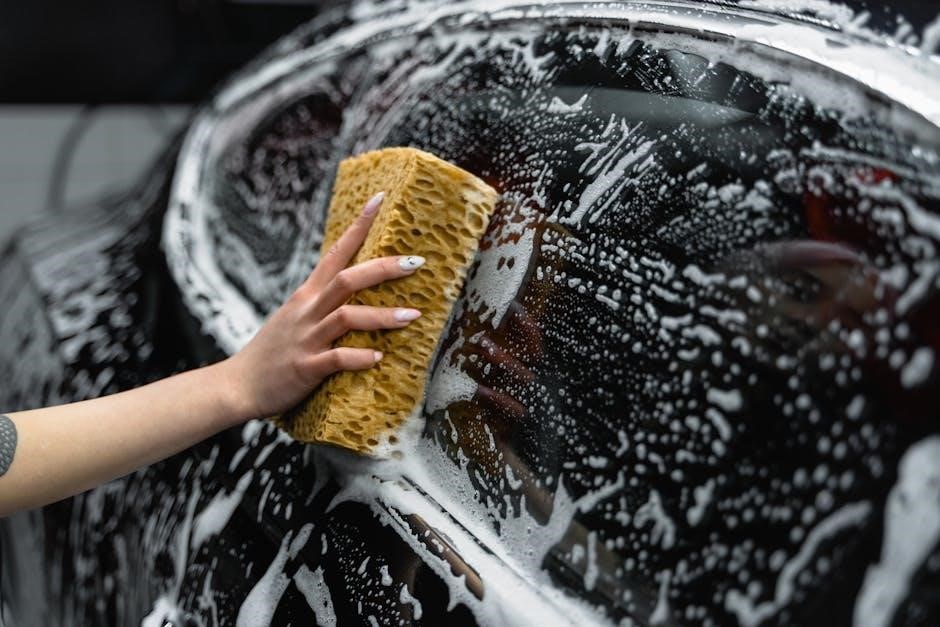
Cleaning the Pressure Washer
Maintaining a clean pressure washer is vital for longevity and performance. After each use‚ disconnect the water supply and nozzle. Wipe down the exterior housing with a damp cloth and mild detergent‚ avoiding abrasive cleaners.
Inspect and clean the nozzle(s) regularly to remove any buildup. Check the hose for dirt and debris‚ flushing it with water if needed. Ensure proper ventilation during cleaning and drying. Refer to the owner’s manual for specific cleaning recommendations.
Winterizing Your Pressure Washer
Proper winterization prevents freeze damage to your Troy-Bilt 2700 PSI pressure washer. First‚ disconnect the water supply and drain all remaining water from the pump and hose. Use a pump saver kit‚ adding antifreeze to protect internal components.
Disconnect the spark plug wire for safety. Change the engine oil before storage. Store the unit in a dry‚ protected location. Consult the owner’s manual for detailed winterizing instructions specific to your model.
Troubleshooting Common Issues
This section addresses frequent problems with your Troy-Bilt 2700 PSI pressure washer. If the engine won’t start‚ check fuel levels‚ the spark plug‚ and air filter. Low pressure output often indicates a clogged nozzle‚ kinked hose‚ or insufficient water supply.
Inspect and clean nozzles regularly. Ensure proper water connection and adequate flow. Refer to the owner’s manual for detailed diagnostic steps and safety precautions before attempting repairs. Always disconnect the power source first.
Engine Won’t Start
If your Troy-Bilt 2700 PSI pressure washer’s engine fails to start‚ begin by verifying sufficient fuel in the tank. Next‚ inspect the spark plug for fouling or damage‚ cleaning or replacing it as needed. A clogged air filter restricts airflow‚ hindering ignition; clean or replace it.
Ensure the engine’s on/off switch is in the ‘on’ position. Check the oil level – low oil can prevent starting. Consult the manual for specific GCV160 engine troubleshooting steps.
Low Pressure Output
Experiencing low pressure with your Troy-Bilt 2700 PSI pressure washer? First‚ confirm the water supply is fully on and the inlet filter isn’t clogged. Inspect the high-pressure hose for kinks or damage‚ replacing if necessary. A partially blocked nozzle significantly reduces pressure; clean or change it.

Verify the pressure settings are correctly adjusted. Air in the pump can cause issues; follow the manual’s priming procedure. Check for leaks around connections. Consult the GCV160 engine section for potential power delivery problems.
Replacing Parts
Maintaining your Troy-Bilt 2700 PSI pressure washer often requires part replacement. Nozzle replacement is straightforward; simply unscrew the old one and screw in the new‚ ensuring a secure fit. Hose replacement demands disconnecting both ends – the pump and the wand.
Always relieve pressure before disconnecting. Ensure the new hose is rated for the pressure washer’s PSI. Refer to the parts diagram in the manual for correct component identification. Genuine Troy-Bilt parts are recommended for optimal performance and longevity.

Nozzle Replacement
Replacing a nozzle on your Troy-Bilt 2700 PSI pressure washer is a simple task. First‚ ensure the pressure washer is turned off and the water supply is disconnected. Locate the nozzle you wish to replace on the spray wand.
Gently unscrew the old nozzle in a counter-clockwise direction. Apply the new nozzle and tighten it securely‚ but avoid over-tightening. Always use nozzles specifically designed for your Troy-Bilt model. Refer to the manual’s nozzle selection guide for appropriate applications.
Hose Replacement
Replacing the high-pressure hose on your Troy-Bilt 2700 PSI pressure washer requires careful attention. Always disconnect the power source and water supply before starting. Loosen the connections at both ends of the hose – the pump and the spray gun.
Remove the old hose and inspect the connections for damage. Attach the new hose‚ ensuring a tight and secure fit at both ends; Verify there are no kinks or twists in the new hose. Consult the manual for specific hose specifications.
Understanding the Engine (GCV160)
Your Troy-Bilt 2700 PSI pressure washer is powered by the Honda GCV160 engine‚ a reliable and efficient four-stroke unit. Understanding its basic operation is crucial for maintenance. The GCV160 requires regular oil changes‚ typically every 50-100 hours of use‚ or annually.
Maintaining a clean air filter is also vital for optimal performance. Refer to the manual for specific oil type and air filter replacement instructions. Proper engine care extends the life of your pressure washer.
Oil Change Procedures
Regular oil changes are essential for the GCV160 engine’s longevity. First‚ warm the engine briefly. Then‚ locate the oil drain plug and position a suitable container underneath. Remove the plug and allow the oil to drain completely.
Reinstall the plug securely‚ then add the recommended oil type and quantity (refer to your manual). Check the oil level with the dipstick. Dispose of used oil responsibly at a recycling center. This process typically takes 30-60 minutes.
Air Filter Maintenance
Maintaining a clean air filter is crucial for optimal engine performance. Periodically inspect the air filter for dirt and debris. Remove the filter cover and carefully take out the filter element. If the filter is only slightly dirty‚ gently tap it to remove loose particles.
For heavily soiled filters‚ replace it with a new one. Reinstall the clean or new filter and secure the cover. Check the filter every 25 hours of operation. A clean filter ensures proper airflow to the engine.

Warranty Information
Troy-Bilt stands behind its 2700 PSI pressure washer with a limited warranty. The engine‚ specifically the GCV160‚ carries a separate manufacturer’s warranty. Generally‚ the Troy-Bilt warranty covers defects in materials and workmanship for a specified period‚ typically one to three years from the date of purchase.
This warranty doesn’t cover items damaged by misuse‚ neglect‚ or normal wear and tear. Register your product online to activate the warranty. Keep your purchase receipt as proof of date. See the official manual for complete details.
Downloading the Official Manual
Accessing the official Troy-Bilt 2700 PSI pressure washer owner’s manual is straightforward. Visit the Troy-Bilt website and navigate to the “Support” or “Manuals” section. You can search by model number to locate the correct document.
The manual is typically available as a downloadable PDF‚ allowing you to view it on any device. It contains crucial information regarding safety‚ operation‚ maintenance‚ and troubleshooting. Having a digital copy ensures you always have access to vital instructions.
Frequently Asked Questions (FAQ)
Common questions include how to start the engine‚ select the correct nozzle‚ and perform basic maintenance. Users often inquire about troubleshooting issues like low pressure or engine failure. The manual details oil change procedures for the GCV160 engine.
Another frequent query concerns winterizing the pressure washer to prevent damage from freezing temperatures. Troy-Bilt’s support website also provides answers to many frequently asked questions‚ alongside contact information for further assistance.
Where to Find Replacement Parts
Genuine Troy-Bilt replacement parts can be purchased directly from the Troy-Bilt website‚ ensuring compatibility and quality. Authorized Troy-Bilt service centers also stock a wide range of parts‚ offering professional assistance with selection and installation.
Additionally‚ many online retailers specializing in outdoor power equipment carry replacement parts for the 2700 PSI pressure washer. When ordering‚ have the model number readily available to guarantee the correct fit. Refer to the manual for parts diagrams.
Contacting Troy-Bilt Support
For assistance with your Troy-Bilt 2700 PSI pressure washer‚ several support options are available. Visit the official Troy-Bilt website for a comprehensive FAQ section and troubleshooting guides. You can also connect with their customer support team via phone‚ typically available during standard business hours.
Live chat support is often offered online for immediate assistance. Furthermore‚ Troy-Bilt provides a service locator tool to find authorized repair centers near you. Keep your model number handy when contacting support.
Pressure Washer Specifications
The Troy-Bilt 2700 PSI pressure washer boasts a robust GCV160 engine‚ delivering substantial cleaning power. Maximum pressure reaches 2700 PSI‚ while the flow rate (GPM) typically ranges around 2.3 GPM. It features a high-pressure hose‚ often 25 feet in length.
Nozzle sizes vary‚ offering different spray patterns; The unit’s weight is approximately 62 pounds. Fuel capacity is around 0.47 gallons. These specifications ensure effective cleaning for various outdoor tasks.
Tips for Effective Cleaning
Begin by sweeping away loose debris before applying water. Always start with a wider nozzle (25-degree) and gradually move to narrower ones (0-degree) for stubborn stains. Maintain a consistent distance of about 8-12 inches from the surface.
Work in overlapping strokes to avoid streaking. Test on an inconspicuous area first. Utilize detergents specifically designed for pressure washers. Rinse thoroughly after cleaning. Proper technique maximizes cleaning power and prevents damage.
Understanding PSI and GPM
PSI (pounds per square inch) measures the water’s force‚ determining its ability to lift dirt. GPM (gallons per minute) indicates the volume of water delivered‚ impacting rinsing efficiency.
The Troy-Bilt 2700 PSI offers a balance of force and flow. Higher PSI is ideal for tough grime‚ while higher GPM speeds up cleaning. Matching nozzle selection to the task optimizes performance. Understanding these metrics ensures effective and safe cleaning.
Proper Storage Procedures
Before long-term storage‚ thoroughly drain all water from the pump and hose. Disconnect the water supply and power cord. Apply pump protector to prevent freezing and corrosion.
Store the unit in a clean‚ dry location‚ protected from freezing temperatures. Keep the nozzle and wand secured to prevent damage. Regularly check the oil level in the GCV160 engine. Following these steps ensures your Troy-Bilt 2700 PSI pressure washer remains in optimal condition.
Safety Gear Recommendations
Always wear safety glasses or goggles to protect your eyes from debris. Closed-toe shoes are essential to prevent foot injuries. Consider wearing gloves to protect your hands from the high-pressure spray and detergents.

Hearing protection is advisable during extended use due to engine noise. Avoid loose clothing that could get caught in the machinery. Prioritize personal safety when operating your Troy-Bilt 2700 PSI pressure washer‚ ensuring a secure and comfortable working environment.
Environmental Considerations
Responsible disposal of detergents is crucial; choose biodegradable‚ environmentally friendly options. Avoid washing directly into storm drains‚ which lead to waterways. Contain runoff and prevent chemicals from contaminating soil or vegetation.

Properly maintain your Troy-Bilt 2700 PSI pressure washer to minimize emissions and fuel consumption. Follow local regulations regarding wastewater disposal. Consider water conservation techniques during cleaning projects‚ promoting sustainable practices and protecting the environment.