honeywell t6 pro series thermostat manual

Honeywell T6 Pro Series Thermostat Manual: A Comprehensive Guide

This manual provides detailed instructions for the Honeywell T6 Pro thermostat, covering installation, operation, and troubleshooting. It assists users in maximizing product functionality,
including smart home integration and remote access via a mobile app.

The Honeywell T6 Pro Series represents a significant advancement in home climate control, offering a blend of functionality, ease of use, and smart home compatibility. This thermostat isn’t merely a temperature regulator; it’s a central hub for optimizing home comfort and energy efficiency. As highlighted in recent discussions, Honeywell, founded in 1885, boasts a rich history of innovation, consistently delivering reliable and high-performance products.

The T6 Pro builds upon this legacy, providing users with precise temperature control, customizable scheduling, and remote access capabilities. Whether you’re a first-time thermostat user or a seasoned smart home enthusiast, the T6 Pro is designed to integrate seamlessly into your lifestyle. Its intuitive interface and comprehensive features, as noted in user guides, empower you to create a comfortable and energy-saving environment. From coolant recirculation in specific models to its broader application in building and industrial control technologies, the T6 Pro embodies Honeywell’s commitment to cutting-edge solutions.

Understanding the T6 Pro Features

The Honeywell T6 Pro boasts a robust feature set designed for optimal climate control and convenience. Key features include a vibrant, easy-to-read touchscreen display, providing clear temperature readings and system status. Programmable 7-day scheduling allows for customized comfort settings tailored to your lifestyle, maximizing energy savings. Geofencing capabilities, leveraging smartphone location, automatically adjust temperatures when you’re away or returning home.

Furthermore, the T6 Pro offers seamless integration with popular smart home platforms, enabling voice control via Amazon Alexa or Google Assistant. Compatibility extends to various heating and cooling systems, ensuring broad applicability. As Honeywell’s product range demonstrates, they prioritize both functionality and user experience. Specific models may include features like coolant recirculation for precise temperature maintenance, as seen in advanced applications. The thermostat also provides detailed energy usage reports, helping you monitor and optimize consumption, aligning with Honeywell’s commitment to sustainable solutions.

Initial Setup and Installation

Before beginning, ensure power is OFF at the breaker to prevent electrical shock. The initial setup involves removing your old thermostat and identifying existing wiring. Carefully label each wire corresponding to its terminal on the old unit – this is crucial for correct reconnection. The Honeywell T6 Pro package includes a backplate; mount it securely to the wall using the provided screws.

Connect the wires to the corresponding terminals on the T6 Pro backplate, referencing the wiring diagrams included in this manual. Double-check all connections for tightness and accuracy. Once wired, attach the thermostat display to the backplate. Power ON the breaker and follow the on-screen prompts to configure the initial settings, including date, time, and system type. The thermostat will guide you through a system test to verify proper operation. Successful completion confirms correct installation, allowing you to proceed with programming schedules and exploring advanced features.

Wiring Diagrams and Compatibility

The Honeywell T6 Pro is designed for compatibility with most 24V heating and cooling systems, including furnaces, air conditioners, heat pumps, and boilers. However, verifying compatibility is essential before installation. This manual provides detailed wiring diagrams for common system configurations, illustrating the correct connections for each wire (R, C, W, Y, G, etc.).

Pay close attention to the diagrams, as incorrect wiring can damage the thermostat or your HVAC system. The ‘C’ wire (common wire) is often required for consistent power; if absent, a C-wire adapter may be necessary. Diagrams differentiate between conventional and heat pump systems, outlining specific wiring requirements for each. Ensure your system voltage matches the thermostat’s specifications (24VAC). If unsure about your system type or wiring, consult a qualified HVAC technician to avoid potential issues and ensure safe, proper installation.

Navigating the Thermostat Interface

The Honeywell T6 Pro features a user-friendly interface with a backlit LCD screen and intuitive controls. The main screen displays the current temperature, setpoint, mode (Heat, Cool, Auto, Off), and fan setting (Auto, On). Use the up and down arrow buttons to adjust the temperature or navigate through menu options.

The menu button, typically represented by three horizontal lines, accesses advanced settings like scheduling, system configuration, and Wi-Fi connectivity. Within the menu, utilize the arrow buttons to scroll and the select/OK button to confirm choices. The thermostat also incorporates a temporary hold function, allowing quick temperature adjustments without altering the programmed schedule. Familiarize yourself with the icons representing different modes and settings for efficient operation. A brief press of any button illuminates the screen for easy viewing in low-light conditions.

Programming Schedules: Basic Operation

The Honeywell T6 Pro allows for customized heating and cooling schedules to optimize comfort and energy savings. To begin, access the “Schedule” option within the thermostat’s menu. You can create separate schedules for weekdays and weekends, or program a unique schedule for each day of the week.

Each period (Wake, Leave, Return, Sleep) can be individually programmed with a desired temperature and time. Use the arrow buttons to adjust the time and temperature for each period. The thermostat supports multiple periods per day, allowing for granular control over your home’s climate. Remember to save your changes after each adjustment. You can temporarily override the schedule using the “Hold” function, specifying a duration for the override. Regularly reviewing and adjusting your schedule based on seasonal changes and occupancy patterns will maximize efficiency.

Advanced Scheduling Options

Beyond basic scheduling, the Honeywell T6 Pro offers advanced features for refined climate control. Utilize the “Smart Response” function to enable quicker heating or cooling before scheduled periods, ensuring comfort when you need it. Explore the “Follow Me” feature, which prioritizes temperature readings from the thermostat’s location, adapting to your immediate surroundings.

The T6 Pro also supports vacation mode, allowing you to set a constant temperature while away for extended periods, preventing energy waste and potential issues like frozen pipes. Consider utilizing the “Filter Change Reminder” to maintain optimal system performance; For complex schedules, the thermostat allows copying settings from one day to another, streamlining the programming process. Regularly reviewing and fine-tuning these advanced options will unlock the full potential of your T6 Pro, maximizing both comfort and energy efficiency.

Geofencing and Smart Home Integration

The Honeywell T6 Pro seamlessly integrates with popular smart home ecosystems like Amazon Alexa and Google Assistant, enabling voice control for temperature adjustments and schedule management. Geofencing utilizes your smartphone’s location to automatically adjust the thermostat when you leave or approach home, optimizing energy usage without manual intervention.

To enable geofencing, you’ll need to connect the thermostat to the Honeywell Home app and grant location permissions. This feature learns your typical routines, creating a virtual perimeter around your home. Beyond voice control and geofencing, the T6 Pro can be incorporated into broader smart home routines, triggering actions based on temperature or occupancy. Explore IFTTT (If This Then That) compatibility for even greater customization. Ensure your home network is stable for reliable connectivity and optimal performance of these integrated features.

Remote Access and Mobile App Control

The Honeywell Home app provides comprehensive remote control of your T6 Pro thermostat from anywhere with an internet connection. Through the app, you can adjust the temperature, view current settings, and modify programmed schedules, ensuring comfort and energy savings even when you’re away from home. Real-time energy usage reports are also accessible, helping you track consumption patterns and identify potential cost-saving opportunities.

Setting up remote access requires connecting the thermostat to your home’s Wi-Fi network during the initial setup process. The app offers a user-friendly interface for managing multiple thermostats and creating customized comfort profiles. Push notifications alert you to significant temperature changes or system alerts, providing peace of mind. Regular app updates ensure compatibility and access to the latest features, enhancing the overall user experience and maintaining secure remote access.

Troubleshooting Common Issues

If your Honeywell T6 Pro isn’t responding, first check the battery level and ensure it’s securely installed. A weak battery is a frequent cause of operational problems. If the display is blank, verify the wiring connections at the thermostat and the HVAC system, referencing the wiring diagrams in this manual. For connectivity issues, confirm your Wi-Fi network is functioning correctly and the thermostat is within range.

Temperature discrepancies can often be resolved by recalibrating the thermostat’s temperature sensor within the settings menu. If the system isn’t heating or cooling as expected, check the circuit breaker and ensure the HVAC system is powered on. Consult the error code section of this manual for specific diagnostic information related to system malfunctions. If problems persist, contacting Honeywell’s customer support is recommended for further assistance and potential repair options.

Error Codes and Their Meanings

The Honeywell T6 Pro utilizes a series of error codes to diagnose system issues. Code “E1” typically indicates a loss of communication with the HVAC system, requiring a check of wiring connections. “E2” suggests a sensor malfunction, potentially needing sensor replacement. A “W2” error often points to a problem with the auxiliary heat function, possibly a faulty relay or wiring issue.

“L1” signifies a low battery condition, prompting immediate battery replacement. “C2” indicates a communication failure between the thermostat and the Wi-Fi network, requiring network troubleshooting. Refer to the complete error code list within this manual for a comprehensive understanding of each code and recommended solutions. Ignoring error codes can lead to further system damage or inefficient operation. Contacting a qualified HVAC technician is advised for complex or recurring error codes.

Battery Replacement and Maintenance

The Honeywell T6 Pro thermostat requires periodic battery replacement to maintain consistent operation, even when connected to a power source (C-wire). Low battery warnings, indicated by an “L1” error code, signal the need for new alkaline batteries – typically two AA batteries. Replacement is straightforward; access the battery compartment on the thermostat’s side or back panel.

Regular maintenance includes cleaning the thermostat’s display with a soft, dry cloth. Avoid using liquids or abrasive cleaners. Inspect wiring connections annually to ensure they are secure and free from corrosion. Dust accumulation can also affect performance, so occasional gentle cleaning of the thermostat’s exterior is recommended. Proper battery maintenance and routine cleaning contribute to the longevity and reliable performance of your T6 Pro thermostat.

Resetting the Thermostat to Factory Defaults

Resetting your Honeywell T6 Pro thermostat to factory defaults clears all personalized settings, schedules, and network connections, returning it to its original out-of-the-box state. This is useful for troubleshooting persistent issues or preparing the thermostat for a new user. The reset procedure typically involves navigating through the thermostat’s menu system.

Access the settings menu, often found under “System” or “Advanced” options. Locate the “Reset” or “Factory Reset” function. Confirm your decision, as this action is irreversible without re-entering all your preferences. The thermostat will power cycle and revert to its initial setup screen. You will then need to re-establish your Wi-Fi connection and reprogram your desired schedules. Caution: Ensure you understand the implications before performing a factory reset, as all custom configurations will be lost.

Coolant Recirculation and Radiator Cooling (Specific to certain models)

Certain Honeywell T6 Pro models, particularly those designed for advanced vehicle integration, feature coolant recirculation and radiator cooling functionalities. These systems regulate engine temperature by continuing to circulate coolant even after the engine is switched off, preventing thermal shock and maintaining optimal operating conditions. This is crucial for turbocharged engines or those subjected to heavy loads.

The thermostat controls the coolant pump and radiator fan, adjusting their operation based on engine temperature sensors. This prevents overheating during operation and maintains temperature during cool-down. Proper functioning relies on accurate sensor readings and correct programming within the thermostat’s settings. Note: These features are not universally available across all T6 Pro models; consult your specific model’s documentation for confirmation and detailed operating instructions. Incorrect settings can impact engine performance and efficiency.

Honeywell’s History and Product Range

Honeywell’s legacy stretches back to 1885, originating as a regulator manufacturer in the United States. Through innovation and strategic acquisitions – including the merger with AlliedSignal – Honeywell evolved into a diversified technology and manufacturing powerhouse. Today, it operates globally, serving industries like aerospace, building technologies, and performance materials.

The company’s extensive product range reflects its commitment to diverse technological solutions. Beyond thermostats like the T6 Pro series, Honeywell offers air purification systems (like the KJ760F-P22W), gas detectors, industrial control systems (PKS), and scanning technology (OH4502). This broad portfolio demonstrates Honeywell’s expertise in creating solutions for both residential and industrial applications. The T6 Pro thermostat represents a focused application of Honeywell’s broader expertise in building automation and control, leveraging decades of experience in sensor technology and system integration.

Safety Precautions and Warnings

Prior to installation and operation of the Honeywell T6 Pro thermostat, carefully review these safety guidelines. Electrical shock hazard: Disconnect power at the breaker box before commencing any wiring. Improper wiring can lead to damage or injury. Qualified personnel only: Installation should be performed by a trained HVAC technician to ensure compliance with local codes and safe operation.

Gas safety: If your system includes gas heating, verify gas supply is shut off before working on wiring. Do not disassemble: The thermostat contains no user-serviceable parts. Attempting repairs yourself voids the warranty and poses a safety risk. Operating temperatures: Ensure the thermostat is operated within specified temperature ranges to prevent malfunction. Carbon Monoxide: Honeywell also offers carbon monoxide detectors; consider installing one for comprehensive home safety. Always follow local regulations and heed warnings regarding potential hazards associated with HVAC systems.

dodge ram 1500 owners manual

Welcome! This manual details the 2025 Ram 1500’s features. It covers operation, maintenance, and safety, mirroring information from 2014 models onward.

Access official manuals, potentially requiring the dodgeram.ru password for club access, and explore resources like Ram Truck Forums.

Purpose of the Manual

This Owner’s Manual serves as a comprehensive guide to your 2025 Ram 1500. It illustrates and describes all standard and optional equipment, ensuring safe and effective vehicle operation. FCA US LLC provides this resource to help you understand your truck’s capabilities.

The manual details maintenance schedules, emergency procedures, and warranty information. It’s designed for both new owners and experienced Ram drivers, offering insights into features and potential troubleshooting, referencing materials from 2014 onwards.

Model Year Coverage (2014-2025)

This manual encompasses information relevant to Ram 1500 models from 2014 through 2025. While specific features may vary by year, the core principles of operation and maintenance remain consistent. Access to official manuals, including those from prior years, is available through dedicated online resources.

Owners can find detailed information pertaining to their specific model year, ensuring accurate guidance. Note that some archived files may require a password – dodgeram.ru – for club member access.

Vehicle Identification

Locate your Ram 1500’s unique Vehicle Identification Number (VIN). This crucial code decodes vital information about your truck’s specifications and history.

Vehicle Identification Number (VIN) Location

Finding your VIN is essential. Typically, the 17-digit VIN for your 2025 Ram 1500 is located on the driver’s side dashboard, visible through the windshield. It’s also often found on the driver’s side doorjamb sticker.

Additionally, check your vehicle registration and insurance documents, as the VIN will be clearly listed there. Knowing its location ensures easy access for service, warranty claims, and vehicle history reports.

Decoding the VIN

Your Ram 1500’s VIN holds crucial information about its origin and specifications. Each digit represents a specific characteristic, including the manufacturer (FCA US LLC), model year, assembly plant, engine type, and more.

Online VIN decoders can translate this code into a readable report, revealing details about your truck’s build and features. This is valuable for verifying vehicle history and understanding its original configuration.

Understanding Your Vehicle

Ram 1500 trucks offer diverse engines – Hemi, EcoDiesel, and others – paired with varied transmission options. Choose between 4×2 or 4×4 drivetrains.

Engine Specifications (Hemi, EcoDiesel, etc.)

The 2025 Ram 1500 presents a range of powerful engine choices. The legendary Hemi V8 delivers robust performance, while the EcoDiesel offers impressive fuel efficiency and torque. Additional options may include V6 engines, catering to diverse driving needs.

Specific horsepower and torque figures vary depending on the chosen engine and configuration. Refer to the detailed specifications section for precise data. FCA US LLC continually refines these engines.

Transmission Options

The 2025 Ram 1500 offers several transmission choices designed to optimize performance and efficiency. Typically, these include advanced automatic transmissions, such as an eight-speed automatic, paired with the various engine options.

These transmissions are engineered for smooth shifting and responsive control. FCA US LLC continuously improves transmission technology. Specific transmission pairings depend on the selected engine, enhancing the overall driving experience.

Drivetrain Systems (4×2, 4×4)

The 2025 Ram 1500 provides both 4×2 and 4×4 drivetrain options, catering to diverse driving needs. The 4×2 system is ideal for on-road driving, offering fuel efficiency.

The 4×4 systems enhance traction and capability for off-road adventures or challenging weather conditions. FCA US LLC designs these systems for reliability. Select the drivetrain that best suits your lifestyle and terrain requirements.

Key Features and Controls
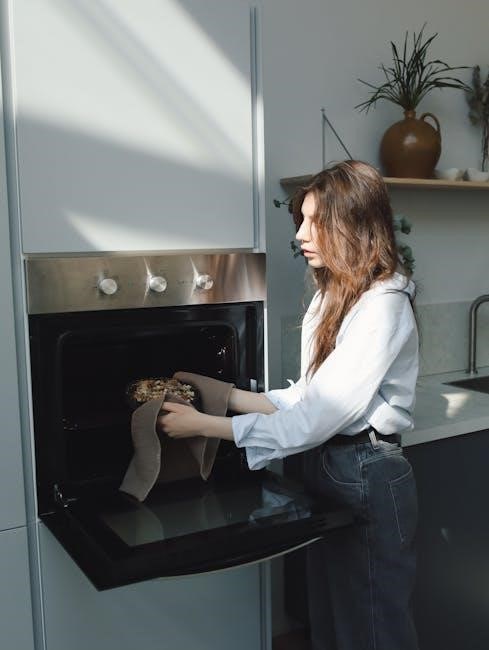
Explore the 2025 Ram 1500’s interior and exterior controls. Understand the infotainment system’s operation for a seamless driving experience. Familiarize yourself with all features!

Interior Controls Overview

Discover the 2025 Ram 1500’s cabin layout. Locate essential controls like climate settings, lighting, and the Uconnect infotainment system. Understand steering wheel-mounted buttons for audio and cruise control. Familiarize yourself with seat adjustments, door locks, and window operation.

Learn about the instrument cluster display and its customizable features. Explore the gear selector and transfer case controls (if equipped). Master the operation of interior lights and power outlets for optimal comfort and convenience during every journey.

Exterior Controls Overview

Explore the 2025 Ram 1500’s exterior features. Identify headlight and taillight controls, including automatic operation. Locate the windshield wiper and washer controls for optimal visibility. Understand the operation of exterior mirrors and their adjustment features.

Familiarize yourself with the door handles, locks, and keyless entry system. Learn about the fuel filler door release and tailgate operation. Discover the location of the trailer brake controller (if equipped) and any exterior lighting options for enhanced safety.

Infotainment System Operation

Discover the 2025 Ram 1500’s advanced infotainment system. Navigate the touchscreen display and understand its various menus and functions. Connect your smartphone via Bluetooth for hands-free calling and audio streaming. Utilize the system’s navigation features for turn-by-turn directions.

Explore audio controls, including radio, media player, and available premium sound systems. Learn about voice command functionality for convenient operation. Customize system settings to personalize your driving experience and access available apps.

Maintenance Schedule

Follow the recommended schedule for routine tasks. Check fluid levels regularly and perform necessary replacements to maintain optimal Ram 1500 performance.

Routine Maintenance Tasks

Regular inspections are crucial for your Ram 1500. This includes checking tire pressure, examining fluid levels (oil, coolant, brake fluid, and windshield washer fluid), and inspecting belts and hoses for wear. Ensure proper operation of lights, wipers, and the horn. Adhering to the schedule outlined in this manual will help prevent unexpected issues and maintain vehicle reliability. Don’t forget to rotate tires for even wear, extending their lifespan and improving handling.

Fluid Checks and Replacements

Maintaining correct fluid levels is vital. Regularly check engine oil, coolant, brake fluid, power steering fluid, and transmission fluid. Follow the recommended intervals for fluid replacements as detailed in the manual. Using the correct fluid type is essential; consult the specifications section. Neglecting fluid maintenance can lead to component damage and reduced performance. Proper fluid levels ensure optimal operation and longevity of your Ram 1500.

Towing and Payload Capacity

Determine your Ram 1500’s towing capacity and payload limits before hauling. Proper weight distribution is crucial for safe operation and vehicle stability.

Calculating Towing Capacity

To accurately calculate your 2025 Ram 1500’s towing capacity, consult the vehicle’s door jamb sticker and your owner’s manual. Consider factors like engine type, axle ratio, and whether it’s 4×2 or 4×4. Remember to subtract the total weight of passengers and cargo within the truck from the Gross Vehicle Weight Rating (GVWR).

Additionally, the Gross Combined Weight Rating (GCWR) – the maximum permissible weight of the truck and trailer – must not be exceeded. Always prioritize safety and adhere to these weight limits.

Payload Limits and Distribution

Understanding your 2025 Ram 1500’s payload capacity is crucial for safe operation. Refer to the vehicle’s door jamb sticker for the maximum payload weight. Proper distribution of cargo is equally important; heavier items should be placed over or slightly ahead of the rear axle.

Avoid exceeding the payload limit, as this can compromise handling and braking. Uneven weight distribution can lead to instability, especially during emergency maneuvers.

Emergency Procedures

In emergencies, the 2025 Ram 1500 owner’s manual details roadside assistance programs. It also provides critical guidance on actions to take following an accident.

Roadside Assistance Program Details

FCA US LLC offers a Roadside Assistance Program for your 2025 Ram 1500. However, be aware that the company reserves the right to modify the program’s terms or even discontinue it entirely at any time.

Details regarding coverage, limitations, and how to access assistance are thoroughly outlined within the official owner’s manual. Ensure you familiarize yourself with these specifics for peace of mind.

What to Do in an Accident

Following an accident involving your 2025 Ram 1500, prioritize safety first. Ensure the well-being of all occupants and, if possible, move the vehicle to a secure location away from traffic.

Contact local authorities to report the incident and obtain a police report. The owner’s manual provides essential guidance on documentation and insurance claim procedures.

Safety Features

Your 2025 Ram 1500 includes an advanced airbag system and a stability control system. These features enhance occupant protection during various driving conditions.

Airbag System

The 2025 Ram 1500 is equipped with an advanced airbag system designed to provide occupant protection in the event of a collision. This system includes front, side, and curtain airbags strategically positioned throughout the vehicle’s cabin.

Airbags work in conjunction with seatbelts to minimize injury. Always ensure all occupants are properly restrained. Refer to the full owner’s manual for detailed information regarding airbag operation, limitations, and safety precautions. Improper use could increase risk.

Stability Control System

The 2025 Ram 1500 features a sophisticated Electronic Stability Control (ESC) system. This system helps maintain directional control during challenging driving conditions, like slippery roads or sudden maneuvers. ESC selectively applies brakes to individual wheels, assisting the driver in staying on the intended path.

The system works seamlessly with other safety features. Refer to the owner’s manual for a complete understanding of ESC functionality, limitations, and indicator lights. Remember, ESC enhances, but doesn’t eliminate, driving risks.

Detailed System Descriptions

Explore in-depth explanations of your Ram 1500’s core systems. This section covers the braking, steering, and cooling systems, providing technical insights for informed maintenance.

Braking System

Your Ram 1500 features a sophisticated braking system designed for optimal stopping power and control. This system incorporates components like disc brakes on all wheels, and potentially, advanced features such as Anti-lock Brake System (ABS).

Regular inspections of brake pads, rotors, and fluid levels are crucial for maintaining peak performance. Consult the maintenance schedule for recommended intervals. Understanding the system ensures safe operation and longevity.

Steering System

The 2025 Ram 1500 utilizes a responsive steering system engineered for precise handling and driver comfort. This system typically employs power steering to assist with maneuverability, reducing driver effort.

Regularly check for any unusual noises or excessive play in the steering wheel. Proper alignment is vital for tire wear and vehicle stability. Refer to the maintenance schedule for inspection guidelines and ensure optimal performance.

Cooling System

The 2025 Ram 1500’s cooling system prevents engine overheating through circulating coolant. This system includes a radiator, water pump, and thermostat, all crucial for maintaining optimal engine temperature.

Regularly inspect coolant levels and hoses for leaks or damage. Follow the recommended maintenance schedule for coolant flushes to ensure efficient heat dissipation and prevent corrosion within the system.

Troubleshooting Common Issues

This section addresses typical Ram 1500 problems like starting failures and electrical malfunctions. Refer to this guide for initial diagnostic steps before seeking professional help.

Starting Problems

If your 2025 Ram 1500 fails to start, first check the battery connections for corrosion or looseness. Ensure sufficient fuel is present and the fuel pump is functioning correctly. Consider a faulty starter motor or solenoid as potential causes. Consult the owner’s manual for specific diagnostic procedures and recommended troubleshooting steps. Remember to verify the ignition switch is fully engaged. A weak battery is a common culprit, especially in cold weather.

Electrical Issues

Experiencing electrical problems with your Ram 1500? Begin by inspecting fuses related to the affected system. Check for loose or corroded wiring connections, particularly near the battery. A failing alternator can cause widespread electrical malfunctions. Consult the owner’s manual’s wiring diagrams for accurate identification. Remember to disconnect the negative battery terminal before performing any electrical repairs. Professional diagnosis is recommended for complex issues.

Warranty Information

Your 2025 Ram 1500 is covered by a basic vehicle warranty and a separate powertrain warranty. FCA US LLC may modify or discontinue roadside assistance programs.

Basic Vehicle Warranty

The 2025 Ram 1500’s basic vehicle warranty provides coverage for defects in materials or workmanship. This warranty typically spans a defined period, often 3 years or 36,000 miles, whichever occurs first.

It’s crucial to review the specific terms and conditions outlined in your warranty documentation. FCA US LLC retains the right to modify these terms or discontinue programs, so staying informed is essential for maximizing your coverage benefits.

Powertrain Warranty

The 2025 Ram 1500 also includes a powertrain warranty, covering major engine, transmission, and drivetrain components. This warranty generally extends beyond the basic coverage, often reaching 5 years or 60,000 miles.

Like the basic warranty, specific details are outlined in your documentation. FCA US LLC reserves the right to alter terms or discontinue the program. Understanding these conditions ensures you’re aware of your rights and protections regarding vital vehicle systems.

Specifications

This section details crucial 2025 Ram 1500 dimensions, weights, and fluid capacities. Refer to these specifications for accurate vehicle information and maintenance needs.

Dimensions and Weights

Understanding your Ram 1500’s physical characteristics is vital. This includes overall length, width, and height, impacting maneuverability and storage. Weight specifications – gross vehicle weight rating (GVWR), curb weight, and payload capacity – are crucial for safe operation.

These figures directly influence towing capabilities and handling. Consult the manual for precise measurements related to your specific Ram 1500 configuration, as variations exist between cab styles and options.

Fluid Capacities

Maintaining correct fluid levels is essential for optimal Ram 1500 performance. This section details capacities for engine oil, coolant, transmission fluid, brake fluid, power steering fluid, and windshield washer fluid.

Refer to the owner’s manual for specific amounts, as they vary based on engine type (Hemi, EcoDiesel) and options. Accurate fluid levels ensure proper lubrication, cooling, and system function, preventing damage and extending vehicle life.

Index and Glossary

Locate information quickly using the alphabetical index. A comprehensive glossary defines key terms related to your Ram 1500, ensuring clear understanding of this manual.

Alphabetical Index of Topics

A – Airbag System, Accessories, Alignment. B – Braking System, Battery, Body. C – Capacity (Towing/Payload), Climate Control, Cooling System. D – Dimensions, Drivetrain, Dodge Ram 1500 details. E – Electrical System, Engine Specifications, Emergency Procedures.

F – Fluid Capacities, Fluids (Checks/Replacements). I – Infotainment System, Interior Controls. M – Maintenance Schedule, Manual Access. O – Owner’s Manual, Operation. R – Roadside Assistance, Routine Maintenance. S – Safety Features, Steering System. T – Transmission Options, Troubleshooting. V – Vehicle Identification Number (VIN).

Definitions of Key Terms

FCA US LLC: The manufacturer of Ram Trucks, formerly Chrysler Group LLC. HEMI: Ram’s signature engine series. VIN: Vehicle Identification Number, a unique code for your Dodge Ram 1500. Roadside Assistance: A program offering help with breakdowns (terms may change).

Payload: The maximum weight your truck can carry. Towing Capacity: The maximum weight your truck can tow safely. 4×2/4×4: Drivetrain designations – two-wheel or four-wheel drive. Manual: This owner’s guide for your Ram 1500.

Digital Resources

Explore online access to your Ram 1500 owner’s manual. Join Ram Truck Forums and clubs, like dodgeram.ru, for community support and information!

Online Owner’s Manual Access

Access a digital version of your 2025 Ram 1500 owner’s manual conveniently online. This provides quick and easy access to vital information regarding your vehicle’s operation and maintenance.

Official manuals, dating back to 2014, are available, offering a comprehensive resource for all model years. This digital format allows for searchable content and eliminates the need to carry a physical copy. Explore the resources for a better ownership experience!

Ram Truck Forums and Clubs (dodgeram.ru)

Connect with fellow Ram 1500 owners through online forums and clubs, notably dodgeram.ru. These platforms offer a valuable space to share experiences, troubleshoot issues, and access specialized knowledge.

Certain files and archived manuals may require the password “dodgeram.ru” for access, highlighting the community’s collaborative nature. Engage in discussions and benefit from the collective wisdom of Ram truck enthusiasts!

rp5-gm31 manual

RP5-GM31 Manual: Comprehensive Guide

This manual details the RP5-GM31 interface, enabling factory radio replacement in select GM vehicles with 29-bit LAN systems. It covers installation, features, and troubleshooting.

The PAC RP5-GM31 is a radio replacement interface specifically engineered for select General Motors vehicles utilizing a 29-bit LAN data bus system. This innovative interface streamlines the installation process, offering preloaded software for crucial retention features. These include maintaining functionality of OnStar systems, retaining existing steering wheel controls (SWC), and providing outputs for seamless navigation integration.

Essentially, the RP5-GM31 acts as a bridge, translating signals between the aftermarket radio and the vehicle’s complex electronic network. It eliminates the need for separate modules often required for these retention features, saving installers valuable time and reducing installation costs. Its compact dimensions (8.60in. x 8.50in. x 2.10in.) allow for flexible mounting options within the vehicle.

What is the RP5-GM31 and its Purpose?

The RP5-GM31 is a sophisticated interface module designed by PAC Audio to facilitate aftermarket radio installations in compatible General Motors vehicles. Its primary purpose is to retain essential factory features when upgrading the vehicle’s head unit. This includes preserving the functionality of the OnStar telematics system, allowing continued access to emergency and concierge services.

Furthermore, the RP5-GM31 ensures steering wheel controls remain operational with the new radio, providing convenient control over audio functions. It also outputs signals compatible with aftermarket navigation systems, enabling integration of map data and directions. By consolidating these features into a single unit, the RP5-GM31 simplifies the upgrade process and enhances the overall user experience.

Key Features of the RP5-GM31

The PAC RP5-GM31 boasts several key features that streamline radio replacement in GM vehicles. Preloaded software for OnStar retention, amplifier retention, and steering wheel control (SWC) significantly reduces programming time. It supports 29-bit LAN data bus communication, ensuring compatibility with a wide range of GM models.

Navigation-based output signals allow seamless integration with aftermarket navigation systems, displaying crucial information. Its compact physical dimensions (8.60in x 8.50in x 2.10in) facilitate easy installation in tight spaces. The interface is designed for select GM LAN vehicles, offering a reliable and feature-rich solution for audio upgrades, enhancing both convenience and functionality.

Compatibility and Vehicle Applications

The RP5-GM31 is designed for select General Motors vehicles utilizing a 29-bit LAN data bus system, ensuring proper integration and functionality.

Supported GM Vehicle Years

Determining compatibility begins with the vehicle’s model year. The RP5-GM31 interface generally supports a wide range of General Motors vehicles manufactured from 2007 through 2021. However, specific year support varies depending on the GM model and its particular 29-bit LAN configuration.

It’s crucial to verify compatibility using the PAC vehicle search tool or Crutchfield’s fit guide before purchasing. These resources provide up-to-date information on supported years for each GM model. While the interface often works with vehicles within this range, exceptions exist due to factory radio options and production changes. Always double-check to ensure a seamless installation and full functionality.

Specific GM Models Compatible with RP5-GM31

The RP5-GM31 interface demonstrates broad compatibility across numerous GM models. Supported vehicles include the Chevrolet Silverado, GMC Sierra, Chevrolet Tahoe, GMC Yukon, and Cadillac Escalade. It also works with models like the Chevrolet Equinox, GMC Terrain, Buick Enclave, and various Chevrolet Impala and Malibu generations.

Furthermore, compatibility extends to certain GM trucks and vans, such as the Chevrolet Express and GMC Savana. However, it’s vital to consult the official PAC vehicle database or Crutchfield’s fit guide for a definitive list. These resources detail specific trim levels and factory radio configurations supported within each model year, ensuring accurate compatibility verification before installation.

Checking Vehicle Compatibility

Confirming vehicle compatibility is crucial before installing the RP5-GM31. Utilize the PAC vehicle search tool on their official website, inputting your vehicle’s year, make, and model. Crutchfield’s fit guide provides another reliable resource, offering a compatibility checker specifically for car audio installations.

Verify your vehicle utilizes a 29-bit LAN data bus system, as the RP5-GM31 is designed for these systems. Check your factory radio’s wiring harness; the interface requires specific connector types. Incorrect compatibility can lead to functionality issues, including loss of OnStar or steering wheel control. Always double-check before proceeding with installation to avoid potential problems.

Installation Overview

Proper installation of the RP5-GM31 requires careful wiring and connection to the vehicle’s data bus. A wiring diagram is essential for a successful setup.

Tools Required for Installation

Successfully installing the RP5-GM31 necessitates a specific set of tools to ensure a secure and functional connection within your General Motors vehicle. Essential items include a wire stripper/crimper for preparing and connecting wires, along with various connectors to match the vehicle’s existing harness.

A multimeter is crucial for verifying power and ground connections, while a soldering iron and solder can provide more permanent and reliable joints. Panel removal tools will aid in accessing the factory radio location without causing damage to interior components. Don’t forget basic hand tools like screwdrivers and pliers. Finally, electrical tape or heat shrink tubing is needed for insulating exposed wires, preventing shorts and ensuring a professional finish.

Wiring Diagram Overview

The RP5-GM31 wiring diagram illustrates the connections between the interface module, the vehicle’s factory wiring harness, and the aftermarket radio. Key connections include the 12V constant and switched power wires, the ground connection, and the 29-bit LAN data bus wires.

Separate wires are dedicated to steering wheel control retention, OnStar functionality, and navigation output signals. Carefully matching wire colors and functions is critical for proper operation. The diagram details how to connect the RP5-GM31 to retain existing features while integrating the new radio. Always refer to the specific diagram included with your RP5-GM31 unit, as wiring configurations can vary based on vehicle model and year.

RP5-GM31 Connection Points

The RP5-GM31 connects primarily to the vehicle’s radio harness and the 29-bit LAN data bus. Locate the factory radio connector behind the dashboard; this is the main connection point. The interface module also requires a connection to a 12V constant power source, a 12V switched power source, and a solid ground.

Specific wires from the RP5-GM31 are designated for steering wheel control retention, OnStar integration, and navigation output signals. Ensure secure and proper connections to each designated wire. Incorrect connections can lead to malfunction or damage. Refer to the detailed wiring diagram for precise pin locations and wire colors for your specific vehicle model.

OnStar Retention

The RP5-GM31 is preloaded with OnStar retention software, allowing continued functionality after radio replacement. Proper connection is crucial for operation.

How OnStar Retention Works with RP5-GM31

The RP5-GM31 facilitates OnStar retention by intercepting and translating the necessary data signals between the aftermarket radio and the vehicle’s OnStar module. This interface essentially mimics the factory radio’s communication, ensuring OnStar services – like emergency assistance, remote diagnostics, and vehicle location – remain fully operational post-installation.

It achieves this through a dedicated connection point and pre-programmed software. The module handles the complex 29-bit LAN data bus communication, preventing loss of OnStar functionality. Correct wiring and a secure connection are paramount for successful retention. Without proper integration, OnStar may become inoperable, highlighting the importance of following the installation guide meticulously.

Troubleshooting OnStar Functionality

If OnStar isn’t functioning after RP5-GM31 installation, verify all connections to the OnStar module and the interface itself are secure. Double-check the wiring diagram for correct pin assignments. A common issue is a loose ground connection, impacting communication. Ensure the vehicle’s battery has been properly reconnected after installation.

Attempt a system reset by cycling the ignition on and off. If problems persist, confirm the RP5-GM31 has the latest firmware. Some vehicles may require OnStar re-subscription or reprogramming after radio replacement. Contacting OnStar support can help diagnose issues and confirm account status. A faulty interface module should also be considered.

OnStar Programming Considerations

When integrating the RP5-GM31, understand that some GM vehicles require specific OnStar programming procedures post-installation. This often involves a dealer visit or utilizing specialized diagnostic tools to re-enable full OnStar functionality. The interface is preloaded with retention software, but vehicle-specific adaptations may be necessary.

Verify that the vehicle’s security system remains operational after installation, as OnStar is often integrated with it. Ensure the RP5-GM31 is correctly configured for the specific GM model. Incorrect settings can lead to OnStar malfunctions. Always consult the vehicle’s service manual for detailed programming instructions and potential compatibility issues.

Steering Wheel Control (SWC) Retention

The RP5-GM31 interface retains factory steering wheel controls, offering preloaded SWC software for simplified integration with aftermarket radios.

SWC Programming Procedure

Programming steering wheel controls with the RP5-GM31 typically involves a learning procedure initiated through the connected aftermarket radio. The interface transmits signals from the steering wheel to the radio, which then prompts the user to associate each control with its corresponding function.

Generally, this requires pressing and holding specific steering wheel buttons while the radio is in programming mode. The radio’s manual will detail the exact sequence for your specific unit. Crutchfield often provides detailed instructions tailored to the radio and RP5-GM31 combination. Successful programming ensures seamless control of volume, track selection, and other functions directly from the steering wheel, enhancing the driving experience and safety.

Supported Steering Wheel Control Functions

The RP5-GM31 interface generally supports a wide array of steering wheel control functions, dependent on both the vehicle and the aftermarket radio. Commonly retained functions include volume up/down, track up/down, and radio station presets. Many systems also allow control of phone call answering/hanging up, voice control activation, and navigation commands.

However, specific functionality can vary. Some advanced features, like multi-function controls or vehicle-specific commands, may not be fully supported depending on the radio’s capabilities. Compatibility charts provided by PAC and Crutchfield detail which functions are typically retained for various GM models and radio brands, ensuring a user-friendly experience.

Troubleshooting SWC Issues

If steering wheel controls aren’t functioning post-installation with the RP5-GM31, verify all wiring connections are secure and correct. Double-check the SWC programming procedure was completed accurately, ensuring the correct radio brand and model were selected. Confirm the aftermarket radio supports steering wheel control integration.

If issues persist, consult the PAC website or Crutchfield support for updated firmware or programming instructions. A reset of the RP5-GM31 module may also resolve conflicts. In rare cases, vehicle-specific CAN bus communication issues may require professional diagnosis. Ensure the RP5-GM31 is properly powered and receiving a stable signal.

Navigation Output Signals

The RP5-GM31 provides navigation-based output signals for seamless integration with aftermarket navigation systems, enhancing functionality and user experience.

Understanding Navigation-Based Outputs

The RP5-GM31 interface excels by providing crucial navigation-based output signals, designed to facilitate smooth integration with a wide array of aftermarket navigation systems. These outputs transmit essential data, including vehicle speed, parking brake status, and reverse trigger signals.

This data allows the aftermarket navigation system to accurately display vehicle-related information and respond appropriately to driving conditions; For example, the speed signal ensures map scaling is correct, while the reverse trigger automatically switches the navigation display to a rear-view camera feed when the vehicle is put in reverse.

Proper utilization of these outputs is key to a fully functional and integrated navigation experience, eliminating the need for complex workarounds or additional modules.

Wiring for Navigation Integration

Successful navigation integration with the RP5-GM31 requires careful attention to wiring connections. The interface provides dedicated output wires for vehicle speed, reverse trigger, and parking brake signals. These wires must be securely connected to the corresponding input wires on your aftermarket navigation system.

Typically, the vehicle speed wire is connected to the speed sensor input on the navigation unit, enabling accurate map scaling. The reverse trigger wire connects to the reverse camera input, automatically activating the camera when the vehicle shifts into reverse.

Ensure proper polarity and secure connections to avoid signal interference or malfunction. Consult both the RP5-GM31 wiring diagram and your navigation system’s manual for specific wire colors and connection points.

Compatibility with Aftermarket Navigation Systems

The RP5-GM31 interface is designed for broad compatibility with numerous aftermarket navigation systems, but verifying specific model support is crucial. Alpine, Pioneer, Kenwood, and JVC units are frequently used with this interface, offering seamless integration of features like steering wheel controls and vehicle data display.

However, compatibility can vary depending on the navigation system’s firmware and wiring harness. Always consult Crutchfield’s vehicle-specific fit guides or the PAC website to confirm compatibility before purchasing.

Some systems may require additional adapters or programming to fully utilize all RP5-GM31 features. Proper wiring and configuration are essential for optimal performance and functionality;

Technical Specifications

The RP5-GM31 requires 12V DC power and utilizes a 29-bit LAN data bus. Its dimensions are 8.60in x 8.50in x 2.10in, weighing approximately 1.5lbs.

RP5-GM31 Power Requirements

The RP5-GM31 interface is designed to operate on a standard 12V DC power supply, commonly found in most General Motors vehicles. It’s crucial to ensure a stable and consistent power source for optimal performance and to prevent any potential operational issues.

Typically, the unit draws minimal current during normal operation, but peak current draw may occur during initial startup or when accessing certain features. A properly fused power connection is highly recommended to protect both the interface and the vehicle’s electrical system.

Avoid connecting the RP5-GM31 to unregulated or fluctuating power sources, as this could lead to damage or malfunction. Always verify the polarity before making any connections – incorrect polarity can cause irreversible damage to the unit. Consult your vehicle’s service manual for specific wiring diagrams and power source locations.

Data Bus Information (29-bit LAN)

The RP5-GM31 interface is specifically engineered for vehicles utilizing the 29-bit LAN data bus system, prevalent in many General Motors models. This advanced communication protocol allows the interface to seamlessly integrate with the vehicle’s existing electronic systems, enabling features like steering wheel control and OnStar retention.

Understanding the 29-bit LAN is crucial for successful installation and troubleshooting. The interface interprets and translates data signals traveling along this bus, facilitating communication between the aftermarket radio and the vehicle’s computer.

Proper connection to the 29-bit LAN is essential for all retained features to function correctly. Incorrect wiring or a faulty connection can result in loss of functionality. Refer to the wiring diagrams and vehicle-specific documentation for accurate data bus connection points.

Physical Dimensions and Weight

Understanding the RP5-GM31’s physical specifications is vital for determining suitable mounting locations within the vehicle’s dashboard. The interface module measures approximately 8.60 inches in length, 8.50 inches in width, and 2.10 inches in height. These dimensions ensure compatibility with a wide range of vehicle interiors.

The unit’s relatively compact size allows for discreet installation, minimizing obstruction of other components. The RP5-GM31 weighs a modest amount, contributing to minimal added weight to the vehicle’s electrical system.

Careful consideration of these physical attributes will streamline the installation process, ensuring a secure and stable fit. Proper placement is crucial for preventing interference and maintaining optimal performance.

Troubleshooting Common Issues

This section addresses frequent problems like power loss, steering wheel control malfunctions, and OnStar issues, providing solutions for a smooth installation experience.

No Power to the RP5-GM31

If the RP5-GM31 receives no power, begin by verifying the vehicle’s accessory power wire connection. Ensure it’s securely connected to the interface’s designated 12V accessory input. Next, check the ground connection; a poor ground is a common culprit. Confirm it’s clean, secure, and connected to a solid chassis ground point.

Use a multimeter to test voltage at the RP5-GM31’s power and ground terminals. If voltage is absent on the power wire with the ignition on, trace the wire back to the fuse box and inspect the corresponding fuse. A blown fuse indicates a short circuit or overload. Finally, confirm the vehicle’s battery voltage is within acceptable limits, as low voltage can prevent proper operation.

Loss of Steering Wheel Control

Experiencing a loss of steering wheel control after RP5-GM31 installation often indicates a programming or wiring issue. First, re-verify all SWC wiring connections to the interface, ensuring they match the vehicle’s specific wiring diagram. Double-check the PAC RP5-GM31 is correctly programmed for your vehicle’s year, make, and model using the latest firmware.

If programming appears correct, attempt a SWC relearn procedure, as outlined in the interface’s programming guide. Some vehicles require a specific relearn sequence after an aftermarket radio installation. Confirm the vehicle’s SWC buttons are functioning correctly before assuming an interface fault.

OnStar Not Functioning After Installation

If OnStar fails to operate post-installation with the RP5-GM31, verify the OnStar retention wire is securely connected. This wire is crucial for maintaining OnStar functionality during radio replacement. Confirm the interface is programmed correctly for OnStar retention; some models require specific settings.

Check for any error messages displayed on the vehicle’s infotainment screen related to OnStar. A system reset of the vehicle’s electrical system (disconnecting the battery for 15 minutes) can sometimes resolve communication issues. If problems persist, consult the PAC documentation or contact technical support for assistance, as OnStar compatibility can vary.

hyper tough ht100 manual

Hyper Tough HT100 Manual: A Comprehensive Guide

This manual provides detailed instructions for the Hyper Tough HT100 code reader, covering installation, operation, troubleshooting, and vital user agreement details.
It ensures a seamless diagnostic experience, referencing virtualization compatibility and warranty support.

The Hyper Tough HT100 is a powerful diagnostic tool designed for both professional mechanics and DIY enthusiasts. This code reader efficiently accesses vehicle diagnostic trouble codes (DTCs), offering a comprehensive solution for identifying and resolving automotive issues. It’s a user-friendly device, streamlining the process of understanding your vehicle’s health.

This manual serves as a complete guide, walking you through every aspect of the HT100, from initial setup and operation to advanced features like live data stream analysis and freeze frame data interpretation. Understanding the HT100’s capabilities empowers you to perform effective vehicle diagnostics, potentially saving on costly repair bills. The device’s compatibility extends to a wide range of vehicles, making it a versatile addition to any automotive toolkit.

Furthermore, this guide will address potential issues, including those related to virtualization technologies like Hyper-V, which can sometimes interfere with device connectivity. We’ll cover troubleshooting steps and provide essential safety information, alongside details regarding the product’s warranty and available support resources.

Unboxing and Initial Setup

Upon receiving your Hyper Tough HT100 Code Reader, carefully inspect the packaging for any signs of damage during transit. The box should contain the HT100 scanner, a USB cable for data transfer and potential updates, and this user manual. Verify all components are present before proceeding.

Initial setup is straightforward. Connect the HT100 to your computer using the provided USB cable. While the device is generally plug-and-play, you may need to install necessary drivers – these are often automatically installed by your operating system. Check the manufacturer’s website for the latest driver versions, especially if you encounter connectivity issues.

Before first use, it’s recommended to fully charge the device. Although some models operate while charging, a full charge ensures uninterrupted operation during diagnostics. Familiarize yourself with the device’s buttons and indicators (detailed in the next section) and review the safety precautions outlined in the user agreement. Ensure your vehicle’s ignition is off during the initial connection process.

Device Overview: Buttons and Indicators

The Hyper Tough HT100 features a user-friendly interface with several key buttons and indicators. The Power button, typically located on the side, initiates device operation. The Menu/OK button navigates through options and confirms selections. Arrow buttons allow for scrolling through diagnostic menus and data lists. An Escape or Back button returns to the previous screen;

The device incorporates a clear LCD screen displaying diagnostic information, DTCs, and live data streams. LED indicators signal power status, connection status (to the vehicle and potentially to a computer via USB), and fault code retrieval progress. A ‘Ready’ indicator confirms the scanner is prepared for operation.

The OBDII port connector securely links the HT100 to your vehicle’s diagnostic system. Ensure a firm connection for reliable data transfer. Refer to the quick start guide for a visual diagram identifying each button and indicator’s function. Understanding these elements is crucial for efficient troubleshooting and code interpretation.

Powering On and Basic Operation

To power on the Hyper Tough HT100, press and hold the Power button until the LCD screen illuminates. The device will initiate a self-test sequence, displaying the Hyper Tough logo and version information. Once completed, you’ll be presented with the main menu.

Basic operation involves navigating the menu using the arrow buttons. Select “Read Codes” to retrieve stored Diagnostic Trouble Codes (DTCs). Use the up and down arrows to scroll through the available modules (Engine, ABS, Transmission, etc.). Press OK to enter a specific module.

The HT100 automatically detects compatible vehicles when connected to the OBDII port. Ensure your vehicle’s ignition is turned on (engine off) before initiating the scan. The device supports a wide range of makes and models. Refer to the compatibility list in the manual for specific vehicle support. Familiarize yourself with the menu structure for efficient operation.

Understanding Diagnostic Trouble Codes (DTCs)

Diagnostic Trouble Codes (DTCs) are alphanumeric codes generated by your vehicle’s onboard computer when it detects a malfunction. The Hyper Tough HT100 retrieves these codes, providing valuable insight into potential issues. DTCs are typically five-character codes; the first character indicates the system (P – Powertrain, B – Body, C – Chassis, U – Network).

The remaining four characters specify the particular fault. For example, a code like P0301 indicates a misfire in cylinder one. The HT100 not only displays the code but also provides a brief description. However, for a comprehensive understanding, consult a repair manual or online database.

DTCs can be categorized as current codes (active faults) or history codes (previously detected faults that may not be currently active). Clearing codes doesn’t repair the underlying problem; it simply resets the system. Always address the root cause of the DTC to prevent recurrence and ensure vehicle safety.

Reading Diagnostic Trouble Codes

To read DTCs with the Hyper Tough HT100, begin by ensuring the vehicle’s ignition is on, but the engine is off. Connect the HT100’s cable to the vehicle’s OBD-II port, typically located under the dashboard. Power on the device using the power button. Navigate the menu using the directional buttons to select “Read Codes” or a similar option.

The HT100 will communicate with the vehicle’s computer and display any stored DTCs. Codes will appear as alphanumeric identifiers, accompanied by a brief description. Review each code carefully, noting its system and specific fault. The device may offer options to view freeze frame data associated with the code, capturing vehicle conditions at the time of the fault.

Record all retrieved DTCs for future reference. Some codes may require further investigation using live data or component testing. Remember, the HT100 provides a starting point for diagnosis; a thorough understanding of automotive systems is crucial for accurate repairs.

Clearing Diagnostic Trouble Codes

Clearing DTCs with the Hyper Tough HT100 should only be performed after the underlying issue causing the code has been addressed. Select the “Clear Codes” or “Erase Codes” option from the HT100’s menu after successfully reading and recording all stored codes. The device will prompt for confirmation before proceeding.

Confirm the action to initiate the clearing process. The HT100 will communicate with the vehicle’s computer to reset the diagnostic system. A progress bar or message will indicate the completion status. Once cleared, the device should confirm successful erasure of all codes.

Important Note: Clearing codes without repairing the fault may cause the check engine light to illuminate again after a short period. Additionally, clearing codes can erase valuable diagnostic information. Always verify repairs before clearing codes, and understand potential implications for emissions testing.

Live Data Stream Functionality

The Live Data Stream feature of the Hyper Tough HT100 allows real-time monitoring of various vehicle sensor data. Access this function through the device’s menu, selecting “Live Data” or a similarly named option. The HT100 will connect to the vehicle and display a list of available parameters, such as engine RPM, coolant temperature, and oxygen sensor readings.

Select the desired parameters to display them graphically or numerically. This data updates continuously, providing insights into the vehicle’s operation. Analyzing live data can help pinpoint intermittent issues or confirm the effectiveness of repairs. The HT100 may offer data freezing capabilities, allowing you to capture specific moments for detailed analysis.

Interpreting Data: Understanding normal operating ranges for each parameter is crucial. Refer to the vehicle’s service manual for specifications. Abnormal readings can indicate potential problems requiring further investigation.

Freeze Frame Data Analysis

Freeze Frame data, captured by the Hyper Tough HT100, provides a snapshot of vehicle operating conditions at the moment a Diagnostic Trouble Code (DTC) was set. Access this feature within the DTC information screen after reading a code. The HT100 stores parameters like engine speed, coolant temperature, fuel trim, and vehicle speed – essentially, a ‘frozen’ picture of the conditions when the fault occurred.

Analyzing freeze frame data is crucial for accurate diagnosis. It helps determine why a DTC was triggered, not just that it was triggered. For example, a misfire code paired with a lean fuel trim reading suggests a vacuum leak. This data narrows down potential causes, saving time and effort.

Interpreting the Data: Compare the freeze frame values to the vehicle’s specifications. Look for values outside the normal range. Consider the context – what was the vehicle doing when the code set? This holistic approach, combined with the HT100’s data, leads to effective repairs.

I/O and Data Transfer Capabilities

The Hyper Tough HT100 features a standard USB port for data transfer and potential firmware updates. This connectivity allows users to download stored diagnostic data – DTCs, freeze frame data, and live data streams – to a computer for detailed analysis and record-keeping. The device typically supports data export in common formats like .txt or .csv, compatible with spreadsheet software.

While the HT100 doesn’t offer wireless connectivity like Bluetooth or Wi-Fi, the USB interface provides a reliable method for transferring information. Regularly updating the device’s firmware via USB ensures access to the latest vehicle coverage and bug fixes. Check the manufacturer’s website for available updates and instructions.

Data Management: Organize downloaded data files logically, using descriptive filenames that include the vehicle’s year, make, model, and the date of the diagnostic session. This practice simplifies retrieval and analysis when reviewing past repairs or tracking intermittent issues.

Hyper-V and Virtualization Compatibility

The Hyper Tough HT100 code reader’s software compatibility with virtualized environments like Hyper-V is generally straightforward. As a USB-connected device, it typically functions without specific driver conflicts within a Hyper-V virtual machine (VM). However, ensuring proper USB passthrough is crucial for reliable communication.

If experiencing issues, verify that the USB port connected to the HT100 is correctly assigned to the VM within the Hyper-V Manager settings. Disabling Hyper-V features, like the Hyper-V Virtual Ethernet Adapter (vEthernet), can resolve network adapter conflicts that sometimes interfere with USB device recognition. Adjusting the VM’s resource allocation – CPU, memory – may also improve performance.

Troubleshooting: If the HT100 isn’t recognized, try a different USB port, restart the VM, or update the host machine’s chipset drivers. While the HT100 doesn’t directly require Hyper-V, managing its interaction within a virtualized setup demands careful configuration.

Troubleshooting Common Issues

If the Hyper Tough HT100 fails to power on, first check the USB connection and ensure it’s receiving sufficient power. A weak connection or faulty USB port can prevent operation. If the device powers on but doesn’t connect to the vehicle, verify the OBDII port is clean and the ignition is in the ‘ON’ position.

Communication errors often stem from incorrect vehicle selection within the scanner’s menu. Double-check the make, model, and year are accurately chosen. For intermittent connection issues, try a different USB cable or restart both the scanner and the vehicle. If encountering DTC reading or clearing failures, ensure the vehicle’s battery is adequately charged.

Regarding Hyper-V conflicts (as sometimes reported), disabling unnecessary Hyper-V features or adjusting VM settings can resolve connectivity problems. Refer to the ‘Hyper-V and Virtualization Compatibility’ section for detailed steps. Always consult the user agreement and support resources for further assistance.

Addressing Network Adapter Conflicts (vEthernet)

The appearance of a vEthernet (Default Switch) adapter, alongside a Hyper-V Virtual Ethernet Adapter, often indicates Hyper-V virtualization is active on your system. This typically occurs after installing virtual machine software like VM Virtual Machine. While not directly related to the HT100’s core functionality, it can sometimes interfere with network connectivity.

To resolve potential conflicts, consider adjusting the Hyper-V Virtual Machine Management service’s startup type from ‘Automatic’ to ‘Manual’ or ‘Disabled’ within the Services application (services.msc). This prevents the adapter from initializing unless actively needed. Ensure the HV Host Service and Hyper-V Host Compute Service are also running as needed.

If Hyper-V isn’t required, completely disabling it through ‘Windows Features’ (appwiz.cpl) is recommended. For WSL2 users, only the ‘Virtual Machine Platform’ component is necessary; full Hyper-V isn’t always required. Remember to restart your computer after making any changes to these settings.

Disabling Hyper-V Features

Disabling Hyper-V can resolve network adapter conflicts, particularly the vEthernet issue, though it’s not directly related to the HT100’s operation. Access ‘Programs and Features’ via the Control Panel (or use the Run dialog with ‘appwiz.cpl’). Select ‘Turn Windows features on or off’ from the left pane.

Locate ‘Hyper-V’ in the list and uncheck all associated components – Hyper-V Management Tools, Hyper-V Platform, and any sub-features. If Hyper-V isn’t listed, your Windows edition (like Home) might not have it installed by default. Alternatively, command-line uninstallation is possible with administrator privileges.

For WSL2 users, disabling the full Hyper-V isn’t always necessary; the ‘Virtual Machine Platform’ feature is sufficient. After unchecking, Windows will prompt for a restart to complete the process. Confirm the removal and reboot your system. This ensures the virtual adapters are removed and potential conflicts are eliminated, restoring normal network functionality.

Enabling Hyper-V Features

To enable Hyper-V, navigate to ‘Programs and Features’ through the Control Panel, or utilize the Run dialog box with ‘appwiz.cpl’. Select ‘Turn Windows features on or off’ from the left-hand menu. Locate ‘Hyper-V’ within the feature list and ensure all associated components – including Hyper-V Management Tools and the Hyper-V Platform – are checked.

Confirm your selection and allow Windows to install the necessary files. A system restart is required to complete the enabling process; Upon rebooting, Hyper-V will be active, creating the Hyper-V Virtual Ethernet Adapter in your network adapters list.

For WSL2 functionality, enabling the ‘Virtual Machine Platform’ feature alongside Hyper-V is crucial. Verify that the ‘HV Host Service’, ‘Hyper-V Virtual Machine Management’, and ‘Hyper-V Host Compute Service’ are running in the Services manager (services.msc). Enabling these features allows for virtualization capabilities within your Windows environment.

Windows Feature Configuration (Hyper-V)

Configuring Hyper-V within Windows features requires careful attention to detail. Access ‘Turn Windows features on or off’ via the Control Panel’s ‘Programs and Features’. Ensure ‘Hyper-V’ and its subcomponents – Management Tools and Platform – are selected. This enables the core virtualization infrastructure.

For optimal performance, consider enabling ‘RemoteFX vGPU’ if your hardware supports it, allowing virtual machines to leverage your dedicated graphics card. However, note that this feature may not be available on all systems.

Post-installation, verify the services are running. Open ‘services.msc’ and confirm ‘HV Host Service’, ‘Hyper-V Virtual Machine Management’, and ‘Hyper-V Host Compute Service’ are set to ‘Automatic’ and are actively running. These services are fundamental for Hyper-V’s operation. Proper configuration ensures seamless integration and functionality within your Windows environment, supporting features like WSL2 and virtual machine operation.

Using Command Line for Hyper-V Management

Hyper-V’s command-line interface, accessed through an elevated Command Prompt, offers powerful management capabilities. Utilize hyperv manager to list virtual machines, start/stop them, and modify settings. The Get-VM cmdlet retrieves detailed information about VMs, while Start-VM and Stop-VM control their execution.

For advanced tasks, employ PowerShell cmdlets. New-VM creates new virtual machines, specifying memory, network adapters, and virtual hard disks. Set-VMProcessor adjusts processor allocation, and Add-VMNetworkAdapter configures networking.

Uninstalling Hyper-V via command line involves disabling features using DISM /Online /Disable-Feature /FeatureName:Microsoft-Hyper-V-All. Remember to restart your system after executing these commands. Command-line management provides granular control and automation possibilities, streamlining Hyper-V administration and enabling scripting for complex operations.

User Agreement and Safety Information

By utilizing the Hyper Tough HT100 code reader, you acknowledge and agree to abide by the terms outlined within this user agreement. This includes responsible use, adherence to vehicle manufacturer guidelines, and understanding the limitations of the device. Misuse can lead to vehicle damage or inaccurate diagnostics.

Safety is paramount. Always disconnect the vehicle’s battery before performing any electrical work. Avoid operating the device in wet or hazardous environments. Do not attempt to disassemble or modify the HT100, as this voids the warranty and poses safety risks. Ensure proper ventilation during use.

Data privacy is respected. The device collects diagnostic data solely for analysis and troubleshooting. This information is not shared with third parties without your explicit consent. Review the full warranty information and support resources for complete details regarding your rights and responsibilities as a user.

Warranty Information and Support Resources

The Hyper Tough HT100 code reader is covered by a [Specify Warranty Period ౼ e.g., one-year] limited warranty against defects in materials and workmanship from the date of original purchase. This warranty does not cover damage resulting from misuse, accidents, unauthorized modifications, or normal wear and tear.

To initiate a warranty claim, please retain your proof of purchase and contact Hyper Tough customer support; Detailed instructions and claim forms are available on the official Hyper Tough website [Insert Website Address]. Warranty service typically involves repair or replacement of the defective unit, at Hyper Tough’s discretion.

For technical support, troubleshooting assistance, and frequently asked questions, visit the Hyper Tough support portal. You can also reach our dedicated support team via email at [Insert Support Email Address] or by phone at [Insert Phone Number]. Access to online resources, including user manuals and software updates, is readily available to enhance your experience.

magnum x5 airless paint sprayer manual

Graco’s Magnum X5 manual details operation for models X5‚ X7‚ ProX7‚ and ProX9.
It emphasizes safety‚ providing dispense rates‚ hose lengths‚ and maximum pressure information.
Download the PDF for comprehensive guidance!

Overview of the Sprayer and its Capabilities

The Graco Magnum X5‚ as outlined in its manual‚ is a powerful‚ portable airless sprayer. It handles a wide range of coatings—latex‚ stains‚ and even light acrylics.
Capable of spraying up to 800 sq. ft. per gallon‚ it’s ideal for both homeowners and professionals.
The manual highlights adjustable pressure for varied applications.

Intended Use and Applications

The Magnum X5 manual specifies its use for interior and exterior painting projects. Applications include walls‚ ceilings‚ decks‚ fences‚ and furniture.
It’s suited for DIY enthusiasts and professionals tackling smaller to medium-sized jobs.
The manual cautions against spraying flammable materials‚ emphasizing water-based coatings only.

Safety Precautions

Graco’s manual prominently warns against spraying or cleaning with flammable materials.
Always utilize water-based solutions and carefully read all instructions before operation for safe use.

General Safety Warnings

The manual stresses reading all warnings and instructions before using the Magnum X5. Save these instructions for future reference! Graco emphasizes understanding model series information‚ including dispense rates and pressure limits.
Always disconnect power before adjustments or maintenance‚ and never alter safety devices.

Fire and Explosion Hazards

Crucially‚ the Graco manual explicitly warns: do not spray or clean with flammable materials. Use only water-based paints and cleaning solvents. This prevents potential fire and explosion risks associated with flammable vapors. Always ensure adequate ventilation during operation and cleaning procedures.

Personal Protective Equipment (PPE)

The Graco manual doesn’t explicitly detail PPE‚ but safe spraying necessitates precautions. Always wear appropriate eye protection – safety glasses or a face shield – to prevent paint splashes. Gloves and a respirator are recommended to avoid skin contact and inhaling spray mist.

Component Identification

The manual breaks down the sprayer unit‚ hose‚ gun‚ and nozzle assembly. It also details the filter system‚ crucial for maintaining optimal spray performance.

Sprayer Unit Breakdown

Graco’s manual meticulously details the sprayer unit’s components. This includes the motor‚ pump section‚ and pressure controls. PDF diagrams illustrate each part’s location and function. Understanding this breakdown is vital for maintenance‚ troubleshooting‚ and ensuring proper operation of your Magnum X5 airless paint sprayer.

Hose‚ Gun‚ and Nozzle Assembly

The Graco manual provides detailed instructions for assembling the hose‚ gun‚ and nozzle. Proper connection is crucial for optimal performance. PDF illustrations show correct attachment points and tightening procedures. Selecting compatible nozzles‚ as outlined in the manual‚ ensures appropriate spray patterns for various projects.

Filter System Details

The Graco Magnum X5 manual stresses the importance of the filter system for preventing clogs and ensuring a smooth finish. It details filter locations – in the sprayer and gun – and provides replacement guidance. Regular filter checks‚ as described in the PDF‚ maintain optimal spray quality.

Setting Up the Magnum X5

The manual guides connecting the paint supply‚ priming the sprayer‚ and adjusting pressure.
Proper setup‚ detailed in the PDF‚ ensures efficient operation and optimal spray results.

Connecting the Paint Supply

Graco’s manual instructs users to securely attach the paint supply to the sprayer unit.
Ensure compatibility with water-based materials‚ avoiding flammable substances.
Proper connection prevents leaks and maintains consistent paint flow.
The PDF provides diagrams illustrating correct hose and container attachment‚
emphasizing a stable paint source for optimal performance and safety during operation;

Priming the Sprayer

Graco’s manual details priming as crucial for removing air from the system.
Turn the sprayer on at a low-pressure setting‚ directing the gun into a bucket.

Continue until a consistent stream of paint emerges‚ free of bubbles.
The PDF illustrates this process‚ ensuring proper operation and preventing uneven
spraying‚ ultimately delivering a professional finish with the Magnum X5.

Adjusting Pressure Settings

Graco’s manual emphasizes pressure adjustment for optimal results. Start with a lower setting and gradually increase until achieving the desired spray pattern.
Higher pressures suit larger surfaces‚ while lower pressures are ideal for details.
Refer to the PDF for specific recommendations based on paint type and application‚ ensuring consistent coverage with the Magnum X5.

Operation Instructions

Graco’s manual guides users through spraying techniques‚ pattern control‚ and troubleshooting common issues.
Proper operation ensures efficient and professional results with the Magnum X5 airless sprayer.

Spraying Techniques

Graco’s manual stresses consistent speed and distance for even coats.
Maintain a 6-8 inch distance‚ using overlapping passes of 50-60%.
Adjust the trigger for starts and stops‚ feathering edges to avoid build-up.
Practice on cardboard first‚ and always follow safety guidelines for optimal results!

Pattern Control and Adjustment

Graco’s manual explains adjusting the spray pattern via the nozzle and pressure.
A wider fan requires more pressure‚ while a narrower fan needs less.
Experiment to find the optimal setting for your project‚ considering paint viscosity.
Proper adjustment minimizes overspray and ensures a professional finish.

Dealing with Common Spraying Issues

Graco’s manual addresses issues like uneven patterns‚ often caused by a clogged nozzle or incorrect pressure.
Thin paint may require pressure increases‚ while thick paint needs decreases;
Consistent speed and distance are crucial; refer to the manual for troubleshooting steps and preventative measures.

Maintenance and Cleaning

Graco recommends daily cleaning with water-based materials‚ filter replacement as needed‚ and proper storage.
The manual details procedures to maintain optimal sprayer performance and longevity.

Daily Cleaning Procedures

Graco emphasizes thorough daily cleaning after each use. Flush the sprayer with water or recommended cleaning solution‚ following the manual’s detailed instructions.
Clean the gun‚ hose‚ and nozzle meticulously to prevent clogs and ensure consistent performance.
Proper cleaning extends the sprayer’s lifespan and maintains optimal spray quality.

Filter Replacement

Graco recommends regular filter replacement‚ as outlined in the Magnum X5 manual‚ to maintain optimal spray quality and prevent clogs.
Inspect filters frequently and replace them when dirty or damaged.
Using clean filters ensures smooth operation and prolongs the sprayer’s overall lifespan‚ avoiding issues.

Long-Term Storage

The Graco Magnum X5 manual advises thorough cleaning before long-term storage. Flush the system with water‚ then pump a cleaning solution through it.
Store the sprayer in a dry location‚ protecting it from freezing temperatures. Disconnect and properly store the hose and gun.

Troubleshooting

The manual addresses issues like sprayer start-up failures‚ uneven patterns‚ and incorrect paint viscosity.
Refer to it for solutions to common Magnum X5 problems!

Sprayer Won’t Start

If the Magnum X5 fails to start‚ the manual advises checking the power source and ensuring the trigger is engaged.
Verify the prime is complete and the paint supply is adequate.

Inspect for clogs in the filter or nozzle‚ and confirm proper hose connections.
Consult the manual for detailed troubleshooting steps.

Uneven Spray Pattern

According to the manual‚ an uneven spray pattern with the Magnum X5 often indicates a partially clogged nozzle or filter.
Check and clean these components thoroughly.
Adjusting the pressure settings and maintaining a consistent spraying distance can also resolve this issue‚ as detailed in the guide.

Paint is Too Thin or Too Thick

The manual states that paint consistency is crucial for the Magnum X5. If too thin‚ reduce the paint or add a thickening agent.
If too thick‚ dilute with the appropriate thinner.
Proper mixing and filtering‚ as outlined in the guide‚ are essential for optimal results.

Technical Specifications

The manual details maximum flow rates and pressures for Magnum X5 models.
It also lists supported paint types‚ ensuring compatibility and optimal sprayer performance;

Maximum Flow Rate

Graco’s Magnum X5 manual specifies dispense rates varying by model series.
For example‚ the X5 (262800‚ Series D) has a specific rate‚ while the X7 (262805‚ Series C) differs.
Understanding these rates—detailed within the PDF—is crucial for project planning and efficient paint application.

Maximum Pressure

The Graco Magnum X5 manual highlights maximum working pressure‚ varying by model.
The X5 (262800‚ Series D) has a defined limit‚ crucial for safe operation.
Exceeding this pressure‚ detailed in the downloadable PDF‚ can cause damage or injury.
Always adhere to the specified pressure for optimal performance and longevity.

Supported Paint Types

The Graco Magnum X5 manual strongly advises using only water-based materials. Fire and explosion hazards exist when spraying flammable substances. The PDF details compatible paints‚ stains‚ and sealers.
Avoid solvents and thinners not specifically approved‚ as they can damage the sprayer components.

Understanding the Manual

The Magnum X5 manual includes model/series information‚ warning label decoding‚ and a quick start guide.
Locate your model number for specific details and safe operation!

Locating Model and Series Information

Locating your Magnum X5’s model and series is crucial for accessing the correct information.
Refer to page 3 of the manual; it details specifics like dispense rate and maximum pressure.
Models include 262800 (X5 Series D)‚ 262805 (X7 Series C)‚ 261815 (ProX7 Series B)‚ and 261820 (ProX9 Series B).
This ensures compatibility with parts and support.

Decoding Warning Labels

The manual prominently features warnings regarding flammable materials; Graco explicitly states using only water-based paints.
Pay close attention to fire and explosion hazard labels.
Always read all instructions before operation.
Saving these instructions is vital for safe and effective use of your Magnum X5 airless sprayer.

Referencing the Quick Start Guide

The Graco Magnum X5 manual includes a quick start guide for simplified setup.
It highlights model series information‚ including dispense rates and recommended hose lengths.
This guide assists in locating crucial details for optimal performance and safe operation of your airless paint sprayer.
Refer to it frequently!

Downloading the Manual

Access the Graco Magnum X5 manual as a PDF from the Internet Archive or the official Graco website for detailed instructions.

Accessing the PDF Version

Download the Graco Magnum X5 airless sprayer manual in PDF format directly from the Internet Archive‚ offering convenient access to comprehensive operational guides. Alternatively‚ visit Graco’s official website to obtain the latest version‚ ensuring you have the most up-to-date information for safe and effective use.

Internet Archive Resources

The Internet Archive hosts a downloadable PDF of the Graco Magnum Airless Sprayers X5 user manual (manualsbase-id-582094). Explore single-page processed JP2 ZIP files and TORRENT downloads. Access 12 files‚ including 6 originals‚ for comprehensive support and historical versions of the manual.

Graco Official Website

Visit Graco’s official website at http://magnum.graco.com for additional resources. Explore Magnum Products Operational Videos at http://magnum.graco.com/magop/. The manual emphasizes reading all warnings and instructions before use‚ ensuring safe and effective operation of your X5 sprayer.

Warranty Information

The manual details coverage specifics and claim procedures for your Graco Magnum X5. Refer to the documentation for complete warranty details and limitations.

Coverage Details

Graco’s warranty‚ as outlined in the manual‚ covers defects in materials and workmanship for a specified period. This doesn’t include misuse‚ abuse‚ or normal wear.
The length of coverage varies by component; carefully review the PDF document for precise details regarding parts and labor. Registration may be required to activate full coverage.

Claim Procedures

To initiate a warranty claim‚ consult the manual and contact Graco Customer Service at 888-541-9788. You’ll likely need proof of purchase‚ the model and series number‚ and a description of the defect. Graco may request the defective part for inspection before authorizing repair or replacement.

Resources and Support

Graco offers customer service at 888-541-9788 and operational videos at magnum.graco.com/magop. The manual and Internet Archive provide further assistance.

Graco Customer Service Contact

Graco provides dedicated customer support for the Magnum X5 and related airless sprayers. For immediate assistance with your sprayer‚ including manual-related questions or troubleshooting‚ contact them directly.
The official contact number is 888-541-9788.
Visit magnum.graco.com for additional support options and resources.

Operational Videos

Graco offers a wealth of helpful operational videos specifically for Magnum sprayers‚ including the X5 model. These videos demonstrate setup‚ spraying techniques‚ and maintenance procedures. Access these resources at magnum.graco.com/magop to visually guide you through using your sprayer and understanding the manual’s instructions.

Frequently Asked Questions (FAQ)

While a dedicated FAQ isn’t explicitly detailed in the provided sources‚ the manual itself addresses common concerns. Users frequently inquire about pressure adjustments‚ nozzle selection‚ and troubleshooting spray patterns. Graco’s customer service (888-541-9788) can provide further assistance with specific questions regarding the Magnum X5.

Accessories and Replacement Parts

The manual highlights compatible nozzles‚ hose‚ and gun replacements for the Magnum X5; Graco offers various filter options to maintain optimal sprayer performance.

Compatible Nozzles

Graco Magnum X5 manuals don’t explicitly list every compatible nozzle‚ but emphasize selecting the correct size for your project. Different nozzles impact spray pattern and finish.
Consider tip size for material viscosity; finer tips for thinner paints‚ larger for thicker ones. PDF resources and Graco’s website offer detailed nozzle guides for optimal results.

Hose and Gun Replacements

Graco recommends regularly inspecting the Magnum X5’s hose and gun for wear. The manual doesn’t detail specific replacement parts‚ but Graco’s website and customer service can assist with compatible options. Replacing worn components ensures optimal sprayer performance and prevents potential malfunctions. PDF guides may offer diagrams.

Filter Options

The Magnum X5 manual stresses the importance of filter maintenance. While specific filter types aren’t extensively detailed‚ regular replacement is crucial for preventing clogs and ensuring a smooth spray finish. Graco offers various filter options; consult their website or customer support for compatibility details.

crane manual

Crane Manual: A Comprehensive Guide

This comprehensive guide details crane operations, safety, components, techniques, regulations, and emerging technologies like remote control and automation systems.

Tools such as Crane, Skopeo, and Regclient are essential for registry work, enabling efficient layer and manifest management for container images.

Crane operations encompass a diverse range of lifting activities crucial across numerous industries. Understanding the fundamental principles is paramount for safety and efficiency. This involves mastering load handling, precise positioning, and adherence to strict protocols.

Effective crane operation requires skilled personnel, regular inspections, and a thorough grasp of equipment capabilities. Utilizing tools like Crane, Skopeo, and Regclient aids in managing container image registries, indirectly supporting logistical aspects of material handling. Proper training and certification are non-negotiable.

Successful operations depend on a commitment to best practices.

Types of Cranes

Cranes are categorized by mobility and design, each suited for specific tasks. Overhead cranes, fixed in location, excel in manufacturing and warehousing, offering precise control within a defined area. Mobile cranes, conversely, provide versatility for construction and outdoor projects.

Understanding these distinctions is vital for selecting the appropriate crane for a given application. Tools like Crane, Skopeo, and Regclient, while not directly related to crane types, support the logistical systems that facilitate their operation and maintenance. Careful consideration of load capacity and site conditions is essential.

Overhead Cranes: Design and Functionality

Overhead cranes utilize a hoist system traveling along a horizontal beam, offering substantial lifting capacity within a limited space. Their design typically includes a bridge, runways, and a trolley to move the hoist laterally.

These cranes are ideal for repetitive lifting tasks in manufacturing and warehousing environments. While tools like Crane, Skopeo, and Regclient don’t directly impact the crane’s mechanics, they support the software systems managing inventory and logistics related to materials handled by these cranes. Precise control and safety features are paramount.

Mobile Cranes: Applications and Specifications

Mobile cranes offer versatility, moving materials across diverse construction and industrial sites. Specifications vary widely, encompassing lifting capacity, boom length, and mobility options – from truck-mounted to all-terrain models.

Applications include infrastructure projects, heavy equipment transport, and emergency response. While tools like Crane, Skopeo, and Regclient aren’t directly involved in crane operation, they support the logistical software tracking components and maintenance schedules for these complex machines, ensuring operational readiness and safety.

Crane Safety Procedures

Prioritizing safety is paramount in all crane operations. Thorough pre-operational inspections are crucial, verifying all components function correctly before each lift. Understanding and adhering to strict load capacity and weight limits prevents overloads and potential failures.

Safe lifting practices, including proper rigging and signaling, minimize risks. While tools like Crane, Skopeo, and Regclient manage software aspects, they indirectly support safety by tracking maintenance and ensuring systems are up-to-date, contributing to a secure working environment.

Pre-Operational Inspections

Detailed pre-operational inspections are vital for safe crane function. These checks encompass the hoist, trolley, wire ropes, chains, brakes, and safety devices. Inspectors must verify proper functionality of controls and electrical systems, looking for wear, damage, or anomalies.

Documentation of these inspections is essential, alongside any required maintenance. Tools like Crane, Skopeo, and Regclient, while not directly involved in physical checks, support record-keeping and tracking of maintenance schedules, bolstering overall safety protocols.

Load Capacity and Weight Limits

Understanding and adhering to load capacity limits is paramount for crane safety. Each crane has a specified maximum load, detailed in its documentation, which must never be exceeded. Weight limits account for the load itself, plus the weight of rigging and any additional attachments.

Operators should verify load weights using calibrated scales or accurate estimations. Tools like registry systems (Crane, Skopeo, Regclient) indirectly support this by tracking equipment details and maintenance, ensuring accurate capacity information is readily available.

Safe Lifting Practices

Prioritize a clear lift path, free from obstructions and personnel. Maintain constant communication between the operator, signal person, and rigging team. Ensure loads are properly balanced and secured with appropriate rigging techniques before lifting.

Avoid sudden movements; smooth operation is crucial. Regularly inspect rigging for wear and tear. Utilizing tools like crane simulation software aids in practicing safe lifting scenarios. Remember, adherence to established procedures is vital for preventing accidents.

Crane Components and Maintenance

Regular inspection of hoists and trolleys is paramount, focusing on brake functionality and chain/wire rope condition. Wire ropes and chains require meticulous maintenance, including lubrication and replacement based on wear patterns. Crane controls and electrical systems demand routine checks for loose connections and damaged wiring.

Proactive maintenance minimizes downtime and ensures operational safety. Utilizing registry tools aids in tracking component history and maintenance schedules. Addressing malfunctions promptly prevents escalation into larger, more costly repairs.

Hoists and Trolleys: Inspection and Repair

Thorough hoist and trolley inspections involve checking brakes for proper engagement, examining wire rope for fraying, and verifying hook integrity. Look for smooth trolley travel along the beam, addressing any binding or unusual noises immediately. Repair often entails brake adjustments, gear replacements, or wire rope splicing.

Regular lubrication of moving parts is crucial. Utilize qualified technicians for complex repairs, ensuring adherence to manufacturer specifications. Document all inspections and repairs for traceability and safety compliance.

Wire Ropes and Chains: Maintenance and Replacement

Consistent wire rope and chain maintenance is paramount for safety. Regular inspections should identify wear, corrosion, and deformation. Lubrication reduces friction and extends service life, while proper cleaning removes contaminants.

Replacement is necessary when wear exceeds allowable limits or damage is detected. Follow manufacturer guidelines for selecting appropriate replacements, ensuring compatibility and load capacity. Document all replacements and maintain detailed records of rope/chain usage and inspection history.

Crane Controls and Electrical Systems

Crane controls and electrical systems demand meticulous attention. Routine inspections should verify proper functionality of all controls – hoists, trolleys, and brakes. Check for damaged wiring, loose connections, and malfunctioning sensors.

Electrical components must be protected from environmental factors. Qualified personnel should perform repairs and replacements, adhering to electrical safety standards. Regular testing of safety devices, like emergency stops, is crucial for operational reliability and personnel safety.

Crane Operation Techniques

Effective crane operation requires precision and control. Smooth starting and stopping minimizes load swing, enhancing safety and efficiency. Operators must master precise load positioning, utilizing both horizontal and vertical movements.

Familiarity with emergency stop procedures is paramount; quick reaction times can prevent accidents. Maintain constant communication with signal persons and always prioritize a stable, controlled lift. Proper technique extends equipment life and ensures a secure working environment.

Smooth Starting and Stopping

Achieving smooth starts and stops is crucial for safe crane operation. Abrupt movements induce dynamic loads, stressing the crane and potentially destabilizing the load. Gradual acceleration and deceleration minimize swing, improving control and reducing the risk of collisions.

Operators should anticipate stops well in advance, gently applying the brakes. Mastering this technique requires practice and a thorough understanding of the crane’s momentum. Smooth operation extends component lifespan and enhances overall workplace safety.

Precise Load Positioning

Accurate load positioning demands a skilled operator and a responsive control system. Utilizing small, deliberate movements is key, avoiding jerky actions that can displace the load. Operators must consider the load’s center of gravity and potential swing during transit.

Visual cues and, increasingly, advanced technologies like anti-collision systems aid in precise placement. Consistent practice and a focus on maintaining stability are paramount for safely delivering materials to their designated locations.

Emergency Stop Procedures

Immediate action is crucial during emergencies. Operators must know the location and function of all emergency stop buttons – on the crane itself and potentially on remote controls.

Activating the emergency stop immediately halts all crane movements. Following activation, assess the situation, secure the load if possible, and follow established evacuation procedures. Regular drills are vital to ensure swift and effective responses, minimizing potential damage and injury.

Crane Regulations and Standards

Adherence to stringent regulations is paramount for safe crane operation. The Occupational Safety and Health Administration (OSHA) sets comprehensive crane safety standards, covering all aspects from operator certification to equipment maintenance.

Furthermore, the American National Standards Institute (ANSI) provides detailed guidelines for crane design, inspection, and testing. Compliance with both OSHA and ANSI standards is legally required and ensures a safe working environment, minimizing risks and liabilities.

OSHA Crane Safety Standards

OSHA’s crane safety standards (29 CFR 1926 Subpart CC) mandate rigorous requirements for all crane operations. These cover operator qualification, including certification and capacity evaluation, alongside detailed inspection protocols before each shift and annually.

Specific rules address load charts, lift planning, and the use of safety devices like anti-two-block systems. Proper documentation, reporting of incidents, and adherence to fall protection guidelines are also crucial components of OSHA compliance, ensuring worker safety.

ANSI Crane Standards

The American National Standards Institute (ANSI) develops voluntary consensus standards for cranes, influencing safety and performance. ANSI B30 series covers various crane types, detailing design, construction, inspection, and maintenance procedures.

These standards provide detailed guidance on load testing, wire rope integrity, and braking systems. While not legally binding like OSHA regulations, ANSI standards are often referenced by OSHA and are considered best practices within the industry, promoting a higher level of safety.

Advanced Crane Technologies

Modern cranes increasingly integrate advanced technologies for enhanced safety and efficiency. Remote control systems allow operators to position themselves away from hazards, improving visibility and control.

Anti-collision systems utilize sensors and software to prevent contact between the crane and surrounding objects, minimizing damage and potential injuries. These innovations, alongside sophisticated software tools, are transforming crane operations, optimizing performance and reducing risks in complex environments.

Remote Control Systems

Remote control systems represent a significant advancement in crane technology, offering numerous benefits. Operators can maneuver cranes from a safe distance, improving visibility and reducing exposure to hazardous environments.

These systems typically utilize wireless communication, providing flexibility and maneuverability. Modern remote controls often feature ergonomic designs and intuitive interfaces for precise operation. Enhanced safety and efficiency are key advantages, making remote control a standard feature on many contemporary cranes.

Anti-Collision Systems

Anti-collision systems are crucial safety features in modern crane operations, designed to prevent contact between the crane and surrounding objects. These systems utilize sensors, such as lasers and radar, to detect potential obstacles within the crane’s operating range.

Upon detecting a hazard, the system alerts the operator and can even automatically slow or stop the crane’s movement. This technology significantly reduces the risk of accidents, protecting personnel and equipment. Integration with crane software enhances accuracy and responsiveness.

Troubleshooting Common Crane Issues

Effective troubleshooting is vital for minimizing downtime and ensuring operational safety. Common issues include hoist malfunctions, often stemming from worn components or electrical faults, requiring careful inspection and repair. Brake failures present a serious hazard, demanding immediate attention and potentially component replacement.

Regularly check control systems for responsiveness and accuracy. Diagnostic software can aid in identifying complex problems. Prioritize safety by isolating the crane before attempting any repairs, and always consult the crane’s manual for specific guidance.

Hoist Malfunctions

Hoist malfunctions frequently involve issues with the motor, gearbox, or brake assembly. Worn or damaged components can cause erratic lifting speeds or complete failure. Electrical faults, including wiring problems and controller malfunctions, are also common culprits.

Inspect wire ropes for fraying, kinks, or corrosion. Lubricate moving parts regularly to reduce friction and wear. If a malfunction occurs, immediately cease operation and conduct a thorough inspection before attempting repairs, prioritizing safety.

Brake Failures

Brake failures represent a critical safety hazard, potentially leading to uncontrolled load descent. Common causes include worn brake linings, hydraulic system leaks, or electrical control issues. Regular inspection and maintenance are paramount to prevent such occurrences.

Check brake linings for adequate thickness and ensure proper hydraulic fluid levels. Test brake functionality before each shift. In the event of a brake failure, immediately activate the emergency stop and initiate evacuation procedures, prioritizing personnel safety.

Crane Software and Tools

Modern crane operations increasingly rely on specialized software and tools for enhanced efficiency and safety. Crane simulation software allows operators to practice scenarios and refine skills in a risk-free environment. Tools like Crane, Skopeo, and Regclient are vital for managing container image registries.

These tools facilitate extracting layers, pushing configurations, and managing manifests, streamlining the deployment process. Effective utilization of these resources improves operational workflows and minimizes potential errors, contributing to a safer and more productive work environment.

Crane Simulation Software

Crane simulation software provides a realistic, risk-free training environment for operators of all skill levels. These programs accurately model crane dynamics, load behavior, and various operational scenarios, allowing users to practice complex lifts and emergency procedures.

Benefits include improved operator proficiency, reduced training costs, and enhanced safety awareness. Simulations can replicate diverse worksites and challenging conditions, preparing operators for real-world situations. This technology is a crucial component of comprehensive crane operator training programs.

Registry Tools: Crane, Skopeo, and Regclient

These tools – Crane, Skopeo, and Regclient – facilitate interaction with container registries without requiring a Docker engine. They enable operations like extracting layers, pushing configurations, and managing manifests, crucial for image distribution and management.

Skopeo performs multiple queries per inspection, while Crane and Regclient are more efficient with single manifest requests. Choosing the right tool depends on the scale and frequency of registry interactions, optimizing workflow and performance. These utilities are vital for DevOps and containerization practices.

Crane Applications in Various Industries

Cranes are indispensable across diverse sectors, notably construction and manufacturing. In construction, they lift and position heavy materials, essential for building infrastructure. Manufacturing utilizes cranes for moving raw materials, components, and finished products throughout the production process.

AnyLogic simulations demonstrate crane integration with storage blocks for optimized material handling. Efficient crane usage and integration with storage systems are key to streamlining logistics and maximizing operational efficiency in these industries.

Construction Industry

Within construction, cranes are pivotal for lifting and precisely positioning substantial materials – steel beams, concrete forms, and prefabricated components. Their utilization dramatically accelerates building processes, enhancing efficiency and safety on job sites.

Careful pre-operational checks, adhering to OSHA and ANSI standards, are paramount before each “sitting” or lift. Proper load capacity assessment and safe lifting practices are crucial, ensuring structural integrity and preventing accidents.

Manufacturing Industry

In manufacturing, cranes facilitate the movement of heavy materials, tooling, and finished goods throughout the production floor. They are integral to assembly lines, machine loading, and warehousing operations, optimizing workflow and boosting productivity.

Regular hoist and trolley inspections, alongside wire rope maintenance, are vital for preventing malfunctions and ensuring operational reliability. Implementing anti-collision systems and exploring remote control options further enhance safety and efficiency within the manufacturing environment.

Crane Logistics and Material Handling

Effective crane usage is paramount for streamlined logistics and material handling. Optimizing routes, minimizing travel time, and coordinating with storage systems are key to maximizing throughput.

Integrating cranes with warehouse management systems (WMS) allows for precise inventory control and automated material flow. Utilizing crane simulation software aids in planning and optimizing layouts, while tools like Crane, Skopeo, and Regclient support efficient container image management within the logistics chain;

Optimizing Crane Usage

Maximizing crane efficiency requires strategic planning and execution. Analyzing material flow, minimizing empty travel, and implementing optimized lifting sequences are crucial steps.

Leveraging crane simulation software allows for testing and refinement of operational strategies before implementation. Regularly assessing load distribution and utilizing appropriate lifting attachments further enhance performance. Tools like Crane, Skopeo, and Regclient, while not directly impacting physical usage, support efficient logistical systems that indirectly optimize crane operations.

Integration with Storage Systems

Seamless integration between cranes and storage systems is vital for efficient material handling. Automated Storage and Retrieval Systems (AS/RS) paired with cranes create a streamlined workflow, reducing manual intervention and increasing throughput.

Data exchange between crane controls and warehouse management systems (WMS) ensures accurate inventory tracking and optimized storage allocation. Utilizing tools like Crane, Skopeo, and Regclient supports the underlying containerized infrastructure often used in modern WMS, indirectly enhancing integration capabilities.

Crane Operator Training and Certification

Comprehensive training is paramount for safe and efficient crane operation. Certification requirements, often dictated by OSHA and ANSI standards, involve theoretical knowledge and practical assessments.

Training programs cover load charts, rigging techniques, emergency procedures, and pre-operational inspections. Continuing education ensures operators stay current with evolving safety protocols and advanced technologies. Proficiency with related tools, while not directly part of operator training, supports the broader system understanding.

Certification Requirements

Achieving crane operator certification typically involves a multi-faceted process. This includes successful completion of a written exam demonstrating knowledge of safety regulations, load charts, and operational procedures.

Practical evaluations are crucial, assessing the operator’s ability to safely perform lifts, maneuvers, and emergency shutdowns. Certification bodies, aligned with OSHA and ANSI standards, oversee these assessments. Ongoing recertification may be required, emphasizing continuous competency and adherence to evolving industry best practices.

Continuing Education

Maintaining proficiency in crane operation necessitates ongoing learning. Regular refresher courses reinforce safety protocols and introduce advancements in crane technology, such as anti-collision systems and remote controls.

These courses often cover updated regulations from OSHA and ANSI, ensuring compliance. Specialized training on new crane models or lifting techniques is also beneficial. Participation in industry workshops and seminars fosters knowledge sharing and best practice adoption, ultimately enhancing operator skill and safety.

Future Trends in Crane Technology

The future of crane technology is rapidly evolving, driven by automation and robotics. Smart crane systems, incorporating sensors and data analytics, will optimize performance and predictive maintenance.

Expect increased integration of artificial intelligence for autonomous operation and enhanced safety features. Remote diagnostics and over-the-air software updates will become commonplace. These advancements promise greater efficiency, reduced downtime, and improved operator safety in various industries.

Automation and Robotics

The integration of automation and robotics is transforming crane operations. Autonomous cranes, guided by sophisticated algorithms, promise increased precision and efficiency in material handling.

Robotic arms and automated guided vehicles (AGVs) will work in tandem with cranes, streamlining workflows and reducing human intervention. This shift necessitates advanced safety protocols and robust control systems. Expect a future where cranes operate with minimal supervision, optimizing productivity and minimizing risks.

Smart Crane Systems

Smart crane systems leverage data analytics and the Internet of Things (IoT) to optimize performance and predictive maintenance. Sensors monitor critical components, providing real-time insights into operational status and potential failures.

This data-driven approach enables proactive repairs, minimizing downtime and extending the lifespan of crane equipment. Integration with cloud platforms facilitates remote monitoring and control, enhancing efficiency and safety. Expect increased reliance on AI for optimized load handling and collision avoidance.

335i manual gearbox

The BMW 335i, particularly models from 2008-2013, offered a rewarding six-speed manual transmission option, enhancing driver engagement and control․

Owners report experiencing shifting issues, including slipping gears and rough transitions, sometimes requiring transmission resets or component replacements․

The gearbox is a crucial drivetrain component, transferring engine power efficiently, and proper maintenance is vital for optimal performance and longevity․

Overview of the 335i and its Manual Transmission Option

The BMW 335i (E90, E92, E93) produced between 2007 and 2013, quickly gained popularity for its potent turbocharged inline-six engine and sporty handling․ While an automatic transmission was standard, a six-speed manual gearbox was offered as a no-cost option, appealing to driving enthusiasts․

This manual option transformed the 335i into a more connected and engaging driving experience․ However, online forums reveal that some owners have encountered transmission issues, such as difficulty shifting into fifth gear or experiencing violent jumps during gear changes․ Reports also indicate slipping gears under heavy acceleration and delayed gear engagement․

The 335i’s manual transmission provides a direct link between driver input and vehicle response, offering a level of control not found in automatic variants․ Understanding its nuances and potential problems is key for any owner․

Why Choose a Manual Gearbox in a 335i?

Opting for the manual gearbox in a BMW 335i delivers a significantly more immersive driving experience․ It grants the driver complete control over gear selection, maximizing engine performance and responsiveness․ Enthusiasts appreciate the direct connection and engagement that a manual transmission provides, fostering a stronger bond with the vehicle․

Beyond the driving pleasure, a manual gearbox can offer increased reliability compared to the potentially complex automatic transmissions․ While issues can arise, they are often simpler and less expensive to address․ The manual also allows for greater control during spirited driving, enabling precise gear matching for optimal performance․

For those prioritizing driver involvement and a classic sports car feel, the 335i’s manual transmission is the clear choice․

Technical Specifications of the 335i Manual Gearbox

The 335i’s manual utilizes the Getrag GS6-17BG transmission, featuring precise gear ratios designed for optimal performance and driver control․ It’s a robust system!

Gear Ratios and Final Drive Options

The BMW 335i manual gearbox’s gear ratios are meticulously engineered to maximize the engine’s power band and deliver a responsive driving experience․ First gear is typically geared for strong acceleration, while higher gears prioritize fuel efficiency during cruising․ Specific ratios vary slightly depending on the model year and final drive option․

Common final drive ratios include 3․08, 3․23, and 3․38․ A lower (numerically higher) final drive, like 3․38, provides quicker acceleration but may slightly reduce top speed and fuel economy․ Conversely, a higher (numerically lower) final drive, such as 3․08, offers improved fuel efficiency and a more relaxed highway experience, potentially sacrificing some initial acceleration․ Choosing the right final drive depends on individual driving preferences and intended use․

Specifics of the Getrag GS6-17BG Transmission

The BMW 335i’s six-speed manual transmission is the Getrag GS6-17BG, renowned for its robust construction and precise shifting feel․ This transmission features a sophisticated internal design, incorporating features to enhance durability and driver engagement․ It’s a fully synchronized gearbox, enabling smooth transitions between gears․

The GS6-17BG utilizes a robust housing and high-quality materials to withstand the torque output of the 335i’s engine․ It’s known for its relatively direct feel, providing a connected experience for the driver․ However, like any mechanical component, it’s susceptible to wear and tear over time, particularly with spirited driving or high mileage, potentially leading to issues like synchro wear․

Components of the Manual Gearbox System

The 335i’s manual gearbox system extends beyond the transmission itself․ Key components include the clutch assembly – disc, pressure plate, and throw-out bearing – responsible for disengaging engine power during shifts․ The shift linkage connects the gear lever to the transmission, requiring precise adjustment for smooth operation․

A flywheel, often upgraded for performance, stores rotational energy․ The driveshaft transmits power to the differential, which distributes it to the wheels․ While minimal fluid is used in manual transmissions, gear oil lubricates internal components․ Proper functioning of each element is crucial; failure of the throw-out bearing, for example, can cause noise and shifting problems․

Common Issues with the 335i Manual Gearbox

335i manual transmissions frequently experience synchro ring wear, leading to grinding shifts․ Shift linkage problems and clutch wear are also prevalent concerns for owners․

Synchro Ring Wear and Failure

Synchro rings within the 335i’s manual gearbox are crucial for smooth gear engagement, synchronizing the speeds of the gears before they mesh․ Over time, aggressive shifting or high mileage causes these brass or carbon-fiber rings to wear down․

This wear manifests as grinding during shifts, particularly noticeable when downshifting․ Initially, the grinding may be subtle, appearing only during quick or forceful shifts․ As the synchro rings deteriorate, the grinding becomes more pronounced and consistent, even during normal shifting․

Complete failure of a synchro ring results in an inability to reliably engage the affected gear․ Ignoring this issue can lead to further damage to the gears themselves, necessitating a more extensive and costly repair․ Regular inspection and timely replacement are essential for maintaining gearbox health․

Shift Linkage Problems and Adjustments

The 335i’s manual gearbox relies on a shift linkage system to translate the driver’s movements into gear changes․ This system, comprised of rods, bushings, and pivot points, can develop issues over time, leading to imprecise or difficult shifting․ Worn bushings are a common culprit, creating excessive play and vagueness in the shifter feel․

Symptoms include difficulty selecting specific gears, a loose or sloppy shifter, and a general feeling of disconnection․ Adjustments to the shift linkage can often restore proper operation, tightening up the feel and improving accuracy․ However, severely worn components may require replacement․

Proper lubrication of the linkage is also vital, preventing corrosion and ensuring smooth movement․ Addressing these issues promptly maintains a direct and engaging driving experience․

Clutch Wear and Replacement

The 335i’s clutch is a consumable component, subject to wear and tear with use․ Aggressive driving habits, frequent stop-and-go traffic, and high mileage all accelerate clutch disc material depletion․ Symptoms of a worn clutch include slipping during acceleration, difficulty engaging gears, and a higher pedal engagement point․

Clutch replacement is a significant maintenance item, requiring specialized tools and expertise․ The process involves disconnecting the transmission, removing the old clutch assembly, and installing a new one, including the disc, pressure plate, and throw-out bearing․

It’s crucial to use a quality clutch kit designed for the 335i’s power output․ Proper break-in procedures are essential to ensure optimal performance and longevity․

Throw-Out Bearing Failure Symptoms

The throw-out bearing, also known as the release bearing, is a critical component in the 335i’s manual transmission system․ Its role is to disengage the clutch when the pedal is depressed․ A failing throw-out bearing typically manifests as a squealing or chirping noise, especially when the clutch pedal is pressed․

This noise may disappear when the pedal is fully depressed or released․ In advanced stages, a grinding or rumbling sound can emerge, indicating significant bearing damage․ Ignoring these symptoms can lead to complete bearing failure, rendering the clutch inoperable․

Replacement usually requires transmission removal, often performed concurrently with a clutch replacement for cost-effectiveness․

Diagnosing Manual Gearbox Problems

Identifying issues involves listening for slipping gears, grinding during shifts, and checking for any fluid leaks, though minimal in manual transmissions․

Diagnostic tools can reveal error codes, aiding in pinpointing the root cause of transmission malfunctions․

Identifying Slipping Gears

Slipping gears in the 335i’s manual gearbox manifest as a noticeable disconnect between engine RPM and vehicle speed, often during acceleration․ You might experience the engine revving higher than expected without a corresponding increase in velocity․ This symptom can be intermittent or constant, and sometimes feels like the gear is momentarily disengaged․

Reports indicate slipping can occur specifically between 3rd and 4th gear, or under heavy acceleration․ It’s crucial to differentiate slipping from a worn clutch, as the sensations can be similar․ A slipping clutch typically presents consistently across all gears, while gearbox slip may be gear-specific․ Careful observation of when the slipping occurs – under load, during specific shifts, or consistently – is key to accurate diagnosis․

Recognizing Grinding During Shifts

Grinding during shifts in the 335i’s manual transmission is a clear indicator of synchronization issues within the gearbox․ This harsh, metallic noise occurs when the gear teeth don’t perfectly mesh before full engagement, typically when shifting into gear․ It’s most commonly heard when downshifting, but can also happen during upshifts․

Owners have reported difficulty getting into 5th gear accompanied by violent jumping, suggesting severe grinding․ Grinding can stem from worn synchro rings, low or contaminated gear oil, or improper clutch engagement․ Ignoring grinding can lead to further damage to the gear teeth themselves․ Pay attention to when the grinding occurs – specific gears, hot or cold conditions – to aid diagnosis․

Checking for Fluid Leaks (Although Minimal in Manuals)

While manual transmissions require significantly less fluid than automatics, checking for leaks in the 335i’s gearbox is still a prudent diagnostic step․ Inspect the transmission casing, particularly around the input and output shafts, and the differential housing for any signs of oil residue․ Look for drips or wetness on the undercarriage․

Although leaks are less common, compromised seals can allow gear oil to escape, leading to low fluid levels and potential damage․ Low fluid exacerbates grinding and shifting problems․ Regularly inspect after drives, especially following spirited driving․ Any noticeable fluid loss warrants immediate attention and investigation of the seal integrity․

Using Diagnostic Tools for Error Codes

Although the 335i’s manual gearbox is mechanically simpler than an automatic, diagnostic tools can still provide valuable insights․ While dedicated manual transmission codes are rare, the car’s DME (Digital Motor Electronics) may register related faults․ These can include speed sensor discrepancies or communication errors affecting the drivetrain․

Using a BMW-specific scanner, such as INPA or ISTA, allows access to these codes․ These tools can reveal underlying issues contributing to shifting problems․ Even seemingly unrelated codes, like those from the engine or ABS system, might indirectly impact transmission performance․ Proper interpretation of these codes requires technical knowledge and can guide focused troubleshooting․

Repair and Maintenance of the 335i Manual Gearbox

Regular maintenance, including fluid checks and timely component replacements like the clutch, are crucial․ Addressing issues like synchro wear promptly prevents further damage․

Regular Maintenance Schedule

Maintaining the 335i’s manual gearbox requires a proactive approach to ensure longevity and optimal performance․ While not as frequent as automatic transmissions, regular checks are vital․ Every 30,000 miles, inspect the shift linkage for wear and proper adjustment, addressing any looseness promptly․

Gear oil should be changed every 60,000 to 75,000 miles, or sooner if subjected to aggressive driving․ Inspect the clutch disc and throw-out bearing during gear oil changes for signs of wear․ A slipping clutch or unusual noises indicate impending failure․

Periodically check for fluid leaks around the gearbox housing, although manual transmissions have minimal fluid requirements․ Consistent monitoring and adherence to this schedule will help prevent costly repairs and maintain a smooth, enjoyable driving experience․

Clutch Replacement Procedure

Replacing the clutch on a 335i requires mechanical expertise and specialized tools․ Begin by disconnecting the driveshaft and exhaust system for access; Drain the gearbox oil before separating the transmission from the engine․ Support the engine securely․ Remove the old clutch disc, pressure plate, and throw-out bearing, inspecting the flywheel for damage or scoring – resurface or replace as needed․

Install the new throw-out bearing, pressure plate, and clutch disc, ensuring proper alignment․ Carefully reinstall the transmission, aligning the input shaft with the clutch disc․ Reconnect all components, refill the gearbox with the correct oil, and test the clutch operation thoroughly․

Synchro Replacement Guide

Synchro replacement on the 335i’s Getrag GS6-17BG gearbox is a complex task best left to experienced mechanics․ It necessitates complete transmission removal, disassembly, and careful inspection of all internal components․ Identify the worn synchro rings, typically causing grinding during shifts․

Using specialized tools, carefully remove the old synchro rings and install the new ones, ensuring proper orientation and seating․ Inspect the shift forks and sliders for wear, replacing them if necessary․ Reassemble the gearbox with new seals and gaskets, and refill with the correct gear oil․ Thorough testing is crucial to verify smooth, precise shifting․

Gear Oil Change Recommendations

Maintaining the correct gear oil level and quality is vital for the 335i’s manual gearbox longevity․ BMW recommends using a 75W-80 GL-5 synthetic gear oil meeting their specific specifications․ A fluid change should be performed every 30,000 miles or 3 years, whichever comes first, to ensure optimal lubrication and prevent wear․

During the oil change, inspect the drain plug for metal shavings, indicating potential internal damage․ Use a pump to fill the gearbox to the correct level, avoiding overfilling․ Regular oil changes help maintain smooth shifting and protect the synchros and bearings from premature failure, contributing to overall transmission health․

Performance Modifications for the 335i Manual Gearbox

Enhancements like short shifters and upgraded shift knobs improve the 335i’s manual gearbox feel․ Lightweight flywheels can sharpen throttle response and increase performance․

Short Shifter Installation

Installing a short shifter on your BMW 335i’s manual gearbox dramatically reduces shift throw, creating a more direct and sporty driving experience․ This modification minimizes the distance the lever travels between gears, enabling quicker, more precise shifts․

Several reputable brands offer short shifters specifically designed for the 335i, each with varying degrees of reduction․ Installation typically involves removing the center console, shift linkage, and accessing the transmission selector․

Careful alignment and adjustment are crucial for proper operation․ Improper installation can lead to difficulty selecting gears or even damage to the transmission․ Following a detailed guide or seeking professional assistance is highly recommended․ The result is a noticeably improved connection between driver and machine․

Upgraded Shift Knob Options

Enhancing the feel of your BMW 335i’s manual gearbox extends beyond the shifter itself; an upgraded shift knob significantly impacts the driving experience․ Numerous materials and designs are available, catering to diverse preferences․

Aluminum shift knobs offer a weighty, solid feel, providing a premium sensation during gear changes․ Leather-wrapped options deliver comfort and a classic aesthetic․ Spherical knobs promote palm-filling grip, while weighted knobs reduce vibrations․

Consider the knob’s weight, shape, and texture when selecting an upgrade․ A heavier knob can slightly increase shift throw but provides a more substantial feel․ Ensure compatibility with the 335i’s shift lever threading․ A well-chosen knob complements the gearbox’s precision․

Lightweight Flywheel Considerations

Installing a lightweight flywheel on your BMW 335i’s manual gearbox is a popular performance modification, but requires careful consideration․ Reducing rotational mass allows the engine to rev more freely, improving acceleration and throttle response․

However, a lighter flywheel can increase the likelihood of stalling, particularly at low speeds․ It may also introduce more drivetrain vibrations and a noisier idle․ Clutch chatter can become more pronounced, potentially reducing clutch life․

Selecting the appropriate weight is crucial; excessively light flywheels can compromise drivability․ Upgraded clutch components are often recommended to handle the increased stress․ Professional installation and proper break-in procedures are essential for optimal performance and longevity․

Troubleshooting Specific Symptoms

Common issues include difficulty shifting, jerky movements, and unusual noises․ These can indicate synchro wear, linkage problems, or internal transmission damage requiring diagnosis․

Difficulty Shifting into Gear

Experiencing trouble getting the 335i into gear often points to several potential culprits within the manual transmission system․ A primary suspect is a worn clutch, failing to fully disengage, making smooth gear selection problematic․

Hydraulic issues within the clutch system, such as a failing master or slave cylinder, can also contribute to this symptom․ Furthermore, worn synchro rings, crucial for matching gear speeds, can cause grinding and resistance when attempting to shift․

Inspect the shift linkage for looseness or damage, as imprecise connections hinder proper gear engagement․ A gearbox reset, while sometimes helpful for electronic glitches, won’t resolve mechanical failures․ Thorough inspection and diagnosis are essential for a lasting repair․

Jerky or Rough Shifting

Jerky or rough shifting in a 335i’s manual gearbox frequently indicates internal wear or misalignment within the transmission․ Worn synchronizer rings are a common cause, failing to smoothly mesh gears, resulting in noticeable jolts during shifts․

Low or degraded gear oil can exacerbate this issue, reducing lubrication and increasing friction between moving parts․ Inspect the shift linkage for binding or excessive play, as this can contribute to imprecise and harsh gear changes․

A failing clutch, even without complete slippage, can also transmit vibrations and roughness․ Addressing these issues promptly prevents further damage and restores a smooth driving experience․

Transmission Noise During Operation

Unusual noises emanating from the 335i’s manual gearbox often signal underlying mechanical problems․ Whining sounds, particularly noticeable during acceleration or deceleration, can indicate worn bearings within the transmission․ Grinding noises, especially when shifting, strongly suggest synchronizer ring wear or damage․

Clunking sounds may point to issues with the differential or worn U-joints․ A humming noise could be related to the throw-out bearing․ Ignoring these sounds can lead to catastrophic failure․

Regularly inspecting gear oil levels and condition is crucial, as low or contaminated oil exacerbates wear and increases noise levels․

Resources for 335i Manual Gearbox Owners

Online forums and dedicated communities provide invaluable support, while parts vendors offer necessary components․ Technical documentation and repair manuals aid DIY maintenance efforts․

Online Forums and Communities

Engaging with online BMW 335i communities is incredibly beneficial for manual gearbox owners․ Forums like Bimmerfest, E90Post, and dedicated Reddit subreddits (r/BMW, r/E90) host extensive threads discussing common issues, repair procedures, and performance modifications․

These platforms allow owners to share experiences, diagnose problems collaboratively, and access a wealth of knowledge from experienced enthusiasts and mechanics․ You’ll find detailed discussions on synchro ring wear, shift linkage adjustments, clutch replacements, and troubleshooting specific symptoms like difficulty shifting or transmission noise․

Many members have documented their repair journeys, providing step-by-step guides and photos․ This collective wisdom can save you time and money, offering alternatives to expensive shop repairs․ Active participation fosters a supportive environment for all 335i manual gearbox owners․

Parts Suppliers and Vendors

Sourcing quality parts for your BMW 335i manual gearbox is crucial for reliable repairs and upgrades․ Several vendors specialize in BMW performance and maintenance components․ FCP Euro is a popular choice, known for its lifetime replacement guarantee on all parts, including gearbox components like synchros, bearings, and seals․

ECS Tuning offers a wide selection of OEM and aftermarket parts, catering to both stock repairs and performance enhancements․ RealOEM provides detailed parts diagrams, aiding in accurate identification․ Additionally, BMW dealerships can supply genuine parts, though often at a higher cost․

When purchasing, verify compatibility with your specific 335i model year and transmission code․ Consider reputable suppliers with strong return policies and customer support to ensure a smooth experience․

Technical Documentation and Repair Manuals

Comprehensive technical documentation is invaluable when working on the BMW 335i manual gearbox․ The Bentley Publishers BMW 3 Series (E90/E91/E92/E93) Service Manual provides detailed repair procedures, diagrams, and specifications․ This manual covers disassembly, inspection, and reassembly of the Getrag GS6-17BG transmission․

BMW’s Technical Information System (TIS) offers official service bulletins, wiring diagrams, and diagnostic procedures, but requires a subscription․ Online BMW forums, like Bimmerfest and E90Post, often host user-generated guides and troubleshooting tips․

Accessing exploded views and parts lists via RealOEM is also highly recommended for identifying components and understanding assembly sequences․ Proper documentation ensures accurate repairs and avoids potential issues․

marshall code 50 manual

Marshall Code 50 Manual: A Comprehensive Guide

Marshall’s legacy in guitar amplification continues with the CODE 50, offering diverse tones and digital flexibility. This manual details setup, features, and troubleshooting.

Explore authentic Marshall modeling, alongside contemporary amp options, all within a user-friendly interface. Discover presets and customization options.

Learn about connectivity, software integration, and maximizing your CODE 50’s potential for optimal sound and performance. Enjoy the journey!

The Marshall CODE 50 is a versatile 50-watt modeling amplifier designed for guitarists seeking a wide range of tones and convenient digital control. Building upon Marshall’s iconic heritage, it delivers authentic emulations of classic Marshall amps, alongside a diverse selection of contemporary sounds.

This amplifier caters to both practice and performance, offering a user-friendly interface and extensive customization options. The CODE 50 allows players to sculpt their sound with ease, utilizing built-in effects and preset selections. It’s a powerful tool for exploring different sonic landscapes, from vintage crunch to high-gain leads.

Its compact design and robust construction make it ideal for various musical applications.

Unboxing and Initial Setup

Upon unboxing your Marshall CODE 50, verify all components are present: the amplifier itself, a power cable, and the user manual. Carefully remove the amplifier from its packaging, retaining the materials for potential future transport. Connect the provided power cable to the amplifier and a suitable power outlet.

Before powering on, ensure your guitar is connected to the input jack. Begin with the volume controls at a minimum setting. Power on the amplifier and allow a few seconds for it to initialize. Select a basic preset to confirm initial sound output.

Familiarize yourself with the rear panel connections;

Control Panel Overview

The Marshall CODE 50’s control panel is logically organized for intuitive operation. The central display screen provides visual feedback for all adjustments. Key sections include the Master Volume, controlling overall output; the Channel section, for selecting and modifying amp models; and the Modulation/Delay section, offering a range of effects.

Further controls manage EQ, preset selection, and footswitch assignments. Dedicated buttons allow quick access to frequently used functions. The panel’s layout facilitates both novice and experienced users to sculpt their desired tones efficiently.

Master Section

The Master Section of the Marshall CODE 50 governs the overall amplifier volume and power scaling. The Master Volume knob dictates the final output level, allowing for precise control over loudness. Crucially, the Power Reduction switch offers selectable wattage options – 50W, 20W, or 10W – enabling tube-like power amp saturation at manageable volumes.

This feature is ideal for home practice or smaller venues. The Master section ensures tonal consistency across different volume levels, preserving the character of the selected amp model.

Channel Section

The Channel Section of the Marshall CODE 50 allows selection between distinct tonal voices. Users can switch between four channels: Clean, Crunch, Overdrive, and Lead. Each channel stores independent settings for gain, volume, and EQ. The Channel Select button, coupled with the footswitch, enables seamless transitions during performance.

Dedicated gain controls shape the drive character, while volume knobs adjust the output level for each channel. This section is central to crafting diverse sounds, from pristine cleans to high-gain distortion.

Modulation and Delay Section

The Modulation and Delay Section of the Marshall CODE 50 provides a rich palette of effects. This includes chorus, phaser, flanger, tremolo, and rotary effects, each with adjustable depth and rate controls. Dedicated delay parameters allow shaping of time, feedback, and mix for diverse echo textures.

These effects can be activated or bypassed individually, or combined for complex soundscapes. The section offers both subtle enhancements and dramatic sonic transformations, adding depth and character to your tone.

Amplifier Models

The Marshall CODE 50 boasts a comprehensive library of amplifier models, categorized for easy navigation. These models faithfully recreate the sonic characteristics of iconic Marshall amps, alongside sought-after American and high-gain designs.

Explore classic British crunch, pristine Fender cleans, and searing modern distortion. Each model offers adjustable gain, EQ, and voicing parameters, allowing for precise tone shaping. The diverse selection caters to a wide range of musical styles and playing preferences;

British Models

Marshall’s British models within the CODE 50 are the heart of its tonal palette, faithfully recreating the sounds that defined rock and blues. Expect iconic tones ranging from the chime of early Vox AC30s to the aggressive crunch of JCM800s and the high-gain roar of Plexi amps.

These models excel at delivering classic British warmth and responsiveness. Fine-tune gain, EQ, and presence controls to achieve everything from sparkling clean rhythms to saturated lead tones. Experience the legacy of British amplification!

American Models

Marshall’s American amp models on the CODE 50 deliver a diverse range of tones, inspired by iconic American amplifiers. Explore the clean, shimmering sounds of Fender Twin Reverbs and Deluxe Reverbs, alongside the mid-focused crunch of a Mesa/Boogie Dual Rectifier.

These models provide a foundation for various genres, from country and blues to rock and fusion. Adjust the gain, EQ, and presence to sculpt your desired sound. Experience the versatility and character of American amplification!

High Gain Models

Marshall’s CODE 50 boasts a selection of high-gain amplifier models, perfect for rock, metal, and other aggressive genres. These models deliver powerful distortion, sustain, and articulation, inspired by legendary amplifiers like the JCM800 and Soldano SLO.

Explore searing leads, crushing rhythms, and everything in between. Fine-tune the gain, EQ, and noise gate to achieve your desired level of intensity. Unleash the full potential of high-gain tones with the CODE 50’s versatile modeling capabilities!

Preset Selection and Management

Marshall CODE 50 offers a vast library of factory presets, covering a wide range of musical styles and amplifier tones. Easily navigate these presets using the control panel’s selector knob and display screen. Beyond the factory settings, the CODE 50 empowers you to create and save your own custom presets.

Modify existing presets or build from scratch, storing your unique sounds for instant recall. The intuitive interface allows for seamless saving and loading of user presets, ensuring your personalized tones are always at your fingertips.

Factory Presets

Marshall CODE 50 ships with a comprehensive collection of factory presets, meticulously crafted to showcase the amplifier’s tonal versatility. These presets span iconic Marshall sounds, alongside emulations of classic American and high-gain amplifiers. They provide an excellent starting point for exploring the CODE 50’s capabilities.

Categorized by musical genre and amplifier type, the factory presets offer instant access to a diverse palette of tones. Experiment with these presets to understand the effects of different amplifier models and settings, inspiring your own sonic creations.

User Presets: Saving and Loading

Marshall CODE 50 allows you to save your customized tones as user presets, expanding the amplifier’s sonic palette. To save, adjust the desired settings – amplifier model, EQ, effects – then navigate to the preset save function via the control panel. Name your preset for easy recall.

Loading presets is equally straightforward. Use the up/down buttons to scroll through saved presets, or directly enter the preset number. The CODE 50 stores a substantial number of user presets, providing ample space for your creations.

Footswitch Integration

Marshall CODE 50 significantly expands its functionality with footswitch integration, enabling real-time control during performance. A dedicated footswitch input allows for seamless preset switching, bypassing effects, or activating the tuner. The CODE 50 supports various footswitch configurations, offering flexibility for different playing styles.

Programming footswitch functions is done through the amplifier’s menu system. Assign specific actions to each footswitch, tailoring the setup to your individual needs. This hands-free control enhances stage presence and performance fluidity.

Footswitch Functions

Marshall CODE 50 footswitch functions provide dynamic control over your sound. Preset selection is a primary function, allowing instant switching between saved tones during live performance or recording. You can also assign footswitches to toggle effects on/off, creating dynamic textural changes.

Furthermore, the footswitch can activate the built-in tuner for quick onstage adjustments. Some configurations enable bank up/down navigation, expanding preset access. Customization is key; map functions to suit your playing style for optimal control.

Footswitch Programming

Marshall CODE 50 footswitch programming unlocks personalized control. Access the “Global Settings” menu to assign functions to each footswitch button. Options include preset selection, effect activation/deactivation, tuner engagement, and bank navigation. The process is intuitive, utilizing the CODE’s LCD screen and control knobs.

Save your custom configurations as “User Presets” for easy recall. Experiment with different mappings to optimize your live performance workflow. Remember to document your settings for future reference. Proper programming maximizes the footswitch’s utility.

Connectivity Options

Marshall CODE 50 offers versatile connectivity. USB connectivity facilitates firmware updates and direct recording to your computer, utilizing its built-in audio interface. An Auxiliary Input allows jamming along with backing tracks or external audio sources. The Headphone Output enables silent practice and personal monitoring.

These features expand the amplifier’s functionality beyond stage and studio use. Ensure you download the latest firmware for optimal performance and access to new features. Explore the possibilities of direct recording and silent practice sessions.

USB Connectivity and Firmware Updates

USB connectivity on the Marshall CODE 50 enables direct connection to your computer for recording and firmware updates. Download the latest firmware from the Marshall website to ensure optimal performance and access to new features and bug fixes.

The amplifier functions as an audio interface, simplifying recording. Follow the on-screen prompts during the update process; do not disconnect the USB cable until completion. Regular updates maintain compatibility and enhance the overall user experience.

Auxiliary Input and Headphone Output

The Marshall CODE 50 features an auxiliary input (Aux In) for connecting external audio sources like smartphones or MP3 players, allowing you to play along with backing tracks or your favorite music. For private practice, utilize the headphone output.

This output provides a clear and direct signal, ensuring a focused listening experience without disturbing others. Adjust the master volume to control the headphone level. Both inputs offer convenient options for versatile practice and jamming sessions.

Power Amp Section and Speaker Simulation

The Marshall CODE 50’s power amp section delivers 50 watts of power, providing ample headroom for various playing scenarios. Crucially, it incorporates sophisticated speaker simulations, accurately recreating the sound of various Marshall cabinets and microphone placements.

These simulations allow you to achieve authentic tones directly through the amplifier, even when using headphones or connecting to a PA system. Experiment with different cabinet models to find the perfect sonic match for your chosen amp model and playing style.

Bias Adjustment and Maintenance

The Marshall CODE 50 is a solid-state amplifier and, as such, does not require traditional tube biasing. This significantly simplifies maintenance compared to valve amplifiers. Regular cleaning with a dry cloth is recommended to remove dust and debris from the exterior and ventilation areas.

Ensure adequate ventilation to prevent overheating. Periodically check the connections for tightness. Firmware updates, accessible via USB, are crucial for optimal performance and bug fixes. Avoid exposing the amplifier to extreme temperatures or humidity.

Troubleshooting Common Issues

No Sound Output: Verify the power cable, speaker cable, and input source. Check the master volume and channel volume settings. Ensure the correct input is selected. If using headphones, confirm they are properly connected.

Unexpected Behavior: Try resetting the amplifier to factory settings via the global settings menu. Update the firmware to the latest version using the Marshall software. If issues persist, consult the online support resources or contact Marshall customer service for assistance.

No Sound Output

Initial Checks: Confirm the power cable is securely connected to both the amplifier and a working outlet. Verify the speaker cable is firmly plugged into the amplifier’s speaker output and your cabinet. Ensure your guitar’s volume is up and the input cable is functioning correctly.

Settings Verification: Check the master volume knob and the selected channel’s volume. Confirm the correct input source (guitar or auxiliary) is chosen. Verify the amplifier isn’t muted and the global volume isn’t set to zero.

Unexpected Behavior

Preset Issues: If a preset sounds drastically different than expected, attempt loading a factory preset to isolate the problem. User presets may be corrupted or altered. Consider resetting the amplifier to factory settings as a last resort, noting this will erase all custom settings.

Software Glitches: Disconnect and reconnect the USB cable. Restart the amplifier. If issues persist, check for firmware updates via the Marshall website and follow the update instructions carefully. Contact support if problems continue.

Understanding the EQ Controls

Low, Mid, and High frequencies shape the core tone. Lower frequencies add bass and fullness, while higher frequencies provide clarity and brightness. The Mid control sculpts the tonal center, impacting presence and definition. Experiment to find the sweet spot for each amplifier model.

Presence adds high-frequency harmonics, enhancing cut and articulation. Resonance controls low-end response, affecting the amplifier’s “tightness” and overall feel. Subtle adjustments yield significant tonal changes; use sparingly.

Low, Mid, and High Frequency Adjustments

Low frequencies (bass) add warmth and body, crucial for rhythm tones and heavier genres. Excessive boost can cause muddiness. Mid frequencies define the character of the amp, impacting clarity and punch. Scooping the mids creates a modern, aggressive sound.

High frequencies (treble) provide brightness and articulation, essential for lead tones and cutting through the mix. Too much treble can sound harsh. Adjust these controls interactively to sculpt a balanced and defined tone, tailored to your playing style.

Presence and Resonance Controls

Presence shapes the very highest frequencies, adding “air” and bite to your tone. Increasing presence enhances clarity and articulation, useful for solos and cutting through a band mix. Be cautious, as excessive presence can introduce harshness.

Resonance controls the low-end response, affecting the amplifier’s perceived “tightness” and fullness. Higher resonance delivers a booming, powerful bass, while lower settings provide a tighter, more controlled low-end. Experiment to find the sweet spot for your desired sound.

Using the Effects Section

The CODE 50’s effects section provides a versatile palette for shaping your sound. Access modulation, delay, and reverb effects, each with adjustable parameters. Experiment with combinations to create unique textures.

Effects are arranged in a serial chain, allowing for dynamic interactions. Modulation effects like chorus and flanger add movement, while delay creates space and depth. Reverb simulates different acoustic environments. Utilize the effects loop for external pedals, expanding your sonic possibilities.

Modulation Effects

The CODE 50 offers a comprehensive suite of modulation effects, including chorus, flanger, phaser, tremolo, and vibrato. Each effect features adjustable depth and rate controls, allowing for subtle or dramatic tonal shifts. Experiment with different waveforms and settings to achieve desired textures.

Chorus adds richness and shimmer, while flanger creates a swirling, jet-plane effect. Phaser provides a subtle, sweeping motion, and tremolo offers rhythmic volume pulsations. Vibrato modulates pitch, adding a warbling quality. Combine modulation effects for complex sounds.

Delay and Reverb Effects

The CODE 50’s delay section provides a range of options, from pristine digital delays to warm analog-style echoes. Adjust delay time, feedback, and mix levels to create subtle ambience or expansive repeats. Explore dotted eighth note delays for rhythmic textures.

Reverb options include spring, plate, hall, and room simulations. Control decay time, pre-delay, and tone to shape the reverb’s character. Combine delay and reverb for spacious, atmospheric sounds. Experiment with different settings to enhance your tone and create depth.

Exploring the Noise Gate and Serial FX Loop

The CODE 50 features a built-in noise gate to eliminate unwanted hum and noise, especially crucial for high-gain tones. Adjust the threshold control to determine the gate’s sensitivity, silencing noise during pauses while preserving sustain. Careful adjustment prevents unwanted signal cutting.

The serial FX loop allows integration of external effects pedals, offering expanded tonal possibilities. Connect pedals like chorus, flanger, or wah into the send and return jacks. This loop is positioned after the preamp section, ensuring a consistent signal path.

Advanced Features: Power Reduction and Global Settings

The CODE 50 offers a power reduction feature, allowing you to switch between 50W and 20W operation. This is ideal for home practice or lower-volume settings, retaining the amp’s tone at manageable levels. Access this via the rear panel switch.

Global settings control overall amplifier behavior. Adjust the master volume, brightness, and reverb levels to shape the overall sound. Explore the USB connectivity options for firmware updates and software editor access, enhancing customization and expanding the CODE 50’s capabilities.

Software Editor and Mobile App Integration

The Marshall CODE 50 seamlessly integrates with dedicated software and a mobile app, expanding its functionality. These tools provide a visual interface for creating, editing, and managing presets with greater precision than the front panel controls allow.

Utilize the software to deeply customize amplifier models, effects chains, and routing options. The mobile app offers convenient remote control and preset browsing. Regularly check for updates to ensure compatibility and access new features, maximizing your CODE 50 experience.

Tips and Tricks for Optimal Sound

To unlock the full potential of your Marshall CODE 50, experiment with the studio-quality effects and amplifier models. Utilize the noise gate judiciously to eliminate unwanted hum. Explore the power reduction feature for cranked-amp tones at manageable volumes.

Remember that speaker simulation significantly impacts the final sound; choose one that complements your cabinet or recording setup. Regularly save your favorite presets and don’t be afraid to tweak existing ones. Fine-tune EQ settings for your guitar and playing style.

Safety Precautions and Warranty Information

Always ensure proper ventilation around the Marshall CODE 50 to prevent overheating. Avoid operating in humid or excessively dusty environments. Disconnect the power cord during lightning storms or prolonged periods of disuse. Never attempt to open or modify the amplifier’s internal components.

This product is covered by a one-year limited warranty against defects in materials and workmanship. The warranty excludes damage caused by misuse, accidents, or unauthorized repairs; Retain your proof of purchase for warranty claims. See the full warranty details online.

ncvt 2 klein manual

NCVT-2 Klein Manual: A Comprehensive Guide

This manual provides detailed instructions for the Klein Tools NCVT-2, a dual-range non-contact voltage tester, ensuring safe and effective electrical work practices;

The Klein Tools NCVT-2 is a robust and reliable non-contact voltage tester designed for electrical professionals and DIY enthusiasts alike. This dual-range device (12-1000V & 70-1000V AC) quickly detects the presence of AC voltage without making direct contact with exposed conductors.

Its intuitive design and clear indicators – both visual and audible – offer a user-friendly experience. The NCVT-2 enhances safety by identifying potentially live circuits, allowing for informed decisions before commencing electrical work. This manual will guide you through its features, operation, and safety precautions.

What is a Non-Contact Voltage Tester?

A Non-Contact Voltage Tester (NCVT) is a safety tool used to detect the presence of alternating current (AC) voltage without physically touching a live conductor. It functions by sensing the electromagnetic field surrounding energized wires. This provides a crucial layer of protection, minimizing the risk of electric shock.

NCVTs like the Klein NCVT-2 are invaluable for quickly identifying live circuits in outlets, wires, circuit breakers, and more. They are not a substitute for a multimeter, but offer a rapid initial assessment of voltage presence, enhancing workplace safety.

Understanding the NCVT-2 Features

The NCVT-2 boasts dual voltage ranges, an auto power-off function for battery conservation, and clear visual and audible indicators for easy voltage detection.

Dual Range Functionality (12-1000V & 70-1000V AC)

The NCVT-2 offers exceptional versatility with its dual-range functionality. It accurately detects AC voltage within two distinct ranges: 12-1000V and 70-1000V. This allows users to safely and effectively test a wider variety of electrical circuits and systems.

The lower range (12-1000V) is ideal for standard household wiring, while the higher range (70-1000V) is better suited for industrial applications or situations requiring increased sensitivity. Selecting the appropriate range ensures optimal performance and accurate readings, enhancing user safety and confidence during electrical testing procedures.

Auto Power-Off Feature

The NCVT-2 is equipped with a convenient auto power-off feature designed to conserve battery life and extend the operational lifespan of the device. If no buttons are pressed or no voltage is detected for a certain period, the tester will automatically shut down.

This feature eliminates the risk of accidental battery drain, ensuring the tool is ready when needed. It also contributes to responsible energy consumption. The auto power-off function enhances the overall usability and practicality of the NCVT-2 for professionals and DIY enthusiasts alike.

Visual and Audible Indicators

The NCVT-2 utilizes both visual and audible indicators to clearly communicate the presence of AC voltage. When voltage is detected, a bright red LED illuminates, providing a clear visual alert, even in dimly lit environments. Simultaneously, a distinct audible tone sounds, further confirming the detection.

The intensity of both the visual and audible signals increases as the voltage gets closer to the probe. These dual indicators offer a comprehensive and reliable method for identifying live wires, enhancing user safety and confidence during electrical testing procedures.

Operating Instructions

To begin, ensure the device is functioning correctly by following the steps for powering on, selecting the appropriate voltage range, and performing a test.

Powering On and Off the Device

The NCVT-2 activates simply by pressing the power button located on the device body. A self-test initiates upon powering on, confirming operational status. The tester automatically deactivates after a period of non-use, utilizing the auto power-off feature to conserve battery life. This feature typically engages after a specified duration of inactivity, enhancing overall efficiency. To manually power off, press and hold the power button until the device ceases operation. Always ensure the device is fully off when not in use, and before storing it, to prevent accidental battery drain or false readings.

Selecting the Voltage Range

The NCVT-2 offers dual-range functionality, accommodating both 12-1000V AC and 70-1000V AC. The device automatically selects the appropriate range based on the detected voltage level. However, understanding these ranges is crucial for accurate readings. The lower range (12-1000V) is ideal for standard household wiring, while the higher range (70-1000V) is suited for industrial applications. There is no manual range selection; the tester intelligently adjusts. Always be aware of the potential voltage present before testing, ensuring the NCVT-2 operates effectively.

Performing a Voltage Test

To perform a voltage test, power on the NCVT-2 by pressing the power button. Slowly bring the probe tip near the suspected live wire – physical contact isn’t required. The device will indicate voltage presence via both visual (lights) and audible (beeping) signals. A faster beep and brighter lights signify higher voltage. Maintain a firm grip on the tester’s body, avoiding contact with the probe itself. If no voltage is detected, ensure the device is functioning correctly and repeat the process carefully.

Safety Precautions

Always prioritize electrical safety; the NCVT-2 isn’t a substitute for proper safety procedures. Understand its limitations and handle the device with utmost care.

General Electrical Safety Rules

Before utilizing the NCVT-2, adhere to established electrical safety protocols. Always assume conductors are energized. Wear appropriate personal protective equipment (PPE), including insulated gloves and eye protection. Never work alone, and ensure the work area is clear and dry. De-energize circuits whenever possible before testing, and verify de-energization with a reliable testing device.

Remember that a non-contact voltage tester confirms the presence of voltage, not the absence. It doesn’t verify a circuit is safe to touch. Follow all local electrical codes and regulations. If unsure about any aspect of electrical work, consult a qualified electrician.

Limitations of Non-Contact Voltage Testing

The NCVT-2 detects AC voltage through a non-conductive material, but it has limitations. It may not detect voltage if conductors are shielded, grounded, or located within metallic enclosures. Readings can be affected by electromagnetic interference (EMI) or nearby energized circuits.

False negatives can occur if the tester isn’t properly calibrated or if the voltage is too low. It cannot detect DC voltage. Always confirm a circuit is de-energized using a contact voltage tester before working on it. This tool is for detection, not confirmation of safety.

Proper Handling and Storage

To ensure longevity and accuracy, handle the NCVT-2 with care. Avoid dropping or subjecting it to strong impacts. Clean the device regularly with a damp cloth, avoiding harsh chemicals or solvents. Store the tester in a dry, clean environment, away from extreme temperatures and direct sunlight.

Remove the battery when storing for extended periods to prevent corrosion. Do not disassemble the device beyond battery replacement. Inspect the probe for damage before each use. Proper storage maintains reliable performance and extends the lifespan of your Klein NCVT-2.

Component Identification

Key components include the probe, power button, locking tab, and body of the tester, all crucial for safe and accurate non-contact voltage detection.

Probe Description

The probe is the primary sensing element of the NCVT-2, designed for non-contact voltage detection. It’s carefully engineered to detect AC voltage through insulated materials. Users should ensure the probe is clean and undamaged for optimal performance. Avoid applying excessive force, as this could compromise its sensitivity. The probe’s shape facilitates access to confined spaces, allowing for testing in various electrical environments. Regular visual inspection of the probe is recommended to identify any cracks or wear. Proper probe maintenance ensures reliable and safe voltage detection.

Power Button Location

The power button on the NCVT-2 is centrally located on the device body, easily accessible for one-handed operation. It’s designed for intuitive activation and deactivation of the voltage tester. Pressing the power button initiates the self-test sequence, confirming the device is functioning correctly. A clear tactile feedback confirms button presses. The button’s placement minimizes accidental activation during storage or transport. Ensure the button is free from debris for reliable operation. Consistent pressing activates the device, enabling non-contact voltage detection capabilities.

Locking Tab Function

The locking tab, a crucial safety feature on the NCVT-2, secures the probe when not in use, preventing accidental activation and potential hazards. This tab physically restrains the probe, safeguarding against unintended voltage detection. Engaging the locking tab during storage and transport minimizes battery drain. It also protects the sensitive probe tip from damage. To release, simply disengage the tab before use. Regularly check the tab’s functionality to ensure proper operation and continued safety. This simple mechanism enhances the overall reliability of the tool.

Technical Specifications

The NCVT-2 detects 12-1000V and 70-1000V AC voltage, operates at a specified temperature range, and requires battery power for optimal functionality.

Voltage Detection Ranges Detailed

The Klein NCVT-2 boasts dual-range functionality, offering versatility for various electrical applications. Range 1 covers 12 to 1000V AC, suitable for standard household wiring and low-voltage systems. Range 2 extends from 70 to 1000V AC, ideal for industrial settings and higher voltage applications.

These ranges allow the tester to accurately identify the presence of AC voltage without making direct contact, enhancing user safety. Specifications are subject to change, but the core functionality remains consistent: reliable non-contact voltage detection across two distinct and useful ranges.

Operating Temperature

The NCVT-2 is designed for reliable performance within a specified temperature range. While precise figures aren’t explicitly detailed in readily available documentation, optimal operation is generally expected in typical indoor and outdoor working environments.

Extreme temperatures, both high and low, can potentially affect the accuracy and functionality of the device. Avoid prolonged exposure to temperatures outside the range suitable for standard electronic equipment to ensure consistent and dependable voltage detection. Maintaining appropriate temperature conditions is crucial for safe and accurate readings.

Battery Information

The NCVT-2 operates on batteries, though the specific type isn’t consistently detailed across all available resources. Users should refer to the device itself or the included documentation for the correct battery specification.

Regular battery checks are recommended to ensure the tester functions correctly. Low battery levels can impact the accuracy of voltage detection. When replacing batteries, always use the specified type and observe proper polarity. Dispose of used batteries responsibly, following local regulations for battery recycling and disposal.

Troubleshooting Common Issues

Addressing problems like no power, inconsistent readings, or false positives is crucial for reliable operation of the NCVT-2 non-contact voltage tester.

No Power/Device Not Turning On

If the NCVT-2 fails to power on, first verify the battery is correctly installed with proper polarity. A depleted battery is the most common cause; attempt replacement with a fresh battery of the correct type. Ensure the battery compartment is clean and free of corrosion, which can impede conductivity.

Inspect the battery contacts for any bending or damage that might prevent a secure connection. If a new battery still doesn’t resolve the issue, there may be an internal component failure requiring professional service or replacement of the unit. Do not attempt to disassemble the device yourself.

Inconsistent Readings

Inconsistent voltage readings on the NCVT-2 can stem from several factors. Ensure a firm, stable grip on the tool, as hand capacitance can influence detection. Verify the selected voltage range (12-1000V or 70-1000V) is appropriate for the circuit being tested.

Environmental interference, such as nearby electrical noise or strong electromagnetic fields, may cause fluctuations. Test in a controlled environment if possible. Confirm the probe is positioned correctly and close enough to the conductor, without direct contact. If issues persist, consider battery strength as a potential contributor.

False Positive Readings

False positive readings with the NCVT-2 often occur due to static electricity or induced voltage from adjacent energized conductors. Shielded cables or grounded metal objects nearby can create these misleading signals. Ensure the testing environment is as clear as possible from extraneous electrical sources.

Moisture or dirt on the probe or the surface being tested can also trigger false indications. Always clean both surfaces before performing a test. Remember, the NCVT-2 detects voltage fields, not direct contact, so stray fields can be misinterpreted. Verify the circuit is truly de-energized with a confirmed method.

Maintenance and Care

Regular cleaning with a damp cloth and prompt battery replacement are crucial for maintaining the NCVT-2’s accuracy and ensuring reliable performance over time.

Cleaning the Device

To ensure the longevity and accurate functioning of your Klein NCVT-2, regular cleaning is recommended. Always disconnect any power source before cleaning. Use a clean, damp cloth to wipe down the device’s exterior, removing any dirt, dust, or debris. Avoid using harsh chemicals, solvents, or abrasive cleaners, as these can damage the plastic casing and internal components.

Do not immerse the NCVT-2 in water or any other liquid. Pay particular attention to cleaning the probe tip, ensuring it is free from any conductive residue that could affect voltage detection. After cleaning, allow the device to dry completely before storing or using it.

Battery Replacement Procedures

When the NCVT-2’s low battery indicator appears, replace the batteries promptly to maintain accurate readings. Locate the battery compartment, typically on the device’s handle. Open the compartment using a small screwdriver if necessary. Remove the old batteries, noting their correct polarity (+ and -).

Insert new batteries of the same type, ensuring correct polarity alignment. Close the battery compartment securely. Dispose of used batteries responsibly, following local regulations. Incorrect battery installation can damage the device, so double-check before closing the compartment.

Warranty Information

Klein Tools provides a warranty covering defects in materials and workmanship. Details regarding the warranty period and coverage can be found on their website.

Klein Tools Warranty Details

Klein Tools stands behind its products with a limited lifetime warranty against defects in materials and workmanship. This warranty doesn’t cover misuse, abuse, alteration, or normal wear and tear. Specifically, for tools like the NCVT-2, the warranty ensures functionality under normal operating conditions.

To make a warranty claim, contact Klein Tools customer service with proof of purchase. They will assess the issue and determine if it’s covered under the warranty terms. The warranty provides repair or replacement at Klein Tools’ discretion. Full warranty details are available on the Klein Tools website.

Contacting Klein Tools Support

For assistance with your NCVT-2 or any Klein Tools product, several support options are available. You can visit their official website, www.kleintools.com, for FAQs, manuals, and troubleshooting guides. Alternatively, reach out to their customer service team directly via phone;

Their customer service number is readily available on the website. Klein Tools also offers support through email, allowing you to submit detailed inquiries. Ensure you have your product model number handy when contacting support for faster assistance. Prompt and helpful service is a Klein Tools priority.

NCVT-2 Model Variations

The NCVT-2P offers enhanced features compared to the standard NCVT-2, including the ability to detect voltage in two distinct, user-selectable ranges.

NCVT-2 vs. NCVT-2P Differences

The primary distinction between the Klein Tools NCVT-2 and NCVT-2P lies in their voltage detection capabilities. While both are dual-range non-contact voltage testers, the NCVT-2P introduces selectable ranges for increased versatility.

The NCVT-2P can detect voltage in two distinct modes, defined by the voltage level – offering greater precision for specific applications. Both models feature auto power-off and visual/audible indicators, but the ‘P’ version provides enhanced functionality for professionals needing adaptable testing options.

Essentially, the NCVT-2P builds upon the foundation of the NCVT-2, adding a layer of control and specificity to voltage detection.

Resources and Further Information

For comprehensive support and additional resources regarding the Klein Tools NCVT-2, visit the official Klein Tools website at www.kleintools.com. There, you’ll find downloadable manuals, frequently asked questions, and detailed product specifications.

Klein Tools’ customer support is readily available to address any concerns or provide assistance with operation and troubleshooting. Warranty details and claim procedures are also accessible online.

Remember to always prioritize safety when working with electrical systems and consult qualified professionals when needed. Staying informed through official Klein Tools resources ensures optimal product utilization.

nzxt kraken manual

NZXT Kraken Manual: A Comprehensive Guide

This guide provides detailed instructions for NZXT Kraken coolers, covering installation, software, troubleshooting, and maintenance․ PDF manuals are readily available online for Kraken Z series models․

NZXT CAM software enables monitoring, tuning, and configuration of Kraken hardware, including RGB lighting and performance profiles․ Support is accessible via NZXT Customer Support․

NZXT Kraken series represents a premium line of all-in-one (AIO) liquid coolers designed for efficient CPU cooling and aesthetic customization․ These coolers, including the Kraken Plus, RGB, and Z series, offer superior thermal performance compared to traditional air coolers․

The series caters to diverse builds, from compact mid-tower cases to expansive enthusiast setups․ NZXT CAM software integration allows users to monitor temperatures, control pump and fan speeds, and customize RGB lighting effects․ Detailed manuals, available as PDF downloads, guide users through installation and operation․

The Kraken Elite 420 RGB, a flagship model, showcases NZXT’s commitment to innovation and high-performance cooling solutions․

Understanding Kraken Components

NZXT Kraken coolers comprise several key components․ The radiator dissipates heat, available in various sizes (240mm, 280mm, 360mm, 420mm) with specific mounting requirements․ The pump block, featuring a copper cold plate, transfers CPU heat to the liquid․ High-static pressure fans ensure efficient airflow through the radiator․

Kraken Z series models include an integrated LCD screen for displaying system information or custom images․ Compatibility varies based on CPU socket and case dimensions․ Manuals detail radiator specifications and fan configurations․ Proper understanding of these components is crucial for successful installation․

Radiator Specifications and Mounting

NZXT Kraken radiators come in various sizes – 240mm, 280mm, 360mm, and 420mm – impacting compatibility and cooling performance․ Manuals detail specific dimensions and supported fan configurations․ Mounting involves securing the radiator to the case using screws and standoffs, ensuring proper airflow․

Consider case compatibility before purchasing․ Top or front mounting are common options, but space constraints may apply․ Proper radiator orientation maximizes cooling efficiency․ Refer to the NZXT documentation for detailed mounting instructions specific to your Kraken model and case․

Pump and Block Details

The NZXT Kraken pump is a crucial component, circulating coolant through the system․ It’s typically pre-installed on the CPU water block, ensuring optimal contact for heat transfer․ Manuals emphasize careful handling during installation to avoid damage․ The block’s base is usually copper, maximizing thermal conductivity․

NZXT designs prioritize compatibility with various CPU sockets․ The pump connects to the motherboard or a dedicated fan header for power and control via CAM software․ Proper thermal paste application is vital for efficient cooling, as detailed in the Kraken user manual․

Fan Configurations and Compatibility

NZXT Kraken coolers support various fan configurations, influencing cooling performance and noise levels․ Manuals detail optimal fan placement on the radiator – push, pull, or push-pull – for maximized airflow․ Compatibility extends to standard 120mm or 140mm fans, including NZXT’s own RGB options․

CAM software allows precise fan speed control, balancing cooling and acoustics․ The manual highlights radiator thickness and case clearance requirements․ Users can integrate existing case fans with the Kraken system, controlled centrally through the NZXT ecosystem․

Installation Guide

Proper installation is crucial for optimal Kraken performance․ Begin by preparing your system, ensuring compatibility and clearing necessary space․ The manual provides step-by-step guidance for mounting the radiator within your case, considering airflow and component placement․

Next, carefully install the pump block onto the CPU, applying thermal paste correctly․ Secure all components firmly, referencing the manual for torque specifications․ NZXT recommends leak testing before powering on the system, detailed in the provided documentation․

Preparing Your System for Kraken Installation

Before installation, verify your case supports the Kraken’s radiator size․ Ensure adequate clearance for the pump block and tubing․ Disconnect power and ground yourself to prevent static discharge․ Consult your motherboard manual for CPU cooler mounting compatibility․

Remove the existing CPU cooler and thoroughly clean the CPU surface․ Gather necessary tools: screwdriver, thermal paste (if not pre-applied), and the NZXT Kraken manual․ Plan cable routing for a clean build, referencing the manual’s diagrams․

Mounting the Radiator

Carefully position the radiator within your case, aligning it with the designated mounting points․ Utilize the provided screws and standoffs, ensuring a secure fit․ Consider airflow direction – typically, pull-air configuration is preferred․ Tighten screws firmly, but avoid over-tightening to prevent damage to the case or radiator․

Refer to the NZXT Kraken manual for specific mounting instructions based on your case and radiator size․ Double-check stability before proceeding․ Proper radiator mounting is crucial for optimal cooling performance and preventing leaks․

Installing the Pump Block on the CPU

Before installation, ensure the CPU surface is clean and free of thermal paste residue․ Apply a fresh, even layer of high-quality thermal paste․ Carefully align the pump block with the CPU and mounting bracket, ensuring proper contact․

Secure the pump block using the provided screws, tightening them in a diagonal pattern to distribute pressure evenly․ Refer to the NZXT Kraken manual for torque specifications․ Incorrect installation can lead to overheating or damage․ Double-check all connections before powering on․

NZXT CAM Software Overview

NZXT CAM is essential for controlling and monitoring your Kraken cooler․ This freeware software allows for comprehensive hardware configuration, including pump and fan speed adjustments․ Download and installation are straightforward from the NZXT website, providing a user-friendly interface․

CAM facilitates performance tuning and provides real-time system monitoring․ It’s crucial for optimizing cooling performance and customizing RGB lighting effects․ The software supports various NZXT devices, offering centralized control․ Refer to the NZXT Kraken manual for detailed software guidance․

Downloading and Installing CAM

NZXT CAM software is a free download available directly from the official NZXT website․ Ensure you download the latest version for optimal compatibility with your Kraken cooler․ The installation process is simple and guided, requiring administrator privileges․

Follow the on-screen prompts during installation, accepting the license agreement and choosing your preferred installation directory․ Once installed, launch CAM and create an NZXT account or log in to an existing one․ This account links your hardware and enables cloud-based features․

Navigating the CAM Interface

NZXT CAM features a user-friendly interface divided into distinct sections․ The ‘Dashboard’ provides an overview of system performance, including CPU temperature and Kraken pump speed․ The ‘Devices’ tab lists all connected NZXT hardware, allowing individual control․

Explore the ‘Fans’ and ‘Pump’ sections for granular adjustments․ The ‘Lighting’ tab manages RGB settings, while ‘Profiles’ stores custom configurations․ Utilize the monitoring tools to track temperatures, fan speeds, and coolant flow, ensuring optimal cooling performance and system stability․

Controlling Pump and Fan Speeds

NZXT CAM allows precise control over both pump and fan speeds․ Within the ‘Devices’ tab, select your Kraken cooler to access individual settings․ Adjust pump speed to balance cooling performance and noise levels, utilizing custom fan curves for optimal results․

Fan speed control offers options for PWM or voltage-based adjustments․ Create custom fan curves based on CPU temperature, prioritizing silence or maximum cooling․ Experiment with different settings to find the ideal balance for your system and workload, maximizing efficiency and longevity․

Customization Options with CAM

NZXT CAM software unlocks extensive customization for your Kraken cooler․ Beyond basic speed control, users can personalize RGB lighting effects, creating vibrant and dynamic displays․ Performance profiles allow tailoring cooling behavior to specific applications or gaming sessions, optimizing for silence or maximum performance․

For Kraken Z series coolers, CAM enables display customization, showcasing system information, GIFs, or custom images on the integrated LCD screen․ Monitor temperatures, fan speeds, and other vital stats directly on the cooler, enhancing both aesthetics and functionality․

RGB Lighting Control

NZXT CAM software provides comprehensive control over the RGB lighting on your Kraken cooler and compatible NZXT components․ Users can select from a wide spectrum of colors and dynamic lighting effects, including static, breathing, and spectrum modes․ Synchronization across all NZXT RGB devices is easily achieved, creating a unified aesthetic․

Customize lighting based on CPU temperature, fan speeds, or system load for reactive and immersive visuals․ CAM allows saving custom lighting profiles for quick access and easy switching between different themes, enhancing your system’s overall appearance․

Performance Profiles and Monitoring

NZXT CAM software allows users to create and manage custom performance profiles for their Kraken cooler․ These profiles enable adjusting pump and fan speeds to optimize cooling performance based on specific workloads or noise preferences․ Real-time monitoring of CPU temperature, coolant temperature, and pump speed is readily available within the CAM interface․

Detailed graphs and statistics provide insights into system performance and cooling efficiency․ Users can observe the impact of different settings and fine-tune their profiles for optimal results, ensuring stable and quiet operation․

Display Customization (Kraken Z Series)

Kraken Z Series coolers feature a customizable LCD screen integrated into the pump block․ NZXT CAM software provides extensive options for displaying system information, custom images, GIFs, or even short videos on this screen․ Users can monitor CPU temperature, coolant temperature, fan speeds, and other vital statistics directly on the cooler itself․

Personalization extends to custom artwork and animations, allowing for a unique aesthetic touch․ The display settings are easily configurable within the CAM interface, offering a seamless customization experience․

Troubleshooting Common Issues

Common issues with NZXT Kraken coolers include pump detection failures and software connectivity problems․ If the pump isn’t detected, ensure all cables are securely connected and the NZXT CAM software is up-to-date․ Leak testing is crucial during installation; carefully inspect all connections․

For software issues, verify CAM compatibility with your operating system․ If problems persist, contact NZXT Customer Support for assistance and obtain a Return Merchandise Authorization (RMA) number before returning the product․

Pump Not Detecting

If your NZXT Kraken pump isn’t detected, first verify all connecting cables – both power and USB – are firmly secured to the motherboard and pump․ Ensure the NZXT CAM software is installed and running the latest version․ A restart of your system can sometimes resolve detection issues․

Double-check BIOS settings to confirm USB devices are enabled․ If the problem continues, contact NZXT Customer Support for further troubleshooting steps and potential RMA authorization․

Leak Testing and Prevention

Prior to powering on your system after installing the NZXT Kraken, thoroughly inspect all connections – radiator, pump block, and tubing – for tightness․ While rare, leaks can occur․ NZXT recommends a 24-hour leak test with the pump powered, but the system off, using paper towels to monitor for any seepage․

Avoid over-tightening fittings, as this can damage components․ Regularly check for any signs of coolant discoloration or drips․ Contact NZXT support immediately if a leak is suspected․

Software Connectivity Problems

If NZXT CAM fails to recognize your Kraken cooler, ensure the pump’s USB cable is securely connected to both the pump and the motherboard․ Verify CAM is updated to the latest version․ Try reinstalling CAM, completely removing previous installations first․ Check your firewall settings, allowing CAM access to the internet․

Sometimes, a different USB port can resolve connectivity issues․ If problems persist, consult the NZXT support website for troubleshooting guides or contact their customer support team for assistance․

Maintenance and Care

Regular maintenance ensures optimal Kraken performance․ Periodically clean the radiator fins with compressed air to remove dust accumulation, maintaining efficient heat dissipation․ The pump block can be gently wiped with a soft, damp cloth – avoid abrasive cleaners․

For long-term storage, drain the coolant completely and seal the block and radiator to prevent corrosion․ Always refer to the official NZXT manual for specific cleaning recommendations and coolant compatibility information before undertaking any maintenance procedures․

Cleaning the Radiator and Block

Radiator cleaning involves removing dust buildup with compressed air, ensuring airflow isn’t restricted․ Gently brush the fins if necessary, avoiding bending them․ The pump block should be cleaned with a soft, damp cloth; never use abrasive cleaners․

Inspect the block’s contact surface for thermal paste residue and carefully clean it before reapplication․ NZXT recommends checking the manual for specific cleaning solutions suitable for your Kraken model, preserving its longevity and performance․

Long-Term Storage Instructions

For extended storage, completely drain the Kraken cooler’s coolant․ This prevents corrosion and pump damage․ Disconnect all components and store them in a dry, static-free environment․ Ensure the pump block’s contact surface is protected from dust and oxidation․

NZXT advises storing the radiator and block in their original packaging, if available․ Avoid extreme temperatures during storage․ Before re-installation, inspect all components for damage and refer to the manual for re-filling instructions․

NZXT Kraken Manuals and Documentation

Official NZXT Kraken manuals, in PDF format, are easily accessible online for various models․ Locate specific guides for the Kraken Plus, Kraken RGB, and the Kraken Z series (Z53, Z63, Z73) on the NZXT support website․ These resources provide comprehensive installation steps and troubleshooting advice․

Downloadable manuals cover multi-language support and detailed component information․ The NZXT website is the primary source for the latest documentation, ensuring you have the most up-to-date instructions for your cooler․

Locating Official Manuals (PDF Downloads)

NZXT provides readily available PDF downloads of official Kraken manuals directly on their website․ Users can easily find documentation for models like the Kraken Plus and Kraken RGB․ Specifically, the Kraken Z series – including Z53, Z63, and Z73 – all have dedicated manuals accessible for download․

These PDF files offer detailed instructions, ensuring a smooth installation and optimal performance․ Visiting the NZXT support section is the quickest way to locate the correct manual for your specific Kraken cooler model․

Kraken Plus and Kraken RGB Manuals

NZXT offers dedicated user manuals in PDF format for both the Kraken Plus and Kraken RGB series coolers․ These comprehensive guides detail installation procedures, component identification, and software integration with NZXT CAM․ They cover multi-language support, ensuring accessibility for a wider user base․

The manuals provide step-by-step instructions for mounting the radiator, installing the pump block, and configuring RGB lighting effects․ Downloading these resources is crucial for maximizing the performance and lifespan of your Kraken cooling solution․

Kraken Z Series Manuals (Z53, Z63, Z73)

NZXT provides optimized PDF manuals specifically for the Kraken Z series – including the Z53, Z63, and Z73 models․ These guides detail the unique features of each cooler, particularly focusing on the integrated LCD display and its customization options within NZXT CAM software․

Users will find detailed instructions on display configuration, performance monitoring, and troubleshooting common issues․ Accessing these manuals ensures proper setup and utilization of the advanced functionalities offered by the Kraken Z series liquid coolers․

Warranty Information and Support

NZXT offers specific warranty policies covering their Kraken series coolers, protecting against manufacturing defects․ Before initiating a return, contacting NZXT Customer Support is crucial to obtain prior approval and a valid Return Merchandise Authorization (RMA) number․

NZXT reserves the right to refuse returns without proper authorization․ For assistance with warranty claims, troubleshooting, or general inquiries, reach out to NZXT’s dedicated support team․ Detailed warranty information and contact details are available on the official NZXT website․

NZXT Warranty Policies

NZXT’s warranty safeguards against defects in materials and workmanship for Kraken coolers․ The warranty period varies by product, detailed on the official NZXT website․ It doesn’t cover damage from misuse, improper installation, or unauthorized modifications․

To claim warranty service, a proof of purchase is required․ NZXT may request photos or return of the defective product for inspection․ Returns without prior approval and an RMA number will be rejected․ The warranty is non-transferable and applies to the original purchaser․

Contacting NZXT Customer Support

NZXT provides customer support through various channels for Kraken-related issues․ Their official website features a comprehensive FAQ section and a support ticket submission system․ Users can also reach out via email for assistance with installation, troubleshooting, or warranty claims․

For immediate help, NZXT offers live chat support during business hours․ Active community forums provide peer-to-peer assistance and valuable insights․ Ensure you have your product details and purchase information ready when contacting support for efficient resolution․