Alps Guides: A Comprehensive Overview (as of 12/20/2025)
Alps guiding faces evolving challenges due to climate change, impacting routes and safety; however, demand for experiences—including self-guided tours—remains strong, especially in regions like Switzerland.
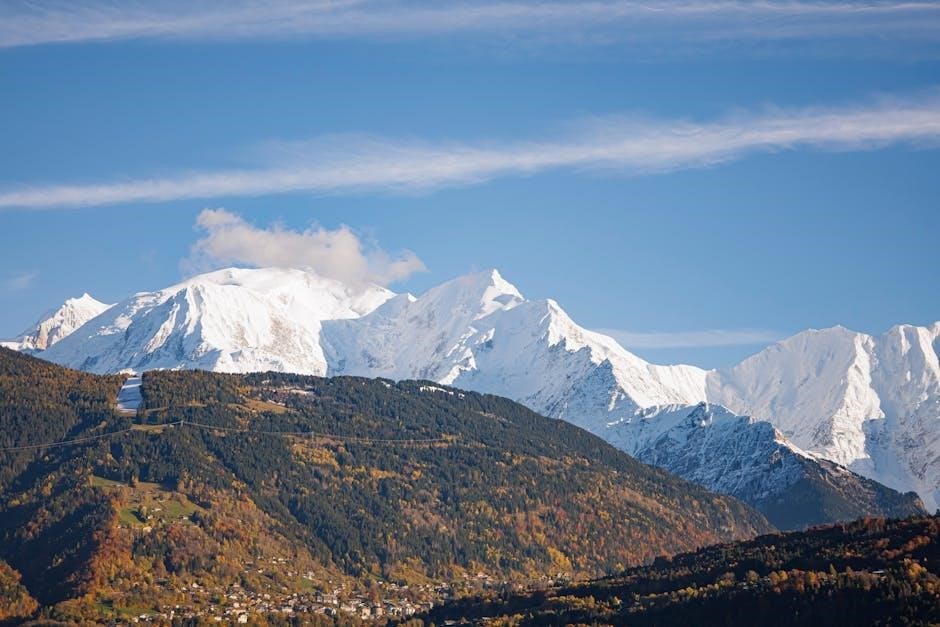
Alps guiding represents a cornerstone of experiencing the majestic mountain range safely and fully. For centuries, skilled professionals have facilitated exploration, from pioneering ascents to leisurely hikes. Today, as of December 20, 2025, the role of the Alps guide is multifaceted, encompassing expertise in mountaineering, skiing, via ferrata, and increasingly, navigating a changing alpine environment.
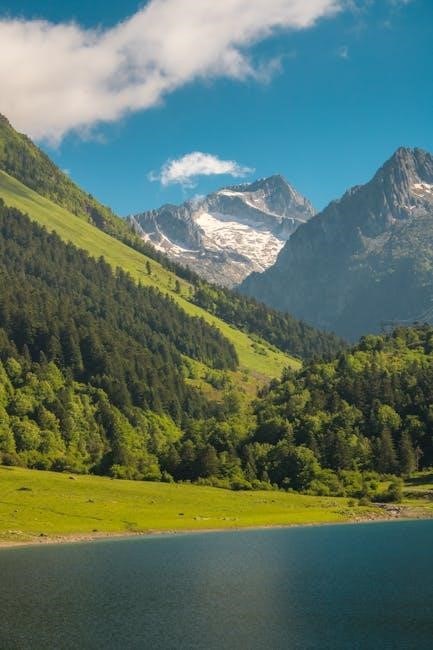
The allure of the Alps draws visitors seeking breathtaking scenery and challenging adventures. However, the mountains demand respect and knowledge. Guides provide crucial insights into weather patterns, avalanche risks, and optimal routes, ensuring a memorable – and secure – journey. Furthermore, the growing interest in “cool-cations” and lesser-known routes highlights the guide’s role in unlocking hidden alpine gems, while sustainable tourism practices become paramount.
The Role of a Mountain Guide
A mountain guide’s role extends far beyond simply leading individuals up a peak. They are educators, risk managers, and local experts, responsible for the safety and enjoyment of their clients. This includes meticulous weather monitoring, constant avalanche safety assessments, and thorough equipment checks before embarking on any excursion.
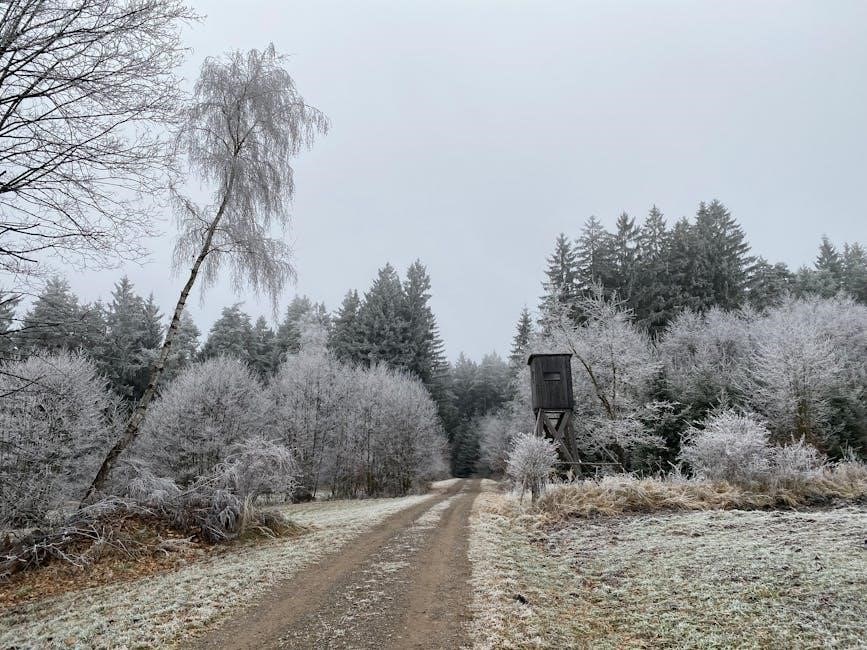
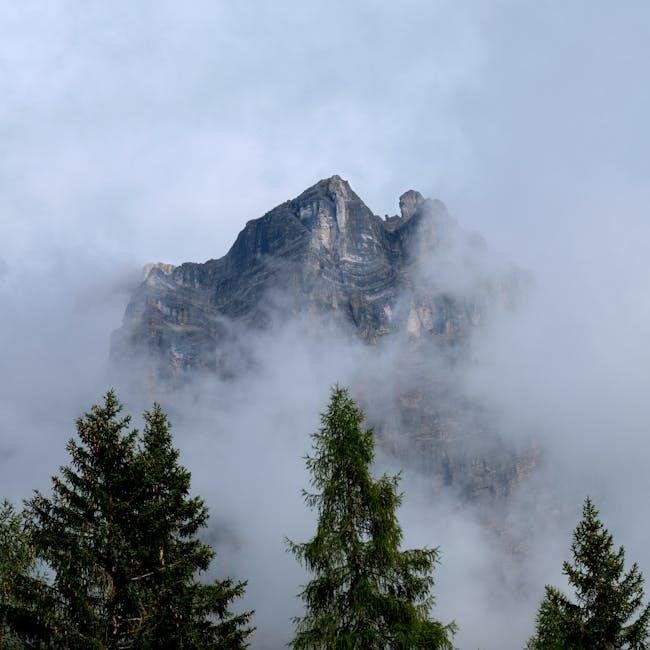
Guides possess in-depth knowledge of alpine terrain, identifying potential hazards like rockfall – a growing concern due to climate change – and selecting appropriate routes based on skill level and conditions. Effective communication is also vital, ensuring clients understand instructions and potential risks. Increasingly, guides are adapting to altered weather patterns and glacier retreat, offering alternative routes and embracing sustainable tourism practices to preserve the alpine environment for future generations.
Historical Context of Guiding in the Alps
Alpine guiding originated with local villagers assisting early explorers and adventurers in the 19th century, initially as porters and then as skilled navigators of the challenging mountain terrain. This evolved into a formalized profession, driven by the increasing popularity of mountaineering and the desire to conquer iconic peaks.
Early guides possessed intimate knowledge of routes, weather patterns, and local conditions, passed down through generations. The formation of organizations like the UIAGM/IFMGA (discussed later) standardized training and certification, elevating guiding to a highly respected and regulated profession. Throughout its history, guiding has adapted to changing technologies and client expectations, while remaining rooted in a deep respect for the mountains and a commitment to safety.
Types of Guiding Services Available
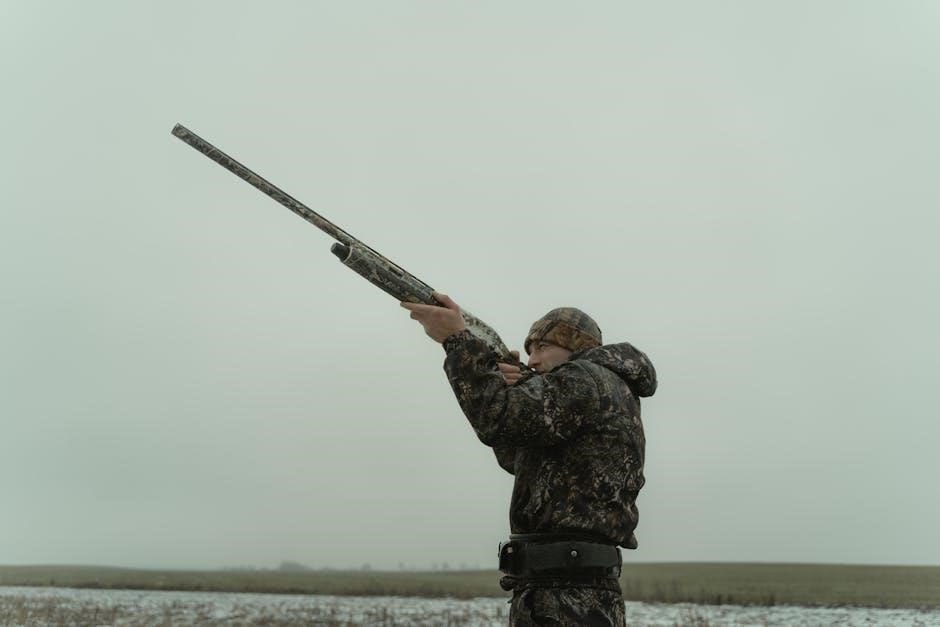
Alps guiding encompasses diverse options: ski touring, mountaineering, hiking, via ferrata, and ice climbing, catering to varied skill levels and adventure preferences.
Ski Guiding in the Alps
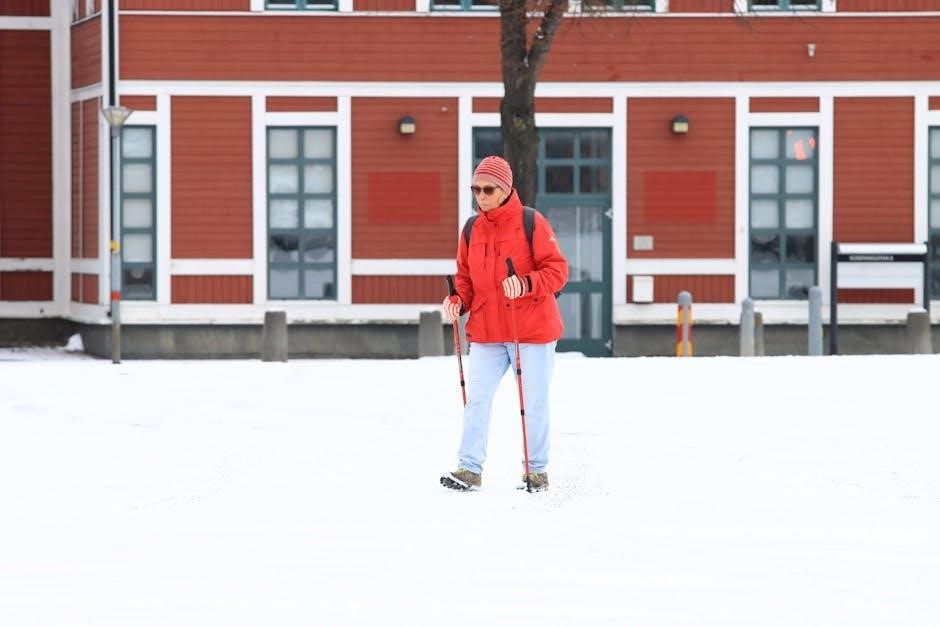
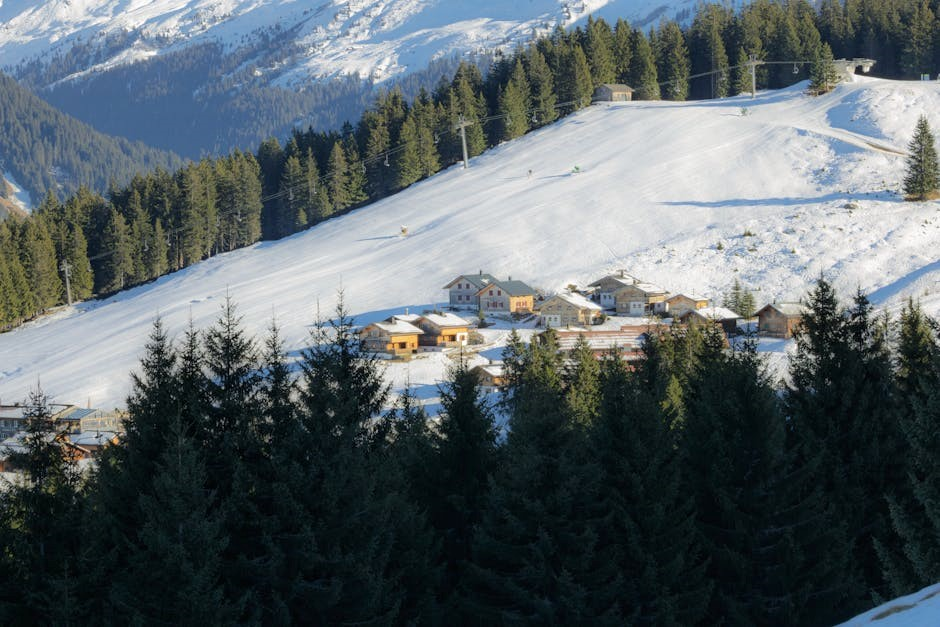
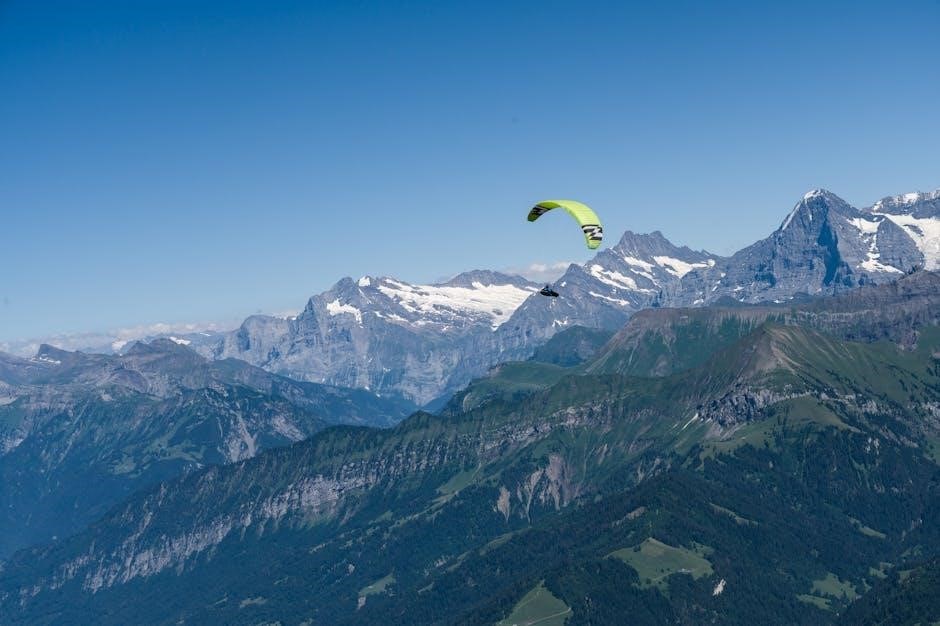
Ski guiding within the Alps provides access to incredible off-piste terrain and ensures safety in avalanche-prone environments. Experienced guides expertly navigate complex snow conditions, utilizing weather monitoring and avalanche safety protocols. They tailor experiences to individual skill levels, from beginner powder introductions to challenging backcountry expeditions.
The allure of skiing the Alps remains strong, even with rising costs and alternative options like indoor facilities—such as the proposed “Texas Alps”—gaining traction. Guides offer invaluable local knowledge, maximizing enjoyment while minimizing risk. They can lead groups to pristine slopes, hidden valleys, and iconic peaks, providing insights into the region’s history and ecology. As climate change alters conditions, their expertise in adapting to glacier retreat and altered weather patterns becomes increasingly vital.
Mountaineering Guides
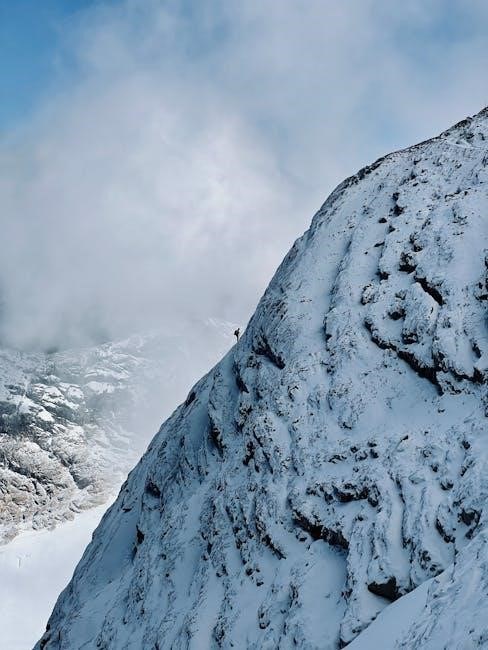
Mountaineering guides in the Alps are highly specialized professionals, leading clients on challenging ascents of iconic peaks. Their expertise encompasses advanced rope techniques, glacier travel, and crevasse rescue – skills crucial for navigating the complex alpine environment. They assess risks related to rockfall, changing weather, and the impacts of glacier retreat, adapting routes as necessary to ensure client safety.
These guides possess extensive local mountain knowledge, understanding subtle shifts in conditions and potential hazards. They provide instruction on essential mountaineering skills, empowering clients to participate actively and safely. As climate change increases instability, their ability to interpret evolving terrain and predict potential dangers is paramount. The Pyrenees, alongside the Alps, present increasingly risky conditions, demanding exceptional guiding expertise.
Hiking and Trekking Guides
Hiking and trekking guides within the Alps cater to a wide range of abilities, from leisurely valley walks to multi-day, high-altitude traverses. They expertly navigate intricate trail systems, offering insights into local flora, fauna, and cultural heritage. Guides prioritize safety, monitoring weather patterns and assessing terrain conditions, particularly as climate change alters landscapes and increases risks like rockfall.
The Swiss Alps, renowned for their scenic beauty, present diverse hiking opportunities, but require careful planning due to varying terrain. Guides provide essential knowledge of route planning, navigation, and emergency procedures. Increasingly, they are facilitating “cool-cations” and exploring lesser-known routes, offering unique experiences beyond traditional tourist hotspots. Their role is vital in promoting sustainable tourism and responsible mountain access.
Via Ferrata Guides
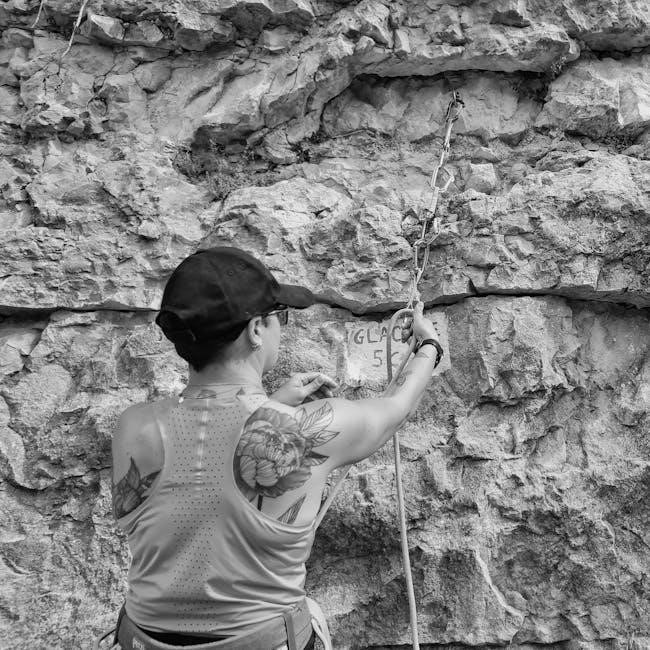
Via Ferrata guides specialize in assisting climbers on protected climbing routes employing steel cables, rungs, and ladders fixed to the rock face. These routes offer a thrilling experience, bridging the gap between hiking and rock climbing, but require specialized equipment and knowledge. Guides ensure participants are properly harnessed, understand safety protocols, and can confidently navigate exposed sections.
As the Alps experience climate change, via ferrata routes are subject to altered conditions, including increased rockfall risk and changes in snow and ice cover. Guides meticulously assess route stability and adapt plans accordingly. They provide instruction on using via ferrata equipment, managing exposure, and making informed decisions in a mountain environment. Their expertise is crucial for a safe and enjoyable experience on these increasingly popular routes.
Ice Climbing Guides
Ice climbing guides lead expeditions on frozen waterfalls and glaciers, demanding a high level of technical skill and expertise. They assess ice conditions, establish safe climbing routes, and provide instruction on ice axe and crampon techniques. Participants learn self-arrest procedures, belaying methods, and how to manage the risks inherent in vertical ice environments.
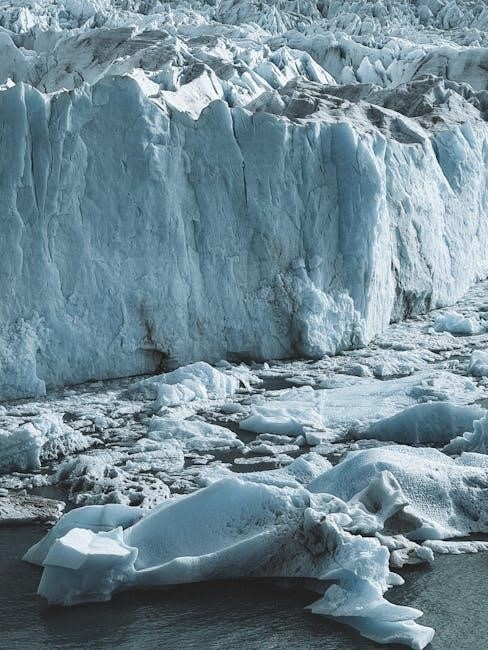
Climate change significantly impacts ice climbing in the Alps, with glacier retreat and altered freeze-thaw cycles creating unstable conditions. Guides must possess in-depth knowledge of local ice formations and constantly monitor for hazards like falling ice and changing weather patterns. They prioritize safety, utilizing specialized equipment and employing conservative decision-making to mitigate risks. Their role is vital for navigating this dynamic and challenging alpine discipline.
Key Regions for Alps Guiding
Switzerland, France, Austria, and Italy are premier destinations, each offering unique terrain and guiding opportunities—from Swiss peaks to Pyrenees waterfalls and beyond.
Swiss Alps Guiding
The Swiss Alps represent a cornerstone of alpine guiding, renowned for their majestic views and diverse terrain, appealing to both seasoned mountaineers and novice hikers. Guiding services here cater to a wide spectrum of activities, encompassing challenging ascents of iconic peaks like the Matterhorn and Eiger, alongside more accessible trekking routes through picturesque valleys.
Swiss guides are highly regarded for their professionalism and adherence to stringent safety standards, often holding the coveted UIAGM/IFMGA certification. The region’s infrastructure supports a robust guiding industry, with readily available equipment rentals and logistical support. However, the Swiss Alps are also experiencing the effects of climate change, necessitating guides to adapt routes and prioritize avalanche safety due to glacier retreat and altered weather patterns. Despite these challenges, the Swiss Alps remain a premier destination for unforgettable guided alpine experiences.
French Alps Guiding
The French Alps offer a diverse guiding landscape, from the iconic Mont Blanc massif – Western Europe’s highest peak – to the extensive Chamonix valley, a world-renowned mountaineering hub. Guiding services here specialize in everything from classic climbs and challenging ski touring to introductory glacier walks and via ferrata adventures. The region attracts a global clientele seeking both adrenaline-fueled exploits and immersive alpine experiences.
French guides, like their Swiss counterparts, typically possess the rigorous UIAGM/IFMGA certification, ensuring a high level of expertise and safety. Increased rockfall risk and altered weather patterns, driven by climate change, are significant concerns, demanding constant route assessment and adaptation. Despite these evolving conditions, the French Alps continue to be a premier destination, offering unparalleled access to stunning scenery and world-class guiding services.
Austrian Alps Guiding
The Austrian Alps present a unique guiding experience, characterized by a blend of challenging mountaineering and accessible hiking opportunities. Regions like Tyrol and Salzburg boast a strong tradition of alpine guiding, with services catering to all skill levels. While perhaps less internationally famed for extreme climbs than the French Alps, Austria excels in ski guiding, high-mountain trekking, and via ferrata routes.
Austrian guides, similarly to those in other Alpine nations, adhere to stringent UIAGM/IFMGA standards, prioritizing safety and professional competence. Glacier retreat is impacting traditional routes, necessitating adaptive guiding practices. The increasing popularity of “cool-cations” and exploring lesser-known routes is also shaping the Austrian guiding scene, offering visitors diverse and sustainable alpine adventures.
Italian Alps Guiding
The Italian Alps, encompassing regions like the Dolomites and Aosta Valley, offer a distinctly Italian approach to alpine guiding – blending technical expertise with cultural richness. Guiding services here range from challenging mountaineering expeditions on iconic peaks to leisurely hiking and via ferrata adventures suitable for families. The Dolomites, a UNESCO World Heritage site, are particularly renowned for their dramatic landscapes and well-maintained via ferrata routes.
Italian guides, upholding rigorous UIAGM/IFMGA certifications, are adept at navigating the evolving alpine environment. Climate change impacts, such as altered weather patterns and increased rockfall risk, demand constant route assessment and adaptation. A growing interest in sustainable tourism is also influencing guiding practices, promoting responsible exploration of these stunning mountains.
Essential Skills and Qualifications of Alps Guides
Highly qualified Alps guides possess UIAGM certification, advanced first aid/rescue training, in-depth local mountain knowledge, and strong language skills for client safety.
UIAGM/IFMGA Certification
The UIAGM/IFMGA certification, internationally recognized, represents the highest standard for mountain guides globally, and is paramount for those operating within the Alps. Achieving this accreditation demands rigorous training encompassing extensive technical skills – including rock climbing, ice climbing, and skiing – alongside comprehensive knowledge of meteorology, glaciology, and mountain rescue techniques.
Guides undergo continuous assessment and re-certification to maintain proficiency. This certification isn’t merely a qualification; it’s a commitment to upholding the highest safety standards and providing clients with expertly led experiences. It assures clients they are in the hands of a professional capable of navigating complex alpine environments and responding effectively to emergencies. The demanding process ensures a consistent level of competence across the Alps’ guiding community.
First Aid and Rescue Training
Comprehensive first aid and rescue training are non-negotiable components of an Alps guide’s skillset, extending far beyond standard certifications. Guides receive specialized instruction in wilderness medicine, focusing on trauma care, altitude sickness management, and hypothermia treatment – conditions frequently encountered in alpine environments.
Training encompasses crevasse rescue techniques, avalanche rescue protocols (including transceiver use and probe searches), and improvised rope systems for evacuation. Regular refresher courses and scenario-based exercises ensure guides maintain proficiency in these critical skills. Given the increasing risks associated with climate change – such as altered terrain and unpredictable weather – robust rescue capabilities are vital for ensuring client safety and effective emergency response in remote mountain locations.
Local Mountain Knowledge
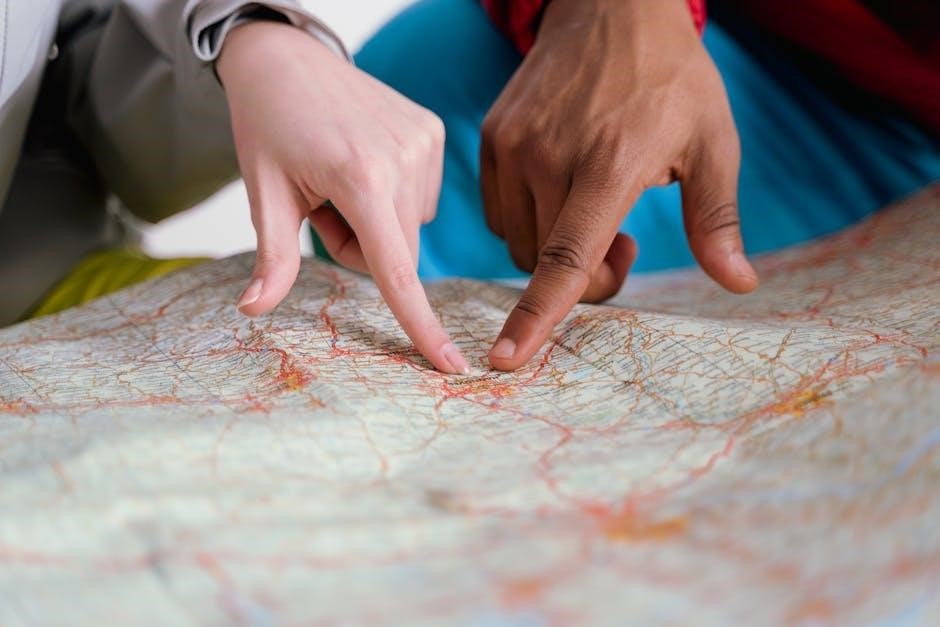
Exceptional local mountain knowledge distinguishes superior Alps guides, going beyond map reading and route finding. This encompasses an intimate understanding of microclimates, prevailing weather patterns specific to each valley and peak, and subtle indicators of changing conditions. Guides possess detailed knowledge of rockfall zones, glacier movements – increasingly important due to retreat – and potential hazards related to altered terrain.
They are familiar with local flora and fauna, emergency evacuation routes, and the locations of mountain huts and refuges. This deep understanding allows guides to proactively assess risks, adapt plans based on real-time observations, and provide clients with informed decisions, enhancing both safety and the overall alpine experience.
Language Proficiency
Effective communication is paramount for Alps guides, necessitating fluency in multiple languages. While English is widely spoken, proficiency in German, French, and Italian – the languages of the primary Alpine nations – is crucial for interacting with local authorities, mountain hut personnel, and rescue services. Guides must clearly convey safety instructions, technical information, and route details to clients from diverse linguistic backgrounds.
Beyond basic translation, guides require cultural sensitivity to build rapport and trust. The ability to understand and respond to nuanced questions, explain complex situations, and provide reassurance in a client’s native language significantly enhances the overall guiding experience and contributes to a safer, more enjoyable adventure.
Safety Considerations When Using an Alps Guide
Prioritizing safety involves avalanche awareness, diligent weather monitoring, thorough equipment checks, and established communication protocols—essential for navigating the changing Alpine environment.
Avalanche Safety
Avalanche safety is paramount when venturing into the Alps, and a qualified guide provides crucial expertise. Guides continuously assess snowpack stability, utilizing observations and forecasts to mitigate risk. Clients receive instruction on recognizing avalanche terrain, proper use of avalanche safety equipment – including transceivers, shovels, and probes – and practicing effective search techniques;
Understanding weather patterns is also key, as rapid warming or significant snowfall dramatically increases avalanche danger. Guides actively monitor conditions and adjust plans accordingly, prioritizing conservative decision-making. They’ll explain how factors like slope angle, aspect, and recent snowfall contribute to instability. Participating in a pre-trip avalanche awareness course is highly recommended, supplementing the on-mountain guidance provided.
Weather Monitoring
Effective weather monitoring is integral to safe Alps guiding, as conditions can change rapidly at altitude. Guides utilize multiple sources – including detailed mountain forecasts, real-time observations from local stations, and their own experienced assessments – to anticipate shifts. They track temperature fluctuations, wind patterns, precipitation levels, and visibility, understanding how these elements impact route conditions and potential hazards.
Altered weather patterns, linked to climate change, necessitate even more vigilant monitoring. Guides are trained to recognize subtle indicators of approaching storms or deteriorating conditions, and to make informed decisions about adjusting itineraries or even retreating. Client safety dictates prioritizing conservative planning based on the most current and comprehensive weather data available.
Equipment Checks
Thorough equipment checks are a non-negotiable aspect of responsible Alps guiding, ensuring both client and guide safety. Before embarking on any excursion, guides meticulously inspect all essential gear – including harnesses, helmets, ropes, ice axes, crampons, and avalanche safety equipment. They verify proper fit, functionality, and condition, addressing any deficiencies immediately.
Guides also assess client-owned equipment, offering guidance on appropriate choices and ensuring everything meets safety standards. This includes checking boot compatibility with crampons, verifying beacon functionality, and confirming adequate layering for anticipated conditions. Regular checks are performed throughout the trip, particularly after changes in terrain or weather, to maintain optimal safety margins.
Communication Protocols
Robust communication protocols are vital for safe and effective Alps guiding, encompassing both internal team coordination and client interaction. Guides establish clear communication channels before, during, and after excursions, utilizing radios, mobile phones (where coverage permits), and pre-arranged signals. Regular position reports and hazard assessments are shared amongst the guiding team.
Crucially, guides clearly communicate potential risks, route changes, and emergency procedures to clients, ensuring everyone understands expectations. They actively solicit feedback and address concerns throughout the trip. In emergency situations, guides follow established protocols for contacting mountain rescue services, providing accurate location information and a concise description of the incident;
The Impact of Climate Change on Alps Guiding
Climate change significantly alters Alps guiding, with glacier retreat, increased rockfall, and unpredictable weather patterns demanding adaptive strategies and heightened safety measures.
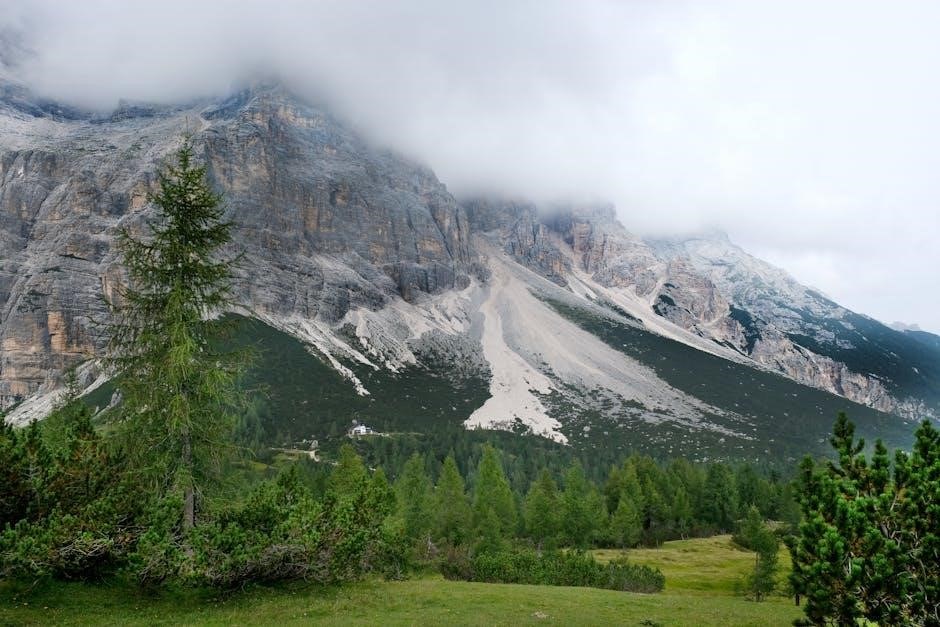
Glacier Retreat and Route Changes
Glacier retreat is dramatically reshaping the alpine landscape, forcing guides to constantly reassess and modify traditional routes. What were once reliable passages over glacial ice are now often exposed rock, scree slopes, or unstable ice formations. This necessitates a deeper understanding of evolving terrain and a greater emphasis on real-time risk assessment. Guides must possess updated topographical knowledge and be adept at identifying new hazards created by the melting ice.
Classic mountaineering routes are becoming increasingly challenging, or even impassable, requiring guides to develop alternative ascents. This shift demands enhanced navigation skills, including the ability to read complex terrain and utilize GPS technology effectively. Furthermore, the changing conditions impact the overall duration and difficulty of climbs, requiring careful consideration when planning expeditions and communicating expectations to clients. The dynamic nature of the glaciers means routes can change significantly within a single season.
Increased Rockfall Risk
Rising temperatures are destabilizing mountain slopes, leading to a significant increase in rockfall events throughout the Alps. Permafrost thaw weakens rock structures, making them more susceptible to fracturing and collapse. Guides are now prioritizing routes that minimize exposure to potential rockfall zones, often requiring detours or complete avoidance of previously popular climbs. This demands meticulous route planning and constant vigilance during ascents.
Guides must be proficient in assessing slope stability, recognizing warning signs like fresh rock debris, and implementing appropriate safety measures, including helmet use and careful timing of passage through hazardous areas. Communication with clients regarding the heightened risk is crucial, ensuring they understand the potential dangers and follow instructions diligently. The unpredictable nature of rockfall necessitates a proactive and cautious approach to mountain travel, emphasizing hazard awareness and mitigation strategies.
Altered Weather Patterns
Climate change is dramatically altering weather patterns in the Alps, presenting new challenges for guides and clients alike. Traditional seasonal predictability is diminishing, with more frequent and intense extreme weather events – including sudden storms, unseasonal warm spells, and unpredictable snowfall. This necessitates constant weather monitoring and a willingness to adjust plans rapidly.
Guides must now possess advanced meteorological skills, interpreting complex forecasts and recognizing microclimatic variations within the mountains. Flexibility is paramount, as itineraries may need to be altered or canceled at short notice due to deteriorating conditions. Clients require thorough briefings on the potential for rapidly changing weather and the importance of being prepared for all eventualities, emphasizing appropriate layering and emergency shelter strategies.
Emerging Trends in Alps Guiding
Alps guiding sees a rise in self-supported tours, “cool-cations” to lesser-known routes, and a growing focus on sustainable tourism practices for preservation.
Self-Guided Tours with Support
Self-guided tours in the Alps are gaining significant traction, offering adventurers independence alongside a safety net. These tours typically involve pre-planned routes, detailed maps, and readily available logistical support, such as baggage transfer between accommodations. Crucially, they often include access to emergency assistance and local contacts for advice.
This trend caters to experienced hikers and mountaineers comfortable navigating independently but desiring peace of mind. Support services can range from simply providing GPS tracks and accommodation bookings to offering a 24/7 helpline and even the option to hire a local guide for specific sections of the trek. The increasing popularity reflects a desire for personalized experiences and flexibility, allowing individuals to explore the Alps at their own pace while mitigating risks. MarketWatch highlights the surging interest in this type of travel.
Cool-cations and Lesser-Known Routes
“Cool-cations,” or cooler climate destinations, are experiencing a surge in popularity, and the Alps are perfectly positioned to benefit. Travelers are increasingly seeking alternatives to overcrowded, traditional hotspots, leading to a growing interest in exploring lesser-known routes within the Alpine region. This shift encourages dispersal of tourism, reducing pressure on popular trails and supporting local economies in smaller villages.

Guides are adapting by curating unique itineraries that venture beyond the well-trodden paths, showcasing hidden valleys, remote peaks, and authentic cultural experiences. These routes often emphasize sustainable tourism practices, minimizing environmental impact and fostering responsible travel. The trend aligns with a desire for more immersive and off-the-beaten-path adventures, offering a refreshing alternative to conventional Alpine holidays, as noted by travel specialists.
Focus on Sustainable Tourism
A growing emphasis on sustainable tourism is reshaping the Alps guiding industry. Recognizing the fragility of the Alpine environment, guides are actively adopting eco-friendly practices to minimize their impact. This includes promoting responsible waste management, supporting local businesses, and educating clients about environmental conservation.
Many guiding companies are now prioritizing smaller group sizes to reduce trail erosion and disturbance to wildlife. They are also advocating for responsible travel behaviors, such as utilizing public transportation and respecting local cultures. The increasing awareness of climate change’s effects – glacier retreat and rockfall risk – further fuels this commitment. Guides are becoming stewards of the mountains, ensuring their preservation for future generations, aligning with a global shift towards conscious travel.
Indoor Skiing Alternatives (e.g., Texas Alps)
The emergence of indoor skiing facilities, like the proposed “Texas Alps” in Grapevine, represents a novel response to climate change impacts and accessibility challenges within traditional Alps guiding. While not a direct substitute for the Alpine experience, these venues offer year-round skiing and snowboarding opportunities, potentially attracting individuals seeking to develop skills before venturing to the mountains.
This trend could indirectly influence the guiding profession, creating a broader base of skilled skiers and snowboarders. However, it’s crucial to acknowledge the significant difference in terrain and conditions. Indoor slopes primarily serve as training grounds, lacking the scale and complexity of the Alps. They represent a supplemental, rather than replacement, option for those aspiring to experience authentic mountain guiding.