PWD Grooming Guide: A Comprehensive Plan
Maintaining a Portuguese Water Dog’s health and bond requires diligent grooming, whether performed at home or by a professional.
Regular 6-8 week full grooms, coupled with consistent ear cleaning and nail trims, are essential for this breed’s well-being and appearance.
Understanding the PWD Coat
The Portuguese Water Dog (PWD) possesses a unique coat, distinctly different from many other breeds, demanding specific grooming approaches. Characterized by either curly or wavy textures, the PWD coat is single-layered, lacking the undercoat common in many dogs – meaning they produce less shedding. However, this also means less insulation, making them sensitive to extreme temperatures.
A tight, curly coat, as seen in many PWDs, requires consistent attention to prevent matting. The texture can vary even within the same dog, with some areas being tighter than others. This coat type benefits from regular brushing and clipping to maintain its health and appearance. Understanding your dog’s specific coat texture is crucial for selecting the right grooming tools and techniques. The coat’s hypoallergenic qualities are often touted, but consistent grooming is still vital to minimize allergens.
Coat Types and Textures
Portuguese Water Dogs exhibit two primary coat types: curly and wavy. The curly coat is dense, tightly curled, and naturally forms cords if left ungroomed. This texture requires frequent brushing and professional grooming to prevent severe matting. The wavy coat, while still requiring maintenance, is looser and has a more flowing appearance. It’s less prone to cording but still needs regular attention.
Texture can also vary within a single dog. Some PWDs may have a tighter curl on their body and looser waves on their ears or tail. Coat density also plays a role; some dogs have thicker, more abundant coats than others. Recognizing these variations is key to tailoring a grooming routine. A rescue PWD, like the one mentioned, may present with coat challenges due to past neglect, requiring extra patience and care.
The Importance of Regular Grooming
Regular grooming isn’t merely cosmetic for a Portuguese Water Dog; it’s fundamental to their health and well-being. Their non-shedding coat, while hypoallergenic for some, is prone to matting if neglected, causing discomfort and skin irritation. Consistent brushing prevents painful tangles and allows for early detection of skin issues.
Grooming also strengthens the bond between owner and dog, particularly crucial for a sensitive or rescue PWD who may be wary of strangers. A positive grooming experience builds trust. Routine ear cleaning prevents infections, especially after swimming, and nail trimming ensures comfortable mobility. As one owner noted, patience is paramount – a good groomer (or owner!) understands a PWD’s unique temperament.
Essential Grooming Tools
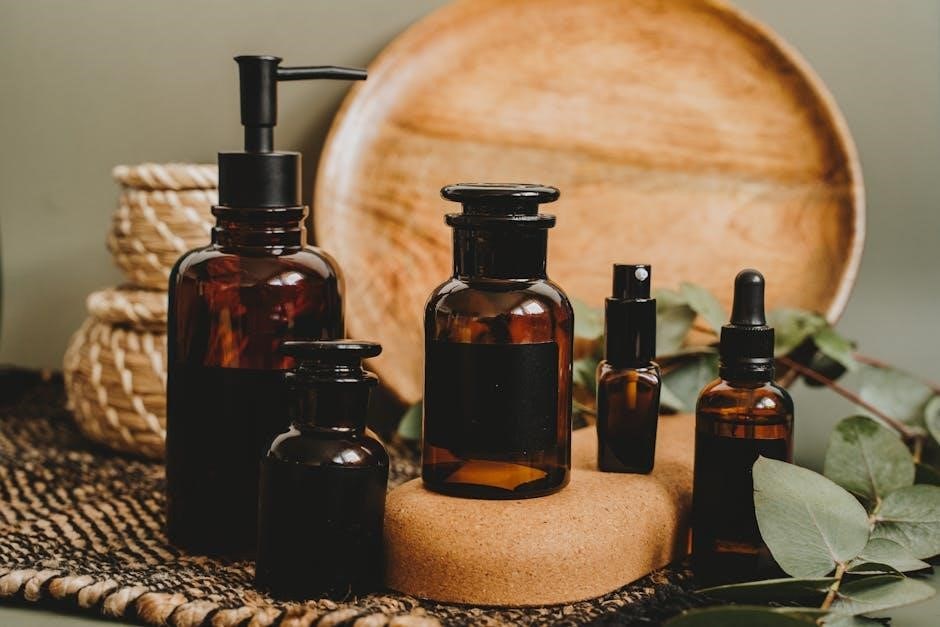
Successful PWD grooming demands specific tools: clippers, blades, brushes, combs, PWD-specific shampoos, ear cleaning solutions, nail clippers, and styptic powder for quick care.
Clippers and Blades
Investing in quality clippers is paramount for home PWD grooming. A robust, professional-grade clipper will handle the dense, curly coat more effectively than consumer models. Consider a two-speed clipper for versatility. Blade selection is equally crucial; a #10 blade is a good starting point for overall body clipping, while longer blades (#7F or #5F) can be used for achieving different lengths.
Cooling sprays are vital to prevent blade overheating and skin irritation during extended grooming sessions. Regularly oiling the blades ensures smooth operation and prolongs their lifespan. Remember that a dull blade can tug at the coat, causing discomfort for your PWD. Maintaining sharp blades is key to a stress-free grooming experience. Don’t hesitate to seek professional sharpening services when needed.
Brushes and Combs
For a PWD’s coat, a combination of brush types is most effective. A slicker brush excels at removing loose hair and tackling minor tangles, but use it gently to avoid skin irritation. A metal comb, with both wide and narrow teeth, is essential for reaching the undercoat and detecting mats. Pin brushes can help fluff the coat during drying.
Regular brushing, even daily, prevents matting, a common issue with curly-coated breeds. Pay close attention to areas prone to tangles, such as behind the ears, under the legs, and around the tail. A good brushing routine stimulates the skin and distributes natural oils, promoting a healthy coat. Invest in quality tools; they’ll make the process easier for both you and your PWD.
Shampoos and Conditioners (PWD Specific)
Choosing the right shampoo and conditioner is crucial for a PWD’s unique coat. Avoid products containing harsh chemicals or sulfates, as these can strip the coat of its natural oils and cause skin irritation. Opt for hypoallergenic, moisturizing formulas specifically designed for curly or double-coated breeds.
Consider a whitening shampoo if you want to maintain the brightness of your PWD’s coat, especially if they have lighter coloring. A good conditioner helps to detangle, hydrate, and restore elasticity to the curls. Some PWD owners find leave-in conditioners beneficial for ongoing moisture. Always rinse thoroughly to prevent residue buildup, which can lead to skin problems.
Ear Cleaning Solutions
PWDs are prone to ear infections due to their floppy ears and love of water, making regular ear cleaning vital. Choose an ear cleaning solution specifically formulated for dogs, avoiding those containing alcohol, as it can be irritating. Look for solutions that help to dry the ear canal and dissolve wax buildup.
Veterinarian-approved ear cleaning solutions are often the best choice. Gently fill the ear canal with the solution, massage the base of the ear, and then allow your dog to shake their head. Wipe away any excess solution and debris with a cotton ball or pad – never insert anything into the ear canal. Routine cleaning, especially after swimming, is key to preventing infections. If you notice redness, swelling, or discharge, consult your vet immediately.
Nail Clippers and Styptic Powder
Maintaining your PWD’s nails is crucial for their comfort and mobility. Choose either guillotine-style or scissor-style nail clippers, ensuring they are sharp to prevent splitting. If your dog has dark nails, trim small increments at a time to avoid hitting the quick – the blood vessel and nerve within the nail.
Always have styptic powder on hand! Accidents happen, and styptic powder quickly stops bleeding if you accidentally cut the quick. Apply a generous amount to the bleeding nail and apply gentle pressure. Regular nail trimming, ideally every 2-3 weeks, prevents overgrowth and potential discomfort. Some owners prefer to have a professional groomer or veterinarian handle nail trims, especially if they are uncomfortable doing it themselves.

Grooming Frequency and Schedule
A consistent schedule is key; Porties need full grooms every 6-8 weeks, with daily/weekly brushing and routine ear cleaning for optimal coat and skin health.
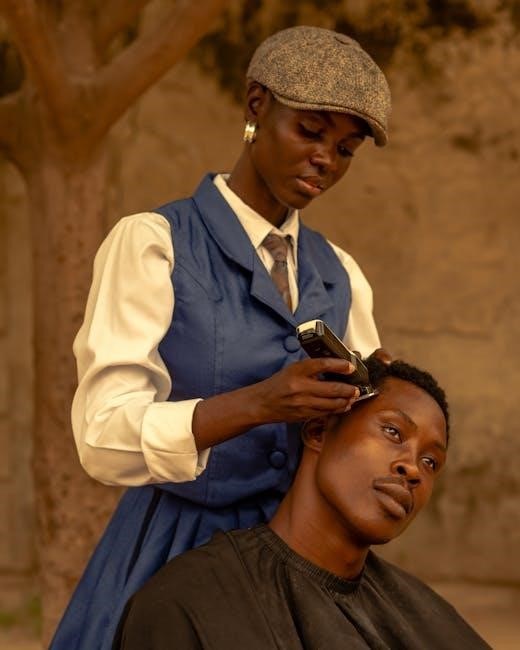
Professional Grooming vs. Home Grooming
The choice between professional grooming and tackling it yourself depends on your comfort level, the dog’s temperament, and your time commitment. Professional groomers possess expertise and specialized equipment, ensuring a precise clip and thorough cleaning, particularly beneficial for initial grooms or complex styles.
However, many PWD owners successfully groom at home, especially those with dogs sensitive to strangers, as seen with rescue dogs. Investing in quality clippers, a Flyin’ Pig dryer, brushes, and ear cleaning supplies (under $600) makes home grooming feasible.
It requires patience and practice, but the bond strengthened through hands-on care is invaluable. Remember, a groomer lacking patience can be detrimental, especially with a PWD. The more you groom, the better you and your dog become at it, and the results improve over time – a bad haircut grows out in two weeks!
6-8 Week Full Grooming Cycle
A comprehensive full grooming for a Portuguese Water Dog should ideally occur every 6 to 8 weeks to maintain coat health and desired clip style. This cycle allows sufficient time for coat growth while preventing matting and discomfort. During this full groom, the entire coat is clipped to the chosen length and style – Retriever or Lion – and meticulously shaped.
This timeframe also encompasses thorough ear cleaning, including plucking excess hair, and a complete nail trim. Consistent adherence to this schedule is crucial, especially after activities like swimming, where ear hygiene is paramount.
While diligent home maintenance extends the freshness of the clip, the 6-8 week cycle ensures the coat remains manageable and the dog remains comfortable, preventing skin issues and promoting overall well-being.
Daily/Weekly Maintenance Brushing
Consistent brushing is vital for a Portuguese Water Dog, even between full grooming cycles. Daily or, at a minimum, several times weekly brushing prevents matting, a common issue with their curly coat. This routine distributes natural oils, promoting a healthy, shiny coat and reducing the risk of skin irritation.
A slicker brush and metal comb are excellent tools for this purpose, effectively removing loose hair and detangling minor knots. Pay particular attention to areas prone to matting, such as behind the ears, under the legs, and around the tail.
Regular brushing also provides an opportunity to check for any skin abnormalities or parasites. It strengthens the bond between owner and dog, making grooming a positive experience.
Ear Cleaning Routine
Portuguese Water Dogs are prone to ear infections due to their floppy ears and love of water. A consistent ear cleaning routine is therefore crucial for their health and comfort. After swimming or bathing, thoroughly dry the ears with a soft cloth.
Weekly cleaning with a veterinarian-approved ear cleaning solution helps remove wax and debris, preventing bacterial or yeast overgrowth. Gently fill the ear canal with the solution, massage the base of the ear, and then allow the dog to shake its head. Wipe away any excess solution and debris with a cotton ball – never insert anything into the ear canal itself.
Professional groomers can also pluck ear hair, further improving airflow and reducing the risk of infection. Regular checks and prompt attention to any signs of redness, swelling, or discharge are essential.
Nail Trimming Schedule
Maintaining proper nail length is vital for a PWD’s comfort and mobility. Overgrown nails can cause pain, alter gait, and even lead to skeletal issues. A regular nail trimming schedule is therefore essential, ideally every 2-3 weeks, though this can vary depending on the dog’s activity level and growth rate.
If you hear clicking on hard surfaces, it’s time for a trim! Use dog-specific nail clippers, being careful to avoid the quick – the pink part containing blood vessels and nerves. If you accidentally cut the quick, styptic powder will quickly stop the bleeding.
Many owners prefer to have a professional groomer or veterinarian handle nail trimming, especially if they are uncomfortable doing it themselves. Consistent trimming prevents the quick from growing longer, making future trims easier.
The Two Main PWD Clips
PWDs traditionally sport either the Retriever or Lion clip, each with a distinct aesthetic and historical purpose. The Lion clip is the breed’s traditional standard.
The Retriever Clip: A Detailed Look
The Retriever clip offers a more practical and streamlined appearance, leaving a substantial amount of coat covering the body. This clip provides warmth and protection, mirroring the look of a working retriever – hence the name. It involves clipping the muzzle, feet, and tail to a shorter length, typically around one inch, while the body coat is left longer, usually between one and two inches.
This style is favored by owners who enjoy a less formal look and appreciate the added insulation during colder months. It’s also a good choice for dogs who are very active and spend a lot of time in the water, as the longer coat offers some protection from the elements. Maintaining this clip requires regular brushing to prevent matting, especially in the longer areas. It’s a popular choice for those who prefer a more natural, less sculpted appearance for their PWD.
The Lion Clip: Traditional Breed Standard
The Lion Clip is the iconic and historically significant grooming style for the Portuguese Water Dog, deeply rooted in the breed’s working past. Originally, this clip was designed to protect the dog’s vital organs – the chest and hindquarters – while allowing for free movement of the limbs. The rear half of the body is clipped short, resembling a lion’s hindquarters, while the front legs, chest, and mane are left with a longer, fuller coat.
This creates a striking visual contrast and showcases the breed’s unique conformation. While visually dramatic, the Lion Clip isn’t necessarily the most practical for active dogs. It requires significant maintenance to prevent matting in the longer mane and leg furnishings. It’s considered the traditional breed standard and is often preferred for show dogs, highlighting the PWD’s elegant and distinctive appearance.
Choosing the Right Clip for Your PWD
Selecting the appropriate clip for your Portuguese Water Dog depends heavily on your lifestyle and your dog’s activity level. The Retriever Clip is generally more practical for active dogs and families, offering a lower-maintenance, uniform length that minimizes matting and allows for greater freedom of movement. It’s ideal for dogs who spend a lot of time swimming or playing outdoors.
Conversely, the Lion Clip, while visually stunning, demands more frequent and meticulous grooming. It’s a good choice for dogs who aren’t heavily involved in strenuous activities and whose owners are committed to regular brushing and maintenance. Consider your dog’s temperament; some PWDs may not enjoy the feeling of a full mane. Ultimately, the best clip is one that keeps your dog comfortable, clean, and looking their best!
Step-by-Step Grooming Guide
Begin with a thorough bath and drying, then carefully clip the body, followed by scissoring for shaping. Don’t forget ear plucking/cleaning and nail trims!
Bathing and Drying Techniques
Bathing a PWD requires a bit of preparation! Start with a thorough brushing to remove any mats or tangles before wetting the coat. Use a high-quality, PWD-specific shampoo and conditioner to maintain coat health and prevent skin irritation. Ensure a lukewarm water temperature for comfort.

When rinsing, be meticulous – residual shampoo can cause skin issues. The drying process is crucial. A high-velocity dryer, like the “Flyin Pig,” is a fantastic investment, significantly reducing drying time and helping to straighten the curly coat.
Direct the airflow with the grain of the coat to avoid creating mats. Continue drying until the coat is completely dry to the skin, as dampness can lead to skin problems. Remember patience is key, especially with a sensitive PWD who may be wary of the dryer’s noise.
Clipping the Body
Before clipping, ensure your PWD is completely dry! Select the appropriate blade length based on the desired clip – typically a #10 or #7F blade is used for the body. Begin clipping with the grain of the coat for a smoother, more even finish. Work in sections, overlapping each pass slightly to avoid leaving lines.
Maintain consistent pressure and speed throughout the clipping process. Pay close attention to areas prone to matting, like behind the ears and under the legs. Regularly check the blade temperature to prevent discomfort. Remember, practice makes perfect – you’ll improve with each grooming session!

A steady hand and patience are vital. Don’t rush; a careful approach yields the best results. Consider watching video tutorials for visual guidance on proper clipping techniques.
Scissoring and Shaping
After clipping, scissoring refines the coat and achieves the desired clip style. Use curved shears to blend transitions between clipped and scissored areas, creating a seamless look. Carefully shape the topline, legs, and feet, paying attention to breed-specific standards.
Thinning shears are invaluable for softening lines and removing bulk without creating harsh edges. Blend the coat around the head and face, ensuring a balanced and aesthetically pleasing appearance. Regularly comb through the coat while scissoring to check for symmetry and evenness.
Take your time and step back frequently to assess your work from different angles. A sharp pair of shears is essential for clean, precise cuts.
Ear Plucking and Cleaning
PWDs are prone to ear issues due to their floppy ears and love of water, making ear care crucial. Plucking removes excess hair within the ear canal, improving airflow and reducing moisture buildup – a breeding ground for bacteria. Use a specialized ear plucking powder to soothe the skin and grip the hairs.
After plucking, gently clean the ear canal with a PWD-specific ear cleaning solution. Avoid cotton swabs, as they can push debris further in. Instead, use a cotton ball or gauze wrapped around your finger. Massage the base of the ear to loosen any remaining wax or dirt.
Regular professional ear cleaning, as some owners utilize, can be beneficial, especially for dogs resistant to home care.
Nail Trimming Best Practices
Regular nail trimming is vital for a PWD’s comfort and mobility. Overgrown nails can cause pain, alter gait, and even lead to skeletal issues. Aim to trim nails every 2-3 weeks, or as needed, to maintain a comfortable length. Utilize sharp, high-quality nail clippers designed for dogs.
When trimming, be cautious not to cut into the quick – the pink part of the nail containing blood vessels and nerves. If you accidentally cut the quick, apply styptic powder immediately to stop the bleeding. Start with small trims, gradually working towards the desired length.
Some owners prefer to have a groomer or veterinarian handle nail trimming, especially if they are uncomfortable performing it themselves. Consistent trimming prevents overgrowth and makes the process easier for both you and your PWD.

Addressing Common Grooming Challenges
PWDs can be sensitive, prone to matting, and experience skin allergies; patience is key, preventative brushing helps, and consider dietary needs.
Dealing with a Sensitive PWD
Portuguese Water Dogs are known for their strong bonds with family, but this often translates to distrust of strangers, making grooming a challenge. A sensitive PWD may exhibit stress during handling, especially by unfamiliar groomers. Patience is absolutely crucial; rushing the process will only exacerbate anxiety.
Start slowly, introducing tools and sensations gradually. Positive reinforcement, like treats and verbal praise, can create positive associations. A familiar environment, like your home, can be less stressful than a busy salon. If your dog is particularly anxious, consider short grooming sessions broken up throughout the day.
Remember, a calm and reassuring demeanor from you will significantly impact your PWD’s experience. Building trust is paramount, and recognizing your dog’s limits is essential for a positive grooming outcome. Don’t force anything; a gentle approach yields better results.
Matting and Tangles Prevention
Preventing mats and tangles is paramount with a PWD’s curly coat. Consistent, thorough brushing is the cornerstone of preventative care. Daily or, at minimum, several times weekly brushing removes loose hair and prevents knots from forming, especially in areas prone to friction like the armpits and behind the ears.
A slicker brush and metal comb are essential tools. Ensure you reach the skin while brushing, working through the coat in layers. Regular bathing, using a PWD-specific shampoo and conditioner, also helps maintain coat health and manageability. After swimming, a thorough rinse and drying are crucial to prevent salt or chlorine from causing tangles.
Address any small tangles immediately before they escalate into painful mats. Early intervention saves discomfort for your dog and avoids the need for extensive dematting, which can be stressful and potentially damaging to the coat.
Skin Allergies and Grooming Considerations
PWDs can be prone to skin allergies, making grooming a critical component of managing these conditions. When allergies flare up, the skin becomes irritated, leading to itching, redness, and potential secondary infections. Selecting hypoallergenic, fragrance-free shampoos and conditioners specifically formulated for sensitive skin is vital.
Avoid products containing harsh chemicals or artificial dyes. Thoroughly rinse all shampoo residue to prevent further irritation. Frequent bathing, as recommended by your veterinarian, can help remove allergens from the coat and soothe inflamed skin. Consider incorporating a medicated shampoo or conditioner if prescribed.
Gentle, thorough drying is also important; avoid excessive heat, which can exacerbate skin issues. Regular grooming appointments allow for early detection of skin problems, enabling prompt veterinary intervention and preventing complications.
PWD Grooming for Rescue Dogs
Grooming a PWD rescue requires patience and understanding, as their history may be unknown, potentially leading to sensitivity or anxiety. Many rescues, like those from the PWDCA, may have experienced inconsistent or negative grooming experiences. Start slowly, building trust through gentle handling and positive reinforcement.
Introduce grooming tools gradually, pairing them with treats and praise. A calm, quiet environment is crucial. Be mindful of matting and tangles, which are common in neglected coats; professional help may be needed for severe cases. Prioritize comfort over achieving a perfect clip initially.

Recognize that a rescue may be wary of strangers, so home grooming is often preferable. Consistent, gentle grooming can become a bonding experience, helping the dog feel safe and secure. Remember, patience is key to unlocking a happy, well-groomed companion.