posterior tibial tendon dysfunction exercises pdf

Understanding Posterior Tibial Tendon Dysfunction (PTTD)

PTTD arises from posterior tibial tendon damage, causing foot arch collapse; exercises, often found in PDF guides, aim to restore function and alleviate discomfort.

What is the Posterior Tibial Tendon?

The posterior tibial tendon is a crucial structure, originating from the calf muscle and extending along the inside of the ankle and foot. Its primary function is to support the arch of the foot, enabling walking, running, and balancing. PDF exercise guides frequently emphasize this tendon’s importance. Damage or inflammation, leading to Posterior Tibial Tendon Dysfunction (PTTD), compromises this support. Understanding its anatomy—connecting muscle to bone—is key to comprehending PTTD. Strengthening exercises, detailed in downloadable resources, target this specific tendon. Ignoring early symptoms can lead to progressive arch collapse, necessitating more intensive interventions outlined in specialized PDFs.

The Role of the Tendon in Foot Support

The posterior tibial tendon acts as a dynamic stabilizer of the foot’s arch, preventing it from collapsing during weight-bearing activities. It resists excessive pronation – the inward rolling of the foot. PDF exercise programs focus on restoring this crucial support. When functioning correctly, it distributes weight evenly across the foot. Dysfunction leads to a flattened arch, causing pain and instability. Targeted exercises, often detailed in downloadable PDF guides, aim to strengthen the tendon and surrounding muscles. Maintaining arch support is vital for proper biomechanics, and PDF resources offer structured rehabilitation plans.

Causes of PTTD

PTTD develops from gradual tendon degeneration, often linked to overuse, particularly in high-impact activities. Risk factors include age, obesity, and pre-existing conditions like diabetes; Acute injuries, such as falls or direct trauma, can also contribute. PDF exercise guides often emphasize addressing these underlying causes. Repetitive strain weakens the tendon over time. Understanding the etiology is crucial for effective rehabilitation, detailed in many PDF resources. Proper footwear and activity modification, alongside targeted exercises found in PDFs, can prevent progression and manage symptoms.

Overuse and Repetitive Strain

PTTD frequently stems from repetitive stress on the posterior tibial tendon, common in activities like running, hiking, or sports. This gradual overload leads to micro-tears and inflammation. PDF exercise programs often prioritize eccentric strengthening to address this. Ignoring early symptoms exacerbates the condition. PDF guides detail progressive loading strategies. Factors like improper footwear and training intensity contribute to overuse. Early intervention, guided by PDF resources, is vital. Addressing biomechanical imbalances, as outlined in PDFs, can prevent recurrence and promote long-term tendon health.

Acute Injuries

PTTD can result from sudden trauma, such as falls or direct blows to the foot and ankle. These injuries may cause immediate tendon rupture or significant damage. PDF rehabilitation protocols initially focus on immobilization and pain management. Early-stage PDF exercises emphasize gentle range-of-motion and non-weight-bearing activities. As healing progresses, PDF guides introduce strengthening exercises. Surgical intervention may be necessary for severe ruptures, followed by a structured PDF-based post-operative rehabilitation program. Proper diagnosis and adherence to PDF exercise plans are crucial for optimal recovery.

Symptoms of PTTD

PTTD presents with insidious onset of medial foot pain, often worsening with activity. Patients may notice gradual flattening of the arch, leading to an altered gait. Swelling around the inner ankle is common. PDF resources detail symptom progression; early stages involve mild pain, while advanced stages exhibit significant deformity. PDF guides emphasize recognizing these changes. Ignoring symptoms can lead to chronic pain and functional limitations. Early intervention, guided by PDF exercise programs, is vital. Accurate self-assessment, using information from PDFs, aids timely medical consultation.

Early Stage Symptoms

Early PTTD manifests as mild pain along the inner ankle and arch, often fluctuating with activity. Individuals may experience subtle arch flattening, noticeable when standing. Swelling isn’t typically prominent initially. PDF exercise guides focus on pain management at this stage. Early intervention, detailed in PDFs, aims to prevent progression. Patients might report stiffness in the foot or ankle. Ignoring these initial signs can lead to worsening symptoms. PDF resources emphasize gentle exercises and avoiding aggravating activities. Prompt action, guided by PDF instructions, is crucial.

Progressive Stage Symptoms

As PTTD advances, arch collapse becomes more pronounced, leading to a visible flatfoot deformity. Pain intensifies and becomes more consistent, extending along the foot’s outer edge. Ankle swelling is common, and walking becomes increasingly difficult. PDF exercise programs shift towards strengthening. Ignoring these signs risks rigid foot deformity. PDF guides detail advanced exercises, but caution is vital. Individuals may develop pain in the knee, hip, or back due to altered biomechanics. PDF resources emphasize proper form to avoid further injury. Seeking professional guidance, alongside PDF exercises, is recommended.

Diagnosis of PTTD

Accurate PTTD diagnosis is crucial before starting any exercise program, even those found in PDF guides. A thorough physical examination assesses foot and ankle range of motion, arch height, and pain location; Imaging techniques, like X-rays, reveal arch collapse severity. MRI or ultrasound visualize tendon damage. Many PDF resources emphasize self-assessment, but professional evaluation is paramount. Correct diagnosis differentiates PTTD from other conditions. PDF exercise plans should align with the diagnosis’s stage. Early, accurate diagnosis, coupled with appropriate PDF-guided exercises, improves outcomes.

Physical Examination

A PTTD physical examination, vital before utilizing PDF exercise guides, involves assessing the foot’s arch, observing gait, and palpating the posterior tibial tendon. The examiner checks for tenderness along the tendon’s path. Single-leg heel raise tests reveal weakness. Range of motion assessments identify limitations. Neurological evaluation rules out other causes. PDF resources often suggest self-checks, but a professional’s evaluation is essential for accurate diagnosis. This examination guides appropriate exercise selection from PDF plans, ensuring safety and effectiveness. Proper assessment informs personalized PTTD management.

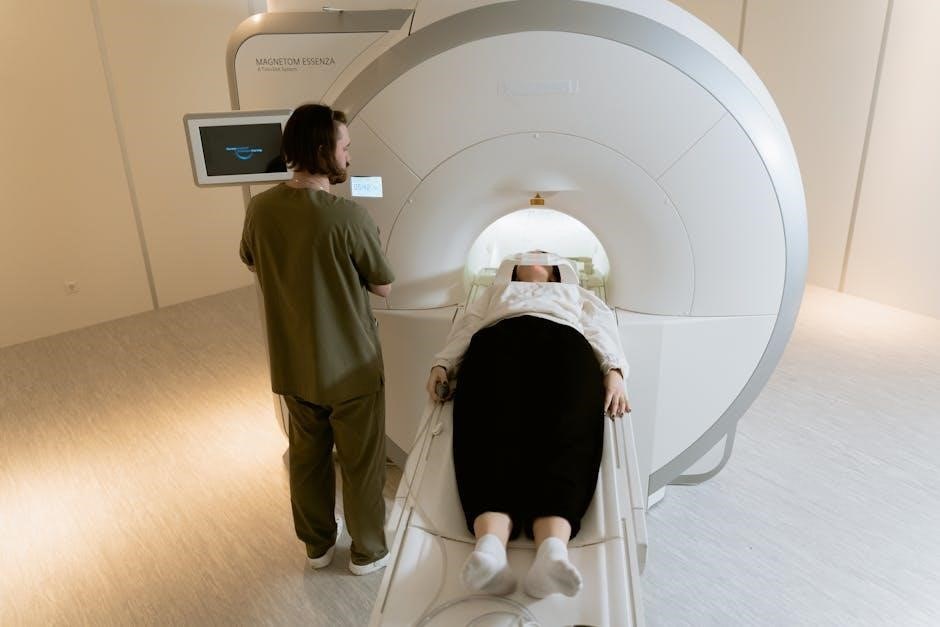
Imaging Techniques (X-rays, MRI, Ultrasound)

While PTTD exercise PDFs offer guidance, imaging confirms diagnosis and severity. X-rays reveal bone changes from chronic PTTD. MRI provides detailed tendon and surrounding tissue views, identifying tears. Ultrasound, a cost-effective option, assesses tendon structure and inflammation. These techniques differentiate PTTD from other conditions. Imaging guides exercise prescription; severe tears may require immobilization before exercise. PDF programs should complement, not replace, professional imaging interpretation. Accurate diagnosis, aided by imaging, ensures safe and effective exercise implementation from any PTTD resource.

PTTD Exercises: A Comprehensive Guide

PTTD exercise PDFs detail progressive routines—from pain reduction to strengthening and functional training—to support the foot’s arch and restore mobility.

Non-Surgical Treatment Options

Non-surgical approaches are often the first line of defense for PTTD, and readily available PDF exercise guides are central to these strategies. These guides typically emphasize a phased rehabilitation program, starting with reducing pain and inflammation through rest, ice, and bracing.

Crucially, PDF resources detail specific exercises targeting calf muscle flexibility, intrinsic foot muscle strengthening, and proprioceptive retraining. Consistent adherence to these exercises, as outlined in the PDFs, aims to support the arch, improve foot alignment, and prevent further tendon degeneration.

Orthotics, alongside exercise, are frequently recommended, and PDFs may offer guidance on selecting appropriate arch supports.

Phase 1: Early Stage Exercises (Pain Management & Inflammation Reduction)

PDF exercise guides for PTTD’s initial phase prioritize pain and swelling reduction. Calf stretches, detailed in these PDFs, improve ankle flexibility, lessening tendon strain. Towel curls, also illustrated, gently strengthen intrinsic foot muscles without overloading the posterior tibial tendon.

These early exercises are low-impact and focus on restoring range of motion. PDFs emphasize performing these exercises slowly and within a pain-free range. Ice application, often detailed alongside exercises in PDFs, complements the program.

The goal is to create a foundation for more robust strengthening later.

Calf Stretches

PDF guides for PTTD consistently feature calf stretches as a foundational exercise. Two primary variations are detailed: gastrocnemius and soleus stretches. The gastrocnemius stretch, performed with a straight knee, targets the upper calf muscle. PDFs illustrate holding the stretch for 30 seconds, repeating several times.

The soleus stretch, with a bent knee, focuses on the lower calf. These PDFs emphasize maintaining proper form – a straight back and gentle tension – to avoid exacerbating symptoms. Consistent stretching improves ankle dorsiflexion, reducing strain on the posterior tibial tendon.

Towel Curls

PTTD exercise PDFs frequently include towel curls as an early-stage strengthening activity. This exercise targets the intrinsic foot muscles crucial for arch support. A towel is placed flat on the floor, and the patient uses their toes to curl it towards themselves.

PDF guides recommend starting with short repetitions, gradually increasing the number as strength improves. Maintaining a controlled movement is emphasized to avoid compensation. This simple exercise enhances foot muscle endurance and proprioception, aiding in arch stabilization and reducing reliance on the damaged tendon.

Phase 2: Intermediate Stage Exercises (Strengthening)

PTTD exercise PDFs transition to strengthening in Phase 2, building upon initial pain management. These exercises focus on restoring muscle power around the foot and ankle. Common routines include heel raises – both concentric (lifting) and eccentric (lowering) – to target calf muscles supporting the arch.

Toe raises strengthen anterior tibialis, while resistance band inversion exercises specifically address posterior tibial function. PDF guides emphasize proper form and controlled movements, gradually increasing resistance as strength improves, preparing the foot for functional activities.

Heel Raises (Concentric & Eccentric)

PTTD exercise PDFs frequently detail heel raises, a cornerstone of strengthening. Concentric heel raises involve lifting the heel off the ground, engaging calf muscles. Eccentric raises, equally crucial, focus on slowly lowering the heel, building strength during muscle lengthening.

PDF guides often suggest performing these against a wall for balance, starting with both legs and progressing to single-leg variations. Proper form—controlled movement, full range of motion—is vital. Increasing repetitions and sets gradually enhances effectiveness, rebuilding arch support.

Toe Raises

PTTD exercise PDFs commonly include toe raises to strengthen anterior tibialis, balancing calf work. These involve lifting the toes off the ground while keeping heels planted, engaging shin muscles. This counteracts the posterior tibial tendon’s weakness, improving foot stability.

PDF instructions emphasize slow, controlled movements, avoiding jerky motions. Begin seated, then progress to standing, potentially using a wall for support. Gradual increases in repetitions and sets build endurance. Consistent practice helps restore proper foot mechanics and reduces strain.

Inversion Exercises with Resistance Band

PTTD exercise PDFs frequently detail inversion exercises using resistance bands, targeting the posterior tibialis directly. Secure a band around the foot and anchor it to a stable object. Slowly turn the sole of the foot inward, resisting the band’s pull.

PDF guides stress maintaining controlled movement and avoiding pain. Start with light resistance, gradually increasing it as strength improves. These exercises rebuild the tendon’s capacity to support the arch, crucial for restoring foot function and preventing further collapse. Proper form is paramount.

Phase 3: Advanced Stage Exercises (Functional Training & Proprioception)

PTTD exercise PDFs outline Phase 3 as focusing on real-world movements and balance. PDF guides often include single-leg balance drills, progressing from stable to unstable surfaces. Walking heel-to-toe challenges arch support during gait.

Agility drills, like cone weaving, improve foot and ankle coordination. These exercises, detailed in PDF resources, rebuild confidence and function. Prioritize proper form and listen to your body, gradually increasing intensity. This phase aims to return to activities safely and effectively.

Single Leg Balance

PTTD exercise PDFs frequently feature single-leg balance as a cornerstone of Phase 3. Begin by balancing on the affected leg for 30 seconds, gradually increasing duration. Start with eyes open, then progress to eyes closed for a greater challenge.

Use a stable surface nearby for support if needed. PDF guides suggest variations like tandem stance (heel-to-toe) and incorporating gentle head turns. This exercise enhances proprioception – your body’s awareness in space – crucial for restoring stability and preventing re-injury.

Walking Heel-to-Toe

PTTD exercise PDFs often include heel-to-toe walking as a functional progression. Walk in a straight line, placing the heel of one foot directly in front of the toes of the other. Maintain a slow, controlled pace, focusing on smooth movement and balance.

Start with a short distance (10-15 feet) and gradually increase as tolerated. This exercise mimics the natural gait cycle, strengthening the posterior tibial tendon and improving coordination. PDF guides may suggest performing this exercise on varied surfaces.

Agility Drills

PTTD exercise PDFs frequently incorporate agility drills for advanced rehabilitation. These drills enhance proprioception and dynamic stability, crucial for restoring functional movement. Examples include lateral shuffles, cone drills, and figure-eight runs, performed at a controlled pace.

Focus on maintaining proper foot and ankle alignment throughout each drill. PDF resources emphasize starting slowly and gradually increasing speed and complexity. Prioritize quality of movement over quantity, ensuring minimal pain and avoiding overexertion.

Important Considerations for Exercise Programs

PTTD exercise PDFs stress proper form, gradual progression, and listening to your body; avoid pushing through significant pain during rehabilitation.

Proper Form and Technique

When utilizing PTTD exercise PDFs, maintaining correct form is paramount to prevent further injury and maximize effectiveness. Focus on controlled movements, avoiding quick or jerky motions. Ensure proper alignment of your foot and ankle during each exercise, as detailed in the guide.

Engage core muscles for stability and avoid compensating with other body parts. Incorrect technique can exacerbate the condition, hindering progress. Prioritize quality over quantity; fewer repetitions with perfect form are more beneficial than numerous repetitions performed incorrectly. Consult the PDF’s illustrations and descriptions carefully.

Gradual Progression

PTTD exercise PDFs typically outline a phased approach to rehabilitation, emphasizing gradual progression. Avoid the temptation to advance too quickly, as this can overload the injured tendon. Begin with the initial exercises, focusing on pain management and inflammation reduction, as instructed.

As strength and stability improve, slowly increase the intensity and complexity of the exercises. Monitor your body’s response and adjust the progression accordingly. The PDF should provide clear guidelines for when to advance to the next phase, ensuring a safe and effective recovery.

Listening to Your Body

PTTD exercise PDFs stress the importance of attentive self-monitoring; Pain is a crucial signal; never push through sharp or increasing discomfort during exercises. Mild soreness is expected, but it should subside quickly. If pain persists or worsens, immediately stop the exercise and consult your physical therapist.

Respect your body’s limitations and adjust the program as needed. Some days you may be able to do more, while others require a reduced workload. Prioritize proper form over quantity, and remember that consistent, gentle progress is key to successful rehabilitation.

Resources for PTTD Exercise PDFs

PTTD exercise PDFs are available from reputable sources and physical therapists, offering structured rehabilitation plans to support foot and ankle recovery.

Reliable Online Sources

Numerous websites provide PTTD exercise PDFs, but verifying credibility is crucial. The American Academy of Orthopaedic Surgeons (AAOS) offers patient-focused resources, including exercise guides, detailing progressive rehabilitation protocols. Similarly, the Mayo Clinic’s website presents comprehensive information on PTTD and links to potential exercise programs.

WebMD also features articles and potential exercise illustrations. However, always prioritize guidance from a qualified healthcare professional. Look for resources authored by physical therapists or orthopedic specialists to ensure accuracy and safety. Downloading PDFs from university hospital websites can also be beneficial, as they often reflect evidence-based practices.

Consulting a Physical Therapist

While PDF exercise guides offer valuable information, a physical therapist (PT) provides personalized care for PTTD. A PT conducts a thorough evaluation to determine the stage of your condition and tailor an exercise program specifically for your needs. They ensure proper form, preventing further injury, and monitor your progress, adjusting the program accordingly.

Self-treating solely with online resources can be risky. A PT can address biomechanical issues contributing to PTTD and offer manual therapy alongside exercises. They’ll guide you through each phase – pain management, strengthening, and functional training – maximizing recovery and long-term foot health.

free nursing notes pdf

Free nursing notes in PDF format are invaluable resources for students and professionals․ They offer accessible, condensed information, aiding comprehension and efficient study habits․

These readily available materials supplement traditional learning, providing a convenient way to review key concepts and improve clinical performance;

What are Nursing Notes?

Nursing notes are comprehensive records documenting a patient’s health status, interventions, and progress․ Traditionally handwritten, they now frequently exist as digital documents, including widely accessible PDFs․ These notes detail observations, assessments, diagnoses, implemented care plans, and patient responses to treatment․

Effective nursing notes are crucial for continuity of care, legal documentation, and communication among healthcare team members․ They provide a chronological account of a patient’s journey, enabling informed decision-making․ Free nursing notes PDFs often serve as study aids, offering examples of proper documentation techniques and illustrating key concepts․ They can cover a broad spectrum of topics, from fundamental nursing principles to specialized areas like medical-surgical or pediatric care, aiding both students and practicing nurses․

Why Use PDF Format for Nursing Notes?

PDFs offer significant advantages for distributing and utilizing nursing notes․ Their universal compatibility ensures consistent formatting across various devices and operating systems – crucial for students and professionals alike․ This format preserves the original layout, preventing unwanted alterations during sharing or printing․

Free nursing notes PDFs are easily downloadable and portable, allowing offline access for study or quick reference during clinical rotations․ PDFs also support features like searchability, enabling efficient retrieval of specific information; Furthermore, they are relatively secure, protecting the integrity of the content․ The static nature of PDFs ensures the notes remain unchanged, providing a reliable resource for learning and practice, unlike editable documents prone to accidental modification․

Finding Reliable Free Nursing Notes PDFs

Locating trustworthy free nursing notes requires careful searching․ Reputable websites, university resources, and dedicated study groups offer valuable, accessible materials for learners․

Reputable Websites Offering Free Resources

Numerous online platforms provide free nursing notes in PDF format, though discerning quality is crucial․ Websites dedicated to nursing education often host collections of student-created or faculty-approved notes covering various specialties․ These resources can be incredibly helpful for reinforcing classroom learning and preparing for exams․

However, always cross-reference information with trusted textbooks and clinical guidelines․ Some sites specialize in NCLEX preparation and offer focused notes on key concepts․ Be cautious of sites with unclear authorship or outdated content․ Prioritize platforms with a strong reputation within the nursing community and regularly updated materials to ensure accuracy and relevance․ Remember to always verify the information!

University and College Open Courseware

Many universities and colleges are embracing open courseware initiatives, making lecture notes, syllabi, and even entire course materials freely available online․ This presents a valuable source of free nursing notes in PDF format, often created by experienced nursing faculty․ These resources typically reflect rigorous academic standards and current best practices․

Searching for “nursing open courseware” or “[University Name] nursing course materials” can yield impressive results․ While not always specifically formatted as concise “notes,” these materials offer in-depth explanations of core concepts․ Be aware that the level of detail may vary, and some courses may assume prior knowledge; Always check the source and date of the materials for relevance;

Nursing School Study Groups and Forums

Online nursing school study groups and forums are vibrant communities where students frequently share resources, including meticulously crafted nursing notes in PDF format․ Platforms like Reddit’s r/NursingStudent, AllNurses, and dedicated Facebook groups often host threads specifically for note sharing․ These collaborative efforts can provide diverse perspectives and fill gaps in individual understanding․

However, exercise caution when utilizing notes from these sources․ Always verify the accuracy of the information against your textbook and course materials․ While helpful, student-generated notes may contain errors or omissions․ Treat them as supplementary tools, not replacements for official learning resources․ Respect copyright and only share notes with permission․

Types of Nursing Notes Available as PDFs

Numerous PDF nursing notes cover diverse specialties: fundamentals, medical-surgical, pediatrics, maternity, and pharmacology․ These resources cater to varied learning needs and clinical rotations․

Fundamentals of Nursing Notes

Fundamentals of Nursing notes, frequently available as free PDFs, establish the core principles essential for all nursing practice․ These resources typically detail basic nursing skills – vital signs assessment, medication administration techniques, infection control protocols, and patient safety measures․

Students can find comprehensive guides covering hygiene, nutrition, mobility assistance, and effective communication strategies․ Many PDFs also include detailed explanations of the nursing process: assessment, diagnosis, planning, implementation, and evaluation․ These notes often emphasize the importance of critical thinking and clinical judgment․

Furthermore, they frequently address legal and ethical considerations foundational to responsible nursing care, providing a solid base for advanced studies and clinical experiences․

Medical-Surgical Nursing Notes

Medical-Surgical Nursing notes, often found as free PDF downloads, cover a broad spectrum of adult health conditions and related nursing interventions․ These resources typically focus on the management of common diseases like diabetes, heart failure, pneumonia, and post-operative care․

Expect detailed information on pathophysiology, clinical manifestations, diagnostic tests, and pharmacological treatments․ Many PDFs include nursing care plans outlining specific interventions for various patient scenarios, emphasizing assessment findings and expected outcomes․

Students benefit from concise summaries of complex topics, including fluid and electrolyte balance, acid-base disturbances, and wound management․ These notes frequently incorporate evidence-based practice guidelines for optimal patient care․

Pediatric Nursing Notes

Pediatric Nursing notes available as free PDFs are crucial for understanding the unique healthcare needs of infants, children, and adolescents․ These resources emphasize growth and development milestones, age-specific physiological differences, and common childhood illnesses like asthma, infections, and congenital conditions․

Expect detailed information on pediatric medication dosages (often weight-based), immunization schedules, and family-centered care approaches․ Many PDFs include guidance on communicating effectively with children of different ages and their parents, addressing their anxieties and concerns․

Students will find valuable content on recognizing signs of child abuse or neglect, and understanding the ethical considerations specific to pediatric care;

Maternity Nursing Notes

Free maternity nursing notes in PDF format provide essential information covering the entire continuum of care – from preconception through postpartum and neonatal periods․ These resources detail the physiological changes during pregnancy, stages of labor and delivery, and potential complications like preeclampsia or gestational diabetes․

Expect comprehensive coverage of nursing interventions for antepartum, intrapartum, and postpartum patients, including pain management techniques, fetal monitoring, and newborn assessment․ Many PDFs emphasize the importance of emotional support for expectant and new mothers․

Key topics include breastfeeding education, newborn care instructions, and recognizing signs of postpartum depression․

Pharmacology Nursing Notes

Free pharmacology nursing notes in PDF format are crucial for mastering medication administration and understanding drug effects․ These resources typically categorize drugs by pharmacological class, detailing their mechanisms of action, indications, contraindications, and common side effects․

Expect detailed information on routes of administration, dosage calculations, and nursing considerations for safe and effective medication delivery․ Many PDFs include drug interaction charts and mnemonics to aid memorization․

Important topics covered include pharmacokinetics, pharmacodynamics, and the nursing process as it applies to medication management, ensuring patient safety and optimal therapeutic outcomes․

Content Typically Found in Free Nursing Notes PDFs

Free nursing note PDFs commonly include disease processes, nursing diagnoses, interventions, and medication guides, offering a comprehensive overview for effective patient care․

Disease Processes and Pathophysiology

Free nursing notes PDFs frequently dedicate significant sections to detailing various disease processes and their underlying pathophysiology․ These resources break down complex medical conditions into understandable components, explaining the disruption of normal physiological functions․

Expect to find information on the etiology, signs, and symptoms of illnesses, alongside detailed explanations of how the disease impacts different body systems․ Diagrams and flowcharts are often included to visually represent the progression of the disease․

Understanding pathophysiology is crucial for nurses to anticipate potential complications, implement appropriate interventions, and provide effective patient care․ These notes serve as a valuable tool for solidifying this foundational knowledge, bridging the gap between theoretical concepts and real-world clinical practice․

Nursing Diagnoses and Interventions

Free nursing notes PDFs consistently feature comprehensive sections dedicated to nursing diagnoses and corresponding interventions․ These notes translate patient problems into standardized nursing diagnoses, utilizing frameworks like NANDA-I․

For each diagnosis, you’ll typically find detailed lists of defining characteristics, related factors, and expected outcomes․ Crucially, these resources outline specific nursing interventions – both independent and collaborative – designed to address the identified issues․

These interventions often include rationales explaining why a particular action is taken, promoting critical thinking․ Students benefit from seeing examples of how to individualize care plans based on patient needs, enhancing their clinical decision-making skills and overall patient outcomes․

Medication Administration Guides

Free nursing notes PDFs frequently incorporate detailed medication administration guides, essential for safe and effective patient care․ These guides typically cover a wide range of commonly prescribed medications, categorized by drug class or therapeutic effect․

Information provided usually includes the drug’s mechanism of action, indications, contraindications, common side effects, and crucial nursing considerations․ Dosage calculations, routes of administration, and potential drug interactions are also often detailed․

Many notes emphasize the “rights” of medication administration, reinforcing patient safety protocols․ Students and practicing nurses can quickly reference these guides to ensure accurate and responsible medication management, minimizing potential errors and maximizing therapeutic benefits․

Patient Assessment Checklists

Free nursing notes PDFs often contain comprehensive patient assessment checklists, vital tools for systematic data collection․ These checklists guide nurses through a head-to-toe assessment, ensuring all relevant body systems are evaluated thoroughly․

They typically include sections for vital signs, neurological status, cardiovascular function, respiratory assessment, gastrointestinal evaluation, and skin integrity․ Checklists often prompt nurses to document specific findings, both normal and abnormal․

Utilizing these checklists promotes consistency in patient care and reduces the risk of overlooking critical information․ They are particularly helpful for students learning assessment techniques and for experienced nurses needing a quick reference during busy shifts, ultimately improving patient outcomes․

Utilizing Free Nursing Notes PDFs Effectively

Free nursing notes PDFs best serve as study supplements, aiding exam preparation and reinforcing classroom learning․ They enhance clinical understanding and practical application․

Supplementing Textbook Learning

Free nursing notes PDFs shouldn’t replace textbooks, but powerfully supplement them․ Textbooks provide comprehensive foundational knowledge, while PDFs offer concise summaries and focused insights․ Think of PDFs as efficient review tools, distilling complex information into manageable segments․

They’re particularly useful for identifying key concepts and reinforcing understanding after reading a chapter․ Students can use PDFs to create personalized study guides, highlighting crucial details and tailoring the content to their learning style․ Furthermore, diverse PDF sources expose learners to varied explanations of the same material, fostering a deeper grasp of the subject matter․ This multi-faceted approach strengthens retention and improves academic performance, ultimately enhancing the overall learning experience․

Exam Preparation Strategies

Free nursing notes PDFs are excellent tools for focused exam preparation․ Utilize them to create quick-review flashcards, concentrating on key terms, disease processes, and nursing interventions․ Categorize notes by body system or clinical area to streamline study sessions and improve recall․

Practice answering NCLEX-style questions while referencing the PDFs to solidify understanding and identify knowledge gaps․ Don’t simply memorize; actively apply the information to clinical scenarios․ Comparing notes from multiple sources can reveal different perspectives and deepen comprehension․ Remember, PDFs are most effective when used actively – not passively read – as part of a comprehensive exam strategy․

Clinical Rotation Support

Free nursing notes PDFs prove incredibly valuable during clinical rotations, serving as readily accessible references at the point of care․ They offer quick refreshers on disease pathologies, medication administration, and essential nursing skills before encountering patients․ Having concise summaries helps bridge the gap between theory and practice․

Use PDFs to prepare for specific patient assignments, reviewing relevant information beforehand․ They can aid in formulating appropriate nursing diagnoses and interventions․ Remember to always verify information with your clinical instructor and facility protocols․ These notes aren’t replacements for critical thinking, but supportive tools to enhance learning and confidence during real-world patient care experiences․

Legal and Ethical Considerations

Using free nursing notes PDFs requires respecting copyright and verifying accuracy․ Ensure responsible usage and always cross-reference information with trusted sources․

Copyright and Usage Rights

Navigating copyright when utilizing free nursing notes PDFs is crucial․ Many resources are shared with varying usage permissions․ Always check for licensing information – Creative Commons, for example – outlining permitted uses like personal study versus distribution․

Downloading and using these PDFs for individual learning is generally acceptable, but redistributing them, especially for profit, often violates copyright laws․ Respecting intellectual property rights is paramount․

Some notes may be explicitly designated as “open educational resources” (OER), granting broader usage rights․ However, even with OER materials, attribution to the original creator is typically required․ Understanding these nuances protects both users and content creators, fostering a responsible learning environment․

Accuracy and Verification of Information

When utilizing free nursing notes PDFs, critical evaluation of content is essential․ Information sourced online isn’t always peer-reviewed or up-to-date, potentially containing inaccuracies or outdated practices․ Always cross-reference information with trusted sources like textbooks, reputable websites, and clinical guidelines․

Verify details regarding medication dosages, treatment protocols, and disease pathophysiology․ Nursing practice evolves rapidly; relying solely on potentially outdated notes can compromise patient safety․

Consider the source’s credibility – is it a recognized institution or individual? Use these PDFs as a supplementary tool, not a replacement for comprehensive, verified nursing education․ Prioritize patient well-being through diligent fact-checking․

The State of the Worlds Nursing 2025 Report

The WHO’s 2025 report highlights a global nursing workforce of 29․8 million (2023), revealing disparities and emphasizing the critical role nurses play in healthcare․

Global Nursing Workforce Statistics (2018-2023)

Recent data reveals significant shifts in the global nursing landscape between 2018 and 2023․ The total nursing workforce experienced growth, increasing from 27․9 million in 2018 to an estimated 29․8 million in 2023․ This represents a notable, though unevenly distributed, expansion of the profession worldwide․

However, the State of the World’s Nursing 2025 report underscores persistent and substantial disparities in nurse availability across different regions and countries; Some areas face critical shortages, hindering access to quality healthcare, while others demonstrate relative sufficiency․ This uneven distribution necessitates targeted interventions to strengthen nursing capacity globally and ensure equitable access to care․ The report’s findings are crucial for informing policy decisions and resource allocation․

Key Findings from the WHO Report (May 12, 2025)

The WHO’s State of the World’s Nursing 2025 report, launched on May 12th, highlights the critical role nurses play in achieving universal health coverage; A key finding emphasizes the ongoing global nursing workforce challenges, despite overall growth to 29․8 million nurses (2018-2023)․

Significant regional disparities persist, with many low- and middle-income countries experiencing severe shortages․ The report stresses the need for increased investments in nursing education, recruitment, and retention․ Furthermore, it advocates for expanded nursing roles and improved working conditions; These improvements are vital for strengthening health systems and addressing future health crises effectively․ The report’s data informs policy and resource allocation for a stronger nursing future․

Impact of the Report on Nursing Education

The State of the World’s Nursing 2025 report significantly impacts nursing education by underscoring the necessity for curricula aligned with evolving global health needs․ It emphasizes competency-based education, focusing on skills for advanced practice and leadership roles․

Increased investment in faculty development and innovative teaching methodologies, including digital resources like readily available free nursing notes PDFs, are crucial․ The report calls for expanded clinical placement opportunities and strengthened partnerships between educational institutions and healthcare facilities․ Ultimately, the goal is to produce a highly skilled, adaptable nursing workforce prepared to address current and future health challenges, ensuring quality patient care worldwide․

Future Trends in Nursing Note Resources

Future nursing note resources will likely feature interactive PDFs and seamless integration with digital learning platforms, enhancing accessibility and engagement․

Interactive PDF Features

The evolution of free nursing notes PDFs is leaning towards increased interactivity․ Imagine embedded quizzes directly within the document, allowing for self-assessment and immediate feedback on crucial concepts․ Hyperlinked glossaries will instantly define unfamiliar terms, streamlining the learning process and reducing research time․

Furthermore, expect to see clickable diagrams illustrating complex physiological processes, and integrated video demonstrations of essential nursing skills․ These dynamic elements will transform static PDFs into engaging, multi-sensory learning tools․

Interactive case studies, prompting critical thinking and application of knowledge, are also on the horizon․ Such features will significantly enhance the effectiveness of free nursing notes, bridging the gap between theory and practice for aspiring and practicing nurses alike․

Integration with Digital Learning Platforms

The future of free nursing notes PDFs lies in seamless integration with popular digital learning platforms like Canvas, Blackboard, and Moodle․ This connectivity will allow students to directly access and annotate notes within their existing learning ecosystems, fostering a more streamlined workflow․

Imagine automatically synced progress tracking, where completed quizzes and annotations are reflected in course grades․ Collaborative features, enabling peer-to-peer note sharing and discussion, will also become commonplace․

Furthermore, platforms may offer personalized note recommendations based on individual learning styles and course requirements․ This integration will transform free nursing notes from standalone resources into dynamic components of a comprehensive digital learning experience, maximizing student engagement and success․

ptde program guide receipt

PTDE Program Guide Receipt: A Comprehensive Guide (Updated 12/20/2025)

Today’s date is 12/20/2025. The PTDE Program Guide Packet requires a $20 fee paid to TDLR, and the receipt serves as enrollment proof for Texas driving standards.

What is the PTDE Program?

The Parent Taught Drivers Ed (PTDE) Program in Texas is a state-approved alternative to traditional classroom-based driver education. It allows teenagers to fulfill their driver’s education requirements by learning to drive from a parent or legal guardian. However, participation isn’t simply getting behind the wheel; it’s a structured program governed by the Texas Department of Licensing and Regulations (TDLR).

A crucial component of the PTDE Program is the required Program Guide Packet. This packet contains essential forms that must be completed and submitted to the TDLR, officially notifying them of your intent to participate in parent-taught driver education. Obtaining this packet isn’t free; TDLR charges a $20 fee. Upon successful payment and application submission, you’ll receive a vital link – and ultimately, a receipt – confirming your enrollment and compliance with state regulations.

Eligibility Requirements for the PTDE Program

To qualify for the Texas Parent-Taught Drivers Ed (PTDE) Program, several requirements must be met, ensuring both the student and parent instructor are prepared. First, the student must be at least 15 years old and not have previously held a driver’s license. They also need to be enrolled in a high school or have a high school diploma/GED.

Perhaps most importantly, the parent or legal guardian serving as the instructor must be at least 21 years old, have a valid Texas driver’s license for at least three years, and possess a good driving record – free of convictions for certain offenses. Successfully purchasing the PTDE Program Guide Packet from the TDLR, and receiving the associated receipt, is a fundamental step demonstrating commitment to the program and adherence to state guidelines. Without this receipt, progressing towards a learner’s license is impossible.

Ordering the PTDE Program Guide Packet

Acquiring the PTDE Program Guide Packet from the Texas Department of Licensing and Registration (TDLR) is a crucial initial step. This packet contains the necessary forms to notify TDLR of your intention to participate in the Parent-Taught Drivers Ed program. There are two convenient methods for ordering: online or by mail.

The TDLR charges a $20 fee for the packet. Once this fee is paid and your application submitted, you will receive a vital link – or the physical receipt if ordered by mail – confirming your purchase and enrollment. This receipt is essential as proof of program participation. It’s a key document needed when applying for a learner’s license at the Texas Department of Public Safety (DPS). Ensure you retain this receipt securely throughout the PTDE process.

Online Ordering Process

The most efficient way to obtain the PTDE Program Guide Packet is through the TDLR’s online ordering system. This method provides immediate access to the necessary forms after payment of the $20 fee. Typically, after completing the online transaction, you will receive a confirmation email containing a link to download the packet directly.

Crucially, this confirmation email also serves as your official receipt. Save this email and the downloaded packet to your computer or device for easy access. This digital receipt is the proof of enrollment required by the Texas Department of Public Safety (DPS) when applying for a learner’s license. Ensure the receipt clearly displays your transaction details and the date of purchase – currently December 20, 2025 – for seamless verification.

Ordering by Mail

If online access isn’t feasible, you can order the PTDE Program Guide Packet via mail. To do so, you’ll need to submit a request, along with a check or money order for $20, payable to the Texas Department of Licensing and Regulations (TDLR). Be sure to include your full name, mailing address, and a phone number where you can be reached.

Allow ample processing time, as mail-in orders typically take longer than online orders. Once your payment is processed, TDLR will mail the Program Guide Packet and your official receipt to the address provided. This physical receipt is vital as proof of enrollment for the PTDE program and must be presented to the DPS when applying for a learner’s license. Keep the receipt in a safe place, as duplicates may not be readily available.

The $20 Fee and Payment Methods

A non-refundable fee of $20 is required to obtain the PTDE Program Guide Packet from the Texas Department of Licensing and Regulations (TDLR). This fee covers the cost of the packet, which contains essential forms and information needed to complete the Parent-Taught Driver Education program.

TDLR offers convenient payment options. You can securely pay online with a credit card (Visa, Mastercard, American Express, and Discover are generally accepted) during the online ordering process. Alternatively, if ordering by mail, you must submit a check or money order payable to TDLR. Cash is not accepted for mail-in orders. Ensure the check or money order includes your name and address for proper processing. The receipt confirming your $20 payment is crucial proof of enrollment.

Understanding the PTDE Program Guide Contents

The PTDE Program Guide Packet is a comprehensive resource designed to facilitate successful completion of the Texas Parent-Taught Driver Education program. It contains all necessary forms required for notification to the TDLR regarding your intent to participate in PTDE. Beyond the forms, the guide provides a detailed overview of the program’s requirements and the steps involved in fulfilling them.

Key Documents Included in the Packet will outline specific forms needed for application and completion. The guide also serves as a roadmap, detailing the process from initial application to eventual eligibility for a learner’s license. It’s designed to help both parent instructors and students navigate the program effectively, ensuring compliance with state regulations and a thorough understanding of safe driving practices. The receipt from TDLR confirms you have access to this vital information.

Key Documents Included in the Packet

The PTDE Program Guide Packet contains crucial forms for notifying the Texas Department of Licensing and Registration (TDLR) of your participation. These forms are essential for initiating the Parent-Taught Driver Education program and ensuring compliance with state regulations. Specifically, the packet includes applications and documentation required to formally register as a parent instructor and student.

While a complete list is within the packet itself, expect forms related to student enrollment, parental agreement, and verification of driving hours. The TDLR receipt, obtained after the $20 packet purchase, confirms access to these vital documents. These forms aren’t simply bureaucratic hurdles; they represent a commitment to a structured, safe, and legally compliant driver education experience. Proper completion and submission are key to a smooth process.

Overview of Required Steps

Successfully completing the PTDE program involves several key steps, beginning with obtaining the Program Guide Packet from the TDLR. This requires a $20 fee, and crucially, retaining the receipt as proof of purchase and enrollment. Following packet receipt, carefully review all included forms and complete them accurately.

Next, submit the completed application to the TDLR as instructed. Once processed, and with the receipt readily available, you can begin the supervised driving portion of the program. Remember, the DPS requires this receipt when applying for a learner’s license. Finally, after fulfilling the required driving hours and passing a driving exam, a full license can be obtained. Maintaining organized records, including the TDLR receipt, is vital throughout this process.

The Importance of the TDLR Receipt

The TDLR receipt is a fundamentally crucial document within the Texas Parent-Taught Drivers Ed (PTDE) program. It serves as official verification that you have purchased the required Program Guide Packet and officially initiated the PTDE process with the state of Texas.

Without this receipt, demonstrating enrollment and compliance with state driving education standards becomes significantly challenging. The Department of Public Safety (DPS) specifically requires this receipt when applying for a learner’s license. It’s not merely proof of payment; it’s evidence that you’re authorized to participate in PTDE. Treat this receipt with the same care as any vital legal document, as losing it can cause delays and necessitate contacting the TDLR for a replacement.

Using the Receipt as Proof of Enrollment

The TDLR receipt functions as your primary proof of enrollment in the PTDE program when interacting with the Texas Department of Public Safety (DPS). Specifically, it’s a mandatory document you must present alongside other required paperwork during your learner’s license application.

Ensure the receipt clearly displays the transaction details, including the date of purchase and the amount paid ($20). Keep the original receipt readily accessible – a digital copy may suffice, but confirm with your local DPS office. This receipt confirms you’ve met the initial requirement of obtaining the PTDE Program Guide, allowing you to proceed with the required parent-taught instruction and eventual driving exam. Without it, the DPS cannot verify your participation in an approved driver education program.

What to Do if You Haven’t Received Your Receipt

If you’ve completed the PTDE Program Guide Packet purchase and haven’t received your TDLR receipt, don’t delay in addressing the issue. First, check your email’s spam or junk folder, as the receipt is often delivered electronically. Allow several business days for processing after submitting your payment.

If the receipt isn’t located, immediately contact the TDLR directly using the contact information provided in the resources section. Be prepared to provide your order details, including the date of purchase and payment method. Clearly explain that you haven’t received confirmation of your transaction. The TDLR can investigate the issue, resend the receipt, or provide a transaction number for verification purposes. Prompt action is crucial to avoid delays in your learner’s license application process.

TDLR Contact Information for Receipt Issues

For any questions or concerns regarding your PTDE Program Guide Packet receipt, contacting the Texas Department of Licensing and Registration (TDLR) directly is essential. While specific contact details may evolve, here’s generally how to reach them:

Website: Visit the official TDLR website for frequently asked questions and online resources. Look for a dedicated section on Driver Education or PTDE.

Phone: Call the TDLR customer service line. Be prepared for potential wait times, especially during peak periods. Have your order information readily available.

Email/Online Form: Check the TDLR website for a contact form or a dedicated email address for inquiries. This allows you to document your request and receive a written response. Ensure you clearly state the issue – a missing or delayed receipt – and provide all relevant details for efficient assistance.

PTDE and the Texas Department of Public Safety (DPS)

Successfully completing the Parent-Taught Driver Education (PTDE) program and obtaining the TDLR receipt are crucial steps before applying for a Texas Learner’s License at the Department of Public Safety (DPS). The DPS requires proof of enrollment in an approved driver education program, and the TDLR receipt fulfills this requirement.

When visiting a DPS office, be prepared to present the original PTDE receipt alongside other necessary documentation, such as proof of identity, Social Security number, and proof of Texas residency. Without the receipt, your application may be delayed or denied.

The DPS will verify the receipt’s validity, ensuring it corresponds to an active PTDE program. This verification process confirms compliance with state regulations and allows you to proceed with the learner’s license application.

Documents Needed for DPS Learner’s License Application

To successfully apply for a Texas Learner’s License after completing the PTDE program, several documents are required at the Department of Public Safety (DPS). Critically, you must present the original TDLR receipt as proof of PTDE enrollment. This receipt confirms you’ve initiated the parent-taught program correctly.

Beyond the receipt, acceptable identification includes a certified birth certificate, valid U.S. passport, or permanent resident card. You’ll also need to provide your Social Security number (proof card is acceptable) and two proofs of Texas residency – examples include utility bills or school records.

The DPS may also require the completed PTDE application forms, available within the program guide packet. Ensure all documents are original or certified copies; photocopies are generally not accepted. Verify the DPS website for the most current and comprehensive list of required documentation before your visit.

Frequently Asked Questions About the PTDE Receipt

Q: Is the PTDE receipt mandatory? A: Yes, absolutely. The Texas Department of Licensing and Registration (TDLR) receipt is essential proof of enrollment in the Parent Taught Drivers Ed program and is required by the DPS for a learner’s license.

Q: What if I lose my receipt? A: Contact TDLR immediately. They have procedures for obtaining a duplicate, though it may involve a processing fee and time. Don’t attempt to proceed with your DPS application without a valid receipt.

Q: Can I use a photocopy of the receipt? A: Generally, no. The DPS typically requires the original receipt. Check the DPS website for the latest requirements, but plan to present the original document.

Q: Do I need a separate receipt for each child? A: Yes, each student participating in the PTDE program requires their own purchased PTDE Information Guide and corresponding TDLR receipt.

Common Issues and Troubleshooting

Issue: Receipt not received after payment. Troubleshooting: First, check your email’s spam folder. If not there, contact TDLR with your payment confirmation details. Allow several business days for processing.

Issue: DPS rejecting the receipt. Troubleshooting: Ensure it’s the original receipt, not a copy. Verify the TDLR logo and transaction details are clear. If still rejected, contact TDLR to confirm receipt validity.

Issue: Incorrect information on the receipt. Troubleshooting: Immediately contact TDLR to report the error and request a corrected receipt. Do not proceed with the DPS application until the issue is resolved.

Issue: Difficulty locating the online ordering link. Troubleshooting: Use the official TDLR website. Avoid third-party links, which may be outdated or inaccurate. Double-check the URL for typos.

Resources and Further Information

For comprehensive details regarding the PTDE program and receipt requirements, visit the official Texas Department of Licensing and Regulations (TDLR) website: https://www.tdlr.texas.gov/. This site provides downloadable forms, FAQs, and contact information.

The Texas Department of Public Safety (DPS) website (https://www.dps.texas.gov/) outlines specific documentation needed for learner’s license applications, including the PTDE receipt. Review their requirements carefully before your visit.

Parent-taught driving schools often offer supplementary resources and guidance. Consider exploring options for additional support. Remember, the PTDE program aims to equip new drivers with essential skills and knowledge. Utilizing available resources ensures a smooth and compliant process. Always refer to official sources for the most up-to-date information.

2015 razor sevic maunal .pdf

The NVIDIA App consolidates settings and features from GeForce Experience, RTX Experience, and the NVIDIA Control Panel. It’s a central hub for PC gamers and creators, ensuring optimal performance and the latest NVIDIA technologies.

What is the NVIDIA App?

The NVIDIA App represents a unified platform, merging functionalities previously scattered across GeForce Experience, NVIDIA RTX Experience, and the traditional NVIDIA Control Panel. This application serves as the primary interface for users to manage their NVIDIA graphics cards, optimize game settings, and access cutting-edge technologies like DLSS. It’s designed as a comprehensive solution for both PC gamers and content creators, streamlining the process of updating drivers and enhancing overall system performance.

Essentially, it’s the best friend for PC enthusiasts!

Historical Context: From GeForce Experience to NVIDIA App

GeForce Experience initially launched as a companion tool for NVIDIA graphics card owners, primarily focusing on driver updates and game optimization. Over time, it expanded to include features like ShadowPlay for recording gameplay. However, with the introduction of RTX technology and cloud gaming, NVIDIA recognized the need for a more comprehensive and integrated solution.

This led to the development of the NVIDIA App, consolidating all these functionalities into a single, streamlined application, representing a significant evolution from its predecessor.

Key Features and Functionality

The NVIDIA App automatically optimizes game settings for over 50 titles, from Alice: Madness Returns to World of Warcraft, enhancing your gaming experience.

Game Optimization with NVIDIA App

NVIDIA App excels at automatically optimizing in-game settings for a vast library of titles. This feature analyzes your system and intelligently adjusts graphics options to achieve the best balance between visual fidelity and performance. Currently, optimization profiles are available for more than 50 games, spanning diverse genres – from the atmospheric horror of Alice: Madness Returns to the expansive world of World of Warcraft.

This automated process eliminates the guesswork, ensuring a smooth and enjoyable gaming experience without requiring extensive manual tweaking. Players can benefit from enhanced visuals and higher frame rates, tailored specifically to their hardware capabilities.

Driver Updates and Management

The NVIDIA App functions as a central location for keeping your graphics drivers up-to-date. Regularly updating drivers is crucial for optimal performance, stability, and compatibility with the latest games. The app automatically notifies you when new drivers are available and simplifies the installation process, eliminating the need to manually search and download them.

Beyond simple updates, the app also provides driver management tools, allowing you to revert to previous versions if necessary, ensuring a stable and reliable gaming experience. This streamlined approach simplifies PC maintenance.

Cloud Gaming with GeForce RTX

GeForce RTX Cloud Gaming allows you to stream your favorite PC games to supported devices, leveraging the power of NVIDIA’s RTX GPUs in the cloud. Connect to existing PC game store libraries like Steam, Epic Games, Xbox (PC Game Pass), and Ubisoft Connect to play owned games with GeForce RTX performance;

Thousands of titles are available, and Steam Cloud support ensures game progress is saved for future sessions. Persistent cloud saves are available as an add-on, enhancing the gaming experience.

Connecting to Game Libraries

Seamlessly connect to popular PC game stores like Steam, Epic Games, Xbox, and Ubisoft Connect to play your owned games with enhanced GeForce RTX performance.

Steam Integration

The NVIDIA App offers robust integration with Steam, allowing users to effortlessly access and launch their existing Steam game library. Enjoy the benefits of NVIDIA RTX technologies, including DLSS and ray tracing, directly within your Steam games. Importantly, games supporting Steam Cloud retain game progress for future sessions, ensuring a consistent experience across devices. This integration streamlines gameplay, providing a unified and optimized gaming environment for Steam users, enhancing performance and visual fidelity.

Epic Games Store Integration

The NVIDIA App seamlessly connects with the Epic Games Store, enabling players to launch and enjoy their purchased titles with enhanced performance. Leverage NVIDIA GeForce RTX cloud gaming to experience Epic Games Store games with the power of RTX, even on less powerful hardware. This integration allows for a streamlined gaming experience, bringing the benefits of NVIDIA’s technologies to a wider range of Epic Games Store titles, improving visuals and overall gameplay quality.

Xbox (PC Game Pass & Ubisoft Connect) Integration

The NVIDIA App expands gaming access by connecting to Xbox (PC Game Pass) and Ubisoft Connect libraries. Players can now stream and enjoy titles from these platforms with GeForce RTX’s cloud gaming capabilities. This integration unlocks a vast catalog of games, playable with RTX performance, regardless of local hardware limitations. Seamlessly launch games from PC Game Pass and Ubisoft Connect directly through the NVIDIA App, enhancing convenience and gaming possibilities.

NVIDIA RTX Technology & DLSS

Experience revolutionary gaming with the NVIDIA GeForce RTX 5080 and AI-powered DLSS 4 technology, built on the NVIDIA Blackwell architecture for enhanced performance.

Understanding NVIDIA RTX

NVIDIA RTX represents a significant leap in graphics technology, moving beyond traditional rasterization to introduce real-time ray tracing and AI-powered features. This allows for incredibly realistic lighting, shadows, and reflections within games, creating a more immersive visual experience. RTX GPUs feature dedicated RT Cores for accelerating ray tracing calculations and Tensor Cores for AI-driven enhancements like DLSS.

These cores work in tandem with the streaming multiprocessors to deliver unparalleled graphical fidelity and performance. RTX isn’t just about visuals; it fundamentally changes how games are rendered, offering a new level of realism previously unattainable.

DLSS 4: AI-Powered Performance Boost

DLSS 4 (Deep Learning Super Sampling) is NVIDIA’s latest AI technology designed to dramatically increase gaming performance. Utilizing the power of AI, DLSS 4 upscales lower-resolution images to higher resolutions, resulting in sharper visuals with minimal performance impact. This allows gamers to enjoy higher frame rates and smoother gameplay, even on demanding titles.

It leverages the Tensor Cores within RTX GPUs to intelligently reconstruct images, delivering performance gains without sacrificing visual quality, and is powered by the Blackwell architecture.

NVIDIA Blackwell Architecture

NVIDIA Blackwell represents a significant leap forward in GPU architecture, promising substantial improvements in performance and efficiency. This new architecture is designed to accelerate AI workloads and deliver a revolutionary gaming experience. Blackwell introduces enhanced Tensor Cores and RT Cores, boosting AI-powered features like DLSS 4 and ray tracing capabilities.

It’s engineered to handle complex tasks with greater speed and power, setting a new standard for graphics processing and enabling next-generation gaming technologies.

Cloud Gaming Details

GeForce RTX Cloud Gaming allows players to stream games to various devices, leveraging RTX performance. Steam Cloud support preserves game progress across sessions seamlessly.

GeForce RTX Cloud Gaming Performance

GeForce RTX Cloud Gaming delivers high-performance gaming experiences powered by NVIDIA’s RTX GPUs. Players can access a vast library of games and enjoy enhanced visuals and responsiveness. The service connects to existing PC game stores like Steam, Epic Games, Xbox (PC Game Pass), and Ubisoft Connect, allowing users to play owned PC games with GeForce RTX performance in the cloud.

Thousands of favorite titles are readily available, and games supporting Steam Cloud retain progress for future sessions. Persistent cloud saves are offered as an add-on, ensuring a seamless gaming experience across devices.

Steam Cloud Support

Steam Cloud Support within NVIDIA’s cloud gaming service ensures a smooth and continuous gaming experience for users. Games that utilize Steam Cloud automatically preserve game progress, allowing players to seamlessly resume their adventures across different sessions and devices. This feature eliminates the worry of losing valuable progress, providing convenience and peace of mind.

By leveraging Steam’s existing cloud save infrastructure, NVIDIA enhances the overall cloud gaming experience, making it more accessible and user-friendly for a wider audience.

Persistent Cloud Saves

Persistent Cloud Saves are available as an addition, enhancing the NVIDIA App’s cloud gaming capabilities. This feature ensures that your game progress is securely stored and accessible across various devices, providing a consistent gaming experience. It allows players to pick up where they left off, regardless of the platform they are using.

This robust save system minimizes data loss and maximizes convenience, solidifying NVIDIA’s commitment to a seamless and enjoyable cloud gaming environment for all users.

Troubleshooting & Common Issues

Common issues include connectivity problems and driver installation errors, potentially causing game compatibility issues. Addressing these ensures a smooth NVIDIA App experience.

Connectivity Problems

Experiencing connectivity issues with the NVIDIA App can disrupt cloud gaming and driver updates. First, verify your internet connection stability; a weak signal impacts performance. Ensure the NVIDIA servers aren’t experiencing outages – check the NVIDIA website for status updates.

Firewall settings might block the App’s access; add exceptions for NVIDIA services. Proxy settings can also interfere; try disabling them temporarily. Restarting your router and the NVIDIA App often resolves temporary glitches. If problems persist, consult NVIDIA’s support resources for advanced troubleshooting steps.

Driver Installation Errors

Encountering errors during driver installation can stem from several causes. A corrupted download is a common issue; re-download the driver from the NVIDIA official website. Conflicting software, like antivirus programs, might interfere – temporarily disable them during installation.

Ensure your system meets the driver’s minimum requirements. Performing a clean installation, removing previous drivers completely, often resolves conflicts. If errors persist, utilize the NVIDIA Driver Rollback feature or seek assistance from NVIDIA’s support forums for tailored solutions.

Game Compatibility Issues

Occasionally, games may exhibit compatibility problems with NVIDIA drivers or the App itself. This can manifest as crashes, graphical glitches, or performance drops. First, verify the game’s minimum and recommended system requirements align with your hardware.

Check NVIDIA’s forums and the game’s community for known issues and potential workarounds. Updating the game to the latest version often resolves compatibility conflicts. A clean driver installation can also help, and reporting the issue to NVIDIA aids future improvements.

System Requirements & Compatibility

The NVIDIA App requires a compatible NVIDIA GeForce GPU and driver. Ensure your system meets the minimum specifications for optimal performance and feature access.

Minimum System Specifications

For optimal NVIDIA App functionality, a compatible NVIDIA GeForce, TITAN, or Quadro GPU is essential. The application supports Windows 10 and 11, requiring DirectX 12 or later. A minimum of 2 GB of VRAM is recommended, though 4 GB or more enhances performance, especially with demanding features like DLSS.

A stable internet connection is crucial for driver updates and cloud gaming. Ensure at least 4 GB of system RAM is available, alongside a compatible processor – Intel Core i5 or AMD Ryzen 5 are generally sufficient. Storage requirements are modest, around 200 MB for the application itself.

Supported NVIDIA GPUs

The NVIDIA App provides broad compatibility across GeForce, TITAN, and Quadro GPU series. Specifically, it supports GPUs based on the Maxwell, Pascal, Turing, Ampere, and Ada Lovelace architectures. This includes popular models like the GeForce GTX 960 and newer, extending through the RTX 30 and 40 series.

Older GPUs, while potentially functional, may lack support for newer features like DLSS 3 or ray tracing optimizations. Regularly checking NVIDIA’s official website ensures compatibility with the latest drivers and app updates for your specific GPU model.

NVIDIA App Settings & Customization

Users can tailor graphics settings and privacy options within the NVIDIA App. This allows for personalized experiences, optimizing performance and controlling data sharing preferences.

Graphics Settings Customization

The NVIDIA App provides extensive control over graphics settings, allowing users to fine-tune their gaming experience. Automatically optimize settings for over 50 titles, from Alice: Madness Returns to World of Warcraft, ensuring peak performance. Customize individual game profiles, adjusting parameters like resolution, texture quality, and anti-aliasing.

This granular control empowers gamers to balance visual fidelity with frame rates, catering to diverse hardware configurations. The app facilitates experimentation, helping users discover the optimal settings for each game and their specific system.

Privacy Settings

The NVIDIA App incorporates robust privacy settings, giving users control over data collection and sharing. Manage telemetry data, deciding whether to contribute to performance analysis and app improvement. Control data related to game usage and hardware configurations.

Review and adjust settings related to cloud gaming sessions, ensuring personal data remains secure. Transparency is key; the app clearly outlines what data is collected and how it’s utilized. Users can tailor these settings to align with their individual privacy preferences, maintaining control over their information.

Advanced Features

ShadowPlay enables seamless game recording and live streaming, while Ansel unlocks in-game photography with stunning visuals and customizable options for sharing.

ShadowPlay (Game Recording & Streaming)

ShadowPlay is a powerful feature within the NVIDIA App, allowing users to effortlessly record their gameplay moments and broadcast live streams to platforms like Twitch and YouTube. It utilizes NVIDIA’s hardware encoding capabilities to minimize performance impact, ensuring smooth recording even during demanding gaming sessions.

Users can choose from various recording modes, including instant replay which captures the last few minutes of gameplay, and manual recording for more controlled captures; Customizable settings allow adjustments to video quality, frame rates, and audio sources, tailoring the experience to individual preferences. ShadowPlay is a go-to tool for content creators and gamers alike.

Ansel (In-Game Photography)

Ansel transforms gaming into a photographic experience, enabling players to capture stunning, high-resolution screenshots from unique perspectives within supported games. It allows for the creation of super-resolution photos, exceeding the display’s native resolution, and supports various output formats, including 360-degree panoramic images for VR viewing.

Users can adjust camera angles, apply post-processing filters, and even create stereoscopic 3D images. Ansel empowers gamers to showcase their favorite in-game moments with artistic flair, sharing breathtaking visuals with the community and elevating the gaming experience beyond traditional gameplay.

NVIDIA App vs. Control Panel

The NVIDIA App offers a streamlined, user-friendly interface, while the Control Panel provides granular control over graphics settings for advanced users and customization.

Differences and When to Use Each

The NVIDIA App excels at automated game optimization, driver updates, and cloud gaming features, offering a simplified experience for most users. It’s ideal for quickly enhancing game performance and managing your NVIDIA ecosystem. Conversely, the Control Panel remains crucial for detailed, manual adjustments to graphics settings.

Use the Control Panel when you require precise control over specific rendering options, color settings, or 3D configurations not available within the App. It’s preferred by enthusiasts and professionals needing fine-grained customization for optimal visual fidelity or troubleshooting.

Future Developments & Roadmap

Expect updates bringing new features and improvements to the NVIDIA App, enhancing cloud gaming, and expanding game optimization capabilities for broader compatibility.

Expected Updates and New Features

NVIDIA continually refines the App, promising expanded game optimization for over 50 titles, from classics like Alice: Madness Returns to modern hits such as World of Warcraft. Future iterations will likely deepen integration with game libraries – Steam, Epic Games Store, Xbox (PC Game Pass), and Ubisoft Connect – streamlining access to owned games.

Improvements to GeForce RTX cloud gaming are anticipated, alongside enhanced Steam Cloud support for persistent game saves. The focus remains on delivering a seamless, high-performance experience, leveraging advancements like DLSS 4 and the NVIDIA Blackwell architecture for AI-powered boosts.

Resources & Support

For assistance, visit the official NVIDIA website and explore comprehensive community forums and FAQs. These resources provide solutions and support for all NVIDIA App users.

NVIDIA Official Website

The NVIDIA official website serves as the primary source for all information regarding the NVIDIA App and its associated technologies. Here, users can find detailed product specifications, download the latest software versions, and access extensive documentation. The site offers a dedicated support section with troubleshooting guides, FAQs, and driver downloads.

Furthermore, the NVIDIA website features a vibrant community forum where users can connect with each other, share experiences, and receive assistance from NVIDIA representatives. News and announcements regarding updates and new features are also prominently displayed, ensuring users stay informed about the evolving NVIDIA ecosystem.

Community Forums & FAQs

NVIDIA’s community forums are invaluable resources for users seeking assistance or wanting to engage with fellow gamers and creators. These forums provide a platform to discuss issues, share solutions, and offer feedback directly to NVIDIA developers. A comprehensive FAQ section addresses common questions regarding the NVIDIA App, its features, and troubleshooting steps.

Users can find answers to frequently encountered problems, learn about optimal settings, and discover hidden functionalities. Active moderation ensures a helpful and constructive environment, fostering a strong sense of community among NVIDIA App users.

omron blood pressure machine manual

Omron Blood Pressure Machine Manual: A Comprehensive Guide

Omron excels in automation and healthcare, offering reliable blood pressure monitors backed by a five-year warranty and clinical validation for accuracy.

Understanding Your Omron Blood Pressure Monitor

Omron blood pressure monitors, like the BP6350, are designed for home use, providing efficient and accurate readings; These devices utilize advanced technologies, including fuzzy logic, to minimize measurement variations. Understanding your specific model – such as the E5 within the 5 Series – is crucial.

These monitors are consistently recommended by doctors and pharmacists. Proper use, following the included instructions, ensures reliable data for managing your health. Familiarize yourself with the features and indicators for optimal results.

Model Numbers and Series Overview

Omron offers a diverse range of blood pressure monitors categorized into series, like the 5 Series, with models such as the E5. The model number indicates its position within the lineup and feature set.

Each series caters to different needs, from basic monitoring to advanced features like Bluetooth connectivity and smartphone app integration. Refer to the Omron Blood Pressure Monitor Comparison Chart to identify the best fit for your requirements. Purchasing from authorized sellers ensures quality control.

Key Features and Technologies

Omron blood pressure monitors are renowned for innovative technologies enhancing accuracy and user experience. Exclusive fuzzy logic technology delivers precise measurements, minimizing discomfort. A crucial feature is irregular heartbeat detection, alerting users to potential cardiovascular concerns.

Advanced models boast Bluetooth connectivity, seamlessly syncing data with smartphone apps for convenient tracking and analysis. Omron consistently meets clinical research standards, earning the title of the #1 doctor and pharmacist recommended brand.

Fuzzy Logic Technology

Omron’s exclusive fuzzy logic technology represents a significant advancement in blood pressure monitoring. Unlike conventional methods, it doesn’t rely on rigid pre-set air pressure. Instead, it intelligently analyzes the inflation process, adapting to each individual’s unique vascular condition.

This results in more comfortable measurements with reduced re-inflation, minimizing discomfort and providing greater precision. Fuzzy logic contributes to Omron’s commitment to clinically accurate and user-friendly devices.

Irregular Heartbeat Detection

Many Omron blood pressure monitors, like the BP6350 and E5 model, feature irregular heartbeat detection. This valuable function analyzes your pulse during measurement and alerts you if an irregularity is detected.

While not a diagnostic tool, it prompts you to consult a healthcare professional for further evaluation. Early detection of irregular heartbeats can be crucial for managing cardiovascular health, reinforcing Omron’s dedication to preventative care.

Setting Up Your Omron Blood Pressure Monitor

Proper setup ensures accurate readings. Begin by installing batteries, ensuring correct polarity. Next, attaching the cuff correctly is vital; follow the manual’s illustrations for proper wrist or arm placement.

Confirm the cuff size matches your limb circumference for optimal performance. A secure, yet comfortable fit is essential. Incorrect setup can lead to inaccurate measurements, hindering effective blood pressure management. Refer to your specific model’s instructions.

Installing Batteries

To install batteries, locate the battery compartment, usually on the back or side of the monitor. Open the compartment cover and insert the specified type and number of batteries – typically AA or AAA – matching the polarity (+ and -) markings inside.

Ensure batteries are securely in place before closing the cover. Replace batteries when the low battery indicator appears to maintain accurate readings. Using fresh batteries is crucial for reliable operation of your Omron device.

Attaching the Cuff Correctly

Proper cuff attachment is vital for accurate measurements. Position the cuff on your upper arm, about one inch above your elbow, ensuring the artery mark aligns with your brachial artery.

The cuff should be snug but not too tight – you should be able to slide one finger underneath. For wrist models, position according to the manual. Incorrect cuff placement significantly impacts reading accuracy, so follow instructions carefully.

Taking Accurate Blood Pressure Measurements

Achieving reliable readings requires consistent technique. Before measurement, rest for five minutes in a quiet room. Maintain proper body positioning – seated with back supported, feet flat on the floor, and arm supported at heart level.

Avoid caffeine, exercise, and smoking for at least 30 minutes beforehand. Follow the step-by-step measurement procedure outlined in your model’s manual for optimal results.

Proper Body Positioning

To ensure accurate readings, sit comfortably with your back supported and feet flat on the floor. Avoid crossing your legs, as this can elevate blood pressure. Your arm should be supported at heart level – typically on a table or armrest.

Relax your arm and avoid talking or moving during the measurement. Proper positioning minimizes interference and contributes to reliable blood pressure data.

Measurement Procedure – Step-by-Step

Power on the monitor and attach the cuff correctly, ensuring it’s snug but not too tight. Remain still and quiet during inflation. The monitor will automatically inflate and deflate the cuff, displaying your systolic and diastolic readings, plus pulse rate.

Record your measurements and note any irregular heartbeat indications. Repeat the process if needed, waiting a few minutes between readings for accurate results.

Interpreting Your Blood Pressure Readings

Omron monitors display systolic (top number) and diastolic (bottom number) values, alongside your pulse. Color-coded indicators provide a quick assessment: green typically signifies normal, yellow indicates pre-hypertension, and red suggests high blood pressure.

However, these are guidelines; consult your doctor for personalized interpretation. Consistent monitoring and tracking trends are crucial for managing your cardiovascular health effectively.

Systolic and Diastolic Values

Systolic pressure measures the force when your heart beats, while diastolic reflects the pressure when it rests between beats. These two numbers, presented as systolic/diastolic (e.g., 120/80 mmHg), provide a comprehensive view of your blood pressure.

Understanding both values is vital, as elevated levels in either can indicate potential health risks. Regular monitoring helps establish a baseline and track changes over time.

Understanding the Color-Coded Indicators

Omron blood pressure monitors often utilize a color-coded indicator system for quick interpretation of readings. Generally, green signifies normal blood pressure, yellow indicates prehypertension, and red signals hypertension – levels requiring attention.

These visual cues offer an immediate assessment, but should not replace professional medical advice. Consistent monitoring and consultation with a healthcare provider are crucial for accurate diagnosis and management.

Memory Function and Data Review

Omron blood pressure monitors store measurement data, allowing users to track trends over time. This feature is invaluable for identifying patterns and sharing information with healthcare professionals. The capacity varies by model, enabling storage of numerous readings.

Users can easily review past readings directly on the monitor, facilitating a comprehensive understanding of their blood pressure history and aiding in effective management.

Storing Measurement Data

Omron blood pressure monitors automatically store readings in their internal memory, providing a historical record for tracking health trends. The storage capacity differs depending on the specific model purchased, ranging from dozens to hundreds of measurements.

This stored data includes systolic and diastolic values, pulse rate, and date/time stamps, offering a complete picture of blood pressure fluctuations over time for better health insights.

Reviewing Past Readings

Omron monitors allow easy access to previously stored measurements. Utilize the “Memory” or “Review” button on your device to scroll through past readings, typically displayed with date and time.

Many models calculate average readings over specified periods (e.g., morning, evening, overall) for trend analysis. Some advanced models, when connected via Bluetooth, enable data transfer to a smartphone app for detailed review and sharing with healthcare professionals.

Troubleshooting Common Issues

Omron monitors may display error codes; for example, “E5” indicates potential issues during measurement. Addressing connectivity problems often involves ensuring Bluetooth is enabled and the app is updated.

If readings seem consistently inaccurate, re-check cuff placement and body positioning. Consult the manual for specific error code definitions and solutions. Contact Omron customer support at ordersbvmedical.com or (888) 822-8293 for further assistance.

Error Codes (e.g., E5) and Their Meanings

Omron blood pressure monitors utilize error codes to signal potential problems. The “E5” error, specifically, suggests issues encountered during the measurement process; These codes aren’t defects, but indicators requiring user attention.

Refer to your model’s manual for a complete list and detailed explanations of each code. Correcting the issue often involves re-attaching the cuff or ensuring proper body positioning before attempting another reading.

Addressing Connectivity Problems

If your Omron blood pressure monitor with Bluetooth connectivity experiences issues, first ensure Bluetooth is enabled on your smartphone or tablet. Verify the Omron Connect app is updated to the latest version.

Restart both the monitor and your mobile device. If problems persist, try “forgetting” the device in your Bluetooth settings and re-pairing it. Contact Omron Customer Support at ordersbvmedical.com or (888) 822-8293 for further assistance.

Cleaning and Maintenance

To ensure accurate readings and prolong the life of your Omron blood pressure monitor, regular cleaning is essential. Gently wipe the monitor body with a soft, dry cloth. Avoid using harsh chemicals or abrasives.

For the cuff, carefully clean it with a damp cloth and mild detergent, ensuring it’s completely dry before reattaching. Proper cuff care maintains hygiene and measurement precision.

Cuff Care

Maintaining your Omron cuff is crucial for accurate measurements. Clean the cuff regularly with a damp cloth and mild detergent, avoiding harsh chemicals. Ensure the cuff is completely dry before reattaching to the monitor.

Inspect the cuff for any signs of damage, like cracks or leaks. Proper cuff care extends its lifespan and ensures reliable blood pressure readings, contributing to effective health monitoring.

Monitor Body Cleaning

To clean the Omron monitor body, gently wipe it with a soft, dry cloth. Avoid using water or any liquid cleaners directly on the device to prevent damage. Ensure the monitor is disconnected from any power source before cleaning.

Regularly cleaning the exterior helps maintain hygiene and prolongs the life of your blood pressure monitor, ensuring consistent and reliable performance for years to come.

Warranty Information

Your Omron BP6350 wrist blood pressure monitor is warranted against defects in materials and workmanship for five years from the purchase date, when used as directed.

This warranty extends only to the original purchaser from an authorized Omron seller. Omron, a leader in blood pressure innovation, consistently receives recommendations from doctors and pharmacists for home monitoring. Contact ordersbvmedical.com or (888) 822-8293 for claims.

Coverage Details

The Omron warranty covers defects in materials and workmanship for five years, beginning from the original retail purchase date. This applies specifically to the monitor itself, excluding the wrist cuff and batteries.

Coverage is limited to the initial purchaser and requires proof of purchase from an Omron-authorized seller adhering to their quality control standards. Omron’s dedication ensures clinically accurate and reliable home blood pressure monitoring.

Warranty Claim Process

If you encounter issues with your Omron blood pressure monitor, contact Omron Customer Service at ordersbvmedical.com or call (888) 822-8293. Be prepared to provide your original purchase details and a description of the defect.

Omron will guide you through the claim process, potentially requiring product return for inspection. Valid claims will result in repair or replacement, at Omron’s discretion, ensuring continued accurate monitoring.

Omron’s Business and Product Range

Omron’s core business centers on automation components, equipment, and systems, extending into diverse sectors. Within consumer and medical markets, Omron is a recognized leader, specializing in digital thermometers, blood pressure monitors, and nebulizers;

Dedicated to innovation, Omron consistently delivers clinically validated products, earning the distinction of being the number one recommended brand for home blood pressure monitoring by doctors and pharmacists.

Comparing Omron Blood Pressure Monitor Models

Omron offers a diverse range of blood pressure monitors, including the BP6350 wrist model and the 5 Series, like the E5. The E5 utilizes Omron’s fuzzy logic technology for precise readings and features irregular heartbeat detection.

A comprehensive Omron Blood Pressure Monitor Comparison Chart is available for download, aiding customers in selecting the ideal model based on their specific needs and preferences.

Downloading Manuals and Resources

Access valuable resources to enhance your Omron blood pressure monitor experience! A detailed Omron Blood Pressure Monitor Comparison Chart is readily available for download, assisting in model selection.

Should you require further assistance or have specific questions, Omron’s Customer Service team is available at ordersbvmedical.com or via phone at (888) 822-8293. Easily locate your desired model by searching the Model Number.

Customer Support and Contact Information

Omron prioritizes customer satisfaction, offering dedicated support for all blood pressure monitor inquiries. For questions, concerns, or assistance with your device, reach out to their responsive Customer Service representatives.

You can connect with the team via email at ordersbvmedical.com or by phone at (888) 822-8293. Omron strives to provide efficient and helpful assistance, ensuring a positive user experience with their products.

Clinical Accuracy and Validation

Omron blood pressure monitors are designed with clinical accuracy as a core principle. As a leader in blood pressure innovation, Omron consistently meets rigorous clinical research standards.

These devices are frequently recommended by healthcare professionals – holding the position of the number one doctor and pharmacist-recommended brand for at-home blood pressure monitoring. This dedication ensures reliable and trustworthy readings for users.

Advanced Features (Depending on Model)

Certain Omron blood pressure monitors, like the BP6350, offer advanced functionalities to enhance user experience and data management. Bluetooth connectivity allows seamless synchronization with compatible smartphones.

This integration enables users to track their readings over time via a dedicated smartphone application, facilitating better health monitoring and sharing data with healthcare providers for informed decision-making.

Bluetooth Connectivity

Omron blood pressure monitors equipped with Bluetooth enable wireless data transfer to smartphones and tablets; This feature simplifies tracking blood pressure trends over time, eliminating manual recording.

By pairing your Omron device with the Omron Connect app, you can visualize your readings, identify patterns, and share information with your physician for comprehensive health management and improved care.

Smartphone App Integration

The Omron Connect app seamlessly integrates with Bluetooth-enabled blood pressure monitors, providing a user-friendly platform for managing your cardiovascular health. It stores readings securely and displays them in easy-to-understand graphs.

This integration allows for personalized insights, medication reminders, and the ability to share data with healthcare professionals, fostering proactive health management and informed clinical decisions.

Safety Precautions

Always consult your physician before starting any new blood pressure monitoring regimen. This device is not a substitute for professional medical advice. Do not apply the cuff over injured or irritated skin.

Ensure the cuff is the correct size for your arm to avoid inaccurate readings or discomfort. Keep the monitor dry and avoid extreme temperatures. Do not disassemble or attempt to repair the device yourself.

woman warrior pdf

Exploring the “Woman Warrior” necessitates delving into historical contexts and mythological origins, often documented in accessible PDF formats for scholarly pursuit.

Numerous digital texts illuminate the evolution of this archetype, tracing its roots through ancient cultures and modern interpretations, readily available online.

Historical Context and Origins

Tracing the historical emergence of the “Woman Warrior” archetype reveals a complex tapestry woven through millennia of societal shifts and cultural narratives. While often overshadowed, evidence of female combatants and leaders exists across diverse civilizations. Accessing scholarly articles and digitized historical documents – frequently available as PDFs – provides invaluable insight into these often-suppressed histories.

Early examples, though fragmented, demonstrate women participating in warfare, defense, and even holding positions of authority. Examining Mesopotamian accounts of Inanna/Ishtar, or Roman depictions of warrior goddesses like Diana, reveals early conceptualizations of female strength and agency. These figures, often explored in academic PDFs, prefigure later archetypes. The availability of digitized texts allows researchers to analyze primary sources, challenging traditional narratives and uncovering forgotten stories of women who defied conventional roles. Further exploration through online resources and digital archives expands our understanding of this rich and multifaceted history.

The Rise of Female Warrior Figures in Mythology

Mythology serves as a fertile ground for understanding the enduring appeal of the “Woman Warrior” archetype. Across cultures, goddesses and heroines embodying strength, courage, and strategic prowess emerge, often detailed in accessible academic PDFs and mythological compendiums. Figures like Diana/Artemis, the Roman/Greek goddess of the hunt, exemplify this archetype, representing independence and fierce protection.

Similarly, Inanna/Ishtar, the Mesopotamian goddess of love, war, and justice, showcases a powerful warrior aspect, frequently analyzed in scholarly PDFs focusing on ancient Near Eastern religions. These mythological representations weren’t merely symbolic; they reflected societal anxieties and aspirations surrounding female power. The proliferation of digital texts and online resources allows for comparative analysis of these figures, revealing common threads and unique cultural interpretations. Exploring these myths, often available as downloadable PDFs, provides crucial context for understanding the archetype’s enduring resonance.

Exploring Key Archetypes

Delving into archetypes like Diana, Inanna, and the Crone reveals nuanced facets of the “Woman Warrior,” often detailed within comprehensive PDF studies.

Diana/Artemis: The Huntress and Protector

Diana, the Roman counterpart to the Greek Artemis, embodies a powerful archetype of the woman warrior, representing independence, skill, and fierce protection. Her domain extends beyond the hunt; she safeguards vulnerable creatures and champions wilderness spaces, demonstrating a warrior’s commitment to defending the defenseless.

Scholarly explorations of this archetype, frequently available as downloadable PDF documents, analyze Diana/Artemis’s symbolism within ancient mythology and its enduring influence on modern representations of female strength. These resources detail her rejection of traditional feminine roles, choosing instead a path of self-reliance and mastery of martial skills.

The goddess’s association with the moon further enhances her mystique, linking her to intuition and hidden power – qualities essential for a strategic warrior. Examining PDF analyses reveals how Diana/Artemis serves as a potent symbol for women asserting their agency and challenging societal expectations, embodying a warrior spirit unbound by conventional constraints.

Inanna/Ishtar: The Mesopotamian Warrior Goddess

Inanna (Sumerian) and Ishtar (Akkadian), the Mesopotamian goddess of love, war, and fertility, presents a complex and compelling “woman warrior” archetype. Often depicted travelling in a chariot pulled by lions, she embodies both fierce power and passionate intensity, a potent combination rarely seen in ancient pantheons.

Detailed analyses, often found in academic PDFs, reveal Inanna/Ishtar’s role wasn’t solely about physical combat. She descended into the underworld, confronting and overcoming obstacles – a metaphorical battle representing courage and resilience. This journey highlights a warrior’s inner strength and willingness to face profound challenges.

Exploring these PDF resources demonstrates how Inanna/Ishtar’s multifaceted nature challenged conventional gender roles, asserting her authority in both the political and spiritual realms. She represents a warrior who commands respect through both her power and her undeniable presence, a timeless archetype resonating across cultures.

The Crone Archetype: Wisdom and Fierce Protection

The Crone, representing the final stage of a woman’s life cycle, embodies a unique form of warrior energy – one rooted in accumulated wisdom and unwavering protection. Often overlooked, this archetype isn’t about youthful strength, but about the fierce defense of knowledge, community, and future generations.

Numerous scholarly PDFs explore the Crone’s role as a guardian, utilizing her experience to navigate challenges and offer guidance. She’s the strategist, the healer, and the one who understands the long game, employing cunning and resilience where others rely on brute force.

Digital texts reveal the Crone’s power lies in her refusal to be silenced, her ability to see through deception, and her willingness to confront darkness. She’s a warrior who fights for preservation, ensuring the continuation of stories, traditions, and the sacred feminine, a powerful legacy.

Defining the “Woman Warrior”

Exploring the essence of the “Woman Warrior” requires examining qualities beyond combat, often detailed in accessible PDF resources for deeper understanding.

Beyond Physical Combat: Defining Warrior Qualities

The “Woman Warrior” transcends mere physical prowess; it embodies a constellation of inner strengths and resolute characteristics. While historical depictions often focus on battlefield courage, the archetype’s true power lies in planning, decisive action, and overcoming deeply rooted fears – qualities extensively explored in numerous digital texts and readily available PDF documents.

Assertiveness and the ability to establish firm boundaries are paramount, representing a refusal to compromise safety or integrity. This echoes the spirit of the “woman who refuses to be nice” when niceness equates to vulnerability. These nuanced aspects, alongside wisdom and fierce protection, are often detailed within scholarly articles and accessible online resources, frequently offered as downloadable PDFs.

Furthermore, the warrior spirit isn’t limited to military service; it manifests in activism, motherhood, and any arena demanding unwavering dedication and resilience. Understanding these multifaceted qualities is crucial, and a wealth of information, including comprehensive analyses, can be found in dedicated PDF guides and online communities.

The “Woman Who Refuses to Be Nice” – Assertiveness and Boundaries

This facet of the “Woman Warrior” archetype embodies a radical self-preservation, prioritizing safety over societal expectations of politeness. She is the embodiment of strength, akin to a mother bear fiercely defending her cubs – a powerful image frequently analyzed in academic PDFs exploring feminine archetypes.

Assertiveness isn’t aggression; it’s the clear and confident articulation of needs and boundaries. This refusal to be placid when faced with danger or injustice is a core tenet of the warrior spirit, detailed in numerous downloadable resources and online discussions, often compiled into comprehensive PDF guides.

Exploring this concept through digital texts reveals how historical and mythological figures demonstrate this quality, challenging norms and demanding respect. Accessing these analyses, often available as free PDFs, provides a deeper understanding of the “Woman Warrior’s” unwavering commitment to self-protection and the protection of others.

Literary and Cultural Representations

Examining witches, martyrs, and warriors in literature, accessible through numerous PDF analyses, reveals evolving depictions of feminine strength and resilience across cultures.

Female Archetypes in Literature: Witches, Martyrs, and Warriors

Literary analysis frequently dissects the complex roles women inhabit, categorizing them into archetypes like the witch, the martyr, and the warrior – each representing distinct facets of feminine power. Accessing critical essays and scholarly articles in PDF format provides deeper insight into these representations.

The witch, often demonized yet possessing agency, embodies untamed power and knowledge. Martyrs symbolize sacrifice and unwavering faith, while the warrior, a figure of strength and courage, challenges societal norms. These archetypes aren’t mutually exclusive; a single character can embody multiple traits.

Exploring these figures through digital texts reveals how authors have historically portrayed women – sometimes as victims, sometimes as villains, and increasingly, as complex heroes. PDF collections of literary criticism offer nuanced perspectives on these evolving representations, highlighting the cultural contexts that shape them and the enduring appeal of the “woman warrior” archetype.

Echoes of Her: Women in Greek Myths – Artistic Interpretations

The “Echoes of Her” exhibition at XeniArtSpace Gallery powerfully reimagines women from Greek mythology, offering fresh artistic interpretations of figures often relegated to supporting roles. Examining exhibition catalogs and related scholarly articles – frequently available as PDF downloads – reveals the artists’ deliberate focus on reclaiming these narratives.

These reinterpretations move beyond traditional depictions, highlighting the strength, agency, and complexity of characters like Penelope, Clytemnestra, and Medusa. The exhibition challenges viewers to reconsider these myths through a contemporary lens, recognizing the warrior spirit inherent in many of these women.

Digital resources, including PDF versions of artist statements and critical reviews, provide valuable context for understanding the exhibition’s themes and its contribution to ongoing conversations about female representation in art and mythology. The artwork serves as a visual exploration of the “woman warrior” archetype, demonstrating its enduring relevance.

The Modern “Woman Warrior”

Contemporary interpretations of the “woman warrior” emphasize inner strength, resilience, and assertive boundaries, often explored in downloadable PDF guides.

The Inner Warrior: Planning, Doing, and Overcoming Fears

The modern “woman warrior” isn’t solely defined by physical prowess; she’s a strategic planner and a dedicated doer, navigating life’s challenges with courage and determination. This inner strength, often detailed in accessible PDF resources, allows her to confront fears head-on, acknowledging vulnerabilities while refusing to be paralyzed by them.

She understands that stumbling and falling are inevitable parts of the journey, but possesses the resilience to rise again, learning from each experience. These downloadable guides frequently emphasize the importance of self-compassion alongside assertive action. The “woman warrior” archetype, as presented in these materials, isn’t about eliminating fear, but about acting despite it.

It’s about cultivating a mindset of proactive problem-solving and unwavering self-belief, empowering women to take control of their narratives and forge their own paths. Many PDFs offer practical exercises and affirmations to help cultivate this inner fortitude, fostering a sense of agency and empowerment.

Recognizing Military Service and Warrior Status in Women

Defining a “woman warrior” extends beyond metaphorical battles; it inherently includes acknowledging the vital contributions of women in military service. True warrior status, according to many analyses available in PDF format, necessitates belonging to a recognized military structure – be it a formal army or an organized defense force.

These documents highlight the historical underrepresentation and often-overlooked sacrifices of women in combat and support roles. Recognizing their service isn’t merely about acknowledging their participation, but validating their experiences and the unique challenges they face. Numerous PDF reports detail the evolving role of women in modern warfare.

Furthermore, the concept of “warrior” isn’t limited to frontline combat; it encompasses all who serve with courage, dedication, and a commitment to protecting others. Accessible PDF resources advocate for inclusive definitions that honor the diverse ways women contribute to national security and peacekeeping efforts.

Resources and Further Exploration

Numerous “Woman Warrior” PDFs and digital texts offer in-depth analyses, while online communities and forums provide spaces for vibrant discussion and shared insights.

Finding “Woman Warrior” PDFs and Digital Texts

Locating scholarly articles and comprehensive analyses of the “Woman Warrior” archetype in PDF format is increasingly accessible through various online databases and digital libraries. Academic institutions often provide open access to research papers exploring mythological origins, historical contexts, and literary representations of female warriors.

Furthermore, platforms like JSTOR, Project MUSE, and Google Scholar are invaluable resources for discovering peer-reviewed articles. Searching keywords such as “female warrior archetype,” “mythology and women,” or specific goddess names (Diana, Inanna) will yield relevant results. Many university libraries also offer digital collections containing digitized books and manuscripts pertaining to this subject.

Beyond academic sources, independent researchers and enthusiasts have compiled collections of essays and analyses available as downloadable PDFs. Online forums and communities dedicated to mythology, feminism, and archetypal psychology frequently share links to these resources. Remember to critically evaluate the source and author before accepting the information presented.

Online Communities and Forums for Discussion

Engaging with online communities and forums provides a dynamic space to explore the “Woman Warrior” archetype, share insights from PDF resources, and participate in thoughtful discussions. Platforms like Woman.ru, while primarily a lifestyle magazine, host forums where users discuss female empowerment and strength, often touching upon warrior themes.

Reddit hosts numerous subreddits dedicated to mythology, feminism, and archetypes, offering opportunities to connect with like-minded individuals. Dedicated discussion threads can be initiated to analyze specific PDF articles or explore interpretations of female warrior figures. Similarly, Facebook groups focused on mythology and women’s studies foster vibrant conversations.

XeniArtSpace Gallery’s online presence, particularly following their “Echoes of Her” exhibition, may host discussion boards or social media groups where attendees and art enthusiasts can share their perspectives. These platforms facilitate a collaborative learning environment, allowing individuals to deepen their understanding of the archetype through shared knowledge and diverse viewpoints.

futon bunk bed instructions

Welcome! These instructions are crucial for safely assembling your multifunctional futon bunk bed, offering a chic and versatile sleeping solution.

Carefully review all steps before beginning, ensuring a secure and enjoyable build process.

This guide will help you transform individual parts into a stylish and functional piece of furniture.

Understanding the Multifunctional Design

This futon bunk bed uniquely combines sleeping and lounging options, offering exceptional versatility. The lower bunk effortlessly converts from a cozy daybed into a full-size bed, maximizing space utilization.

This design is ideal for rooms needing adaptable furniture, easily splitting into two separate beds if needed.

Its convertible nature makes it perfect for guest rooms or shared spaces, providing flexible sleeping arrangements and a stylish aesthetic.

Enjoy the convenience of a bunk bed with the added benefit of a comfortable futon option!

Safety Precautions Before You Begin

Prioritize safety! Carefully read all assembly instructions before starting. Ensure a spacious, clear workspace to prevent accidents.

Two people are recommended for assembly, especially during frame construction.

Always inspect all parts for damage before use.

Follow warning label guidelines strictly, and never allow children to assemble the bunk bed. Regularly inspect hardware for tightness and address any wobbles immediately.

Safe usage practices are essential for bunk bed longevity and user well-being.

Unboxing and Inventory

Begin by carefully unboxing all components and comparing them against the detailed parts list provided.

Check for any missing or damaged pieces before proceeding with assembly.

Checking the Parts List

Thoroughly examine the included parts list to familiarize yourself with each component of the futon bunk bed. Verify that all listed items are present within the packaging, noting quantities and specific part designations.

Pay close attention to distinctions between similar-looking pieces.

Confirm you have side rails, headboard, footboard, futon frame parts (P & Q), hardware, and any additional support structures.

Missing parts will delay assembly; contact the manufacturer immediately for replacements.

Identifying Hardware Components

Carefully separate and identify all hardware components. This includes various screws, bolts, washers, and potentially specialized connectors for the futon mechanism.

Organize them for easy access during assembly – small containers or labeled bags are helpful.

Distinguish between different screw lengths and bolt types, as using the wrong hardware can compromise structural integrity.

Refer to the parts list to match hardware with its intended location, ensuring a smooth and secure build.

Tools Required for Assembly

Essential tools include screwdrivers, wrenches, and potentially a rubber mallet. Optional power tools, like a drill, can expedite the process, but manual tools offer greater control.

Essential Hand Tools

For successful assembly, gather a Phillips head screwdriver for most screw fastenings, and a flathead screwdriver for specific hardware. A wrench set, including both open-end and box-end wrenches, is vital for tightening bolts securely.

Consider a rubber mallet to gently tap pieces together without causing damage; Measuring tape ensures accurate alignment, while a level guarantees stability. Don’t forget work gloves to protect your hands during the build!

These basic hand tools will be sufficient for a complete and safe assembly.

Recommended Power Tools (Optional)

To expedite assembly, a power drill with various bits is highly recommended, significantly reducing manual screwing time. An impact driver provides extra torque for stubborn bolts, ensuring a tight and secure fit.

A power screwdriver with adjustable clutch settings prevents over-tightening and damage to the wood. Utilize a power sander for smoothing any rough edges or imperfections.

These tools are optional but can greatly enhance efficiency and ease the assembly process, especially for larger bunk bed models.

Assembling the Bunk Bed Frame

Begin frame construction by carefully attaching the side rails to the headboard and footboard, ensuring proper alignment and secure fastening with provided hardware.

Double-check stability!

Attaching the Side Rails

Securely connect the side rails to the headboard and footboard using the provided bolts and hardware. Ensure proper alignment before fully tightening, as misalignment can compromise the bed’s stability.

Pay close attention to the orientation of the rails, as some may be specifically designed for either the left or right side.

Double-check that all bolts are tightened evenly to prevent wobbling and ensure a robust frame.

This foundational step is critical for the overall safety and longevity of the bunk bed.

Securing the Headboard and Footboard

Begin by attaching the headboard and footboard to the side rails using the designated bolts and washers. Confirm proper alignment before tightening to guarantee a square and stable frame.

Inspect the connection points for any gaps or inconsistencies, adjusting as needed.

Tighten all bolts firmly, but avoid over-tightening, which could damage the wood.

A well-secured headboard and footboard are essential for the bunk bed’s structural integrity and safety.

Futon Mechanism Installation

Install the futon frame and connect the hinges carefully, sliding the futon frame portion into the other.

Ensure smooth operation for easy conversion between bed modes.

Installing the Futon Frame

Begin by carefully positioning the futon frame components (P and Q, as referenced in instructions). Gently slide the futon frame portion (Q) into the corresponding slot within the futon frame portion (P).

Ensure a snug and secure fit, verifying that the mechanism aligns correctly for smooth operation.

Double-check all connections before proceeding, as proper installation is vital for safe and efficient conversion between bunk and futon modes.

Refer to diagrams for visual guidance during this step.

Connecting the Futon Hinges

Carefully align the futon hinges with the pre-drilled holes on both the futon frame and the bunk bed structure. Securely fasten the hinges using the provided hardware, ensuring they are tightened adequately for stability.

Verify smooth articulation of the hinges, testing the futon’s folding and unfolding motion.

Proper hinge connection is crucial for safe and reliable conversion between bed configurations.

Inspect for alignment and re-tighten if necessary.

Converting to a Full-Size Bed

To transform the futon bunk into a full bed, remove the futon mechanism and fully extend the lower bed frame for ample sleeping space.

Removing the Futon Mechanism

Carefully disconnect the futon hinges from both the bunk bed frame and the futon frame portion. Slide the futon frame portion (Q) out of the futon frame portion (P).

This process allows for the conversion to a traditional full-size bed. Ensure all connections are fully released before attempting removal.

Store the futon mechanism safely if you anticipate converting back to the futon configuration in the future.

Remember to consult the assembly instructions for detailed diagrams.

Extending the Lower Bed Frame

To create a full-size bed, carefully pull the lower bed frame outwards until it reaches its maximum extension. Ensure the frame locks securely into place, providing a stable sleeping surface.

The full bed dimension is approximately 76L x 54.4W, offering ample space.

Double-check all locking mechanisms before use.

This conversion utilizes the bed’s inherent versatility, eliminating the need for additional components.

Step-by-Step Assembly Instructions

Follow these detailed instructions for frame construction and futon frame attachment. Prioritize safety and carefully check each connection point during assembly.

Refer to diagrams for clarity.

Detailed Guide to Frame Construction

Begin by attaching the side rails to the headboard and footboard, ensuring a snug fit using the provided hardware. Double-check alignment before fully tightening screws for stability.

Next, carefully secure all connections, referencing the diagrams for correct orientation.

Pay close attention to the placement of support slats, distributing them evenly across the frame to create a solid foundation.

A wobbly frame indicates loose connections – re-tighten immediately!

Futon Frame Attachment Process

Begin by sliding the futon frame portion (Q) into the futon frame portion (P), aligning the hinges carefully. Ensure smooth movement before securing with bolts.

Connect the futon hinges, verifying they operate freely and support the futon’s conversion.

Test the mechanism repeatedly, checking for any obstructions or binding.

Proper hinge connection is vital for safe and easy transition between bunk and full-size bed configurations.

Troubleshooting Common Issues

Addressing wobbles or futon mechanism problems requires checking hardware tightness and alignment. Inspect connections and re-tighten bolts for stability and smooth operation.

Addressing Wobbly Frames

A wobbly frame often indicates loose hardware connections. Carefully inspect all bolts, screws, and joints, ensuring they are securely tightened. Begin with the side rails, headboard, and footboard attachments.

If wobbling persists, check floor levelness; use shims under the bed legs if needed.

Re-tighten all connections after initial use, as wood can settle. Avoid over-tightening, which can strip screws or damage the wood.

Consistent checks will maintain stability.

Fixing Futon Mechanism Problems

If the futon isn’t converting smoothly, inspect the hinges for obstructions or misalignment. Lubricate the hinges with a silicone-based spray to reduce friction.

Ensure the futon frame is correctly seated within the bunk bed frame, and that no parts are bent or damaged.

Check that the connecting hardware is secure. If issues persist, refer to the manufacturer for replacement parts or further assistance.

Avoid forcing the mechanism.

Maintenance and Care

Regularly clean the frame with a damp cloth and inspect all hardware for tightness. Consistent checks ensure long-lasting stability and safety!

Cleaning the Frame

Maintaining a clean frame is essential for longevity and hygiene. Use a soft, damp cloth to wipe down all wooden surfaces, avoiding harsh chemicals or abrasive cleaners that could damage the finish.

For tougher stains, a mild soap solution can be used, followed by a thorough drying. Pay close attention to areas prone to dust accumulation, like the headboard and footboard.

Regular dusting prevents buildup and keeps the bunk bed looking its best. Vacuuming around and under the frame also helps remove debris.

Inspecting Hardware Regularly

Consistent hardware checks are vital for bunk bed safety and stability. At least every six months, or more frequently with regular use, inspect all bolts, screws, and connections.

Tighten any loose hardware immediately using the appropriate tools. Look for signs of wear, corrosion, or damage, and replace any compromised components promptly.

Pay special attention to the futon hinges and frame attachment points, ensuring they operate smoothly and securely. A proactive approach prevents potential issues.

Weight Capacity and Limitations

Observe weight limits! The upper bunk has a maximum capacity; use only compatible mattresses, typically 37.5-38.5 inches wide and 74 inches long.

Exceeding limits is dangerous.

Maximum Weight Limits for Upper Bunk

Safety First! The upper bunk is designed to accommodate a specific weight limit to ensure user safety. Exceeding this limit significantly increases the risk of structural failure and potential injury.

Always adhere to the manufacturer’s specified maximum weight capacity, which is typically around 165-200 pounds.

This limit includes the weight of the sleeper and any bedding materials. Regularly remind all users of this crucial safety guideline to prevent accidents and maintain the bunk bed’s integrity.

Restrictions on Mattress Types

Mattress Compatibility is Key! Using the correct mattress type is vital for both safety and functionality. The upper bunk requires a mattress with a specific thickness, generally between 6-8 inches, to ensure proper guardrail effectiveness.

Avoid using excessively thick or heavy mattresses, as they can compromise stability.

For the futon portion, a thinner, foldable futon mattress is essential for smooth conversion. Always check the manufacturer’s recommendations for compatible mattress dimensions and materials.

Warning Labels and Safety Guidelines

Prioritize Safety! Carefully review all warning labels for crucial information regarding bunk bed usage and limitations.

Always follow safe practices to prevent falls and ensure long-lasting enjoyment.

Understanding Warning Label Information

Crucially, warning labels detail essential safety precautions for bunk bed operation. They highlight maximum weight limits for both the upper bunk and the futon mechanism, preventing structural failure.

Labels also restrict the use of certain mattress types, ensuring proper support and minimizing suffocation hazards. Pay close attention to guidelines prohibiting potentially dangerous items near the bunk.

Ignoring these warnings can lead to serious injury; therefore, thoroughly understand each label before assembly and use. Regularly inspect labels for clarity and adherence.

Safe Usage Practices for Bunk Beds

Prioritize safety! Discourage young children from playing on or around the bunk bed without supervision. Always use a ladder designed for the bed, securing it properly. Regularly check all hardware – bolts, screws – for tightness to prevent instability.

Avoid placing the bunk bed near windows or cords. Educate all users about safe climbing and descending techniques. Never allow jumping on the bed, as this compromises structural integrity.

Ensure adequate headroom exists around the bunk, and maintain a clear floor space.

Future Reference & Re-Assembly

Keep these instructions! They are vital for future disassembly, storage, or re-assembly of your futon bunk bed. Careful preservation ensures a smooth process.

Keeping Instructions for Future Use

Preserve these assembly instructions for effortless future reference! Small parts can loosen during shipping, so retaining this guide aids in identifying components if needed. Should disassembly become necessary for moving or storage, these steps will prove invaluable.

Properly stored instructions also facilitate re-assembly, ensuring a quick return to a functional and safe bunk bed. Don’t discard – keep them accessible!

Disassembly and Storage Instructions

For disassembly, reverse the assembly process carefully, noting hardware locations. Detach the futon mechanism first, then proceed with frame components. Store all parts and hardware together in a labeled container to prevent loss.

When storing, protect the wood finish from damage with blankets or plastic sheeting. Keep instructions with stored parts for easy re-assembly when needed.

Mattress Size Specifications

Use a mattress 37 1/2 ⸺ 38 1/2 inches wide and 74 inches long for optimal fit and safety within the bunk bed frame.

Compatible Mattress Dimensions

Selecting the correct mattress is vital for both comfort and safety. The upper bunk specifically requires a standard twin-size mattress, measuring approximately 38.5 inches in width and 75 inches in length.

For the futon or lower bunk, a full-size mattress, typically around 54 inches wide and 75 inches long, is recommended when converted.

Ensure the mattress thickness doesn’t exceed safety guidelines, allowing sufficient space between the top of the mattress and the guardrails.

Recommended Mattress Thickness

Maintaining safety is paramount when choosing a mattress for your futon bunk bed. A mattress thickness of 6 to 8 inches is generally recommended for both the upper bunk and the futon/lower bed configuration.

This range ensures adequate comfort while preventing excessive height, which could compromise the bunk bed’s stability and increase the risk of falls.

Avoid overly thick mattresses that may reduce headroom or interfere with the futon mechanism’s functionality.

Finding Replacement Parts

Need a replacement? Contact the manufacturer directly or explore online retailers for specific hardware. Maintaining your bunk bed is now easier!

Ensure compatibility before ordering.

Contacting the Manufacturer

For direct assistance, reaching out to the bunk bed’s manufacturer is often the quickest route to securing replacement parts. Locate their contact information – typically found on the original packaging, the assembly instructions, or their official website.

Be prepared to provide your model number (656/0032) and a detailed description of the part needed.

Many manufacturers offer dedicated customer support teams to assist with inquiries and expedite the replacement process, ensuring your bunk bed remains safe and functional.

Online Retailers for Replacement Hardware

Numerous online retailers specialize in replacement hardware for furniture, offering a convenient alternative to contacting the manufacturer directly. Websites like Amazon, eBay, and specialized furniture parts suppliers often stock a wide variety of bolts, screws, and hinges.

Ensure you accurately identify the required hardware specifications – size, thread type, and material – for a perfect fit.

Compare prices and read customer reviews before purchasing to guarantee quality and compatibility with your futon bunk bed.

char broil big easy infrared turkey fryer manual

Char-Broil Big Easy Infrared Turkey Fryer Manual: A Comprehensive Guide

This manual details the Char-Broil Big Easy TRU-Infrared Oil-Less Turkey Fryer, offering setup, operation, and maintenance guidance for a safe, flavorful cooking experience.

The Char-Broil Big Easy TRU-Infrared Oil-Less Turkey Fryer represents a revolutionary approach to holiday cooking, eliminating the dangers and mess associated with traditional oil-based turkey frying. This innovative appliance utilizes infrared heat and convection to deliver a remarkably juicy and flavorful turkey, chicken, or other meats.

Designed for convenience and safety, the Big Easy offers a faster cooking time compared to conventional ovens, while also reducing fat content. It’s a practical solution for those seeking a hassle-free way to prepare delicious meals, especially during peak seasons like Thanksgiving and Black Friday.

Understanding TRU-Infrared Technology

TRU-Infrared technology is the core of the Char-Broil Big Easy’s cooking prowess. Unlike conventional heating methods, TRU-Infrared uses a stainless steel emitter panel to evenly distribute intense radiant heat, directly cooking the food rather than heating the air around it.

This results in faster cooking times, reduced energy consumption, and significantly less moisture loss, leading to juicier, more flavorful results. The system minimizes flare-ups and promotes consistent temperatures, ensuring a perfectly cooked turkey without the need for messy oil. It’s a safer and more efficient alternative to traditional frying.

Safety Precautions for Oil-Less Turkey Frying

The Char-Broil Big Easy eliminates oil, but safety remains paramount. Always operate the fryer outdoors, away from structures and flammable materials. Ensure the unit is on a stable, level surface. Never leave the fryer unattended during operation.

Use oven mitts when handling hot components. Allow the fryer to cool completely before disassembly or cleaning. Keep children and pets away from the hot appliance. Avoid touching the heating element. Proper grounding is essential; never use an extension cord unless absolutely necessary and it’s appropriately rated.

Unboxing and Component Checklist

Upon unboxing your Char-Broil Big Easy, verify all components are present. The package should include the fryer base with legs, the cooking well, a fryer basket, and a lid with the control panel. A food thermometer is also included for accurate temperature readings;

Inspect each part for shipping damage. Refer to the parts diagram in this manual to confirm everything is accounted for. If any components are missing or damaged, contact Char-Broil customer support immediately before assembly. Retain the original packaging for potential returns or warranty claims.

Fryer Basket

The fryer basket is a crucial component, designed to securely hold your turkey or other food during the cooking process. Constructed from durable materials, it allows for easy lifting and removal of the food from the cooking well. Ensure the basket is clean and free of debris before each use.

Properly seating the basket within the cooking well is essential for even cooking. The basket’s design facilitates airflow around the food, contributing to the TRU-Infrared system’s efficiency. Handle the basket with care, using oven mitts when hot.

Cooking Well

The cooking well is the heart of the Char-Broil Big Easy, utilizing TRU-Infrared technology for efficient and even heating. This component houses the burner and directs heat around the food, eliminating the need for oil. Regularly cleaning the cooking well is vital for optimal performance and preventing flare-ups.

Ensure the well is properly assembled and free from obstructions before operation. The design minimizes smoke and ensures a juicy, flavorful result. The well’s shape promotes convection, circulating heat for consistent cooking. Inspect for damage before each use.

Lid and Control Panel

The lid of the Char-Broil Big Easy securely covers the cooking well, retaining heat and moisture during operation. It features a viewing window for monitoring cooking progress without releasing valuable heat. The control panel allows precise temperature and timer settings, crucial for achieving perfectly cooked results.

Familiarize yourself with the control panel’s features, including the temperature dial and timer functions. Proper lid closure is essential for efficient infrared cooking. Regularly inspect the lid’s seal for damage. The control panel ensures consistent and repeatable cooking outcomes.

Base and Legs

The base of the Char-Broil Big Easy provides a stable foundation for the entire unit, ensuring safe operation. Sturdy legs elevate the fryer to a comfortable working height, preventing strain during loading and unloading. These legs are designed for outdoor use on a level surface.

Inspect the legs regularly for stability and ensure they are securely attached to the base. Proper grounding is vital for electrical safety. The base is constructed from durable materials to withstand outdoor conditions. Maintaining a level setup prevents uneven cooking and potential hazards.

Assembly Instructions

Begin by carefully unpacking all components and verifying against the component checklist. Attach the legs to the base, ensuring they click securely into place; Next, position the cooking well onto the base, aligning the designated slots. Carefully lower the fryer basket into the cooking well, confirming it moves freely.

Finally, place the lid onto the cooking well, ensuring a snug fit. Connect the control panel, following the diagram in the manual. Double-check all connections before the initial burn-off. Refer to the detailed diagrams for visual guidance throughout the assembly process.

Preparing the Turkey for Cooking

Proper turkey preparation is crucial for optimal results. Begin by completely thawing the turkey – allow ample time, calculating roughly 24 hours per 5 pounds. Next, consider brining or seasoning the turkey to enhance flavor and moisture. Pat the turkey thoroughly dry, inside and out, with paper towels; this promotes crispy skin.

Remove the neck and giblets from the cavity. Ensure no ice crystals remain, as this can affect cooking time. A dry turkey cooks more evenly and efficiently with the Big Easy fryer.

Thawing the Turkey

Safe thawing is paramount before using your Char-Broil Big Easy. The refrigerator method is recommended: allow approximately 24 hours for every 5 pounds of turkey. Ensure the turkey remains in its original packaging and is placed on a tray to catch any drips. Alternatively, a cold water bath can be used, changing the water every 30 minutes.

Never thaw at room temperature. A fully thawed turkey will have no ice crystals inside the cavity and should be pliable to the touch. Proper thawing ensures even cooking and food safety.

Brining and Seasoning

Brining enhances turkey flavor and moisture. A basic brine consists of water, salt, and sugar, with optional herbs and spices. Submerge the thawed turkey in the brine for 12-24 hours in a food-safe container, refrigerated. After brining, thoroughly rinse and pat the turkey dry.

Seasoning can be done before or after brining. For the Big Easy, a dry rub works well – combine your favorite herbs, spices, and seasonings. Apply generously, ensuring even coverage, both under and over the skin.

Drying the Turkey

Drying the turkey’s skin is crucial for achieving crispy results with the Char-Broil Big Easy. After brining and seasoning, pat the turkey completely dry with paper towels, inside and out. Place the turkey uncovered on a rack in the refrigerator for at least four hours, or preferably overnight.

This allows the skin to dry out, promoting better browning and a more appealing texture. A dry surface reacts better to the infrared heat, ensuring a flavorful, evenly cooked bird. Don’t skip this step!

Operating the Char-Broil Big Easy

Operating your Char-Broil Big Easy is straightforward. Begin with the initial burn-off to eliminate any manufacturing residues. Ensure the unit is on a level, non-combustible surface. Connect the propane tank securely. Turn the control knob to the “High” setting and ignite the burner.

Allow the fryer to burn for 15-20 minutes. Then, set the desired temperature and timer according to your turkey’s size. Monitor the cooking progress using the included thermometer, ensuring the internal temperature reaches a safe level.

Initial Burn-Off

Before your first use, perform an initial burn-off to eliminate any residual oils or manufacturing debris from the Char-Broil Big Easy. Ensure the unit is outdoors in a well-ventilated area, away from flammable materials. Connect a full propane tank securely. Open the lid and turn the control knob to the “High” setting, igniting the burner.

Allow the fryer to operate on high for approximately 15 to 20 minutes. This process will burn off any remaining substances, preparing the unit for safe and effective cooking.

Setting Temperature and Timer

To set the desired cooking temperature, turn the control knob to the appropriate setting, referencing the cooking times and temperatures chart within this manual. The Char-Broil Big Easy offers adjustable heat for versatile cooking. To set the timer, rotate the timer dial to the calculated cooking duration for your turkey or chosen food item.

The timer will automatically shut off the burner when the set time elapses. Regularly monitor the internal temperature using the included thermometer to ensure food safety and optimal results.

Monitoring Cooking Progress

Regularly check the turkey’s internal temperature using the included food thermometer, inserting it into the thickest part of the thigh without touching bone. The Char-Broil Big Easy’s TRU-Infrared technology cooks efficiently, but monitoring ensures optimal results. Visually inspect the bird periodically, noting the browning of the skin.

Avoid lifting the lid excessively, as this releases heat and extends cooking time. Trust the thermometer readings and the recommended internal temperature for safe and delicious results.

Cooking Times and Temperatures

Cooking duration with the Char-Broil Big Easy varies based on turkey weight; a 12-14 pound turkey typically requires 2.5 to 3 hours. Always prioritize internal temperature over time. The USDA recommends a minimum internal temperature of 165°F (74°C) in the thickest part of the thigh.

Smaller turkeys cook faster, while larger ones need extended time. Consistent monitoring with the included thermometer is crucial. Remember, these are estimates; always verify doneness with a reliable temperature reading for a safe and juicy bird.

Turkey Size and Cooking Duration

Char-Broil’s Big Easy accommodates turkeys up to 14 pounds efficiently. A 10-12 pound turkey generally cooks in approximately 2.5 hours, while a maximum 14-pound bird may take up to 3 hours. These times are estimates and depend on initial turkey temperature and ambient conditions.

Smaller turkeys will cook faster, potentially in around 2 hours; Always use a meat thermometer to confirm doneness, regardless of estimated cooking time. Consistent monitoring ensures a perfectly cooked, safe, and flavorful turkey every time.

Recommended Internal Temperature

For safe and delicious results, the Char-Broil Big Easy requires careful temperature monitoring. The USDA recommends cooking turkey to a minimum internal temperature of 165°F (74°C). Insert the included thermometer into the thickest part of the thigh, ensuring it doesn’t touch bone.

Check multiple spots to verify consistent temperature. Achieving 165°F guarantees harmful bacteria are eliminated. Allowing the turkey to rest for 20-30 minutes after cooking helps retain juices, resulting in a more tender and flavorful bird.

Using the Included Food Thermometer

The Char-Broil Big Easy includes a food thermometer for accurate temperature readings. Insert the probe into the thickest part of the turkey thigh, avoiding bone contact for a precise measurement. Regularly monitor the internal temperature during cooking, especially nearing the estimated completion time.

Consider upgrading to a digital thermometer, like the Char-Broil Smart thermometer, for remote monitoring and alerts. Consistent temperature checks are crucial for ensuring the turkey reaches the safe minimum internal temperature of 165°F (74°C).

Cleaning and Maintenance

Regular cleaning extends the life of your Char-Broil Big Easy. After each use, allow the unit to cool completely. Remove and clean the cooking well and fryer basket with warm, soapy water; avoid abrasive cleaners. Wipe down the exterior with a damp cloth.

Ensure all components are thoroughly dry before reassembly. Periodically inspect the burner for obstructions. Proper maintenance ensures optimal performance and prevents potential issues. Refer to the manual for detailed cleaning instructions and safety precautions.

Cleaning the Cooking Well

After each use, once cooled, remove the cooking well from the Char-Broil Big Easy. Wash it thoroughly with warm, soapy water, ensuring all grease and food residue are removed. Avoid using abrasive cleaners or scouring pads, as they can damage the surface.

A soft sponge or cloth is recommended. Rinse completely and allow to dry fully before replacing it in the fryer. Inspect for any damage or buildup during cleaning. A clean cooking well ensures optimal heat distribution and food safety.

Cleaning the Fryer Basket

The fryer basket requires careful cleaning after each use with your Char-Broil Big Easy. Remove any remaining food particles and grease with warm, soapy water. A nylon brush can assist in removing stubborn residue. Avoid abrasive cleaners that could damage the basket’s non-stick coating.

Ensure the basket is thoroughly rinsed and completely dry before storing or reusing. Inspect the basket for any signs of wear or damage. A clean basket promotes even cooking and prevents flavor transfer between different foods.

Cleaning the Exterior

Maintaining the exterior of your Char-Broil Big Easy is crucial for longevity and appearance. Wipe down the exterior surfaces with a damp cloth and mild dish soap after each use, ensuring the unit is cool. Avoid abrasive cleaners or scouring pads, as they can scratch the finish.

Pay attention to the control panel, gently cleaning around the buttons and display. Never immerse the fryer base in water. Regularly inspect the legs and base for any buildup and clean accordingly. A clean exterior enhances the overall cooking experience.

Troubleshooting Common Issues

Addressing issues with your Char-Broil Big Easy is often straightforward. If the fryer isn’t heating, check the power connection and ensure the unit is properly plugged in. For uneven cooking, ensure the turkey is positioned correctly within the basket. Temperature fluctuations can occur; allow time for stabilization.

If problems persist, consult the manual for detailed guidance. Avoid attempting repairs yourself, as this could void the warranty. Contact Char-Broil customer support for assistance with more complex issues, ensuring safe and efficient operation.

Fryer Not Heating

If your Char-Broil Big Easy isn’t heating, begin by verifying the power supply. Ensure the unit is securely plugged into a functioning outlet. Check the electrical cord for any visible damage. Confirm the control panel is illuminated, indicating power is reaching the unit. If still unresponsive, examine the burner area for obstructions.

A faulty heating element or control panel could be the cause; avoid self-repair. Contact Char-Broil customer support for professional diagnosis and potential repair options, ensuring safe operation and maintaining your warranty.

Uneven Cooking

Experiencing uneven cooking with your Char-Broil Big Easy? Ensure the turkey is positioned correctly within the basket and cooking well, allowing for consistent infrared heat exposure. Avoid overcrowding; cook within the recommended weight limits. Verify proper airflow around the fryer – don’t enclose it.

Rotating the basket midway through cooking can promote evenness. Utilize the included thermometer to check internal temperatures in multiple locations. If issues persist, contact Char-Broil support; uneven heating may indicate a component malfunction requiring professional attention.

Temperature Fluctuations

Noticing temperature swings during operation of your Char-Broil Big Easy? External factors like wind or cold ambient temperatures can impact performance. Ensure the fryer is sheltered and avoid use during harsh weather. Confirm the lid is securely closed, maintaining consistent heat retention.

Check the power supply for stability. Significant or persistent fluctuations may indicate a faulty heating element or control panel component. Consult the troubleshooting section or contact Char-Broil customer service for assistance and potential repair options.

Recipes Beyond Turkey

The Char-Broil Big Easy isn’t limited to just Thanksgiving! Explore diverse cooking options. Juicy roasted chicken achieves crispy skin with reduced cooking time. Flavorful ribs benefit from the infrared heat, becoming tender and succulent. Prepare a delicious ham, retaining moisture and developing a delightful glaze.

Experiment with various seasonings and marinades to customize your dishes. Remember to adjust cooking times based on the food’s weight and desired internal temperature. Unlock the full potential of your fryer beyond the traditional turkey!

Roasting Chicken

The Char-Broil Big Easy excels at roasting chicken, delivering remarkably crispy skin and juicy meat. A whole chicken cooks faster than in a conventional oven, thanks to the TRU-Infrared technology. Ensure the chicken is thoroughly thawed and patted dry before seasoning. Consider using a dry brine for enhanced flavor and moisture retention.

Cooking times vary based on the chicken’s weight; generally, allow approximately 60-90 minutes. Monitor the internal temperature using the included thermometer, aiming for 165°F (74°C) in the thickest part of the thigh.

Cooking Ribs

The Char-Broil Big Easy is surprisingly adept at cooking ribs, yielding tender, fall-off-the-bone results. Baby back or spare ribs work well; consider removing the membrane for increased tenderness. Season generously with your favorite rib rub. For best results, employ the 3-2-1 method – 3 hours smoking, 2 hours wrapped, and 1 hour unwrapped.

Maintain a temperature around 225-250°F (107-121°C). Wrapping the ribs in foil during the second phase helps retain moisture. The final hour unwrapped allows for a beautiful bark to develop. Ensure internal temperature reaches 195-203°F (90-95°C).

Preparing Ham

The Char-Broil Big Easy excels at cooking hams, delivering moist and flavorful results without drying them out. A fully cooked ham simply requires reheating, while a spiral-cut ham benefits from added moisture. Score the ham’s surface in a diamond pattern and stud with cloves for enhanced flavor. Consider a glaze – brown sugar and mustard are classic choices.

Maintain a temperature around 225-250°F (107-121°C). Cooking time depends on the ham’s size; aim for 10-12 minutes per pound. Ensure the internal temperature reaches 140°F (60°C) for safe consumption.

Understanding the Control Panel Features

The Char-Broil Big Easy’s control panel is designed for intuitive operation. The primary feature is the temperature control knob, allowing precise setting from warm to 450°F. A built-in timer enables you to set desired cooking durations, automatically shutting off the unit upon completion. Char-Broil also offers a Smart thermometer upgrade for remote monitoring.

The power button initiates the heating process, while indicator lights confirm power and heating status. Familiarize yourself with these controls for optimal performance and safe operation. Refer to the manual for detailed explanations.

Warranty Information

Char-Broil offers a limited warranty on the Big Easy Infrared Turkey Fryer, protecting against manufacturing defects. The standard warranty typically covers the main burner for a specified period, often one or two years from the date of purchase. Other components, like the housing and cooking well, may have shorter coverage durations.

To make a claim, retain your proof of purchase and contact Char-Broil’s customer service. The warranty doesn’t cover damage from misuse, accidents, or normal wear and tear. Review the full warranty details included with your fryer.

Char-Broil Model Numbers and Series

The Char-Broil Big Easy TRU-Infrared Oil-Less Turkey Fryer is identified by specific model numbers, with 14101480 being a common designation. Char-Broil organizes its products into various series, including Signature, Commercial, and Performance. The Big Easy falls within a series focused on innovative cooking solutions.

Understanding the model number helps when ordering replacement parts or accessing specific documentation. Char-Broil also produces other grill lines like Hawg, CB 940, and Char-Diamonds. Knowing your fryer’s series aids in identifying compatible accessories.

Finding Replacement Parts

Replacement parts for your Char-Broil Big Easy TRU-Infrared Turkey Fryer can be sourced through several channels. The official Char-Broil website is a primary resource, offering a parts lookup tool using your model number (14101480). Retailers like Amazon and other appliance parts suppliers also stock components.

Commonly needed replacements include the fryer basket, thermometer, and burner components. Always verify part compatibility before purchasing. Maintaining your fryer with genuine Char-Broil parts ensures optimal performance and safety, extending the lifespan of your cooking appliance.

PDF Manual Availability

A PDF version of the Char-Broil Big Easy TRU-Infrared Turkey Fryer manual is readily accessible online. Websites like Manualzilla host downloadable copies, identified by identifier 7062059, converted from PDF to hocr format. This digital format allows for easy access on various devices, eliminating the need for a physical copy.

Char-Broil’s official website may also provide a downloadable PDF. Having the manual in PDF format is beneficial for quick reference during setup, operation, and troubleshooting, ensuring a smooth cooking experience with your fryer.

Early Black Friday Deals and Availability

Amazon’s early Black Friday Sale frequently features deals on the Char-Broil Big Easy TRU-Infrared Oil-Less Turkey Fryer, making it a practical option for holiday cooking. Availability varies, but major retailers often participate in these pre-holiday promotions.

Checking online retailers and Char-Broil’s website during the Black Friday period is crucial for securing the best prices. Demand is high, so early shopping is recommended. These deals present an excellent opportunity to acquire this popular fryer at a reduced cost, enhancing your festive feasts!

Risks of Traditional Oil Frying vs. Infrared

Traditional oil frying poses significant risks, including burns from hot oil and potential fires caused by a turkey reacting with water. The Char-Broil Big Easy utilizes TRU-Infrared technology, eliminating these hazards by cooking without submerging the turkey in oil.

Infrared cooking reduces calorie intake and avoids messy oil spills; It offers a safer, cleaner alternative, delivering a comparable deep-fried flavor without the associated dangers. This makes the Big Easy a preferred choice for worry-free holiday cooking.

The Char-Broil Big Easy TRU-Infrared Oil-Less Turkey Fryer presents a compelling alternative to traditional oil frying, prioritizing safety and convenience. This manual provides comprehensive guidance for optimal performance, from assembly to cleaning.

Its infrared technology delivers juicy, flavorful results while minimizing risks and mess. Whether roasting a turkey, chicken, or ribs, the Big Easy offers versatility and ease of use. Explore the included recipes and enjoy stress-free cooking for holidays and gatherings!

flint tv guide

Flint TV Guide: Comprehensive Listings and Information (December 20, 2025)

Welcome to your complete Flint TV Guide! Discover local channels, streaming options, and detailed schedules for December 20, 2025.
Find listings for WEYI, WJBK, and more!

Access TV Listings via antenna, cable (AT&T U-Verse), or popular TV Apps. Stay connected with local news, sports, and entertainment!

Understanding Flint’s TV Landscape

Flint, Michigan’s television market is uniquely positioned, drawing signals from both local stations and the larger Detroit media hub. This creates a diverse viewing experience for residents, offering a blend of local news, network programming, and specialized content. Historically, over-the-air (OTA) broadcasts have been a cornerstone of Flint’s TV access, providing free access to major networks. However, the landscape is rapidly evolving.

Cable TV providers like AT&T U-Verse continue to serve a significant portion of the population, offering bundled packages and enhanced channel lineups. Simultaneously, the rise of streaming services is dramatically altering how Flint residents consume television. Viewers now have unprecedented control over their viewing schedules and content choices.

Key local stations, such as WEYI (MidMichiganNow), play a vital role in delivering regional news, weather, and community programming. WJBK (Fox 2 Detroit) also holds considerable viewership in Flint, extending the reach of Detroit-based broadcasting. Understanding these dynamics – the interplay between OTA, cable, and streaming – is crucial for navigating the current TV listings and maximizing your entertainment options in Flint.

The availability of TV schedule information is also fragmented, requiring viewers to utilize multiple resources like websites and TV Apps.

Local Channels Available in Flint, MI

Flint, Michigan, and the surrounding Saginaw-Bay City area, benefit from a range of local television channels. WEYI (MidMichiganNow) is a primary local broadcaster, delivering news, sports, and weather specifically tailored to the region, including Lansing, Owosso, and Chesaning. This station provides crucial coverage of local events and community concerns.

While not strictly “local” in the same sense, WJBK (Fox 2 Detroit) enjoys significant viewership within the Flint market. As part of the Detroit media landscape, WJBK offers network programming, news, and entertainment content accessible to Flint residents. Accessing these channels Over the Air is possible with an appropriate antenna.

Beyond these, viewers can receive major network affiliates through cable and satellite providers like AT&T U-Verse. These include ABC, NBC, CBS, and PBS stations serving the broader Michigan area. The specific channel lineup will vary depending on your chosen provider. Utilizing online TV Listings resources is essential to confirm channel availability and programming schedules. Remember to check for broadcast signals in the Flint-Sagnaw-Bay City area.

Staying informed about channel options ensures a comprehensive viewing experience.

Accessing TV Listings for Flint: Options & Providers

Flint residents have multiple avenues for accessing comprehensive TV listings. Traditionally, printed TV Guides were popular, but digital options now dominate. Online TV Listings websites and dedicated apps provide up-to-date schedules for all available channels.

Your choice of provider significantly impacts how you access listings. AT&T U-Verse subscribers can utilize the provider’s on-screen guide or their website/app. For Over-the-Air (OTA) TV, websites specializing in broadcast schedules are crucial. These sites detail programming for channels receivable via antenna in the Flint area.

Several websites aggregate listings from various sources, offering a centralized view. Local Now is one example, providing localized content. Streaming services also integrate TV listings, allowing you to browse live TV options within their platforms. Remember to select your television service provider to view accurate, personalized listings.

Exploring these options ensures you never miss your favorite shows or important news broadcasts in Flint, MI.

Over-the-Air (OTA) TV Listings for Flint

Over-the-Air (OTA) TV remains a viable and free option for Flint viewers. Utilizing a digital antenna, you can receive signals from local broadcast stations without subscription fees. However, accessing accurate listings requires specific resources.

Unlike cable or satellite, OTA doesn’t have a centralized guide. Instead, viewers rely on websites dedicated to compiling broadcast schedules. These sites, like TV Listings, provide detailed program information for the Flint-Saginaw-Bay City area. Listings typically include show titles, times, and channel numbers.

The availability of channels depends on your antenna’s strength and location. Common OTA channels in Flint include WEYI (MidMichiganNow), WJBK (Fox 2 Detroit), and other network affiliates. Regularly checking OTA TV listings websites is essential, as schedules can change.

Remember to rescan your antenna periodically to ensure you’re receiving all available channels. Enjoy free, local television with accurate OTA listings!

Cable TV Listings in Flint: AT&T U-Verse & More

For Flint residents preferring a traditional cable experience, AT&T U-Verse is a primary provider. However, accessing accurate TV listings differs depending on your service. AT&T U-Verse typically offers an on-screen program guide directly through your set-top box, providing a convenient way to browse channels and schedules.

Beyond the on-screen guide, AT&T U-Verse subscribers can utilize the provider’s website or mobile app for more detailed listings. These platforms often allow you to search for specific shows, set reminders, and explore program descriptions. Other cable providers serving parts of Flint may have similar online resources.

It’s crucial to select your specific television service provider when searching for TV listings online. Websites like TV Guide allow you to filter results based on your provider, ensuring you see the correct channel lineup and schedule. Remember that channel positions can vary, so referencing your provider’s guide is always recommended.

Enjoy a comprehensive viewing experience with accurate cable TV listings tailored to your Flint-area service!

Streaming Services & Flint TV Schedules

Flint viewers are increasingly turning to streaming services as alternatives to traditional broadcast and cable TV. Popular platforms like Netflix, Hulu, Disney+, and Paramount+ offer vast libraries of on-demand content, but live TV streaming services are also gaining traction;

Services such as YouTube TV, Sling TV, and Hulu + Live TV provide access to live channels, including many local networks broadcasting to the Flint area. However, schedules can differ slightly from traditional broadcast times due to regional variations and streaming rights.

To find specific showtimes on streaming services, utilize the platform’s built-in search function or third-party TV listing websites and apps that aggregate streaming schedules. Many services also offer personalized recommendations based on your viewing history.

Remember to check the streaming service’s website or app for the most up-to-date TV schedule information. Enjoy the flexibility and convenience of streaming entertainment in Flint!

WEYI (MidMichiganNow) Programming Guide

WEYI (MidMichiganNow) is a key local news and entertainment provider for the Flint and Saginaw area. As of December 20, 2025, the station delivers breaking news coverage, local sports updates, and detailed weather forecasts to viewers across Mid-Michigan, including Lansing, Owosso, and Chesaning.

Typical programming includes local newscasts throughout the day, syndicated talk shows, and nationally broadcast entertainment programs. WEYI also airs a variety of special events and community-focused content. Check local listings for specific times.

On December 20th, expect comprehensive coverage of regional events and potential winter weather advisories. TV Listings will detail the broadcast schedule, including news blocks, daytime programming, and primetime entertainment.

Stay informed with MidMichiganNow’s commitment to local journalism and community engagement. For the most current schedule, visit their official website or utilize a comprehensive TV Guide.

WJBK (Fox 2 Detroit) Schedule Highlights for Flint Viewers

WJBK (Fox 2 Detroit) serves as a significant entertainment and news source for viewers in Flint, offering a blend of national and regional programming. As of December 20, 2025, the station’s schedule features a mix of live news broadcasts, popular syndicated shows, and primetime network television.

Notably, WJBK’s movie schedule on this date includes “Jesus of Nazareth” at 4:00 PM and the classic film “The Robe” (1953) at 8:00 PM, followed by “Demetrius and the Gladiators.” These classic films provide a nostalgic viewing experience for many.

Beyond movies, expect regular news updates, including local Detroit and Michigan news impacting the Flint area. Sports coverage and weather reports are also integral parts of the daily schedule.

For precise TV Listings and schedule details, consult a current TV Guide or visit the WJBK website. Don’t miss out on the diverse programming available to Flint viewers!

How to Find Specific Shows & Movies on Flint TV

Locating your favorite shows and movies on Flint television is easier than ever with a variety of resources available. Start by choosing your television service provider – whether it’s an over-the-air antenna, cable (like AT&T U-Verse), or a streaming service. Each option offers unique ways to navigate schedules.

For comprehensive TV Listings, utilize dedicated websites and apps designed for Flint residents. These platforms allow you to search by show title, actor, or genre, providing a customized viewing experience. Remember to specify your zip code (48532) for accurate local listings.

TV Guide listings are readily accessible online, offering detailed schedules for broadcast, cable, and streaming options. Explore options like Local Now for convenient access. Don’t forget to check the individual network websites (WEYI, WJBK) for specific program details and on-demand content.

Stay connected and informed to never miss a moment of your preferred entertainment!

Sports Programming on Flint TV Channels

Flint sports enthusiasts have a diverse range of options for catching live games and sports-related programming; Local channels and national broadcasts combine to deliver thrilling action throughout the week. WJBK (Fox 2 Detroit) frequently airs major league games, providing coverage of Detroit’s professional teams.

To find specific sporting events, consult comprehensive TV Listings websites and apps. These resources allow you to filter by sport (football, basketball, baseball, hockey, and more) and team, ensuring you don’t miss a crucial game. Remember to check listings for both local and national broadcasts.

Streaming services also offer extensive sports coverage, often including exclusive games and in-depth analysis. Explore options like ESPN+ or dedicated sports packages. Keep an eye out for special event coverage on WEYI (MidMichiganNow), which may include local high school sports highlights.

Stay tuned and enjoy the excitement of sports on Flint TV!

News Coverage in Flint: Local & National Broadcasts

Flint residents have access to a robust mix of local and national news coverage through various television channels. WEYI (MidMichiganNow) serves as a primary source for breaking news, weather updates, and local events impacting the Saginaw, Lansing, and Owosso areas, alongside Flint itself. Their commitment to community reporting keeps viewers informed about crucial happenings.

For national news, WJBK (Fox 2 Detroit) provides coverage from a broader perspective, offering insights into national and international events. Utilizing TV Listings and news apps allows you to schedule viewing times for specific broadcasts.

Cable providers like AT&T U-Verse deliver a wide array of national news channels, including CNN, MSNBC, and Fox News, offering diverse viewpoints. Streaming services also provide access to live news streams and on-demand news segments.

Stay informed and engaged with the world around you through Flint’s comprehensive news landscape!

TV Listings Websites & Apps for Flint Residents

Flint residents have numerous digital resources to access comprehensive TV Listings and schedules. Several websites and applications streamline the process of finding what’s on, catering to diverse viewing preferences. Utilizing these tools ensures you never miss your favorite programs or important news broadcasts.

Dedicated TV Guide websites offer detailed listings, searchable by channel, time, or program title. Many providers, like AT&T U-Verse, feature integrated listings within their apps, providing a seamless experience. “Local Now” is another app offering localized content and schedules.

Streaming services often include “TV Apps” within their platforms, allowing users to browse live TV schedules alongside on-demand content. These apps frequently offer personalized recommendations based on viewing history. Websites specializing in broadcast TV Listings, specifically for over-the-air signals, are also available.

Don’t forget to “Stay Connected” by signing up for alerts and updates from your preferred providers!

Navigating the TV Guide: Tips & Tricks

Successfully navigating the Flint TV Guide requires understanding a few key strategies. Firstly, familiarize yourself with your provider’s specific interface – whether it’s a cable box guide, a streaming app, or a website. Utilize the search function extensively; it’s the quickest way to locate specific shows or movies.

Pay attention to program descriptions. These often reveal genre, actors, and potential content warnings. Many guides allow you to filter listings by genre (movies, sports, news) to streamline your search. Remember that listings are often presented in Eastern or Central Time, so adjust accordingly for accurate viewing times.

Explore the “favorites” or “watchlist” features offered by many apps and websites. This allows you to quickly access shows you regularly enjoy. Be aware of potential TV schedule changes, especially for live events like sports or breaking news.

Finally, consider using multiple sources – a website and an app – for redundancy and a more comprehensive view of available programming.

Understanding TV Schedule Changes & Updates

TV schedule fluctuations are a common occurrence, even with detailed Flint TV Guides. Several factors contribute to these changes. Live sports broadcasts are frequently subject to rescheduling due to weather or game outcomes, impacting subsequent programming. Breaking news events will often preempt regularly scheduled shows, prioritizing immediate coverage.

Networks also make adjustments for special events, such as holiday programming or televised awards shows. These changes are rarely announced far in advance, so frequent checking of listings is crucial. Streaming services generally offer more consistent schedules, but even they can alter release dates or remove content.

Utilize TV Listings websites and apps that offer real-time updates and notifications. Many providers now include alerts for schedule changes directly within their guide interfaces. Remember that local channels like WEYI may adjust schedules based on regional events or local news demands.

Always verify the schedule shortly before your desired viewing time to avoid disappointment.

Future of TV in Flint: Streaming vs. Traditional Broadcast

The television landscape in Flint, like the rest of the nation, is undergoing a significant shift. Traditional broadcast television, relying on over-the-air signals and cable providers like AT&T U-Verse, faces increasing competition from streaming services.

Streaming offers on-demand content, personalized recommendations, and often, a lower monthly cost, appealing to a growing segment of viewers. However, traditional broadcast retains advantages – local news coverage from channels like WEYI and WJBK, and live event broadcasting without potential streaming delays.

The future likely involves a hybrid model. Many Flint residents will “cut the cord” and rely primarily on streaming, while others will maintain a traditional setup or subscribe to streaming services in addition to cable or antenna access.

The availability of reliable high-speed internet in Flint will be a key factor in accelerating the adoption of streaming. Ultimately, viewers will dictate the balance between these two delivery methods.

pert practice test pdf

PERT Practice Test PDF: A Comprehensive Guide

PERT charts, vital for project timelines, utilize nodes and arrows to visualize task order and dependencies;
accessing PDF resources aids preparation, offering practice questions and insights for success.

What is PERT?

PERT, or the Program Evaluation and Review Technique, is a powerful project management tool designed to analyze and represent the tasks within a project, focusing on scheduling and organization. It’s fundamentally a statistical method used to manage uncertain project activities.

At its core, PERT utilizes network diagrams – often called PERT charts – where milestones are depicted as nodes (boxes or circles) and the sequence of tasks is illustrated by arrows connecting these nodes. This visual representation allows for a clear understanding of task dependencies and the overall project timeline.

Unlike simpler methods, PERT accounts for the inherent uncertainty in task durations by employing three estimates: optimistic, pessimistic, and most likely. This statistical approach provides a more realistic assessment of project completion times and helps identify potential obstacles. Essentially, PERT helps project managers create schedules, integrate tasks, and proactively address challenges.

The History and Origins of PERT

PERT’s origins trace back to the late 1950s, born out of the need for managing complex projects within the U.S. Navy’s Polaris missile program. Traditional project management techniques proved inadequate for handling the intricate network of tasks and dependencies involved in such a large-scale endeavor.

Developed in 1958, PERT was a collaborative effort between the Navy’s Bureau of Naval Weapons and the consulting firm Booz, Allen & Hamilton. It aimed to provide a more structured and analytical approach to project scheduling and control. The initial focus was on reducing project timelines and costs, while simultaneously improving reliability.

Initially, PERT was specifically tailored for research and development projects with uncertain activity durations. However, its effectiveness quickly led to its adoption across various industries, including construction, aerospace, and manufacturing. The technique’s ability to visualize project workflows and identify critical paths proved invaluable, solidifying its place as a cornerstone of modern project management.

PERT vs. CPM: Key Differences

Both PERT (Program Evaluation and Review Technique) and CPM (Critical Path Method) are project management tools, yet they differ in their approach to activity duration estimates. PERT utilizes a probabilistic approach, employing optimistic, pessimistic, and most likely time estimates to account for uncertainty, making it ideal for projects with unpredictable tasks.

Conversely, CPM assumes deterministic activity durations – single, fixed estimates. This makes CPM better suited for projects where tasks are well-defined and have predictable completion times. While PERT focuses on event-oriented milestones, CPM emphasizes activity-oriented tasks.

Furthermore, PERT’s calculations involve weighted averages, reflecting the inherent risks in project timelines. CPM, being simpler, is computationally less intensive. Despite these distinctions, both methods share the common goal of identifying the critical path – the sequence of tasks that dictates the project’s overall duration – and optimizing resource allocation.

Understanding the PERT Chart

PERT charts visually map project tasks, using nodes for milestones and arrows to show dependencies, aiding in scheduling and identifying the critical path for completion.

Nodes and Arrows in PERT Diagrams

PERT diagrams fundamentally rely on two key components: nodes and arrows. Nodes, often represented as boxes or circles, signify specific milestones or events within a project. These aren’t tasks themselves, but rather points in time marking the completion of activities.

Arrows, conversely, illustrate the dependencies between these nodes, and therefore, the sequence of tasks. An arrow pointing from node A to node B indicates that the activity represented by that arrow must be completed before node B – and the subsequent activities – can begin.

Understanding this visual language is crucial when working with PERT charts, especially when preparing with PDF practice tests. These tests often require interpreting diagrams to determine task order and potential bottlenecks. Successfully navigating these diagrams is a core skill for effective project management and exam success. The clarity of these visual representations is key to efficient planning.

Task Dependencies and Sequencing

PERT charts excel at visually representing task dependencies – the relationships dictating the order in which activities must be completed. These dependencies are critical for accurate project scheduling and identifying the critical path. Four main types exist: Finish-to-Start (most common), Start-to-Start, Finish-to-Finish, and Start-to-Finish.

Sequencing tasks correctly is paramount. A PERT diagram, often encountered in PDF practice tests, forces you to analyze these relationships. Incorrect sequencing can lead to unrealistic timelines and project delays. Practice tests frequently present scenarios requiring you to determine the logical order of tasks based on given dependencies.

Mastering this concept is vital for exam success. Understanding how one task’s completion impacts the start of another, and how to represent this visually, is a core skill assessed in PERT-related evaluations. Careful analysis of dependencies is key to efficient project planning.

Estimating Task Durations: Optimistic, Pessimistic, and Most Likely

PERT utilizes a weighted average to estimate task durations, acknowledging inherent uncertainty. This involves three estimates: Optimistic (shortest possible time), Pessimistic (longest possible time), and Most Likely (realistic estimate). These aren’t guesses, but informed assessments crucial for PERT chart accuracy.

PDF practice tests often present scenarios requiring you to calculate expected task durations using the formula: (Optimistic + 4*Most Likely + Pessimistic) / 6; This method provides a more realistic timeframe than relying on a single estimate. Understanding this calculation is vital for exam success.

Accurate duration estimation impacts the entire project schedule. Practice tests assess your ability to apply this technique, analyze potential variances, and understand how these estimates influence the critical path. Mastering this skill is key to effective project management and PERT analysis.

PERT Practice Test Content Areas

PERT practice tests, often in PDF format, assess quantitative reasoning, reading comprehension, and writing skills; mastering these areas ensures college placement readiness and success.

Quantitative Reasoning Skills Assessed

Quantitative Reasoning on the PERT practice tests, frequently available as PDF downloads, evaluates a student’s mathematical proficiency without relying heavily on a calculator. Expect questions covering arithmetic, algebra, and geometry – foundational concepts crucial for college-level coursework.

These PDF practice materials emphasize problem-solving abilities, requiring you to interpret data presented in tables, charts, and graphs. You’ll encounter word problems demanding careful analysis and translation into mathematical equations. A strong grasp of fractions, decimals, percentages, and ratios is essential.

Furthermore, the tests assess your understanding of basic algebraic principles, including solving linear equations and inequalities. Geometry questions may involve area, perimeter, volume, and basic geometric shapes. Familiarizing yourself with these concepts through dedicated PERT PDF practice is key to achieving a strong score and demonstrating college readiness.

Reading Comprehension Focus

PERT practice tests in PDF format heavily emphasize reading comprehension skills, mirroring the demands of college-level academic texts. These sections typically present passages from diverse disciplines – literature, history, science, and social studies – requiring careful analysis and interpretation.

Expect questions that assess your ability to identify the main idea, supporting details, author’s purpose, and inferences drawn from the text. PDF practice materials often include questions about vocabulary in context, demanding you understand word meanings based on their usage within the passage.

Successfully navigating these sections requires active reading strategies: highlighting key information, summarizing paragraphs, and identifying the author’s tone. Utilizing available PERT PDF practice tests allows you to build stamina and refine your comprehension techniques, ultimately boosting your confidence and performance.

Writing Skills Evaluated

PERT practice tests, often available in PDF format, assess writing skills crucial for college success. These sections don’t typically involve lengthy essays, but rather focus on identifying errors in sentence structure, grammar, punctuation, and word choice. Expect questions presenting underlined portions of text with multiple-choice options for correction.

PDF resources will provide practice with recognizing and rectifying common grammatical errors like subject-verb agreement, pronoun usage, and misplaced modifiers. A strong understanding of sentence construction and clarity is vital.

Furthermore, the PERT evaluates your ability to effectively revise and improve passages for conciseness and logical flow. Utilizing PDF practice materials allows focused practice on these specific skills, strengthening your editing abilities and preparing you to confidently tackle the writing section of the exam.

Accessing PERT Practice Tests in PDF Format

PERT PDF practice tests are readily available through official college resources and third-party prep providers, offering convenient and focused exam preparation options.

Official PERT Practice Materials

Official PERT practice materials are the cornerstone of effective preparation, providing the most accurate representation of the actual test’s format, content, and difficulty level. These resources, typically available through the Florida College System, often include full-length practice tests in PDF format, allowing students to simulate the testing experience.

These materials are designed to align directly with the skills and knowledge assessed on the PERT, covering Quantitative Reasoning, Reading Comprehension, and Writing. Utilizing official resources ensures familiarity with the question types and scoring criteria. While the availability of free official materials may be limited, investing in official practice tests is highly recommended.

Students should check the websites of Florida’s state colleges and universities, as well as the official PERT program website, for the most up-to-date information on available practice resources and any associated costs. Prioritizing official materials maximizes the chances of success on the PERT exam.

Third-Party PERT Test Prep Resources

Beyond official materials, numerous third-party resources offer PERT practice tests, often available in convenient PDF format. These resources can supplement official preparation, providing additional practice questions and varied testing experiences. Companies specializing in test preparation frequently develop PERT study guides and online courses, including diagnostic tests to pinpoint areas for improvement.

However, it’s crucial to evaluate the quality and accuracy of these resources carefully. Look for providers with a proven track record and positive reviews. Ensure the practice tests closely mirror the PERT’s content and format. Many third-party options offer detailed explanations for answers, aiding in understanding concepts.

While potentially helpful, remember that third-party materials may not always perfectly replicate the official PERT. Combining these resources with official practice tests provides a well-rounded and effective preparation strategy, maximizing your chances of achieving a strong score.

Free PERT Practice Tests Online

Numerous websites offer free PERT practice tests, often accessible as downloadable PDFs or interactive online assessments. These resources can be a valuable starting point for familiarizing yourself with the test’s format and content, particularly for students on a budget. However, the quality of free materials can vary significantly.

While helpful for initial exposure, free tests may not always accurately reflect the difficulty or scope of the actual PERT. Some may contain outdated questions or lack detailed answer explanations. It’s essential to supplement free resources with more comprehensive preparation materials.

Look for websites affiliated with educational institutions or reputable test preparation companies. Always cross-reference information and verify the accuracy of practice questions. Utilizing free tests alongside official materials and paid resources creates a balanced and effective study plan, enhancing your preparedness.

Strategies for Taking the PERT Practice Test

PERT practice tests, often in PDF format, demand effective time management and result analysis; understanding scoring helps identify weaknesses for focused improvement and success.

Time Management Techniques

Effective time management is crucial when tackling a PERT practice test PDF. These tests often have strict time limits, mirroring the actual exam conditions. Begin by familiarizing yourself with the test format and the time allotted for each section.

During the practice test, allocate a specific amount of time to each question. Don’t dwell on particularly challenging questions; instead, mark them for review if time permits. Utilize a timer to stay on track and avoid spending too long on any single item.

Prioritize questions based on difficulty and point value. Answer easier questions first to build confidence and secure points quickly. Regularly check your progress against the allocated time to ensure you’re pacing yourself appropriately. Practicing with a PDF allows you to simulate the real test environment and refine your timing strategies. Remember, consistent practice is key to mastering time management.

Understanding the Scoring System

PERT scoring differs from traditional exams; it’s designed as a placement tool, not a pass/fail assessment. Analyzing a PERT practice test PDF requires understanding how scores translate to college readiness. The test assesses skills in Math, Reading, and Writing, providing scores that indicate proficiency levels.

Each section yields a scaled score, which determines placement into appropriate college courses. Familiarize yourself with the score ranges required for different course levels at your chosen Florida College System institution.

Practice tests help you gauge your current skill level and identify areas needing improvement. Don’t solely focus on the overall score; analyze performance within each sub-section. Understanding the scoring system empowers you to target your study efforts effectively and maximize your placement potential. Review score reports carefully to pinpoint weaknesses.

Analyzing Your Results and Identifying Weaknesses

After completing a PERT practice test PDF, a thorough analysis is crucial. Don’t just look at your overall score; dissect performance by section – Math, Reading, and Writing. Identify specific question types consistently missed. Were errors due to content gaps, time pressure, or careless mistakes?

Review incorrect answers, understanding why you chose the wrong option. Utilize the test’s answer explanations (if provided) to clarify concepts. Focus on areas where you demonstrated the lowest proficiency.

Practice tests pinpoint weaknesses, guiding focused study. Create a study plan addressing these areas, utilizing additional resources like textbooks or online tutorials. Track progress with subsequent practice tests, monitoring improvement. Consistent self-assessment is key to maximizing your PERT score and achieving optimal college placement.

Specific Sections of the PERT Practice Test

PERT practice test PDFs commonly feature Math, Reading, and Writing sections; mastering each is vital for success,
requiring focused preparation and strategic test-taking skills.

PERT Math Practice Questions

PERT math sections within practice PDFs assess quantitative reasoning, covering arithmetic, algebra, and geometry. Expect questions involving fractions, decimals, percentages, ratios, and proportions. Algebraic concepts tested include solving linear equations, inequalities, and understanding exponents. Geometry questions often focus on area, perimeter, volume, and basic geometric shapes.

Effective preparation involves reviewing fundamental math principles and practicing a wide range of problem types. Many PDF resources provide detailed solutions, allowing for thorough understanding of each concept. Focus on strengthening areas where you encounter difficulty. Utilize online calculators for complex calculations during practice, but remember calculator use may be limited during the actual PERT exam. Familiarize yourself with common mathematical formulas and techniques to improve speed and accuracy. Consistent practice with varied questions is key to building confidence and achieving a strong score;

Look for practice tests that mimic the format and difficulty level of the real PERT exam.

PERT Reading Practice Passages

PERT reading sections, found in practice PDFs, evaluate comprehension and critical thinking skills. Passages cover diverse topics – literature, social sciences, and natural sciences – mirroring college-level reading material. Expect questions assessing main idea identification, supporting detail recognition, inference making, and author’s purpose.

Practice PDFs offer varied passage lengths and question types. Effective strategies include skimming passages to grasp the main idea, then carefully rereading for specific details. Pay attention to keywords and transitions. Practice identifying the tone and perspective of the author.

Time management is crucial; allocate sufficient time per passage. Many resources provide answer explanations, aiding understanding of correct reasoning. Focus on improving reading speed and accuracy. Regularly practicing with different passage types will enhance your ability to quickly and effectively extract information, leading to a higher PERT score.

PERT Writing Sample Prompts

PERT writing sections, often found within practice PDFs, assess your ability to express ideas clearly and effectively. Prompts typically require an argumentative or expository essay. Expect topics ranging from current events and social issues to personal experiences and academic concepts.

Practice PDFs provide sample prompts to familiarize you with the expected format and complexity. Focus on developing a clear thesis statement, supporting it with relevant evidence, and organizing your thoughts logically. Pay attention to grammar, punctuation, and sentence structure.

Effective strategies include outlining your essay before writing, and revising for clarity and conciseness. Many resources offer sample essays and scoring rubrics. Consistent practice with diverse prompts will improve your writing skills and boost your confidence on test day, ultimately leading to a better PERT score.

PERT and Florida College System

PERT scores determine Florida college placement; PDF practice tests help students gauge readiness and potentially bypass remedial courses, accelerating academic pathways and success.

PERT as a Placement Tool

The PERT (Postsecondary Education Readiness Test) functions as a crucial placement tool within the Florida College System. Unlike entrance exams focused on acceptance, the PERT assesses a student’s existing skills in Math, Reading, and Writing to determine appropriate course levels. This diagnostic approach ensures students aren’t placed in courses they aren’t prepared for, minimizing frustration and maximizing learning potential.

PDF practice tests become invaluable in this context. They allow prospective students to familiarize themselves with the test format, question types, and pacing. By simulating the actual testing environment, these resources help identify knowledge gaps and areas needing improvement. A strong PERT score can lead to direct enrollment in college-level courses, bypassing developmental education requirements and saving both time and tuition costs. Utilizing available PDF practice materials is, therefore, a proactive step towards academic success within the Florida College System.

Essentially, the PERT isn’t a barrier to entry, but a guide to ensure students begin their college journey on a solid foundation.

PERT Score Interpretation for College Readiness

Understanding your PERT score is vital for determining college readiness and appropriate course placement. Each section – Math, Reading, and Writing – receives a scaled score, typically ranging from 10-63. These scores don’t represent a percentage of correct answers, but rather a student’s demonstrated skill level compared to other test-takers.

PDF practice tests are instrumental in interpreting potential scores. By consistently taking practice exams and analyzing results, students can gauge their likely performance on the actual PERT. Specific score ranges correlate to different college-level course enrollment. For example, a higher Math score might allow direct entry into College Algebra, while a lower score may necessitate a developmental math course.

Accessing score interpretation guides alongside PDF practice materials provides clarity. Colleges often publish their specific PERT score requirements for each course. Familiarizing yourself with these benchmarks, through diligent practice and review, empowers students to make informed decisions about their academic path and maximize their college experience.

PERT Exemptions and Alternatives

While the PERT is widely used for Florida College System placement, exemptions and alternatives exist. Students meeting certain criteria – such as achieving qualifying scores on the SAT or ACT – may be exempt from taking the PERT altogether. These qualifying scores vary by institution, so verifying specific college requirements is crucial.

PDF practice tests can help determine if pursuing an exemption is a viable option. By taking a full-length practice SAT or ACT, alongside PERT PDFs, students can assess their strengths and weaknesses across different standardized tests. Some colleges also offer alternative placement options, like accelerated coursework or departmental placement tests.

Thoroughly researching exemption policies and alternative pathways, alongside dedicated practice with relevant PDF materials, allows students to navigate the placement process effectively. Understanding these options can save time and potentially allow direct enrollment in desired college-level courses, bypassing the need for remedial education.