the misanthrope pdf

The “Star People” Phenomenon & Related PDF Resources: A Comprehensive Overview (as of 12/20/2025)

Digital archives offer various PDF formats – ABBYY GZ and CHOCR – potentially containing books‚ articles‚ and research related to the “Star People” concept.

Download options include B/W PDF versions‚ facilitating access to information concerning extraterrestrial origins and human incarnation beliefs.

Origins of the “Star People” Concept

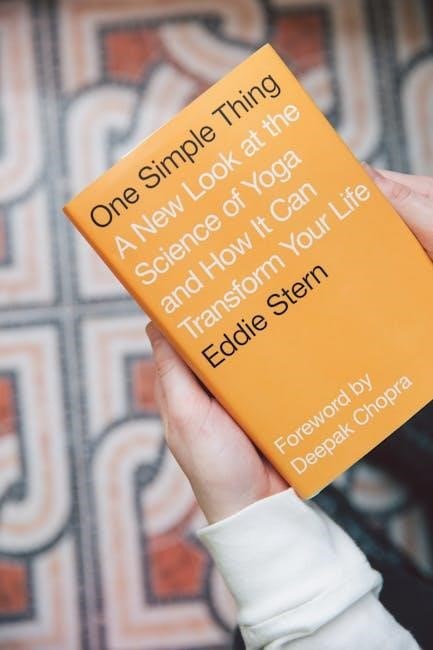
The foundational roots of the “Star People” concept are firmly planted in New Age beliefs and fringe theories‚ specifically originating with author Brad Steiger in 1976. His book‚ Gods of Aquarius‚ first proposed the idea that certain individuals aren’t originally from Earth‚ but rather possess extraterrestrial origins.

Steiger’s work posited that these beings arrive on our planet either through the process of birth – incarnating into human bodies – or via a phenomenon known as “walk-ins‚” where an extraterrestrial consciousness inhabits an existing human form. This core belief quickly gained traction within certain spiritual communities‚ resonating with those seeking explanations beyond conventional understandings of human existence.

The concept‚ while gaining popularity in the latter half of the 20th century‚ continues to evolve and is frequently discussed in online forums and communities dedicated to UFOs and paranormal phenomena.

Brad Steiger and the “Gods of Aquarius”

Brad Steiger’s 1976 publication‚ Gods of Aquarius‚ serves as the primary genesis point for the “Star People” phenomenon. Steiger meticulously explored the burgeoning New Age movement‚ investigating claims of extraterrestrial contact and the potential for human evolution through cosmic intervention.

The book detailed accounts of individuals who believed they were not native to Earth‚ but rather were starseeds – beings originating from other star systems sent to assist humanity’s spiritual awakening. Gods of Aquarius presented these narratives as evidence of a larger cosmic plan unfolding on our planet.

Steiger’s work wasn’t simply a presentation of beliefs; it was a catalyst‚ sparking widespread interest and laying the groundwork for future explorations into alien-human connections and the concept of incarnated extraterrestrials.

The Core Belief: Extraterrestrial Origins & Human Incarnation

At the heart of the “Star People” belief lies the conviction that numerous individuals currently inhabiting Earth are not originally from this planet. These beings‚ often referred to as “starseeds‚” are thought to have originated from various extraterrestrial civilizations.

The central tenet posits that these starseeds intentionally incarnated into human bodies to assist in Earth’s spiritual evolution and to guide humanity through a period of significant transformation. This incarnation isn’t viewed as a random occurrence‚ but rather a deliberate mission.

This belief system suggests a profound interconnectedness between humanity and the cosmos‚ implying that we are part of a larger galactic community and that our origins are far more expansive than traditionally understood.

“Walk-Ins” and the Starseed Narrative

A fascinating‚ and often debated‚ aspect of the Starseed narrative involves the concept of “walk-ins.” This refers to the belief that a non-physical consciousness‚ typically a starseed‚ can enter an existing human body‚ effectively replacing the original personality.

Walk-ins are not portrayed as possession‚ but rather as a consensual or pre-arranged transfer of consciousness‚ occurring when the original inhabitant is either unable or unwilling to continue their life path. This process is believed to facilitate the starseed’s mission on Earth.

The idea of walk-ins adds a layer of complexity to the starseed concept‚ suggesting that some individuals may not have originated as extraterrestrials through birth‚ but rather through a conscious transfer of being.

The 2025 Film “Star People”: A Deep Dive

The 2025 film‚ Star People‚ centers around a photographer investigating a childhood UFO sighting‚ linked to the 1997 Phoenix Lights incident.

Plot Summary: UFO Sightings and Investigative Photography

The narrative of Star People (2025) unfolds through the lens of a photographer haunted by a childhood UFO encounter. Years later‚ a compelling tip reignites her quest for answers‚ drawing her into a complex investigation.

Set against the backdrop of a scorching heatwave‚ the photographer delves into the infamous Phoenix Lights phenomenon of 1997‚ a mass sighting of unexplained aerial phenomena over Arizona.

Her pursuit leads her to confront unknown forces and unravel a mystery that challenges her perceptions of reality. The film blends sci-fi elements with a thriller atmosphere‚ exploring themes of belief‚ skepticism‚ and the search for truth amidst extraordinary circumstances.

The investigation becomes increasingly dangerous‚ blurring the lines between personal history and a larger‚ potentially extraterrestrial‚ conspiracy.

The Phoenix Lights Incident as a Central Theme

The 1997 Phoenix Lights incident serves as a pivotal and recurring element within the Star People (2025) storyline. This widely documented event‚ involving a series of unidentified lights observed over Arizona and Nevada‚ forms the core mystery driving the film’s narrative.

The film doesn’t simply present the incident as historical context; it actively integrates it into the photographer’s personal investigation‚ linking her childhood sighting to the larger phenomenon.

This connection suggests a deeper‚ potentially extraterrestrial‚ involvement‚ fueling the suspense and intrigue. The Phoenix Lights become a symbol of the unknown‚ prompting questions about government cover-ups and the possibility of alien visitation.

The film utilizes the incident to explore themes of mass perception‚ the reliability of eyewitness accounts‚ and the search for verifiable evidence.

Premiere and Release Dates: Dances with Films & Wider Distribution

Star People (2025) initially premiered at the Dances with Films festival in Los Angeles on June 28th‚ generating early buzz and critical attention. This independent film festival provided a platform for the film to reach an initial audience and garner pre-release publicity.

Following the premiere‚ a broader theatrical release was scheduled for July 25th‚ expanding the film’s reach to a wider demographic. Simultaneously with the theatrical launch‚ Star People became available on Video on Demand (VOD) platforms.

This dual release strategy allowed viewers to experience the film both in cinemas and from the convenience of their homes. Streaming options quickly followed‚ further increasing accessibility and viewership.

The film’s distribution strategy aimed to capitalize on the growing interest in UFO phenomena and sci-fi thrillers.

Streaming and VOD Availability

As of July 25th‚ 2025‚ Star People became readily accessible through various Video on Demand (VOD) platforms‚ offering viewers convenient access to the sci-fi thriller. Moviefone serves as a central resource for discovering these streaming and rental options.

This widespread VOD availability allows audiences to watch the film from the comfort of their homes‚ bypassing traditional cinema visits. The film’s presence on multiple platforms ensures broad reach and caters to diverse viewing preferences.

Streaming services are continually updating their catalogs‚ so checking specific platforms is recommended for the most current availability. Star People’s digital distribution strategy reflects the evolving landscape of film consumption.

Immerse yourself in the story of a photographer investigating a childhood UFO sighting – now easily accessible online!

“Star People” & New Age Beliefs

The “Star People” concept intertwines with New Age beliefs‚ particularly alien-human hybrid theories and the notion of spiritual awakening through extraterrestrial connections.

Connection to Alien-Human Hybrid Theories

The “Star People” phenomenon directly correlates with broader New Age beliefs surrounding alien-human hybrids‚ positing that individuals possess extraterrestrial origins or are the result of ancient alien intervention. This theory suggests that certain humans are not solely products of terrestrial evolution‚ but rather incarnations of beings from other star systems.

Brad Steiger’s work‚ introducing the concept in 1976‚ laid the groundwork for these ideas‚ fueling speculation about humanity’s cosmic ancestry. The belief extends to the idea that these “Starseeds” are here to assist in Earth’s spiritual evolution‚ embodying higher consciousness and advanced technologies. Furthermore‚ the narrative often includes the concept of “walk-ins‚” where extraterrestrial entities inhabit human bodies to fulfill specific missions.

These hybrid theories often circulate within online communities‚ fostering discussions about personal experiences and shared beliefs regarding extraterrestrial connections and purpose.

The Role of Fringe Theories in Popularizing the Concept

Fringe theories‚ encompassing UFOlogy‚ channeled messages‚ and esoteric spiritualism‚ have been instrumental in popularizing the “Star People” concept. Brad Steiger’s “Gods of Aquarius” initially presented the idea‚ but its spread was amplified through alternative media and online forums. The 1997 Phoenix Lights incident‚ featured prominently in the 2025 film “Star People‚” exemplifies how unexplained phenomena contribute to the narrative.

These theories often provide explanations for unexplained events‚ attributing them to extraterrestrial activity and the presence of “Starseeds” on Earth. Online communities‚ like Reddit‚ serve as hubs for sharing personal experiences and interpretations‚ further disseminating the belief. The film’s focus on investigative photography and a childhood UFO sighting taps into this existing fascination.

Consequently‚ the concept gains traction beyond core New Age circles‚ reaching a wider audience through popular culture and online discourse.

Starseeds and Spiritual Awakening

The “Starseed” narrative is deeply intertwined with beliefs about spiritual awakening and a perceived shift in human consciousness. Individuals identifying as Starseeds often report a sense of not belonging‚ a longing for “home‚” and heightened sensitivity. This is frequently linked to a mission of assisting humanity’s evolution during a period of planetary transformation.

The concept suggests these individuals possess ancient wisdom and are here to catalyze positive change‚ often experiencing intense emotional and spiritual experiences. The 2025 film “Star People” indirectly touches upon this theme through its protagonist’s investigation and confrontation with unknown forces. It resonates with those seeking deeper meaning and purpose.

Ultimately‚ the Starseed belief offers a framework for understanding personal experiences and contributing to a collective awakening.

Locating and Accessing PDF Resources Related to “Star People”

Online archives and digital libraries may contain relevant PDF documents‚ including books and research papers‚ in formats like ABBYY GZ and CHOCR.

Online Archives and Digital Libraries

Numerous online platforms serve as repositories for digitized texts‚ potentially housing materials related to the “Star People” phenomenon. These include academic databases‚ public domain book collections‚ and specialized archives focusing on New Age beliefs and fringe theories.

Researchers can explore sites like Internet Archive‚ Project Gutenberg‚ and various university library digital collections. Searching for keywords such as “Starseed‚” “Walk-ins‚” “Brad Steiger‚” or “extraterrestrial origins” may yield relevant PDF documents.

Furthermore‚ specialized forums and websites dedicated to UFOs and paranormal phenomena often curate lists of downloadable resources. Be mindful of source credibility when accessing information from less established platforms‚ verifying the authenticity of PDF content before relying on it.

Potential PDF Content: Books‚ Articles‚ and Research Papers

PDF resources related to the “Star People” phenomenon likely encompass a diverse range of materials. Expect to find digitized copies of Brad Steiger’s “Gods of Aquarius‚” foundational to the concept‚ alongside articles exploring alien-human hybrid theories and the Starseed narrative.

Research papers investigating the psychological and sociological aspects of New Age beliefs may also be available. These could analyze the appeal of extraterrestrial origins and the role of “walk-ins” in shaping individual identities. Expect content detailing the Phoenix Lights incident‚ central to the 2025 film.

Additionally‚ promotional materials and analyses of the “Star People” film itself‚ including press kits and critical reviews‚ might be found in PDF format‚ offering insights into its reception and themes.

ABBYY GZ and CHOCR PDF Formats: Understanding the Options

ABBYY GZ and CHOCR represent distinct PDF formats encountered when searching for resources on the “Star People” phenomenon. ABBYY GZ typically indicates a file processed with ABBYY FineReader‚ prioritizing Optical Character Recognition (OCR) for searchable text. This is crucial for research‚ allowing keyword searches within scanned documents.

CHOCR‚ conversely‚ suggests a different OCR engine was utilized‚ potentially resulting in varying levels of accuracy. Both formats aim to convert image-based PDFs into text-searchable documents‚ vital for accessing older or non-digital materials related to extraterrestrial beliefs.

Choosing between them depends on the document’s quality and the OCR accuracy needed for effective research into topics like Starseeds and walk-ins.

Commercial Applications: WeAreStarPeople Recruitment

WeAreStarPeople‚ part of Uniphar‚ strategically recruits for pharma‚ medtech‚ and biotech‚ maximizing commercial success through tailored people strategies and partnerships.

Strategic Recruitment for Pharma‚ Medtech‚ and Biotech

WeAreStarPeople focuses on delivering strategic recruitment solutions specifically tailored for the demanding sectors of pharmaceutical‚ medical technology‚ and biotechnology industries. As a component of the larger Uniphar organization‚ they specialize in identifying and securing top-tier talent to drive commercial success for their client companies.

Their approach isn’t simply filling positions; it’s about understanding the unique challenges and opportunities within these highly regulated and rapidly evolving fields. This allows them to proactively source candidates with the precise skill sets and experience needed to excel.

WeAreStarPeople emphasizes building long-term partnerships‚ offering outsourced recruitment services designed to optimize their clients’ people strategies and ultimately‚ maximize their commercial outcomes.

Outsourced Partnership Services

WeAreStarPeople extends beyond traditional recruitment‚ functioning as a strategic outsourced partner for companies in the pharma‚ medtech‚ and biotech spaces. This collaborative model allows organizations to leverage specialized expertise without the overhead of maintaining a large internal recruitment team.

Their services encompass the entire recruitment lifecycle‚ from initial candidate sourcing and screening to interview coordination and offer negotiation. This comprehensive approach frees up clients to focus on core business functions‚ accelerating time-to-hire and improving overall efficiency.

By acting as an extension of their client’s HR department‚ WeAreStarPeople delivers tailored solutions designed to meet specific organizational needs and contribute directly to commercial success.

Maximizing Commercial Success Through People Strategies

WeAreStarPeople emphasizes that a company’s greatest asset is its people‚ and strategic recruitment is paramount to achieving commercial goals. They focus on identifying and attracting top talent within the pharmaceutical‚ medtech‚ and biotech industries‚ understanding the specialized skillsets required for success.

Their approach isn’t simply filling positions; it’s building high-performing teams aligned with a client’s specific business objectives. This involves a deep understanding of market trends‚ competitor landscapes‚ and the evolving needs of the life sciences sector.

By prioritizing quality of hire and fostering a strong employer brand‚ WeAreStarPeople helps clients drive innovation‚ increase market share‚ and ultimately‚ maximize profitability.

Analyzing Online Discussions and Forums

Reddit and other online communities showcase varied perspectives on “Star People‚” ranging from enthusiastic belief in walk-ins to healthy skepticism regarding extraterrestrial origins.

Reddit and Other Online Communities

Reddit serves as a vibrant hub for discussions surrounding the “Star People” phenomenon‚ with dedicated communities fostering lively debates and shared experiences. Users frequently share personal stories relating to UFO sightings and perceived connections to extraterrestrial origins‚ mirroring themes explored in the 2025 film‚ Star People.

Online forums reveal a spectrum of perspectives‚ from fervent believers identifying as “starseeds” and detailing spiritual awakenings‚ to those expressing considerable skepticism. Common themes include analyses of the Phoenix Lights incident and the Brad Steiger’s “Gods of Aquarius” concept.

These platforms also host discussions regarding recruitment strategies employed by companies like WeAreStarPeople‚ sparking curiosity and occasionally‚ critical examination of their practices within the pharma and biotech sectors.

Common Themes and Perspectives

Recurring themes across online discussions center on the idea of extraterrestrial origins and the concept of “walk-ins‚” as initially popularized by Brad Steiger. Many individuals share beliefs about being “starseeds” undergoing a spiritual awakening on Earth‚ seeking to understand their purpose and connection to the cosmos.

The Phoenix Lights incident frequently surfaces as a pivotal event‚ often cited as evidence supporting the presence of extraterrestrial activity and influencing interpretations of the 2025 film‚ Star People. A significant perspective involves exploring alien-human hybrid theories and their potential implications.

However‚ a contrasting viewpoint emphasizes skepticism‚ demanding empirical evidence and critical analysis of anecdotal accounts. This balanced view acknowledges the allure of fringe theories while maintaining a cautious approach to extraordinary claims.

Skepticism vs. Belief: A Balanced View

Online forums reveal a distinct dichotomy: fervent belief in the “Star People” phenomenon versus rigorous skepticism. Proponents often cite personal experiences‚ intuitive feelings‚ and interpretations of events like the Phoenix Lights as validation.

Skeptics‚ however‚ demand verifiable evidence‚ questioning the lack of scientific proof for extraterrestrial origins or “walk-in” occurrences. They often attribute sightings to misidentification of natural phenomena or psychological factors.

A balanced perspective acknowledges the power of belief and the human tendency to seek meaning‚ while simultaneously emphasizing the importance of critical thinking and evidence-based reasoning. The 2025 film‚ Star People‚ itself sparks debate‚ prompting viewers to consider both possibilities.

ivf diet plan pdf

IVF Diet Plan: A Comprehensive Guide (Updated December 20, 2025)

Downloadable IVF diet plans (PDFs) offer tailored guidance, emphasizing nutrient timing for optimal reproductive health, hormone balance, and improved success rates․

In vitro fertilization (IVF), a beacon of hope for millions, is increasingly recognized as a process profoundly influenced by nutritional status․ While advanced medical techniques are central to IVF’s success, a growing body of evidence highlights diet’s crucial role․ Downloadable IVF diet plan PDFs are becoming invaluable resources, offering structured guidance for optimizing reproductive health․

These plans aren’t one-size-fits-all; they acknowledge individual needs and aim to address deficiencies․ Proper nutrition supports hormone balance, enhances embryo quality, and fosters a receptive uterine environment․ Ignoring dietary factors can negatively impact IVF outcomes, while a well-planned diet can significantly boost chances of a successful pregnancy․

The Role of Nutrition in IVF Success Rates

IVF success rates are demonstrably linked to a patient’s nutritional profile․ Downloadable IVF diet plan PDFs emphasize that optimal nutrition isn’t merely supportive; it’s foundational․ Specific vitamin and mineral deficiencies can impair egg quality, sperm health, and implantation rates․ India’s rising infertility rates underscore the need for proactive nutritional interventions alongside IVF treatment․

These plans often focus on antioxidants, folate, and vitamin D, all vital for reproductive function․ Avoiding sugar, processed foods, and excessive caffeine is equally crucial․ A personalized diet, guided by a PDF resource, can mitigate risks and maximize the potential for a positive outcome․

Pre-IVF Diet: Preparing Your Body

Pre-IVF dietary preparation, detailed in comprehensive IVF diet plan PDFs, is paramount․ This phase focuses on optimizing overall health and addressing nutritional deficiencies before stimulation begins․ These plans advocate for a minimum of three months of focused nutrition․ Prioritizing antioxidant-rich foods and essential vitamins builds a robust foundation for reproductive success․

PDF guides often include meal plans and shopping lists, simplifying the process․ Preparing the body with optimal nutrition improves egg quality, supports hormone balance, and enhances the chances of successful fertilization and implantation․

Focus on Antioxidant-Rich Foods

IVF diet plan PDFs strongly emphasize incorporating antioxidant-rich foods to combat oxidative stress, a known detriment to egg and sperm quality․ Berries, leafy greens, and colorful vegetables are staples․ These foods neutralize free radicals, protecting reproductive cells from damage․

Detailed PDF resources often list specific antioxidant levels in various foods, aiding informed choices․ Prioritizing these nutrients improves egg health and embryo development․ Consuming a diet abundant in antioxidants is a foundational element of pre-IVF preparation, significantly boosting potential success rates․

Essential Vitamins and Minerals for Pre-IVF

IVF diet plan PDFs highlight crucial vitamins and minerals for pre-IVF preparation․ Folate, Vitamin D, and CoQ10 are consistently recommended to support egg quality and implantation․ Iron, Zinc, and Selenium also play vital roles in reproductive health․

Comprehensive PDF guides detail optimal dosages and food sources for each nutrient․ Addressing deficiencies before treatment is paramount․ These vitamins and minerals contribute to hormonal balance and overall cellular function, maximizing the chances of a successful IVF cycle․ Personalized supplementation, guided by a doctor, is often advised․

IVF Diet During Stimulation Phase

IVF diet plan PDFs emphasize dietary adjustments during the stimulation phase, crucial for hormone response․ Increased protein intake is recommended to support follicle development, as detailed in many guides․ Maintaining stable blood sugar levels through controlled carbohydrate consumption is also vital for hormonal balance․

These PDF resources often suggest prioritizing complex carbohydrates and lean proteins․ Careful monitoring of caloric intake is advised, alongside consistent hydration․ The goal is to optimize the body’s response to stimulation medications, enhancing egg production and overall IVF success․

Protein Intake and its Significance

IVF diet plan PDFs consistently highlight the critical role of adequate protein intake during treatment․ Protein supports follicle development and egg quality, essential for successful fertilization․ These guides recommend incorporating lean protein sources – fish, poultry, beans, and lentils – into each meal․

Many PDF resources specify a daily protein target, often around 60-80 grams, tailored to individual needs․ Sufficient protein also aids in managing blood sugar and supports overall hormonal balance․ Prioritizing protein ensures the body has the building blocks needed for optimal reproductive function throughout the IVF process․

Managing Carbohydrates for Hormone Balance

IVF diet plan PDFs emphasize the importance of carbohydrate management for hormonal equilibrium․ These resources advise against restrictive, low-carb diets, as they can disrupt hormonal cycles crucial for IVF success․ Instead, focus on complex carbohydrates – whole grains, fruits, and vegetables – for sustained energy․

PDF guides often recommend pairing carbohydrates with protein and healthy fats to slow absorption and prevent blood sugar spikes․ Maintaining stable blood sugar levels supports optimal hormone production and improves egg quality․ Careful carbohydrate choices, as detailed in these plans, are vital for a balanced endocrine system․

IVF Diet During Egg Retrieval and Embryo Transfer

IVF diet plan PDFs highlight a crucial dietary focus during egg retrieval and embryo transfer․ These guides prioritize easily digestible foods to minimize bloating and discomfort post-retrieval․ Hydration is paramount, with recommendations for increased water intake to support uterine lining health․

PDF resources often suggest a temporary shift towards bland, nutrient-dense options․ Avoiding gas-producing foods is key․ Post-transfer, the plans emphasize continued hydration and a diet rich in anti-inflammatory foods to foster implantation․ These detailed dietary strategies, found within the PDF, aim to optimize the uterine environment․

Hydration Strategies for Optimal Results

IVF diet plan PDFs consistently emphasize robust hydration as a cornerstone of success․ These guides recommend aiming for at least eight glasses of water daily, increasing fluid intake during egg retrieval and embryo transfer phases․ Electrolyte-rich beverages, like coconut water, are often suggested to maintain balance․

PDF resources detail how adequate hydration supports optimal blood volume, crucial for uterine lining development and embryo implantation․ Avoiding sugary drinks and excessive caffeine is stressed․ Detailed charts within the PDF help track daily fluid consumption, ensuring consistent hydration for improved IVF outcomes․

Foods to Avoid During Critical Phases

IVF diet plan PDFs universally advise limiting sugar and processed foods, citing their inflammatory impact on reproductive health․ Festive indulgences, particularly fried foods and alcohol, are flagged as detrimental, potentially disrupting hormone balance․ Raw or undercooked meats, fish, and eggs pose risks, necessitating avoidance․

These PDF guides also caution against excessive caffeine intake, recommending a maximum of one small cup daily․ High-mercury fish is discouraged․ Detailed lists within the PDF clearly outline prohibited items, ensuring patients understand dietary restrictions during crucial stages like stimulation and post-transfer․

Post-Embryo Transfer Diet: Supporting Implantation

IVF diet plan PDFs emphasize a focus on implantation-supporting nutrients post-transfer․ Folate and Vitamin D are highlighted as crucial, often with recommended daily dosages detailed within the PDF․ Anti-inflammatory foods are paramount, promoting a receptive uterine environment․

These guides advocate for continued hydration and moderate protein intake․ Specific PDF resources provide meal plans designed to minimize inflammation and maximize nutrient absorption․ Avoiding triggering foods, as outlined in the PDF, is key to supporting successful implantation and early pregnancy development․

The Role of Folate and Vitamin D

IVF diet plan PDFs consistently underscore the vital roles of folate and Vitamin D post-embryo transfer․ Folate, crucial for neural tube development, is often recommended in higher doses than standard prenatal vitamins, as detailed in the PDF guides․ Vitamin D supports immune function and endometrial receptivity, with PDF resources specifying optimal levels through testing․

These downloadable plans often include food sources rich in both nutrients, alongside supplementation recommendations․ The PDF emphasizes that adequate levels of both are linked to improved implantation rates and a reduced risk of early miscarriage․

Anti-Inflammatory Foods for a Healthy Uterus

IVF diet plan PDFs frequently highlight the importance of an anti-inflammatory diet to foster a receptive uterine environment․ These guides emphasize incorporating foods rich in omega-3 fatty acids, like salmon and flaxseeds, alongside colorful fruits and vegetables packed with antioxidants․ The PDF resources detail how chronic inflammation can hinder implantation․

Specific foods recommended within these PDF plans include berries, leafy greens, and turmeric․ Avoiding pro-inflammatory foods, as outlined in the downloadable guides, is equally crucial for optimizing uterine health and increasing IVF success rates․

Specific Foods to Include in Your IVF Diet

IVF diet plan PDFs consistently recommend prioritizing nutrient-dense foods to support reproductive health․ These downloadable guides emphasize leafy green vegetables – spinach, kale – for their folate content, vital for early fetal development․ Healthy fats, particularly omega-3s from sources like avocados and nuts, are also prominently featured․

PDF resources detail the inclusion of lean proteins, whole grains, and antioxidant-rich berries․ These plans often provide specific recipes and meal ideas, ensuring adequate intake of essential vitamins and minerals crucial for both egg and sperm quality, as detailed within the PDF․

Leafy Green Vegetables and Fertility

IVF diet plan PDFs universally highlight leafy greens as cornerstones of a fertility-focused diet․ Spinach, kale, and romaine lettuce are rich in folate, a B vitamin crucial for preventing neural tube defects and supporting healthy egg development; These PDF guides emphasize that adequate folate intake improves embryo quality․

Furthermore, these vegetables provide antioxidants combating oxidative stress, a known detriment to reproductive health․ PDF resources often suggest incorporating at least one serving daily, detailing preparation methods to maximize nutrient absorption, ensuring optimal benefits during IVF treatment․

Healthy Fats: Omega-3s and Beyond

IVF diet plan PDFs consistently advocate for incorporating healthy fats, particularly Omega-3 fatty acids, into your daily regimen․ Found abundantly in fatty fish like salmon, flaxseeds, and walnuts, Omega-3s reduce inflammation and enhance blood flow to the reproductive organs, potentially improving egg quality and implantation rates․

These PDF guides also emphasize the importance of monounsaturated fats from sources like avocados and olive oil․ They contribute to hormone production and overall cellular health․ PDF resources often detail appropriate portion sizes and suggest avoiding trans fats entirely․

Foods to Limit or Avoid During IVF

IVF diet plan PDFs universally caution against excessive sugar and processed foods, citing their negative impact on hormone balance and inflammation․ Festive indulgences, particularly fried foods and alcohol, are flagged as detrimental, potentially temporarily reducing IVF success․

These PDF resources strongly recommend limiting caffeine intake, as high consumption may interfere with egg quality and implantation․ Detailed PDF guides often provide specific daily limits․ Avoiding unpasteurized dairy and certain fish high in mercury is also advised to minimize exposure to harmful substances during this critical period․

Sugar and Processed Foods: Impact on IVF

IVF diet plan PDFs consistently highlight the detrimental effects of sugar and processed foods on reproductive health․ These foods contribute to inflammation, insulin resistance, and hormonal imbalances – all factors negatively impacting egg quality and embryo implantation․

PDF guides emphasize that a spike in blood sugar can disrupt delicate hormonal communication crucial for successful IVF․ Many PDF resources suggest focusing on whole, unprocessed foods to stabilize blood sugar levels and reduce inflammation․ Limiting these items is a cornerstone of most recommended IVF dietary approaches․

Caffeine and Alcohol Restrictions

IVF diet plan PDFs universally recommend strict limitations on both caffeine and alcohol consumption․ These substances are linked to decreased fertility, increased risk of miscarriage, and potential harm to developing embryos․ PDF guides often suggest eliminating alcohol entirely throughout the IVF process․

Regarding caffeine, most PDF resources advise limiting intake to less than 200mg per day – roughly one 12-ounce cup of coffee․ Some PDFs even recommend complete avoidance, particularly during the stimulation phase and after embryo transfer, to maximize implantation chances and overall success․

Supplements to Consider (with Doctor’s Approval)

IVF diet plan PDFs frequently detail beneficial supplements, always emphasizing the need for physician approval before starting any regimen․ CoQ10 is highlighted for potentially improving egg quality, while Vitamins C and E act as antioxidants, protecting reproductive cells from damage․

Many PDF guides also recommend Folate and Vitamin D, crucial for healthy fetal development and implantation․ Some PDFs suggest Omega-3 fatty acids for uterine health․ It’s vital to remember that self-treating can be detrimental; a personalized supplement plan, guided by your doctor and detailed in your PDF, is essential․

CoQ10 and its Benefits for Egg Quality

IVF diet plan PDFs consistently feature Coenzyme Q10 (CoQ10) as a key supplement, particularly for women over 35․ This naturally occurring antioxidant plays a vital role in mitochondrial function, crucial for egg energy production and overall quality․

PDF guides explain that CoQ10 levels decline with age, potentially impacting fertility․ Supplementation, as detailed in your PDF, may improve egg health and fertilization rates․ Dosage recommendations vary; therefore, strict adherence to your doctor’s advice, outlined in the PDF, is paramount․

Vitamin C and E: Protecting Reproductive Cells

IVF diet plan PDFs highlight Vitamins C and E as powerful antioxidants, essential for safeguarding eggs and sperm from oxidative stress․ This stress, detailed within the PDF resources, can damage reproductive cells, hindering fertilization and implantation;

Your PDF will likely recommend Vitamin C to enhance progesterone levels, supporting the uterine lining․ Vitamin E, as explained in the PDF, improves sperm motility and egg health․ Dosage guidelines are crucial; always consult your doctor and refer to the PDF for personalized recommendations․

Creating a Personalized IVF Diet Plan

IVF diet plan PDFs emphasize that a one-size-fits-all approach isn’t effective․ These PDF resources advocate for tailoring your diet based on individual needs, medical history, and potential deficiencies․

The PDF guides strongly recommend collaborating with a Registered Dietitian specializing in fertility․ They can analyze your current diet, identify areas for improvement, and create a customized plan․ Your PDF will likely include sample meal plans and shopping lists․ Remember, the PDF is a tool; professional guidance ensures the plan aligns with your specific IVF protocol․

Working with a Registered Dietitian

IVF diet plan PDFs consistently highlight the invaluable role of a Registered Dietitian (RD)․ An RD specializing in fertility can translate complex nutritional science into a practical, personalized plan․ They assess your current intake, identify deficiencies, and create a PDF-supported strategy aligned with your IVF stage․

These PDF-guided consultations address specific needs, considering medical history and protocol․ RDs help navigate supplement choices and interpret lab results․ Utilizing a PDF resource alongside professional guidance maximizes your chances of success, ensuring a balanced and effective dietary approach throughout your IVF journey․

Resources and Further Information (PDF Downloads)

Comprehensive IVF diet plan PDFs are readily available from reputable fertility clinics and registered dietitians․ These PDF resources often include sample meal plans, shopping lists, and detailed nutrient guides tailored to each IVF phase․ Several organizations offer downloadable PDF guides focusing on pre-IVF preparation, stimulation support, and post-transfer nourishment․

Look for PDFs detailing specific food recommendations, foods to avoid, and supplement protocols․ Always verify the source’s credibility and consult your medical team before implementing any dietary changes based on a PDF download․

stephen ministry training manual pdf

Stephen Ministry equips individuals to provide confidential, one-on-one Christian care to those experiencing life’s challenges, fostering a supportive community.

This training, often accessed via a Stephen Ministry training manual PDF, prepares caregivers with essential skills for empathetic support.

Snapchat’s features, like Stories and Lenses, mirror Stephen Ministry’s focus on connection, though in a different context, highlighting communication’s importance.

What is Stephen Ministry?

Stephen Ministry is a confidential caring system that equips laypeople within a church to provide one-to-one Christian care to individuals experiencing grief, loss, or difficult life transitions. It’s not counseling, but rather offering a supportive presence and empathetic listening ear;

The core of this ministry lies in specialized training, often delivered through a comprehensive Stephen Ministry training manual PDF. This manual details the principles and skills needed to effectively care for others, emphasizing boundaries, confidentiality, and reflective listening.

Like Snapchat’s focus on personal connection and sharing experiences, Stephen Ministry prioritizes building relationships. However, unlike the public nature of Snapchat, Stephen Ministry care is deeply private and focused on individual needs. The training prepares individuals to navigate complex emotional landscapes, offering comfort and guidance rooted in faith, mirroring Snapchat’s user support resources but with a spiritual dimension.

The Core Values of Stephen Ministry

Stephen Ministry is built upon several foundational values, including confidentiality, support, encouragement, and Christian faith. These principles guide Stephen Ministers in providing effective and compassionate care to those in need.

The Stephen Ministry training manual PDF meticulously outlines these values, emphasizing their practical application in caring relationships. It stresses the importance of creating a safe and non-judgmental space for care receivers to share their struggles.

Similar to Snapchat’s community guidelines promoting respectful interaction, Stephen Ministry prioritizes ethical conduct and boundaries. The manual provides detailed guidance on maintaining appropriate relationships and avoiding harmful interventions. Just as Snapchat offers resources for user safety, Stephen Ministry equips its ministers with tools to protect both themselves and those they serve, fostering trust and genuine connection.

Historical Background of Stephen Ministry

Stephen Ministry originated in 1979 at St. Louis’s Lutheran Church of the Good Shepherd, responding to a recognized need for structured lay caring ministry within congregations. Initially conceived as a pilot program, it quickly demonstrated its effectiveness in providing support during times of crisis and transition.

The development of the Stephen Ministry training manual PDF was crucial to its expansion. This resource standardized the training process, ensuring consistent quality and equipping laypeople with the skills necessary for effective care.

Like Snapchat’s evolution from a simple messaging app to a multifaceted platform, Stephen Ministry has adapted and grown over the decades. The manual reflects this growth, incorporating best practices and addressing contemporary challenges. It’s a testament to the enduring power of compassionate, faith-based care, mirroring Snapchat’s focus on connection, albeit through vastly different means.

The Stephen Ministry Training Process

Stephen Ministry training, detailed in the training manual PDF, involves phases of application, classroom learning, and supervised caring, building essential skills.

Snapchat’s user onboarding parallels this, guiding new users through features.

Phase 1: Initial Application and Interview

The first phase of Stephen Ministry training, thoroughly outlined within the Stephen Ministry training manual PDF, centers on discerning a candidate’s suitability for this vital caring role.

Applicants complete a detailed application, exploring their faith journey, interpersonal skills, and life experiences. This isn’t merely a formality; it’s a thoughtful self-assessment and a transparent presentation to the selection committee.

Following the application, candidates participate in individual interviews. These conversations, guided by trained Stephen Leaders, delve deeper into the applicant’s motivations, emotional maturity, and capacity for empathetic listening.

The interview process aims to identify individuals who possess a genuine desire to serve others, a commitment to confidentiality, and the ability to navigate challenging emotional situations. Like Snapchat’s account creation process, it’s a crucial step ensuring a good fit – in this case, for a deeply impactful ministry.

Phase 2: Classroom Training – Foundations

Phase two, comprehensively detailed in the Stephen Ministry training manual PDF, involves a series of classroom sessions laying the groundwork for effective care. This isn’t simply learning techniques; it’s a transformative experience fostering personal growth and spiritual maturity.

Participants explore core values like confidentiality, boundaries, and empathetic listening. They learn to differentiate between providing support and offering solutions, understanding the power of reflective listening.

The curriculum delves into understanding human needs, recognizing emotional cues, and navigating difficult conversations. Similar to learning Snapchat’s features for connection, trainees acquire tools for building trust and rapport.

Role-playing exercises and group discussions provide a safe space to practice newly acquired skills. This foundational training equips Stephen Ministers to enter the supervised caring phase with confidence and competence, ready to offer Christ-centered support.

Phase 3: Supervised Caring – Skill Development

Phase three, meticulously outlined within the Stephen Ministry training manual PDF, bridges theory and practice. Newly trained Stephen Ministers begin providing one-on-one care to individuals experiencing life difficulties, all under the guidance of a seasoned supervisor.

This supervised experience allows for real-time application of skills learned in the classroom, receiving constructive feedback and refining their approach. It’s a crucial period for solidifying boundaries, practicing active listening, and navigating complex emotional landscapes.

Regular supervision meetings provide a safe space to process challenges, celebrate successes, and ensure adherence to Stephen Ministry’s ethical guidelines. Much like mastering Snapchat’s filters requires practice, effective caring demands ongoing refinement.

This phase isn’t about “fixing” problems, but about walking alongside care receivers, offering compassionate support, and pointing them towards Christ’s healing presence.

Key Components of the Training Manual (PDF)

The manual PDF details essential caring roles, confidentiality protocols, and empathy skill-building, mirroring Snapchat’s safety features for responsible connection and communication.

Understanding the Caring Role

The Stephen Ministry training manual PDF meticulously outlines the unique role of a Stephen Minister, emphasizing it’s not counseling, therapy, or simply friendship. It’s a specific, Christ-centered caring ministry focused on providing support to individuals navigating difficult life circumstances.

This section clarifies the boundaries of the role, stressing active listening and empathetic responses rather than offering advice or solutions. Like Snapchat’s focus on shared moments, Stephen Ministry centers on being with the care receiver, offering unconditional positive regard.

The manual details the importance of recognizing one’s own limitations and knowing when to refer care receivers to professional help. It emphasizes the spiritual aspect of caring, grounding the ministry in Christian principles and prayer. Ultimately, the goal is to help individuals experience the healing power of God’s love through a supportive relationship.

Confidentiality and Boundaries in Stephen Ministry

The Stephen Ministry training manual PDF dedicates significant attention to confidentiality, recognizing it as paramount to building trust with care receivers. It outlines a strict code of conduct, emphasizing that everything shared within the caring relationship remains private, with limited exceptions for safety concerns.

Boundaries are equally crucial, and the manual provides clear guidelines on appropriate and inappropriate behaviors. Similar to Snapchat’s safety features regarding contact control, Stephen Ministry stresses maintaining professional distance and avoiding dual relationships.

This section details how to navigate potentially challenging situations, such as unwanted advances or requests for information outside the scope of the caring role. It reinforces the importance of self-care for Stephen Ministers, preventing burnout and ensuring they can continue to offer effective support while upholding ethical standards.

Active Listening and Empathy Skills

The Stephen Ministry training manual PDF places strong emphasis on developing robust active listening and empathy skills, foundational to effective caring. It moves beyond simply hearing words to truly understanding the care receiver’s emotional state and perspective.

Techniques like reflective listening – paraphrasing and summarizing what’s been said – are thoroughly explored. The manual contrasts empathy with sympathy, highlighting the importance of feeling with rather than feeling for the individual.

Drawing parallels to Snapchat’s focus on shared experiences, Stephen Ministry training encourages ministers to connect authentically. It provides practical exercises and role-playing scenarios to hone these skills, ensuring ministers can create a safe and non-judgmental space for vulnerable individuals to share their stories and find support.

Specific Skills Covered in the Training

The Stephen Ministry training manual PDF details crucial skills: reflection, assertiveness, and navigating difficult emotions, mirroring Snapchat’s communication tools.

These abilities empower ministers to offer compassionate, boundary-respecting care.

Reflection Skills for Effective Caring

Reflection skills, thoroughly detailed within the Stephen Ministry training manual PDF, are paramount for impactful care. This isn’t simply echoing back words; it’s demonstrating understanding of the care receiver’s feelings and experiences.

The manual emphasizes techniques like paraphrasing, clarifying, and summarizing to ensure accurate comprehension. These skills move beyond superficial listening, fostering a deeper connection and trust.

Effective reflection helps care receivers explore their own thoughts and feelings, leading to self-discovery and healing. It avoids offering unsolicited advice or judgment, instead empowering the individual to find their own solutions;

Similar to Snapchat’s emphasis on sharing personal stories, reflection encourages vulnerability and authentic expression within the caring relationship. Mastering these skills, as outlined in the manual, is central to Stephen Ministry’s approach.

Assertiveness in Maintaining Boundaries

The Stephen Ministry training manual PDF dedicates significant attention to assertiveness, crucial for healthy boundaries in the caring role. Caregivers learn to respectfully communicate their limits – time, emotional capacity, and expertise – without guilt or apology.

This isn’t about being unkind; it’s about self-care and ensuring sustainable support. The manual provides practical scripts and role-playing exercises to build confidence in setting boundaries.

Understanding the difference between responsibility and ownership is key, as is recognizing when a situation requires professional referral. Like Snapchat’s safety features protecting users, boundaries protect both the caregiver and care receiver.

Assertiveness prevents burnout and maintains the integrity of the caring relationship, allowing Stephen Ministers to offer consistent, effective support as detailed within the training materials.

Dealing with Difficult Emotions in Care Receivers

The Stephen Ministry training manual PDF thoroughly prepares ministers for encountering intense emotions – grief, anger, fear, and despair – within care receivers. It emphasizes empathetic presence rather than attempting to “fix” feelings.

Caregivers learn techniques for validating emotions, offering a safe space for expression, and avoiding common pitfalls like minimizing or judging. The manual stresses the importance of self-awareness; recognizing how a care receiver’s emotions might impact the minister.

Similar to Snapchat’s community guidelines addressing sensitive content, Stephen Ministry provides guidance on navigating challenging conversations and recognizing when professional intervention is necessary.

The training equips ministers to respond with compassion and skill, fostering trust and facilitating the care receiver’s journey toward healing, as outlined in the comprehensive manual.

Resources Included in the Stephen Ministry Training Manual

Stephen Ministry’s manual PDF provides assessment tools, referral lists for specialized care, and ongoing education materials—supporting both ministers and those they serve.

Assessment Tools for Care Receiver Needs

The Stephen Ministry training manual PDF incorporates several crucial assessment tools designed to help Stephen Ministers understand the specific needs of those they are caring for. These aren’t diagnostic tests, but rather guides to facilitate deeper conversations and identify areas where support is most needed.

Included are questionnaires focusing on emotional wellbeing, spiritual perspectives, and practical concerns. These tools help ministers move beyond surface-level interactions and gain a comprehensive understanding of the care receiver’s situation. The manual emphasizes the importance of using these assessments with sensitivity and respect, always prioritizing the care receiver’s comfort and autonomy.

Furthermore, the PDF details how to interpret the assessment results, recognizing patterns and potential areas for focused care. It stresses that these tools are meant to inform the caring relationship, not define it, and encourages ministers to adapt their approach based on individual needs and responses. Like Snapchat’s focus on individual expression, Stephen Ministry values personalized care.

Referral Resources for Specialized Help

The Stephen Ministry training manual PDF explicitly recognizes the limitations of Stephen Ministers’ training and emphasizes the vital importance of knowing when to refer care receivers to professional help. It’s a core tenet of responsible caring.

The manual provides an extensive list of referral resources categorized by need – including mental health professionals, grief counselors, financial advisors, and legal aid services. These resources are often categorized by geographic location to facilitate easy access. It stresses that Stephen Ministers are not therapists and should avoid offering advice outside their scope of training;

The PDF also guides ministers on how to make a referral, emphasizing sensitivity and respect for the care receiver’s autonomy. Similar to Snapchat’s safety features, Stephen Ministry prioritizes well-being. It encourages open communication about the benefits of professional support and assists care receivers in finding appropriate services.

Continuing Education and Support Materials

The Stephen Ministry training manual PDF isn’t a one-time resource; it’s a foundation for ongoing development. Stephen Ministers receive regular supervision and access to continuing education materials to refine their skills and address evolving needs.

These materials include articles, webinars, and advanced training modules focusing on specific challenges like trauma, grief, or caring for individuals with chronic illness. The manual itself is periodically updated to reflect best practices in caring ministry. Like Snapchat’s constant updates, Stephen Ministry evolves.

Furthermore, the PDF details access to a robust peer support network, allowing Ministers to share experiences, receive encouragement, and learn from one another. This collaborative environment ensures Ministers remain equipped and supported throughout their service, fostering a thriving caring community.

Accessing the Stephen Ministry Training Manual PDF

The Stephen Ministry training manual PDF is primarily available through the official Stephen Ministry website, requiring licensing and associated costs for access.

Digital and print versions exist.

Official Stephen Ministry Website

The official Stephen Ministry website (stephenministry.org) serves as the primary hub for accessing the Stephen Ministry training manual PDF and related resources. Obtaining the manual typically requires a formal agreement and associated licensing fees, reflecting the comprehensive nature of the training program.

The website details various training options, including in-person workshops and self-paced online modules, all designed to equip individuals with the skills necessary to provide effective, Christ-centered care. Information regarding costs, licensing procedures, and available support materials is readily accessible.

Similar to Snapchat’s resource center for user assistance, the Stephen Ministry website provides extensive support for both trainers and Stephen Ministers. It’s a centralized location for updates, continuing education opportunities, and connection with the broader Stephen Ministry community. Exploring the site is the first step for any church or organization interested in implementing this caring ministry.

Cost and Licensing Information

Accessing the complete Stephen Ministry training manual PDF and implementing the program involves specific costs and licensing agreements. These fees support the ongoing development and maintenance of the curriculum, ensuring its quality and effectiveness. Licensing isn’t a one-time purchase; it’s typically structured based on church size or the number of Stephen Ministers being trained.

Costs cover not only the manual itself but also access to supplementary materials, ongoing support, and updates to the training program. Similar to Snapchat’s in-app purchases, Stephen Ministry operates on a resource-based model. The investment reflects the value of a thoroughly vetted and impactful caring ministry. Detailed pricing information is available on the official Stephen Ministry website, with options tailored to different organizational needs and budgets.

Digital vs. Print Versions

The Stephen Ministry training manual PDF is available in both digital and print formats, catering to diverse learning preferences and logistical needs. The digital version offers portability and searchability, allowing easy access on various devices – mirroring Snapchat’s accessibility across platforms. Print versions provide a tactile learning experience and are ideal for those who prefer a physical resource.

While the content remains consistent across both formats, the digital manual often includes interactive elements and hyperlinked resources. Churches can choose the format that best suits their training environment and the needs of their Stephen Minister candidates. Both options ensure comprehensive coverage of the curriculum, equipping caregivers with the skills to provide effective, Christ-centered support.

Post-Training Support and Ongoing Development

Stephen Ministers benefit from continued support, mirroring Snapchat’s community features, and resources beyond the initial training manual PDF, ensuring sustained caring skills.

Regular Supervision and Peer Support

Ongoing support is crucial for Stephen Ministers after completing the initial training, detailed within the Stephen Ministry training manual PDF. Regular supervision, typically provided by a Stephen Leader, offers a safe space to process caregiving experiences, address challenges, and receive guidance.

This isn’t a solitary journey; peer support groups provide a confidential environment for Ministers to share insights, learn from one another, and reinforce the principles learned during training. Like Snapchat’s community aspect, fostering connections is vital.

These groups offer encouragement and prevent burnout, ensuring Ministers maintain healthy boundaries and continue providing effective care. The manual emphasizes the importance of self-care alongside caring for others, and supervision/peer support directly facilitate this. Consistent check-ins and collaborative learning are hallmarks of this ongoing development.

Continuing Education Opportunities

The Stephen Ministry training manual PDF highlights that initial training is just the beginning. Ongoing learning is vital for maintaining skills and addressing evolving needs in caregiving. Stephen Ministries offers a variety of continuing education opportunities designed to deepen understanding and refine techniques.

These include webinars, workshops, and advanced training modules focusing on specific areas like grief support, divorce recovery, or caring for those with chronic illness. Similar to Snapchat’s constant updates and new features, Stephen Ministry evolves its resources.

These opportunities allow Ministers to stay current with best practices and expand their capacity to provide compassionate, effective care. Participation is often encouraged and sometimes required, ensuring a consistently high standard of care within the congregation. The manual details available resources and registration information.

Advanced Training Modules

The Stephen Ministry training manual PDF details several advanced modules for Stephen Ministers seeking specialized skills. These go beyond the foundational training, offering focused learning in specific care areas. Modules cover topics like ‘Caring for the Depressed,’ ‘Grief Support,’ and ‘Divorce Recovery,’ equipping Ministers to address complex needs.

These modules, much like Snapchat’s diverse filters and lenses catering to varied user preferences, provide tailored tools for specific situations. They often involve case studies, role-playing, and expert-led discussions, fostering practical application of learned concepts.

Completion of advanced modules demonstrates a commitment to ongoing professional development and enhances a Minister’s ability to provide effective, compassionate care. The manual outlines prerequisites, learning objectives, and available formats for each module, ensuring accessibility and quality.

bear rice cooker manual

Bear Rice Cooker Manual: A Comprehensive Guide

Discover effortless cooking with your Bear rice cooker! This guide details setup, operation, cleaning, and troubleshooting for optimal performance and delicious results.

Bear rice cookers are gaining popularity for their versatility and user-friendly designs. Beyond simply cooking rice, many Bear models, like the DFB-B20A1, function as steamers and slow cookers, offering a multifunctional kitchen appliance. These cookers cater to various needs, from mini cookers for individuals to 8-cup models for families.

Bear prioritizes convenience, incorporating features like digital control panels and keep-warm functions. The inclusion of accessories – a rice spatula, measuring cup, and non-stick inner pot – enhances the cooking experience. Discover how to unlock the full potential of your Bear rice cooker!

Understanding Your Bear Model

Identifying your specific Bear model is crucial for accessing the correct support and features. Common models include the DFB-B12W1-BLUE, DFB-B16C1, and DFB-B20A1. Locate the model number typically found on the appliance’s base.

Each Bear rice cooker includes essential components: an inner pot with a non-stick coating, a measuring cup for accurate rice-to-water ratios, and a rice spatula for serving. Familiarize yourself with these parts and their functions to maximize your cooking efficiency and enjoyment.

Identifying Your Model Number (e.g., DFB-B12W1-BLUE, DFB-B16C1, DFB-B20A1)

Locating your Bear rice cooker’s model number is the first step towards personalized support and accessing specific instructions. This alphanumeric code (like DFB-B12W1-BLUE, DFB-B16C1, or DFB-B20A1) uniquely identifies your appliance.

You’ll typically find it on a sticker affixed to the bottom or back of the unit. Having this number readily available when contacting customer support or searching for online resources will ensure you receive the most accurate and helpful information for your specific model.

Key Components Included (Inner Pot, Measuring Cup, Rice Spatula)

Your Bear rice cooker package includes essential components for successful cooking. A removable inner pot with a non-stick coating ensures easy food release and cleaning. A dedicated measuring cup allows for precise rice-to-water ratios, crucial for perfect results.

Finally, a rice spatula, often made of wood or heat-resistant plastic, is provided to gently serve fluffy rice without scratching the pot’s surface. Familiarize yourself with each part for optimal use!

Getting Started: Initial Setup

Before your first use, proper setup is vital for longevity and performance. Begin by carefully unpacking all components and removing any packaging materials. Thoroughly clean the inner pot, measuring cup, and spatula with warm, soapy water – rinse and dry completely.

Ensure the cooker is placed on a stable, level surface away from water sources. Familiarize yourself with the control panel and power cord connection before proceeding to the basic function overview.

First-Time Use: Cleaning and Preparation

To ensure optimal hygiene and prevent any initial odors, a thorough cleaning is essential. Remove the inner pot and wash it with warm, soapy water, paying attention to the non-stick coating. The included measuring cup and rice spatula should also be washed and dried.

Wipe the exterior of the rice cooker with a damp cloth. Avoid abrasive cleaners. A quick cycle with water only can further prepare the unit for cooking.

Powering On and Basic Function Overview

Plug your Bear rice cooker into a grounded outlet. The digital control panel illuminates, displaying available functions. Typically, a “Cook” or “Start” button initiates the cooking cycle. Many models feature pre-programmed settings for white rice, brown rice, and other grains.

The “Keep Warm” function automatically activates post-cooking, maintaining rice temperature. Explore the panel to familiarize yourself with each function before your first use.

Cooking Rice: Step-by-Step Instructions

Begin by measuring rice using the provided cup. Rinse the rice under cold water until the water runs clear – this removes excess starch. Add the rinsed rice to the inner pot. Consult your model’s instructions for the correct water-to-rice ratio; generally, it’s a 1:1 ratio for white rice;

Securely place the inner pot into the cooker, close the lid, and press the “Cook” button to start the cycle. Allow the cooker to complete the cycle automatically.

Measuring Rice and Water Ratios

Accurate measurements are crucial for perfectly cooked rice. The standard ratio for most white rice is 1 cup of rice to 1 cup of water. However, this can vary slightly depending on your Bear model and rice type. For brown rice, a ratio of 1 cup rice to 1.5 cups water is recommended.

Always use the measuring cup included with your cooker for consistent results. Adjust water levels slightly based on desired rice texture – less water for firmer rice, more for softer.

White Rice Cooking Cycle

After measuring rice and water, ensure the inner pot is clean and placed securely inside the Bear rice cooker. Close the lid firmly. Select the “White Rice” or “Cook” function on the digital control panel. The cooker will automatically begin the cooking cycle, typically taking around 20-30 minutes.

Avoid lifting the lid during cooking to maintain consistent temperature. Once complete, the cooker will switch to the “Keep Warm” function, signaling fluffy, perfectly cooked rice is ready!

Beyond White Rice: Versatile Cooking Options

Your Bear rice cooker isn’t limited to just white rice! Explore diverse options like nutty brown rice – adjust water ratios accordingly. Enjoy fragrant Jasmine rice with a slightly sweeter flavor; Utilize the steaming function with the included steamer basket for vegetables, fish, or dumplings.

Many Bear models, like the DFB-B20A1, also function as slow cookers, expanding culinary possibilities. Experiment with porridges, soups, and even cakes – consult online resources for specific recipes!

Cooking Different Rice Types (Brown Rice, Jasmine Rice)

Brown rice requires a higher water ratio – typically 2:1 (water to rice) and a longer cooking time. Use the “Brown Rice” setting if available, or the standard cycle. Jasmine rice, known for its aroma, generally uses a 1:1 ratio.

For best results, rinse both types before cooking. Experiment with slight adjustments to water levels based on your preference. Remember, the Bear cooker’s versatility allows for perfectly cooked grains every time!

Steaming Vegetables and Other Foods

Your Bear rice cooker isn’t limited to rice! Utilize the steaming basket (if included) to prepare healthy vegetables, fish, or dumplings. Add water to the inner pot – ensuring it doesn’t touch the food – and select the “Steam” function or a standard cooking cycle.

Cooking times vary depending on the food; check for doneness. This method preserves nutrients and flavors beautifully, offering a convenient and nutritious meal option.

Advanced Features and Functions

Bear rice cookers boast digital control panels offering diverse settings beyond basic white rice. Explore options like “Quick Cook,” “Porridge,” or specialized cycles for different rice types. The “Keep Warm” function maintains rice temperature for extended periods, typically several hours, ensuring a ready-to-serve meal.

Some models include slow cooker functionality, expanding culinary possibilities. Familiarize yourself with your model’s specific features for optimal use and delicious results!

Digital Control Panel Explanation

Bear’s digital control panels vary by model, but common features include a “Cook/Start” button, function selection buttons (White Rice, Brown Rice, etc.), and timer settings. The display indicates the current cooking cycle and remaining time. Some models offer pre-programmed settings for specific rice varieties or dishes.

Refer to your model’s specific diagram for button locations and functions. Experiment with different settings to discover optimal results for your preferred recipes!

Keep Warm Function and Duration

Bear rice cookers feature an automatic “Keep Warm” function, activating after the cooking cycle completes. This maintains rice temperature for extended periods, typically up to 12 hours, preventing it from becoming stale or hard. The duration can sometimes be adjusted on higher-end models.

Avoid leaving rice on “Keep Warm” for excessively long periods, as it can affect texture. Regularly check the rice’s moisture level and consider reheating if needed.

Cleaning and Maintenance

Regular cleaning ensures your Bear rice cooker’s longevity and hygiene. Always unplug the appliance before cleaning. The inner pot, featuring a non-stick coating, requires gentle hand washing with a soft sponge and mild detergent; avoid abrasive cleaners.

The exterior can be wiped down with a damp cloth. Ensure all parts are thoroughly dried before reassembly. Avoid immersing the main unit in water. Proper care maintains optimal performance.

Proper Cleaning of the Inner Pot (Non-Stick Coating)

Protect the Bear rice cooker’s non-stick inner pot! Hand wash gently with warm, soapy water using a soft sponge or cloth. Avoid abrasive cleaners, steel wool, or scouring pads, as these will damage the coating. For stubborn residue, soak the pot in warm water before washing.

Ensure the pot is completely dry before each use. Proper care extends the lifespan and maintains the non-stick properties.

Exterior Cleaning and Care

Maintain your Bear rice cooker’s appearance with simple exterior cleaning! Wipe down the housing with a damp, soft cloth. Avoid using harsh chemicals or abrasive cleaners, which could damage the finish. For stubborn stains, a mild detergent solution can be used, followed by a clean, damp wipe.

Ensure the exterior is dry before storing. Regular cleaning prevents buildup and keeps your cooker looking its best.

Troubleshooting Common Issues

Experiencing problems with your Bear rice cooker? If it won’t turn on, check the power cord and outlet. Undercooked rice may require adjusting the water ratio or selecting a longer cooking cycle. Overcooked rice suggests reducing water or shortening the cycle.

Ensure the inner pot is correctly positioned. If issues persist, consult the full manual or Bear’s support resources for further assistance.

Rice Cooker Not Turning On

If your Bear rice cooker fails to power on, first verify the power cord is securely plugged into both the cooker and a functioning electrical outlet. Test the outlet with another device to confirm it’s providing power. Inspect the power cord for any visible damage or fraying.

Ensure the inner pot is properly seated within the cooker base; a safety mechanism may prevent operation if it’s not. If problems continue, contact Bear support.

Rice is Undercooked or Overcooked

Undercooked rice often indicates insufficient water. Refer to the measuring cup and water ratio guidelines for your specific rice type – adjustments may be needed. Conversely, overcooked rice suggests too much water. Ensure accurate measurements are used consistently.

Also, check the cooker’s sensor window for cleanliness. A dirty sensor can misread the moisture level. Experiment with slightly adjusting water amounts to achieve desired results.

Safety Precautions

Always ensure the rice cooker is properly grounded to prevent electrical shock. Never immerse the appliance, cord, or plug in water. Avoid operating the cooker with a damaged cord or plug – seek professional repair.

Use caution when opening the lid during or after cooking, as steam can cause burns. Do not touch hot surfaces; utilize handles or knobs. Keep the cooker away from flammable materials and supervise children when in use.

Electrical Safety Guidelines

To prevent electrical hazards, always operate the Bear rice cooker on a dedicated, grounded outlet. Never use extension cords. Ensure the voltage matches the cooker’s specifications. Disconnect the appliance when not in use and before cleaning.

Do not operate with a damaged cord or plug; replace immediately. Avoid using outdoors or in damp environments. If the cooker malfunctions, discontinue use and contact qualified service personnel for repair – do not attempt self-repair.

Proper Usage to Avoid Burns

Exercise caution when operating your Bear rice cooker as surfaces become hot during use. Always use oven mitts or pot holders when handling the inner pot and lid. Avoid touching the steam vent during or immediately after cooking to prevent scalding.

Never immerse the cooker base in water. Allow the unit to cool completely before cleaning. Keep children away during operation and ensure proper ventilation to dissipate heat effectively.

Understanding the 2.0L Capacity (DFB-B20A1)

The Bear DFB-B20A1 model boasts a generous 2.0L capacity, ideal for families or meal prepping. This translates to approximately 8 cups of cooked rice, sufficient for 1-4 people. It’s versatile enough for daily use and entertaining guests.

Beyond rice, this capacity accommodates steaming vegetables or slow-cooking stews. Refer to the included recipe guide for optimal ingredient quantities and cooking times to maximize the 2.0L space.

Using the Slow Cooker Function

The Bear DFB-B20A1 cleverly integrates a slow cooker function, expanding its versatility. Select the ‘Slow Cook’ setting on the digital control panel and adjust the timer according to your recipe. This is perfect for soups, stews, and tenderizing meats.

Ensure ingredients are appropriately sized for the 2.0L capacity. Always follow safe food handling practices and monitor cooking progress, especially during extended slow cooking periods, for optimal results.

The 8-Cup Capacity and Serving Sizes

Many Bear rice cookers, like models designed for families or gatherings, boast an 8-cup cooked rice capacity. This generally translates to approximately 4-6 servings, depending on individual appetite and rice type. Consider that different rice varieties expand differently during cooking.

For meal prepping or larger groups, the 8-cup capacity offers convenience. Adjust water levels accordingly when cooking smaller portions to prevent sticking or dryness, ensuring perfectly cooked rice every time.

Bear Rice Cooker Dimensions (e.g., DFB-B12W1-BLUE)

Understanding the dimensions of your Bear rice cooker is crucial for countertop placement. The DFB-B12W1-BLUE, a popular mini model, measures approximately 19cm in width and 20.8cm in depth. Height varies slightly, but generally falls around 24cm.

These compact dimensions make it ideal for smaller kitchens or dorm rooms. Always verify specific measurements for your exact model, as larger capacity cookers will have correspondingly larger footprints.

Warranty Information and Support

Bear rice cookers typically come with a standard manufacturer’s warranty, covering defects in materials and workmanship. The duration varies by model and region, so retain your purchase receipt for verification.

For warranty claims or support, visit the Bear official website (see ‘Where to Find Additional Resources’). You can also find assistance through online user forums and communities. Contacting customer support directly ensures prompt resolution of any issues you may encounter with your appliance.

Frequently Asked Questions (FAQ)

Q: Can I use my Bear rice cooker for anything besides rice? A: Absolutely! Many models steam vegetables and even slow cook.

Q: What rice-to-water ratio should I use? A: It depends on the rice type; refer to the ‘Cooking Rice’ section.

Q: My cooker isn’t turning on. What should I do? A: Check the power cord and outlet (see ‘Troubleshooting’). Contact support if the issue persists.

Where to Find Additional Resources

For comprehensive support, visit the Bear official website. There, you’ll find detailed manuals, troubleshooting guides, and FAQs specific to your model (DFB-B12W1-BLUE, DFB-B16C1, DFB-B20A1, etc.).

Engage with fellow Bear cooker owners in online user forums and communities. Share tips, recipes, and solutions to common issues. These platforms offer valuable insights beyond the standard manual, fostering a collaborative learning environment.

Bear Official Website and Support

The Bear official website is your primary resource for detailed product information, downloadable manuals (including those for models like DFB-B20A1), and direct customer support. You can typically find model-specific FAQs addressing common concerns.

Explore their support section for troubleshooting guides and contact options, potentially including email or live chat. Registering your appliance may unlock additional benefits and warranty information, ensuring a seamless ownership experience.

Online User Forums and Communities

Engage with fellow Bear rice cooker owners in online forums and communities! These platforms offer a valuable space to share experiences, ask questions, and find solutions to common issues. Users often post tips, recipes, and troubleshooting advice specific to various models, like the DFB-B12W1-BLUE.

Search existing threads or start a new one to connect with experienced users who can provide personalized guidance and support beyond the official manual.

zone 10b california planting guide

Zone 10b California Planting Guide: An Overview

Southern California’s mild climate allows for year-round gardening, but understanding Zone 10b’s specifics is crucial for successful harvests and vibrant landscapes.

Understanding Zone 10b

Zone 10b in California represents a region with minimal frost risk, boasting average annual minimum winter temperatures between 30°F and 35°F. This allows for an extended growing season, significantly longer than many other US regions; Gardeners benefit from the ability to cultivate a diverse range of plants, including subtropical varieties often impossible to grow elsewhere.

However, Zone 10b isn’t uniform. Coastal areas experience milder temperatures and higher humidity, while inland locations can see hotter summers and cooler winter nights. Understanding these nuances is key to selecting appropriate plant varieties and adjusting planting schedules. Successful gardening in Zone 10b requires awareness of these temperature variations and adapting strategies accordingly for optimal growth;

Microclimates within Zone 10b

Zone 10b California isn’t a monolithic gardening environment; significant microclimates exist. Coastal areas benefit from marine influence, offering moderate temperatures and higher humidity, ideal for moisture-loving plants. Inland valleys experience hotter summers and cooler winters, demanding heat-tolerant and frost-resistant selections.

Elevation plays a crucial role, with higher altitudes experiencing cooler temperatures. South-facing slopes receive more sunlight, warming soil faster, while north-facing slopes remain cooler and retain moisture longer. Even within a single garden, structures like walls and trees create sheltered spots or shaded areas. Recognizing and utilizing these microclimates allows gardeners to expand the range of plants they can successfully cultivate within Zone 10b.

Vegetable Planting Schedule for Zone 10b

Zone 10b’s extended growing season enables nearly year-round vegetable cultivation, but strategic timing—considering cool and warm seasons—is vital for optimal yields.

Cool Season Vegetables

Zone 10b’s mild winters present a unique opportunity for thriving cool-season vegetable gardens. These crops prefer temperatures between 60-70°F, making fall and early spring ideal planting times. Consider varieties like lettuce, spinach, kale, and broccoli, which flourish in cooler conditions. Root vegetables such as carrots, radishes, and beets also perform exceptionally well during these periods.

Succession planting is key to a continuous harvest. Staggering plantings every few weeks ensures a steady supply throughout the cool season. Remember to provide adequate moisture and well-drained soil for optimal growth. Protecting young seedlings from potential frost is also advisable, especially during colder snaps. Utilizing row covers can offer effective protection and extend the growing season further.

Best Planting Times for Cool Season Crops

For Zone 10b California gardens, the prime time for sowing cool-season vegetable seeds is typically from September through February. Starting seeds indoors in late summer (August-September) allows for transplants to be established before the cooler weather fully arrives. Direct sowing can occur from October onwards, benefiting from the milder temperatures.

Leafy greens like lettuce and spinach can be planted throughout the fall and winter. Root vegetables, such as carrots and radishes, thrive when sown from October to January. Broccoli and cauliflower benefit from a September-November planting window. Consider a final planting in late February to extend the harvest into spring. Adjust these timings slightly based on specific microclimates within your garden.

Specific Cool Season Vegetables & Timing

Lettuce & Spinach: Sow seeds or transplants September-February for continuous harvests. Succession planting every 2-3 weeks ensures a steady supply. Radishes: Direct sow October-January, maturing quickly in about a month. Carrots: Plant seeds October-February; choose shorter varieties for heavier soils.

Broccoli & Cauliflower: Start seeds indoors August-September, transplanting September-November. Peas: Sow seeds September-December for a winter/early spring harvest. Kale: Plant seeds or transplants September-February, enjoying harvests throughout the cooler months. Remember to adjust planting times based on your local microclimate and consider using row covers for added protection against frost.

Warm Season Vegetables

Zone 10b’s extended warm season allows for a diverse range of summer vegetables. Tomatoes & Peppers: Start seeds indoors February-March, transplanting after the last frost (typically April-May). Consider heat-tolerant varieties. Cucumbers & Zucchini: Direct sow or transplant April-June for summer harvests; succession plant for continuous yields.

Beans: Sow seeds March-July, choosing bush or pole varieties. Eggplant: Start seeds indoors February-March, transplanting in May. Corn: Plant seeds April-June, ensuring adequate pollination. Southern California’s sun and warmth are ideal, but consistent watering and soil amendments are vital for optimal growth and abundant harvests.

Optimal Planting Windows for Warm Season Crops

For Zone 10b, the prime window for warm-season vegetables stretches from late March through August, though many crops benefit from staggered planting. Tomatoes & Peppers thrive when transplanted from indoors between April and June, capitalizing on warming soils. Cucumbers & Zucchini excel with direct sowing or transplanting from April to July, allowing for multiple harvests.

Beans demonstrate flexibility, flourishing with sowing from March to July. Eggplant prefers a May transplant. Corn benefits from April-June planting. Remember, these are guidelines; microclimates within Zone 10b can shift these windows slightly, so observe local conditions.

Detailed Warm Season Vegetable Schedule

March-April: Begin with tomatoes, peppers, & eggplant (start indoors 6-8 weeks prior). Direct sow beans & corn. Succession sow radishes for early harvests.

May-June: Transplant tomatoes, peppers, & eggplant. Direct sow cucumbers, zucchini, & summer squash. Continue bean sowing for extended yields. Plant basil alongside tomatoes for pest control.

July-August: Second planting of beans, cucumbers, & zucchini for fall harvest. Consider heat-tolerant varieties. Monitor for pests and adjust watering based on increasing temperatures. Prepare beds for fall cool-season crops.

Fruit Tree Planting in Zone 10b

Zone 10b’s warm climate is ideal for citrus, avocado, & subtropical fruits; proper selection and planting timing are key for abundant yields.

Citrus Trees

Citrus trees thrive in Zone 10b’s mild winters and warm summers, offering a delightful array of options for home gardeners. Varieties like oranges, lemons, grapefruits, and mandarins flourish with proper care. Planting is best done in late winter or early spring, allowing roots to establish before the heat of summer.

Ensure well-draining soil, as citrus trees are susceptible to root rot. Amending with compost enriches the soil and provides essential nutrients. Regular watering is crucial, especially during dry periods, but avoid overwatering. Protect young trees from frost with coverings during occasional cold snaps. Pruning helps maintain shape and encourages fruit production. Consider dwarf varieties for smaller gardens, maximizing yields in limited spaces.

Avocado Trees

Avocado trees are a rewarding addition to Zone 10b gardens, but require specific attention to thrive. Planting is ideally done in spring or early summer, allowing sufficient time for establishment before winter. Choose a location with well-draining soil, as avocados are highly sensitive to root rot. Grafted varieties are recommended for reliable fruit production and quicker maturity.

Protect young trees from strong winds and frost. Consistent watering is vital, especially during fruit development. Avocado trees benefit from regular fertilization with a balanced citrus or avocado-specific formula. Pruning is essential for shaping the tree and removing dead or diseased branches. Pollination can be a concern; consider planting multiple varieties for cross-pollination and increased yields.

Subtropical Fruits

Zone 10b’s warm temperatures support a diverse range of subtropical fruits beyond citrus and avocados. Consider planting guava, papaya, figs, and passion fruit for a bountiful harvest. These fruits generally require full sun and well-drained soil. Planting times vary; figs are best planted in late winter or early spring, while papaya thrives when planted after the last frost.

Regular fertilization is crucial for optimal growth and fruit production. Protect sensitive varieties from frost with coverings or by planting in sheltered locations. Pruning helps maintain shape and encourages fruiting. Be mindful of potential pest and disease issues specific to each fruit type, employing organic control methods whenever possible. Enjoy the exotic flavors of homegrown subtropical delights!

Herb Gardening in Zone 10b

Zone 10b’s climate is ideal for both perennial and annual herbs, offering fresh flavors year-round with minimal effort and consistent growth.

Perennial Herbs

Zone 10b’s warm temperatures support a wide array of perennial herbs, offering a continuous harvest for years with minimal replanting. Rosemary, thyme, oregano, and lavender thrive, becoming established woody shrubs. Consider their mature size when planting, ensuring adequate space for growth and air circulation. Sage also flourishes, providing both culinary and ornamental value.

Mint, while a perennial, can be invasive; planting it in containers is highly recommended to control its spread. These herbs generally prefer well-drained soil and benefit from regular pruning to encourage bushier growth and prevent legginess. Proper care ensures a bountiful supply of flavorful herbs throughout the year, enhancing your culinary creations and adding fragrance to your garden.

Annual Herbs

While Zone 10b favors perennials, several annual herbs provide vibrant flavor and aroma during their growing season. Cilantro and dill are popular choices, best sown directly into the garden in succession for a continuous supply, as they bolt quickly in warmer weather. Basil, though technically a tender perennial, is often grown as an annual, offering abundant leaves throughout the summer months.

Chamomile and summer savory also perform well as annuals, adding unique flavors to teas and culinary dishes. These herbs generally require full sun and well-drained soil. Regular harvesting encourages bushier growth and delays flowering, maximizing leaf production. Remember to replant each season to enjoy their fresh flavors year-round.

Flower Planting Guide for Zone 10b

Zone 10b’s long growing season supports diverse blooms year-round; careful selection ensures continuous color and attracts beneficial pollinators to your California garden.

Spring Blooming Flowers

As temperatures gently rise in Zone 10b California, spring unveils a spectacular array of floral possibilities. Consider vibrant California poppies for a native touch, or cheerful snapdragons adding vertical interest. Petunias thrive, offering a cascade of color, while fragrant sweet peas perfume the air.

Don’t overlook the classic beauty of pansies and violas, perfect for borders and containers. Bulbs planted in fall, like daffodils and tulips (though requiring chilling), burst into bloom. Geraniums also flourish, providing long-lasting color. Remember to provide consistent moisture and well-drained soil for optimal spring flower displays. Succession planting with different varieties extends the blooming period, ensuring a continuously colorful garden throughout the season.

Summer Blooming Flowers

Zone 10b California’s warm summers are ideal for a profusion of vibrant blooms. Zinnias are heat-tolerant and attract butterflies, while marigolds offer cheerful color and pest-repelling properties. Sunflowers provide dramatic height and attract beneficial pollinators. Cosmos are easy to grow and offer delicate, airy blooms.

Consider salvia for its long-lasting flower spikes and drought tolerance. Lantana thrives in the heat, attracting butterflies with its clusters of colorful flowers. Portulaca (moss rose) is a low-growing, drought-resistant option. Regular deadheading encourages continued blooming throughout the summer months. Ensure adequate watering, especially during heat waves, to keep your summer flowers thriving and vibrant.

Seed Starting & Transplants

Starting seeds indoors extends the growing season, while hardening off transplants gradually acclimates them to outdoor conditions in Zone 10b.

Starting Seeds Indoors

For Zone 10b gardeners, initiating seeds indoors provides a head start, particularly for warm-season crops. Utilize seed-starting mixes, ensuring excellent drainage, and maintain consistent moisture. Supplemental lighting is often necessary, especially during shorter winter days, to prevent leggy seedlings.

Small seed varieties benefit greatly from indoor starting, as direct sowing can be challenging. Monitor temperatures closely; warmth encourages germination. Once seedlings emerge, gradually lower temperatures to promote robust growth. Proper ventilation prevents fungal diseases.

Consider using seed trays or individual pots for easy transplanting. Remember to label everything clearly! Timing is key – start seeds 6-8 weeks before the last expected frost, adjusting based on the specific vegetable’s needs.

Hardening Off Transplants

Zone 10b’s generally mild weather doesn’t eliminate the need for hardening off transplants. This crucial step acclimates seedlings grown indoors to outdoor conditions, preventing shock. Begin by placing seedlings in a sheltered spot, protected from direct sun and wind, for just an hour or two.

Gradually increase the exposure time each day, extending it to a full day outdoors over a week or ten days. Monitor plants closely for signs of stress, like wilting or leaf burn. If conditions are harsh, bring them back indoors.

Consistent moisture is vital during hardening off. Protect from sudden temperature drops, especially overnight. This process builds resilience, ensuring successful establishment in your California garden.

Soil Preparation & Amendments

Zone 10b soils vary, but benefit from organic matter additions like compost. This improves drainage, aeration, and nutrient retention for thriving plants in California.

Soil Types in Zone 10b

Zone 10b in California presents diverse soil conditions, often varying significantly even within a single property. Commonly encountered are clay soils, known for their poor drainage but high nutrient content. Sandy soils, conversely, drain rapidly but struggle to retain essential nutrients and moisture. Loamy soils, a balanced blend of sand, silt, and clay, are generally considered ideal, offering good drainage and fertility.

Many areas also feature alkaline soils, a characteristic of the region’s geology, which can impact nutrient availability for certain plants. Understanding your specific soil type is paramount. A simple squeeze test can provide initial insights – clay feels sticky, sand gritty, and loam a balanced texture. Professional soil testing is highly recommended to determine pH levels and nutrient deficiencies, guiding appropriate amendment strategies for optimal plant growth.

Composting & Organic Matter

Enhancing Zone 10b’s soils with compost and organic matter is fundamental for thriving gardens. Composting kitchen scraps, yard waste, and other organic materials creates a nutrient-rich amendment that improves soil structure, drainage, and water retention. This is particularly beneficial for clay and sandy soils prevalent in the region.

Regularly incorporating compost, well-rotted manure, or other organic amendments like leaf mold builds soil fertility naturally, reducing the need for synthetic fertilizers. Organic matter also supports beneficial soil microbes, crucial for nutrient cycling and plant health. Consider sheet mulching or lasagna gardening techniques to build soil directly in garden beds. Utilizing locally sourced organic materials aligns with sustainable gardening practices and promotes a healthy ecosystem within your California garden.

Watering Practices

Zone 10b’s warm temperatures demand mindful watering; efficient irrigation and water conservation are key to maintaining healthy plants and minimizing waste.

Efficient Irrigation Techniques

Given Zone 10b’s often dry conditions, employing efficient irrigation is paramount. Drip irrigation delivers water directly to plant roots, minimizing evaporation and reducing water waste significantly. Soaker hoses offer a similar benefit, gently releasing water along rows of plants. Avoid overhead sprinklers, as they lose substantial water to evaporation, especially during warmer parts of the day.

Mulching around plants is another crucial technique, helping to retain soil moisture and suppress weed growth, which competes for water. Consider grouping plants with similar water needs together – this “hydrozoning” approach allows for targeted watering. Regularly check your irrigation system for leaks and ensure emitters are functioning correctly to maximize efficiency and conserve this precious resource.

Water Conservation Strategies

Water conservation is vital in Zone 10b California gardens. Utilize rainwater harvesting systems – even a simple rain barrel can collect significant amounts of water for irrigation. Greywater systems, reusing water from showers and sinks (where permitted by local regulations), offer another sustainable option. Choose drought-tolerant plant varieties adapted to the Mediterranean climate, reducing overall water demands.

Improve soil health with ample organic matter; healthy soil retains moisture better. Water deeply but less frequently, encouraging deep root growth, making plants more resilient. Schedule irrigation for early mornings or late evenings to minimize evaporation. Consider xeriscaping principles, designing landscapes that require minimal supplemental watering, focusing on native and adapted plants.

Pest & Disease Management

Zone 10b gardens face pests like aphids and diseases from humidity; organic methods, including beneficial insects and proper air circulation, are key.

Common Pests in Zone 10b

Zone 10b California gardens, blessed with a long growing season, unfortunately also attract a variety of pests. Aphids are incredibly common, often clustering on new growth and sucking plant sap, leading to distorted leaves and reduced vigor. Whiteflies are another frequent issue, particularly on warm-season vegetables, causing similar damage. Spider mites thrive in dry conditions, creating webbing and stippling on foliage.

Larger pests like caterpillars can defoliate plants quickly, while snails and slugs target tender seedlings and low-growing crops. Gophers and other rodents pose a threat to root systems. Additionally, fruit trees are susceptible to pests like scale insects and fruit flies. Regular garden inspection is vital for early detection and intervention, preventing widespread infestations and protecting your valuable plants.

Organic Pest Control Methods

Zone 10b California gardeners have excellent options for managing pests without harsh chemicals. Introducing beneficial insects like ladybugs and lacewings can naturally control aphids and other soft-bodied pests. Companion planting, such as marigolds near tomatoes, deters nematodes and other harmful insects. Regularly hand-picking pests like caterpillars and snails is surprisingly effective.

Neem oil is a versatile organic insecticide, disrupting insect life cycles. Insecticidal soap effectively controls aphids, whiteflies, and spider mites. Diatomaceous earth (DE) creates a physical barrier against crawling insects. Maintaining healthy soil and strong plants boosts their natural resistance. Crop rotation and removing infested plant debris also minimize pest populations, fostering a thriving, balanced garden ecosystem.

Succession Planting for Continuous Harvest

Zone 10b’s mild weather enables continuous harvests through staggered planting schedules; plan multiple sowings for extended yields of favorite vegetables and herbs.

Extending the Growing Season

Zone 10b’s remarkably mild winters and long growing season present unique opportunities to maximize garden productivity. Utilizing techniques like row covers and cold frames can protect sensitive plants from occasional frosts, effectively lengthening the harvest period. Consider planting cool-season crops in the fall for winter and early spring yields, while warm-season varieties can be enjoyed well into autumn.

Strategic succession planting, as mentioned previously, is also key. By staggering planting dates, you ensure a continuous supply of fresh produce. Furthermore, selecting varieties with differing maturity rates allows for a prolonged harvest window. Don’t underestimate the power of microclimates within your garden; sheltered spots can offer a warmer environment, extending the growing season even further. Careful planning and these simple methods unlock year-round gardening potential.

Planning for Multiple Harvests

Successful gardening in Zone 10b hinges on anticipating continuous yields. Implement a detailed planting schedule, staggering sowings of the same crop every few weeks to ensure a consistent supply. Focus on “cut-and-come-again” varieties of lettuce, spinach, and herbs, allowing for repeated harvests from a single planting. Interplant fast-maturing crops, like radishes, between slower-growing ones, maximizing space and time.

Consider succession planting with different plant families to avoid soil depletion and pest build-up. For example, follow a legume crop with a leafy green. Utilize vertical gardening techniques to increase yields in limited spaces. Careful record-keeping of planting dates and harvest times will refine your schedule each season, leading to abundant, ongoing harvests throughout the year.

melbourne to geelong train timetable pdf

Melbourne to Geelong Train Timetable PDF: A Comprehensive Guide

Navigating the Melbourne to Geelong rail route requires a current, easily accessible timetable; This guide provides essential information, focusing on the PDF version for convenient offline use, ensuring smooth travel planning․

Understanding the V/Line Network

V/Line operates Victoria’s regional passenger rail network, connecting Melbourne to major regional centres, including Geelong․ It’s crucial to understand V/Line’s structure when planning your journey and interpreting the timetable․ The network isn’t simply a series of point-to-point connections; it’s a complex system influenced by shared track usage with freight trains and metropolitan services․

This shared infrastructure impacts punctuality and can lead to occasional disruptions․ V/Line prioritizes safety and reliability, but external factors can necessitate alterations to the scheduled timetable․ The Geelong line, specifically, is a busy corridor, experiencing frequent services throughout the day․ Understanding this context is vital when reviewing the PDF timetable, as it explains potential variations․

Furthermore, V/Line utilizes a zone-based fare system, and the Geelong line falls within specific zones impacting ticket costs․ The network is continually undergoing improvements and upgrades, so staying informed about planned works is essential․ The official V/Line website and app are the best resources for the most up-to-date information regarding the network’s operation and any ongoing projects․

As of today, December 20th, 2025, the most recent Melbourne to Geelong V/Line timetable is readily available in PDF format․ This timetable reflects the service schedule currently in effect, incorporating any recent adjustments or planned changes․ It’s important to note that timetables are subject to alteration, particularly due to unforeseen circumstances like track maintenance or signal failures․

The current PDF timetable details all scheduled departures from both Melbourne Southern Cross and Geelong stations, including express and stopping services․ It clearly indicates peak and off-peak hour schedules, allowing passengers to plan their journeys accordingly․ The timetable also specifies which services operate on weekends and public holidays, as these often differ from weekday schedules․

V/Line releases updated timetables periodically, typically with each major service adjustment․ Always verify you are using the latest version before commencing travel․ While digital access is convenient, downloading the PDF allows offline viewing, crucial for areas with limited connectivity․ Regularly checking the V/Line website ensures you have the most accurate and current timetable information available․

Where to Find the Official PDF Timetable

The official Melbourne to Geelong V/Line train timetable in PDF format is primarily accessible through the V/Line website․ Navigate to the “Timetables” section, usually found within the “Plan Your Journey” or “Travel Information” area of the site․ From there, select the Melbourne to Geelong line to download the relevant PDF document․

Direct links to the timetable are often provided in V/Line service alerts and announcements, particularly when schedule changes occur․ Additionally, some third-party transport websites and apps may host links to the official PDF, but always verify the source to ensure accuracy․ It’s crucial to download the timetable directly from V/Line’s official channels to avoid outdated or incorrect information․

The V/Line website offers a user-friendly interface for locating and downloading timetables․ Look for clear labeling and version dates to confirm you have the most current schedule․ Consider bookmarking the direct timetable link for quick access during future journey planning․ Downloading the PDF ensures you have a reliable resource, even without an internet connection․

Key Stations on the Melbourne to Geelong Line

The Melbourne to Geelong V/Line train service connects several important stations along its route․ Melbourne Southern Cross is the primary departure point in the city, serving as a major transport hub for regional Victoria․ Key intermediate stations include North Geelong, which provides access to the northern suburbs of Geelong, and Lara, a significant stop for commuters and those connecting to other regional areas․

Werribee is another notable station, offering connections to the city’s south-western suburbs․ Corio station serves the industrial areas and residential communities surrounding Geelong․ Each station offers varying levels of facilities, including ticket offices, waiting rooms, and accessibility features․ Understanding the location of these stations is crucial for efficient journey planning, especially when considering onward travel from Geelong․

The timetable PDF will clearly indicate stopping patterns for each service, highlighting which stations are served by express or stopping-all-stations trains․ Familiarizing yourself with these key stations will streamline your travel experience and ensure you arrive at the most convenient location for your final destination․ Checking station facilities beforehand can also enhance your comfort and convenience․

Geelong Station Information

Geelong Station serves as the primary arrival and departure point for V/Line services connecting to Melbourne․ Located centrally, it facilitates access to Geelong’s city centre and surrounding suburbs․ The station provides essential passenger amenities, including ticket purchasing facilities, waiting areas, and public restrooms․ Accessibility features are available to assist passengers with mobility needs, ensuring a comfortable travel experience for all․

Connecting transport options are readily available outside the station, including local buses and taxis, enabling seamless onward travel․ Information regarding bus schedules and taxi services can be found within the station building․ The station is a gateway to Geelong’s vibrant attractions, such as the waterfront, Eastern Beach, and the Geelong Botanic Gardens․

The timetable PDF will detail all services stopping at Geelong Station, including arrival and departure times․ Checking the PDF before your journey is crucial to confirm platform information and any potential service alterations․ Geelong Station plays a vital role in connecting the region to Melbourne and beyond, supporting both commuters and tourists alike․

Melbourne Southern Cross Station Information

Melbourne Southern Cross Station is the central hub for V/Line services, including the Melbourne to Geelong line․ Strategically located in the city centre, it offers excellent connectivity to Melbourne’s extensive public transport network – trams, buses, and trains․ The station boasts a wide array of passenger facilities, encompassing retail outlets, food and beverage options, luggage storage, and comprehensive information services․

Accessibility is a priority at Southern Cross Station, with lifts, ramps, and accessible restrooms available throughout the complex․ The station’s timetable displays provide real-time service updates, complementing the information found within the official PDF timetable․ Passengers can easily purchase V/Line tickets at the station’s ticket counters or through self-service kiosks․

Southern Cross Station is also a gateway to Melbourne’s attractions, with easy access to the CBD, Docklands, and Southbank․ Always consult the timetable PDF for accurate platform details and potential service changes before commencing your journey to Geelong․ It’s a bustling transport hub, vital for regional connectivity․

Frequency of Services

The Melbourne to Geelong train line generally operates with a consistent, though variable, service frequency throughout the day․ Examining the official V/Line timetable PDF reveals a schedule designed to cater to both peak and off-peak travel demands․ Typically, services run at least hourly during the majority of the day, providing convenient options for commuters and leisure travelers alike․

During peak hours – primarily morning and evening weekdays – service frequency is often increased, with additional trains scheduled to accommodate the higher passenger volume․ The PDF timetable clearly delineates these peak hour services, allowing passengers to plan their journeys accordingly․ Conversely, service frequency may be reduced during late-night hours or on weekends․

It’s crucial to consult the latest timetable PDF, as service levels can be subject to change due to maintenance works, special events, or unforeseen circumstances․ Understanding the frequency allows for efficient travel planning, ensuring a smooth and timely arrival in Geelong․ Regular checks of the timetable are highly recommended․

Peak Hour vs․ Off-Peak Hour Schedules

The Melbourne to Geelong V/Line timetable PDF distinctly differentiates between peak and off-peak hour schedules, reflecting varying passenger demands․ Peak hours, generally 7:00 AM ⸺ 9:00 AM and 4:00 PM ⎻ 6:00 PM on weekdays, see a significantly increased train frequency․ This is designed to accommodate commuters traveling to and from work in both Melbourne and Geelong․

The PDF timetable will showcase more trains running during these periods, often with express services to minimize journey times․ Conversely, off-peak schedules, encompassing midday, evenings, weekends, and public holidays, feature reduced frequency․ Trains may also make more stops at intermediate stations during these times․

Examining the timetable PDF reveals that off-peak trains often provide a more relaxed travel experience, with fewer passengers and potentially longer journey durations․ Understanding these differences is crucial for effective travel planning․ Passengers prioritizing speed should aim to travel during peak hours, while those seeking a quieter journey may prefer off-peak times․ Always verify the specific schedule on the PDF․

Typical Journey Duration

The Melbourne to Geelong train journey, as detailed in the V/Line timetable PDF, typically ranges between 60 to 80 minutes, though this can fluctuate based on the specific service and time of day․ Direct trains, prominently featured within the PDF, generally complete the trip within the lower end of this timeframe – approximately 60-70 minutes․

However, services making multiple stops at intermediate stations will naturally extend the journey duration, potentially reaching closer to 80 minutes or slightly beyond․ The timetable PDF clearly indicates which trains are direct and which have scheduled stops, allowing passengers to select a service that aligns with their time constraints․

Factors like track work or unforeseen delays can also impact travel time, and the V/Line app (referenced elsewhere) provides real-time updates․ The PDF timetable serves as a reliable baseline, but consulting live information is always recommended․ Planning for a journey of around 75 minutes is a prudent approach, ensuring ample time for connections or reaching final destinations in Geelong․

Ticket Purchasing Options

Securing tickets for the Melbourne to Geelong train is convenient through several channels, as outlined when accessing the V/Line timetable PDF․ Passengers can purchase tickets online via the V/Line website, a straightforward process detailed with links within the PDF document itself․ This allows for pre-planning and avoids potential queues․

Alternatively, tickets are available for purchase at staffed V/Line stations, including Melbourne Southern Cross, providing assistance for those preferring in-person service․ The timetable PDF often includes station contact information for quick reference․ Mobile ticketing via the V/Line app is another popular option, offering a paperless and readily accessible solution․

Myki cards, Melbourne’s integrated ticketing system, are not valid on V/Line services to Geelong․ Passengers must use a specific V/Line ticket․ The PDF timetable provides clear guidance on fare structures and different ticket types, such as return fares or concession options․ Purchasing in advance, especially during peak hours, is highly recommended to guarantee a seat and potentially benefit from discounted fares․

V/Line App for Real-Time Updates

The V/Line app is an invaluable companion for travelers utilizing the Melbourne to Geelong train service, complementing the information found within the PDF timetable․ It provides real-time updates on train running times, platform information, and any potential disruptions – crucial for a smooth journey․

Beyond static timetable data, the app delivers live service alerts, notifying passengers of delays, cancellations, or track changes as they occur․ This proactive approach minimizes uncertainty and allows for flexible travel adjustments; The app also features a journey planning tool, enabling users to input their origin and destination to receive tailored travel recommendations․

Users can access digital tickets directly through the app, eliminating the need for paper tickets and streamlining the boarding process․ The app’s interface is user-friendly, offering clear and concise information․ While the PDF timetable provides a scheduled overview, the V/Line app offers dynamic, up-to-the-minute details, ensuring passengers are always informed․ Download is available on both iOS and Android platforms, making it accessible to a wide range of users․

Understanding Fare Classes & Costs

Navigating the fare structure for the Melbourne to Geelong train service requires understanding the different classes available and their associated costs․ While the PDF timetable doesn’t detail pricing, it’s essential to know your options for budget-friendly travel․

V/Line typically offers several fare classes, including Economy, which is the standard option for most passengers․ Concession fares are available for eligible individuals, such as students, seniors, and health care card holders – requiring valid identification․ Flexibility is offered through Myki cards, a reusable smartcard used across Melbourne’s public transport network, including V/Line trains․

Ticket prices vary based on distance, fare class, and whether you travel during peak or off-peak hours․ Purchasing tickets in advance, particularly online, can sometimes secure discounted rates․ Consider a return ticket if you plan to travel back to Melbourne, as this is often more economical․ Checking the V/Line website or using the V/Line app provides the most accurate and up-to-date fare information․ Understanding these options ensures you choose the most cost-effective ticket for your journey, complementing the timetable’s scheduling details․

Disruptions and Service Alerts

While the Melbourne to Geelong train timetable PDF provides scheduled times, unforeseen disruptions can occur, impacting your journey․ It’s crucial to stay informed about potential delays, cancellations, or alterations to the service․

V/Line proactively communicates disruptions through various channels, including its website, the V/Line app, and social media platforms like Twitter (X)․ These alerts detail the nature of the disruption, the affected services, and estimated resumption times․ Planned maintenance works, often scheduled during off-peak hours or weekends, are also announced in advance․

The PDF timetable itself may not reflect real-time changes, making it essential to cross-reference with live updates before and during your travel․ Signal failures, track issues, or unforeseen incidents can all cause delays․ Subscribing to V/Line service alerts via the app or website ensures you receive immediate notifications․ Being aware of potential disruptions allows for flexible travel planning, potentially requiring alternative routes or transport options․ Proactive monitoring minimizes inconvenience and ensures a smoother journey, supplementing the timetable’s planned schedule․

Accessibility Information for Passengers

V/Line is committed to providing accessible travel for all passengers on the Melbourne to Geelong line․ Understanding available assistance is vital for a comfortable journey, supplementing information found within the timetable PDF․

Trains operating on this route generally feature designated wheelchair spaces, priority seating, and accessible toilet facilities․ Passengers requiring assistance with boarding or alighting should pre-book support through the V/Line Assisted Travel service, ideally at least 48 hours in advance․

Southern Cross Station and Geelong Station both offer accessibility features, including ramps, lifts, and accessible restrooms․ Detailed accessibility maps are available on the V/Line website, outlining the layout of these stations and the location of accessible facilities․ The V/Line app also provides information on station accessibility․

For passengers with visual or hearing impairments, V/Line offers audio announcements and visual displays․ Assistance animals are permitted on board․ Detailed information regarding accessibility services, including contact numbers and booking procedures, can be found on the V/Line website, ensuring a fully inclusive travel experience alongside the timetable․

Bicycle Transport on the Train

V/Line facilitates bicycle transport on the Melbourne to Geelong train services, offering a convenient option for combining rail travel with cycling adventures․ However, specific conditions apply, and checking the timetable PDF doesn’t detail all requirements․

Dedicated bicycle spaces are available on most V/Line trains, though availability is limited and operates on a first-come, first-served basis․ Pre-booking is essential, particularly during peak hours or on weekends, to guarantee space for your bicycle․ Bookings can be made via the V/Line website or app․

Bicycles must comply with V/Line’s size and weight restrictions, detailed on their website․ Folding bicycles, properly packed, may be carried as standard luggage if they meet size criteria․ Passengers are responsible for safely securing their bicycles within the designated spaces․

A small fee may apply for bicycle transport․ It’s crucial to review V/Line’s bicycle transport policy before travelling, as regulations can change․ This policy, alongside the timetable, ensures a smooth and compliant journey for cyclists utilizing the Melbourne to Geelong rail link․

Connecting Services from Geelong

Geelong serves as a crucial transport hub, offering connections to various regional destinations beyond the immediate city limits․ While the Melbourne to Geelong train timetable PDF focuses on that primary route, understanding onward travel options is vital for comprehensive journey planning․

Local bus services operate from Geelong Station, providing access to towns like Torquay, Barwon Heads, and Lorne – popular coastal destinations․ These bus connections are often timed to coincide with train arrivals and departures, facilitating seamless transfers․ Detailed bus timetables are available from the Geelong Bus network website․

Long-distance bus services also depart from Geelong, connecting to areas further afield, including the Great Ocean Road and western Victoria․ V/Line coaches provide connections to Warrnambool and Portland, extending the rail network’s reach․ Checking the V/Line website is essential for coach timetables and booking information․

Taxi and ride-sharing services are readily available at Geelong Station, offering convenient door-to-door transport․ Planning connecting services in advance, alongside referencing the train timetable, ensures a smooth and efficient onward journey from Geelong․

Exploring Melbourne’s Attractions Near Southern Cross

Melbourne’s Southern Cross Station isn’t just a transport hub; it’s a gateway to a wealth of attractions, making it easy to extend your journey beyond the train platform․ Knowing the Melbourne to Geelong train timetable allows for efficient planning, maximizing time to explore the city․

Directly adjacent to the station is Marvel Stadium, home to major sporting events and concerts․ A short walk leads to the vibrant Docklands precinct, offering waterfront dining, shopping, and entertainment․ The Melbourne Convention and Exhibition Centre (MCEC) is also nearby, hosting numerous events throughout the year․

A slightly longer walk, or a quick tram ride, takes you to the city centre, where iconic landmarks await․ Federation Square, Flinders Street Station, and Hosier Lane’s street art are all within easy reach․ The Royal Botanic Gardens Victoria, a tranquil oasis, is a short tram journey away․

Utilizing the free City Circle Tram provides a convenient way to navigate these attractions․ Planning your exploration around the train timetable ensures a seamless transition between travel and sightseeing, enhancing your Melbourne experience;

Geelong’s Tourist Destinations

Reaching Geelong via the Melbourne train timetable unlocks a city brimming with coastal charm and cultural experiences․ Efficient travel planning allows ample time to discover Geelong’s diverse attractions, making a day trip or extended stay incredibly rewarding․

The Geelong Waterfront is a focal point, featuring the iconic Bollards – painted sculptures depicting historical figures․ Eastern Beach Reserve offers a beautiful swimming enclosure and picturesque views of Corio Bay․ The Geelong Botanic Gardens provide a tranquil escape, showcasing diverse plant collections․

For art enthusiasts, the Geelong Gallery houses an impressive collection of Australian and international art․ The National Wool Museum delves into the region’s rich wool industry heritage․ Explore the historic streets of Geelong, admiring the Victorian-era architecture․

Beyond the city centre, the Bellarine Peninsula beckons with wineries, beaches, and charming towns․ Knowing the train timetable allows for seamless connections to explore this scenic region, maximizing your Geelong adventure and creating lasting memories․

Alternative Transport Options (if train is unavailable)

Despite the convenience of the Melbourne to Geelong train timetable, disruptions can occur, necessitating alternative travel arrangements․ Fortunately, several options exist to ensure you reach your destination․ Bus services operate frequently between Melbourne and Geelong, offering a cost-effective solution, though journey times are typically longer․

Private car travel provides flexibility, with the journey taking approximately one hour via the M1 highway․ However, consider parking costs and potential traffic congestion, especially during peak hours․ Ride-sharing services like Uber or taxis are available, but can be significantly more expensive than other options․

For a more scenic route, consider a combination of public transport and local buses, exploring regional Victoria along the way․ Checking real-time traffic conditions and bus schedules is crucial when planning alternative transport․ Having a backup plan ensures a smooth journey, even if the train timetable is affected by unforeseen circumstances․

jeny’s surprisingly stretchy bind-off written instructions

Jeny’s Surprisingly Stretchy Bind-Off offers a remarkably flexible edge, ideal for projects needing significant give, like socks or baby items.

What is Jeny’s Surprisingly Stretchy Bind-Off?

Jeny’s Surprisingly Stretchy Bind-Off is a technique designed to create an exceptionally elastic edge on your knitted projects. Unlike traditional bind-offs that can feel rigid, this method incorporates intentional increases within the bind-off process itself. This results in a finished edge that stretches considerably, making it perfect for applications where flexibility is crucial.

The core principle involves strategically knitting together multiple stitches and then passing stitches over, creating a looser, more forgiving bind-off. It’s a fantastic alternative when you need a bind-off that won’t constrict the fabric, ensuring a comfortable fit and preventing puckering, especially in ribbed patterns.

Why Use a Stretchy Bind-Off?

A stretchy bind-off is essential when finishing projects requiring give, such as socks, hats, or baby blankets. Traditional bind-offs can lack elasticity, leading to discomfort or distortion when worn or used. Jeny’s method prevents this by creating a bind-off edge that moves with the fabric.

It’s particularly beneficial for ribbed patterns, where a non-stretchy bind-off can cause the ribbing to pull and lose its shape. Using a stretchy bind-off ensures the ribbing maintains its elasticity and provides a snug, comfortable fit. Ultimately, it enhances both the functionality and the aesthetic appeal of your finished knitwear.

Materials Needed

To begin, you’ll require your knitted project, a yarn needle for weaving in ends, and standard knitting needles appropriate for your yarn weight.

Yarn and Needles

Selecting the right yarn is crucial for achieving the desired stretch. Softer yarns, like merino or blends with nylon, often work beautifully, enhancing the bind-off’s flexibility. The needle size should correspond to your yarn weight, ensuring a balanced fabric.

Generally, use the needles you used to knit the main body of your project. This maintains consistent gauge. However, going up one needle size can create an even looser bind-off, increasing stretch. Avoid drastically different needle sizes, as this may distort the edge. Consider the project’s intended use when making your final selection.

Stitch Markers (Optional)

Stitch markers aren’t essential for Jeny’s Surprisingly Stretchy Bind-Off, but they can be incredibly helpful, especially for beginners or complex stitch patterns. Placing a marker every 10-20 stitches can visually break down the bind-off row, making it easier to track your progress and ensure consistent tension.

They’re particularly useful when working with a multiple of stitches, helping to maintain even spacing. If you find yourself losing count or struggling to identify the stitches to be bound off, stitch markers are a simple solution. Remove them as you bind off each section for a clean finish.

Understanding the Basic Principles

Jeny’s Bind-Off achieves stretch by strategically increasing stitches during the bind-off process, creating a looser, more elastic edge for enhanced comfort.

The Concept of Increased Stitches

The core idea behind Jeny’s Stretchy Bind-Off revolves around deliberately adding stitches as you bind off. Unlike a standard bind-off where you decrease stitch count, this technique temporarily increases it before securing the edge. This is achieved by knitting multiple stitches together (like k2tog or k3tog) and then passing the first stitch over the resulting combined stitch.

This process doesn’t permanently add stitches to your work; it creates slack within the bind-off row. When you pass the first stitch over, you’re essentially creating a loop, contributing to the overall elasticity. The more stitches combined and passed over, the greater the stretch will be in the finished bind-off edge, making it perfect for items requiring flexibility.

Working with a Multiple of Stitches

Jeny’s Bind-Off functions best when your stitch count is easily divisible for the chosen multiple (typically 2 or 3 for K2tog or K3tog). If you end with an odd number, you’ll need to adjust the final bind-off repeats. For example, if you have an odd number and are using K2tog, knit one stitch individually before proceeding with the K2tog sequence.

This ensures a neat and even edge. Don’t worry if your initial cast-on wasn’t a multiple; the bind-off can accommodate slight variations; However, significant discrepancies might lead to an uneven or overly tight edge, so planning ahead is always recommended for optimal results and a beautifully stretchy finish.

Step-by-Step Instructions: The Core Technique

Begin by knitting to your desired bind-off point. Then, execute a K2tog (knit two together), followed by knitting one stitch, and pass the first stitch over.

Step 1: Knit to the Bind-Off Point

Before initiating the Jeny’s Stretchy Bind-Off technique, you must first knit to the point where you intend to begin the bind-off process. This is a crucial preparatory step, ensuring a clean and consistent transition from the knitted fabric to the finished edge. Carefully count your stitches to confirm you’ve reached the correct number, as accuracy is key for a successful outcome.

Maintain consistent tension as you knit these final stitches, avoiding any undue tightness or looseness. This will contribute to a more even and aesthetically pleasing bind-off edge. Remember, the goal is to create a flexible finish, so avoid compressing the stitches unnecessarily. Once you’ve knitted to the bind-off point, you’re ready to proceed to the next step!

Step 2: Knit Two Together (K2tog)

Now, execute a Knit Two Together (K2tog) stitch. This fundamental step is where the stretch begins to develop. Insert your right needle simultaneously into the front loops of two stitches on the left needle. Then, knit these two stitches as if they were one, passing the yarn through and creating a single stitch on your right needle.

This action effectively decreases the number of stitches, but crucially, it also introduces a slight looseness that contributes to the overall elasticity of the bind-off. Ensure you maintain a relaxed grip while performing the K2tog to avoid creating a tight bind-off. This is the core of Jeny’s technique!

Step 3: Knit One

Following the K2tog, knit one stitch normally. Insert your right needle into the next stitch on the left needle, wrap the yarn, and pull it through to create a new stitch on the right needle. This seemingly simple step is vital for balancing the decrease created by the K2tog and maintaining a consistent fabric structure.

Knitting this single stitch prevents the bind-off from becoming overly tight or distorted. It also prepares the edge for the final pass, which further enhances the stretch. Keep your tension even throughout this step to ensure a neat and flexible finish.

Step 4: Pass the First Stitch Over the Second

Now, with two stitches on your right needle, carefully lift the first stitch (the one you just knitted) over the second stitch and off the needle. This action effectively binds off one stitch, creating a secure edge while simultaneously adding to the elasticity. Ensure the first stitch is fully cleared from the needle to avoid accidental re-knitting.

This pass-over motion is the core of Jeny’s bind-off, contributing significantly to its stretchiness. Repeat steps 2-4 – K2tog, knit one, pass the first stitch over – until only the desired number of stitches remain on your left needle.

Variations for Different Levels of Stretch

Adjusting the bind-off allows tailoring the elasticity. Using K3tog increases stretch, while K2tog, knit one, pass over, provides less give.

More Stretch: K3tog, Pass Over

For maximum stretch, employ the K3tog (knit three together) followed by passing the first stitch over the remaining stitches. This technique dramatically increases the bind-off’s elasticity, making it perfect for projects like sock cuffs or the edges of baby blankets where considerable give is essential. The K3tog creates a larger decrease, resulting in fewer stitches and a looser, more pliable edge.

Remember to maintain consistent tension throughout this process to ensure an even and functional bind-off. This variation is especially useful when working with ribbing, as it allows the fabric to stretch and recover without feeling restrictive. Practice this technique to master the level of stretch it provides!

Less Stretch: K2tog, Knit One, Pass Over

If a moderate amount of stretch is desired, utilize the K2tog (knit two together), followed by knitting one stitch, and then passing the first stitch over the second. This method provides a balance between elasticity and security, suitable for necklines or collar edges where a slight give is beneficial but a firm finish is also needed.

This variation creates a less dramatic decrease than the K3tog, resulting in a slightly tighter, yet still flexible, bind-off edge. Consistent tension remains crucial for a neat and even result. Experiment with this technique to achieve the perfect level of stretch for your specific project!

Troubleshooting Common Issues

Addressing tightness or looseness is key to a successful Jeny’s Bind-Off; adjusting tension and stitch size resolves most problems encountered during execution.

Bind-Off Too Tight

A too-tight bind-off with Jeny’s method restricts the fabric’s natural stretch, defeating the purpose. If your edge appears constricted, consciously loosen your tension as you work each stitch. Ensure you aren’t pulling the working yarn excessively tight after passing the first stitch over the second.

Consider using needles one size larger for the bind-off row itself. This provides a bit more space. Practice the technique slowly, focusing on gentle movements. If the issue persists, carefully unravel the bind-off and re-do it, paying close attention to maintaining a relaxed grip on the yarn. Remember, the goal is a flexible, not rigid, edge!

Bind-Off Too Loose

A bind-off that’s too loose can create a sloppy or unstable edge, potentially leading to unraveling. If your Jeny’s bind-off feels overly relaxed, focus on maintaining consistent tension throughout. Avoid letting the loops become excessively large as you knit two together and pass the stitch over.

Try tightening your grip slightly on the working yarn. If needed, go back to the original needle size. Periodically check the tension by comparing it to the surrounding knitted fabric. A slightly snug, but not constricting, bind-off is ideal. Don’t be afraid to experiment to find the sweet spot for your yarn and gauge!

Uneven Bind-Off Edge

An uneven bind-off edge often stems from inconsistent tension. With Jeny’s bind-off, ensuring each K2tog and pass-over step is performed with the same amount of tightness is crucial. Pay close attention to how you’re manipulating the yarn; avoid jerking or pulling too forcefully.

Regularly assess the edge as you work, comparing stitch sizes. If you notice discrepancies, gently adjust your tension on the following stitches. Blocking the finished piece can also help even out minor irregularities. Practice makes perfect – the more you use this bind-off, the more consistent your results will become!

Adapting the Bind-Off for Different Projects

Jeny’s bind-off excels in projects demanding elasticity, such as socks, blankets, and necklines, providing a comfortable and flexible finish for varied knits.

Socks and Ribbing

For socks, Jeny’s bind-off is a game-changer, preventing that frustrating digging-in sensation around the ankle. The increased stretch accommodates foot movement beautifully, ensuring a comfortable fit. When binding off ribbing – whether 1×1, 2×2, or more complex – this technique maintains the elasticity crucial for a snug, yet non-restrictive edge.

Traditional bind-offs can often negate the stretch inherent in ribbing, but Jeny’s method preserves it. Consider adjusting the variation (K3tog, pass over) for extra stretch in areas needing maximum give, like the cuff of a sock or a fitted hat. Experiment to find the perfect balance between stretch and security for your specific project and yarn weight;

Baby Blankets and Edgings

Baby blankets demand softness and a gentle give, making Jeny’s Surprisingly Stretchy Bind-Off an excellent choice. It prevents the edges from feeling stiff or constricting, crucial for delicate baby skin. For blanket edgings, this bind-off creates a beautifully flexible border that won’t pucker or pull when the blanket is used or washed.

When working on small baby items like hats or booties, the stretch allows for easier dressing and undressing. Remember to test your gauge and adjust the bind-off variation to achieve the desired level of elasticity. A slightly looser bind-off is often preferable for baby items, prioritizing comfort and ease of movement.

Necklines and Collars

Necklines and collars benefit immensely from Jeny’s Stretchy Bind-Off, ensuring a comfortable and accommodating fit. This is particularly important for garments that need to be pulled over the head, like sweaters or turtlenecks. The stretch prevents the neckline from feeling restrictive or digging into the skin.

For collars, consider the desired drape and shape. A more substantial stretch is ideal for ribbed collars, while a gentler stretch works well for simpler neck finishes. Experiment with the K3tog variation for increased elasticity, or stick with K2tog for a more subtle stretch. Always test the fit before weaving in the ends!

Advanced Techniques & Considerations

Mastering Jeny’s Bind-Off involves adapting to yarn weights and stitch patterns; lace requires careful tension, while heavier yarns demand a secure finish.

Using Jeny’s Bind-Off with Lace

Applying Jeny’s Bind-Off to lace projects requires a delicate touch to maintain the fabric’s airy quality. The increased stretch can beautifully complement lace edges, preventing puckering or pulling when blocked. However, be mindful of tension – a too-tight bind-off will negate the lace’s drape.

Work slowly, ensuring each stitch is released with evenness. Consider using a needle one size larger than recommended for the lace to further enhance flexibility. Regularly assess the edge as you bind off, gently stretching it to confirm sufficient give. This technique is particularly effective for shawls, scarves, and delicate edgings where a soft, flowing finish is desired.

Working with Different Yarn Weights

Adapting Jeny’s Bind-Off across yarn weights demands adjustments to maintain consistent stretch. For finer yarns (lace, fingering), a slightly looser tension is crucial to avoid an overly firm edge. Conversely, with bulky or super bulky yarns, a firmer hand is needed to prevent excessive looseness.

Experiment with needle size; going up a half-size can benefit heavier weights. Always test a small swatch to evaluate the stretch before committing to the entire project. Remember, the core principle remains the same – creating increased stitches – but the execution requires sensitivity to the yarn’s inherent properties;

Comparing Jeny’s Bind-Off to Other Stretchy Bind-Offs

Jeny’s Bind-Off distinguishes itself with a uniquely adaptable stretch, often surpassing traditional methods and offering a smoother finish than German Twisted options.

Traditional Stretchy Bind-Offs

Traditional stretchy bind-offs typically involve knitting two together (K2tog) followed by knitting one stitch (K1). This sequence is repeated across the row, creating a slightly elastic edge. While effective for moderate stretch, they can sometimes appear tighter and less refined than Jeny’s method.

Variations include K2tog, K1, pass the first stitch over the second, offering increased flexibility. However, these can be prone to unevenness if tension isn’t carefully maintained. Compared to Jeny’s Bind-Off, traditional techniques often require more stitches to achieve a similar level of give, potentially impacting the project’s overall appearance and drape. They are a good starting point, but Jeny’s offers a superior finish.

German Twisted Cast-On Bind-Off

The German Twisted Cast-On Bind-Off utilizes the unique structure of the cast-on edge to create a highly elastic finish. It involves slipping stitches and passing loops through, resulting in a firm yet flexible bind-off. This method is particularly well-suited for socks, providing excellent recovery and preventing gaping at the ankle.

However, it can be more complex to execute than Jeny’s Bind-Off, requiring careful attention to detail. While offering good stretch, it may not achieve the same level of softness or drape. Compared to Jeny’s technique, it often creates a slightly denser edge, potentially less ideal for delicate projects. It’s a solid alternative, but Jeny’s is often simpler.

Resources for Further Learning

Explore online video tutorials on platforms like YouTube for visual guidance, and discover patterns incorporating Jeny’s Bind-Off to practice this technique.

Online Video Tutorials

Numerous knitters have generously shared Jeny’s Surprisingly Stretchy Bind-Off through video tutorials, offering a fantastic visual learning experience. Platforms like YouTube host several demonstrations, catering to various learning styles. These videos often showcase the technique in real-time, allowing you to observe the stitch manipulations closely.

Search for “Jeny’s Stretchy Bind-Off” or “Surprisingly Stretchy Bind-Off” to find a range of options. Pay attention to videos that clearly demonstrate the K2tog, knit one, and pass over sequence. Some tutorials also explore variations for different stretch levels. Watching multiple videos can solidify your understanding and help you troubleshoot any challenges you encounter while practicing. Don’t hesitate to pause, rewind, and replay sections as needed!

Relevant Knitting Patterns

Many knitting patterns specifically recommend or benefit from using Jeny’s Surprisingly Stretchy Bind-Off, particularly those designed for items requiring significant elasticity. Look for patterns for socks, baby blankets, ribbed cuffs, or necklines. Ravelry is an excellent resource for discovering such patterns; utilize the pattern search filters and keywords like “stretchy bind-off” or “Jeny’s bind-off;”

Patterns often provide detailed instructions on where and how to implement the bind-off technique. Examining patterns that already incorporate it can offer valuable insights and demonstrate its application in various projects. Consider practicing the bind-off on a swatch before tackling a larger project to ensure you’re comfortable with the method.

Frequently Asked Questions (FAQ)

Common questions address suitability for beginners and stitch pattern compatibility; Jeny’s bind-off is adaptable with practice, working well with most stitch designs.

Is Jeny’s Bind-Off Suitable for Beginners?

While it introduces a slightly different technique than a standard bind-off, Jeny’s Surprisingly Stretchy Bind-Off is achievable for motivated beginners. It requires understanding of basic knit stitches – knit two together (K2tog) – and the concept of passing a stitch over.

Practice is key! Starting with a swatch allows you to master the technique without the pressure of a larger project. Watching video tutorials alongside written instructions can be incredibly helpful for visual learners. Don’t be discouraged if your first attempt isn’t perfect; consistency comes with repetition.

The core principle of decreasing and passing stitches over is straightforward, making it a rewarding skill to learn, opening doors to projects needing a flexible edge.

Can I Use This Bind-Off with Any Stitch Pattern?

Generally, yes! Jeny’s Surprisingly Stretchy Bind-Off is versatile and works beautifully with most stitch patterns. However, consider the fabric’s density. For very dense or textured stitches, the stretch might be less pronounced, but it will still offer more give than a standard bind-off.

It excels with ribbing, stockinette, and garter stitch, providing a comfortable and flexible edge for socks, cuffs, and baby items. When used with lace, be mindful of maintaining pattern integrity; test on a swatch first.

Adjusting the technique (K3tog instead of K2tog) can further enhance stretch for particularly demanding projects, ensuring a perfect fit and comfortable wear.

fate samurai remnant trophy guide

Fate/Samurai Remnant Trophy Guide ─ Overview

Fate/Samurai Remnant boasts an impressive trophy collection, featuring a total of 82 achievements for dedicated PlayStation hunters to pursue and unlock.

The game includes one coveted Platinum trophy, alongside four Gold, eight Silver, and a substantial sixty-nine Bronze trophies, offering a lengthy challenge.

Total Number of Trophies

Fate/Samurai Remnant presents a comprehensive trophy list, designed to challenge and reward dedicated players. The game features a grand total of 82 trophies available for acquisition on the PlayStation platform. This substantial number ensures a lengthy and engaging trophy-hunting experience for those aiming for full completion.

Breaking down the distribution, players will encounter 69 Bronze trophies, forming the bulk of the achievements. Complementing these are 8 Silver trophies, offering a step up in difficulty and prestige. Further adding to the challenge are 4 Gold trophies, reserved for significant accomplishments within the game. Finally, the ultimate reward – the coveted Platinum trophy – awaits those who conquer all other challenges. The base game itself contains 45 trophies, with an additional 37 spread across the three DLC packs.

Platinum Trophy Details

The Platinum trophy in Fate/Samurai Remnant, representing the pinnacle of achievement, is awarded for obtaining all other trophies within the game and its associated DLC content. This singular achievement signifies complete mastery of the game’s challenges, story, and systems, demanding significant time and dedication from the player.

Earning this prestigious trophy requires unlocking all 69 Bronze, 8 Silver, and 4 Gold trophies, alongside the 37 trophies introduced through the three DLC packs. Players should anticipate a substantial time investment, potentially exceeding dozens of hours, to achieve 100% completion. The Platinum trophy itself is named “All Trophies”, a straightforward acknowledgment of the player’s comprehensive accomplishment. It serves as a testament to their skill and perseverance within the world of Fate.

Estimated Completion Time

Estimating the completion time for Fate/Samurai Remnant’s trophy list is complex, heavily influenced by player skill, chosen difficulty, and dedication to 100% completion. A playthrough focusing solely on the main story and essential trophies could take approximately 30-40 hours for experienced players.

However, achieving the Platinum trophy, encompassing all 82 achievements including DLC content, significantly extends this timeframe. Expect a minimum of 60-80 hours, potentially exceeding 100 hours for those seeking optimal efficiency or struggling with challenging combat encounters. The DLC packs add considerable playtime due to their additional story content and unique trophies. Thorough exploration, mastering combat mechanics, and diligent item farming are crucial for minimizing completion time. Dedicated trophy hunters should prepare for a lengthy, but rewarding, journey.

Difficulty Assessment

Fate/Samurai Remnant’s trophy difficulty is generally considered moderate to high, primarily due to the demanding combat system and the sheer number of trophies requiring extensive grinding or specific in-game actions. While the main story presents a manageable challenge on normal difficulty, certain trophies necessitate mastering character skills and exploiting enemy weaknesses.

The game’s combat demands precise timing and strategic thinking, potentially frustrating players unfamiliar with action RPGs. Several trophies involve completing challenging side quests or defeating powerful optional bosses, adding to the overall difficulty. Furthermore, the DLC content introduces new challenges and trophies that further increase the game’s complexity. A Platinum run requires patience, dedication, and a willingness to learn the intricacies of the battle system.

Trophy List Breakdown

Fate/Samurai Remnant’s trophies are categorized by rarity: 69 Bronze, 8 Silver, 4 Gold, and 1 prestigious Platinum, offering diverse challenges for completionists.

Bronze Trophies ⏤ Early Game

Several Bronze trophies are readily obtainable during the initial stages of Fate/Samurai Remnant, primarily focusing on story progression and basic gameplay mechanics. “A Blinding Night” is awarded upon completing the Prologue, serving as a straightforward starting point for trophy hunters.

“Demonic Revelry” unlocks after finishing Chapter I, continuing the narrative-driven trophy acquisition. Players can also earn trophies like “First Encounter” and others tied to specific story beats within the early chapters. These trophies generally require simply playing through the game and experiencing the unfolding story.

Early exploration and interaction with NPCs can also yield some easy Bronze trophies, encouraging players to fully immerse themselves in the world of Fate/Samurai Remnant. These initial achievements provide a solid foundation for building momentum towards the more challenging trophies later in the game.

Bronze Trophies ─ Mid-Game

As players progress into the mid-game of Fate/Samurai Remnant, the Bronze trophies begin to require a bit more engagement with the combat system and exploration elements. Completing Chapters II and III will unlock several story-related trophies, continuing the trend of narrative progression.

Expect trophies tied to defeating specific enemy types or completing side quests that become available during this portion of the game. Mastering basic combat techniques and utilizing the Spirit Change system effectively will be crucial for overcoming some of these challenges.

Furthermore, discovering hidden locations and interacting with various NPCs will reward players with additional Bronze achievements. These mid-game trophies serve as a bridge between the introductory phase and the more demanding challenges that await in the late game, demanding consistent effort.

Bronze Trophies ⏤ Late Game

The late-game Bronze trophies in Fate/Samurai Remnant demand a thorough understanding of the game’s mechanics and a dedication to completion. Many are tied to finishing the final chapters, uncovering all story branches, and achieving specific outcomes in character interactions.

Expect trophies for defeating challenging optional bosses and mastering advanced combat techniques, including precise timing with Spirit Change abilities. Exploration becomes vital, as hidden items and secret areas often hold the key to unlocking these achievements.

Completing all side quests and maximizing character relationships will also contribute significantly to the Bronze count. These late-game trophies represent a final test of a player’s skill and commitment, requiring patience and a willingness to explore every facet of the game.

Silver Trophies ⏤ Combat & Challenges

Fate/Samurai Remnant’s Silver trophies focused on combat and challenges truly test a player’s mastery of the battle system. These achievements require skillful execution of combos, precise timing with parries and dodges, and strategic utilization of Spirit Change forms.

Expect trophies for defeating specific enemy types using particular strategies, completing difficult combat trials, and achieving high ranks in arena battles. Mastering the unique abilities of each Servant and understanding enemy weaknesses are crucial for success.

Furthermore, some Silver trophies demand completing challenging side quests that involve complex combat scenarios. These achievements aren’t simply about brute force; they require tactical thinking and adaptability. Prepare for demanding encounters!

Silver Trophies ⏤ Story Progression

Fate/Samurai Remnant’s Silver trophies tied to story progression signify significant milestones within the narrative. These aren’t simply awarded for reaching certain chapters; they often require specific choices, completing key side quests related to the main plot, or achieving particular outcomes during crucial story events.

Players can anticipate trophies for fully developing relationships with important characters, uncovering hidden lore, and making decisions that impact the storyline’s direction. Reaching pivotal moments in the narrative, such as completing major chapters or resolving significant conflicts, will unlock these achievements.

Successfully navigating complex dialogue options and understanding the nuances of character interactions are essential for obtaining all Silver trophies related to story progression. Expect a rewarding experience!

Gold Trophies ⏤ Masteries & Completion

Fate/Samurai Remnant’s Gold trophies represent a significant commitment to mastering the game’s systems and achieving comprehensive completion. These aren’t easily earned; they demand dedication, skill, and a thorough understanding of the game’s mechanics.

Expect trophies tied to maxing out character skills, completing all side quests, unlocking all character endings, and achieving high ranks in various gameplay systems. Mastering the combat system, including utilizing all Spirit Changes and perfecting parry timings, will likely be required.

Furthermore, these Gold achievements often involve collecting all items, fully upgrading equipment, and uncovering all hidden secrets within the game world. Prepare for a challenging, yet rewarding, pursuit of mastery!

Platinum Trophy ─ “All Trophies”

The ultimate accolade in Fate/Samurai Remnant, the Platinum trophy, is awarded for the incredibly demanding task of unlocking all other trophies within the game and its associated DLC packs. This represents a true testament to a player’s dedication and skill.

Earning this prestigious reward requires completing every challenge, mastering every combat system, uncovering all secrets, and fully experiencing the narrative through multiple playthroughs and character endings. Expect a significant time investment – potentially exceeding 50+ hours – and a high level of proficiency.

Successfully obtaining the Platinum trophy signifies complete mastery of Fate/Samurai Remnant, solidifying your status as a true champion of the game!

Missable Trophies

Fate/Samurai Remnant contains both story-related and gameplay-dependent trophies that can be missed, demanding careful attention to choices and completionist strategies.

Story-Related Missable Trophies

Several trophies are intrinsically tied to the narrative progression of Fate/Samurai Remnant, making them potentially missable if specific actions aren’t undertaken during particular chapters. Players must prioritize dialogue choices and side quests, as neglecting these can permanently lock certain achievements.

For instance, completing all character interlude quests before the final chapter is crucial, as these become inaccessible afterward. Failing to fully explore character relationships and resolve their storylines will prevent unlocking associated trophies.

Furthermore, certain story branches offer unique outcomes and trophies; selecting the incorrect path can lead to missing these opportunities. It’s highly recommended to consult a detailed walkthrough or guide to ensure no critical story beats are overlooked, guaranteeing a complete trophy collection.

Save scumming is advised for pivotal decisions!

Gameplay-Related Missable Trophies

Beyond the main storyline, Fate/Samurai Remnant features several gameplay-centric trophies susceptible to being missed. These often involve completing specific challenges, mastering certain combat techniques, or acquiring unique items within limited windows of opportunity.

For example, achieving maximum affinity with all supporting characters requires diligent gift-giving and consistent interaction throughout the game; failing to maintain these relationships can lock related trophies. Similarly, completing all arena challenges before the end credits is essential, as they become unavailable afterward.

Don’t overlook hidden collectibles or side activities, as some trophies are tied to their completion. Thorough exploration and consistent engagement with all gameplay systems are vital to avoid missing these achievements.

Regularly check your trophy progress!

DLC Trophy Considerations

Fate/Samurai Remnant expands its trophy list with three DLC packs, adding substantial content and 37 additional achievements to pursue for completionists.

Trophy Pack 1 Trophies

Trophy Pack 1 for Fate/Samurai Remnant introduces a new set of challenges and rewards, adding to the game’s already extensive trophy list. This pack primarily focuses on expanding the narrative and introducing new character interactions, resulting in trophies tied to specific story events and dialogue choices.

Players can expect around twelve Bronze trophies within this pack, often earned through progressing through the added story content and achieving certain milestones within the new scenarios. These trophies generally require attentive gameplay and exploration of the new areas introduced. Expect some trophies related to completing battles with specific conditions or utilizing unique character abilities during the new story segments.

Successfully navigating the intricacies of Trophy Pack 1 will require a blend of strategic combat and careful attention to the unfolding narrative, offering a rewarding experience for dedicated trophy hunters.

Trophy Pack 2 Trophies

Trophy Pack 2 for Fate/Samurai Remnant delves deeper into character relationships and expands upon existing storylines, presenting a fresh wave of trophies for players to unlock. This pack leans heavily into character-specific quests and challenges, demanding a thorough understanding of each servant’s abilities and backstories.

Expect approximately ten Bronze trophies within this pack, primarily awarded for completing unique character quests, achieving high bond levels with specific servants, and mastering new combat techniques. Several trophies will likely require players to make specific dialogue choices that influence character relationships and unlock hidden story paths.

Successfully obtaining all trophies from Pack 2 necessitates a commitment to exploring the nuances of each character and mastering the game’s intricate combat system, offering a fulfilling experience for dedicated players.

Trophy Pack 3 Trophies

Trophy Pack 3 for Fate/Samurai Remnant represents the final layer of challenges, focusing on ultimate mastery of the game’s systems and a deep understanding of its lore. This pack introduces exceptionally difficult combat scenarios and intricate puzzle-solving elements, pushing players to their limits.

Players can anticipate around eight Bronze trophies, earned through completing exceptionally challenging battles, discovering hidden secrets within the game world, and achieving perfect scores on specialized training missions. A single Silver trophy is likely included, awarded for completing all content within the pack.

Successfully unlocking all trophies in Pack 3 signifies a complete and thorough experience with Fate/Samurai Remnant, demonstrating a player’s dedication and skill. Prepare for intense battles and rewarding discoveries!

Useful Tips & Strategies

Mastering combat requires strategic skill usage, precise timing, and exploiting enemy weaknesses. Farming specific items involves revisiting key locations and utilizing efficient battle strategies.

Combat Strategies for Difficult Trophies

Engaging in challenging battles within Fate/Samurai Remnant demands a nuanced approach to combat. Prioritize understanding enemy attack patterns and exploiting their vulnerabilities with targeted skills. Utilizing the Spirit Change system effectively is crucial; switching between stances grants access to unique abilities and defensive options.

For particularly tough encounters, focus on building and maintaining your Extra Attack gauge to unleash devastating special moves. Don’t underestimate the power of Noble Phantasms – timing their activation can turn the tide of battle. Mastering parrying and dodging is essential for minimizing damage and creating openings for counterattacks. Experiment with different Servant combinations to discover synergistic strategies that complement your playstyle. Remember to upgrade your equipment and skills regularly to stay ahead of the escalating difficulty.

Finally, consider lowering the difficulty temporarily if you’re consistently struggling with a specific trophy, then returning to your preferred setting once you’ve mastered the encounter.

Farming Locations for Specific Items

Efficient item farming is vital for progressing through Fate/Samurai Remnant and unlocking certain trophies. For Skill Experience, consistently replay early-game story chapters on lower difficulties, focusing on battles with numerous weaker enemies. Spirit Origin Stones can be reliably obtained by completing side quests in the Anytown area and exploring hidden chests.

To acquire Rare Materials needed for equipment upgrades, target specific enemy types in later-game regions; consult online resources for drop rate information. The Izumo region is known for yielding valuable crafting components. Repeatedly challenge high-level Extra Battles for a chance to obtain exclusive items and materials. Remember to utilize item duplication features where available to maximize your gains.

Finally, regularly check shops in major towns, as their inventories refresh periodically with potentially useful items.

notes on a guitar fretboard pdf

Understanding Guitar Fretboard PDFs

Guitar Fretboard notes are readily available as a free 30-page PDF, aiding guitarists in fretboard navigation and understanding string relationships.

Labeled diagrams, downloadable in PDF format, showcase all notes on the guitar neck, proving invaluable for memorization and learning.

Printable charts, often in PDF, are effective tools for beginners, fostering comprehension of the guitar’s layout and note positions.

What is a Guitar Fretboard PDF?

A Guitar Fretboard PDF is a digital document, typically in the Portable Document Format, designed to visually represent the notes on a guitar’s fretboard; These PDFs serve as invaluable tools for guitarists of all levels, from beginners to seasoned professionals. They commonly depict the fretboard with strings and frets clearly marked, often displaying the corresponding notes for each fret and string combination.

Many PDF resources offer labeled diagrams, showcasing all notes across the neck – a crucial aid for memorization. Others provide blank diagrams, encouraging users to actively learn and fill in the notes themselves. You can find 12-fret and 24-fret versions, catering to different guitar types and playing styles.

These PDFs are easily downloadable and printable, offering a convenient and accessible way to study the guitar fretboard. They are often free, readily available from websites dedicated to guitar education, or can be purchased as part of more comprehensive learning materials. Essentially, a Guitar Fretboard PDF is a portable, visual guide to mastering the notes on your instrument.

Why Use a Fretboard Diagram PDF?

Utilizing a Fretboard Diagram PDF offers numerous benefits for guitarists seeking to improve their understanding of the instrument. These diagrams are exceptionally helpful for memorizing note positions across the neck, a fundamental skill for improvisation and music theory comprehension. A PDF format provides portability and easy access – practice anywhere with a digital or printed copy!

PDFs aid in visualizing scale patterns and chord shapes, accelerating the learning process. They’re particularly useful for beginners, offering a clear map of the fretboard. More advanced players can use them to quickly identify intervals and explore new musical ideas.

Downloading a labeled PDF allows for immediate reference, while blank diagrams encourage active learning and retention. The availability of free resources makes them an accessible learning tool for all. Ultimately, a Fretboard Diagram PDF empowers guitarists to navigate the instrument with confidence and unlock their musical potential.

Anatomy of a Guitar Fretboard

Understanding the guitar’s anatomy, alongside PDF note charts, is crucial. The fretboard features strings, frets, and markers, all relating to note locations.

Strings and Their Tuning

Guitar strings, fundamental to note identification on a fretboard PDF, are tuned to specific pitches. The standard tuning, from thickest to thinnest, is E, A, D, G, B, and high E.

Understanding this tuning is paramount when referencing a fretboard diagram PDF. Each string serves as a base for locating notes across its length. A PDF chart visually represents these notes, but knowing the open string tuning provides context.

For instance, the low E string’s notes change as you fret it, and a PDF will show those changes. Similarly, the A string’s notes are relative to its A pitch. Mastering string tuning allows for efficient use of guitar fretboard resources, like downloadable PDFs, to quickly find desired notes and chords. Accurate tuning ensures the PDF’s information aligns with the instrument’s actual sound.

Frets and Semitones

Guitar frets divide the strings into precise intervals, crucial for understanding a fretboard PDF. Each fret represents a semitone – the smallest musical interval. Moving one fret higher raises the pitch by a semitone.

A PDF chart illustrates how frets correspond to specific notes. Recognizing this relationship is key to navigating the fretboard. For example, between E and F, or B and C, lies a semitone, represented by a fret.

Understanding semitones allows you to decipher note positions on a guitar fretboard diagram PDF. It’s the foundation for scales, chords, and intervals. A PDF becomes more useful when you grasp that each fret is a building block for musical expression. Mastering this concept unlocks the fretboard’s potential, making PDF resources more effective learning tools.

Understanding Fretboard Markers

Fretboard markers, often dots, are visual aids on a guitar neck, assisting in quick note location – especially when using a PDF chart. These markers typically appear on the 3rd, 5th, 7th, 9th, and 12th frets, providing reference points.

A guitar fretboard diagram PDF often highlights these markers. They help you orient yourself without constantly counting frets. The 12th fret marker usually signifies an octave of the open string.

Understanding marker placement, combined with a PDF, accelerates fretboard memorization. More advanced guitars may feature different marker designs or inlays. However, the principle remains the same: they’re navigational tools. Utilizing a PDF alongside these markers streamlines learning, allowing for faster recall of note positions and enhancing overall guitar proficiency.

Navigating the Fretboard: Essential Notes

A guitar fretboard PDF is crucial for mastering essential notes. Downloadable charts reveal where to find each note, aiding fretboard navigation and understanding.

The Natural Notes (A, B, C, D, E, F, G)

Understanding the natural notes – A, B, C, D, E, F, and G – is foundational to navigating the guitar fretboard. A guitar fretboard PDF becomes an invaluable tool for visually mapping these notes across all strings and frets. These notes form the building blocks of melodies and chords, and a clear PDF diagram helps solidify their positions in your memory.

Begin by focusing on one string, like the low E string, and identify the locations of each natural note. Then, systematically move to other strings, referencing your PDF to confirm accuracy. Labeled fretboard diagrams, available as PDF downloads, clearly display these notes, making the learning process more efficient.

Remember that these natural notes repeat across the fretboard, but their positions shift with each octave. Utilizing a PDF allows you to quickly visualize these repeating patterns and internalize the relationships between notes. Consistent practice with a guitar fretboard PDF will unlock your ability to confidently identify and play these essential notes anywhere on the neck.

Sharps (#) and Flats (♭)

Sharps (#) and flats (♭) represent alterations to natural notes, adding nuance and complexity to music. A guitar fretboard PDF is crucial for mastering their placement. Sharps raise a note by a half step, while flats lower it. Visualizing these alterations on a PDF diagram simplifies the learning process.

For example, the note between A and B is A# (A sharp) or Bb (B flat) – it’s the same physical location on the fretboard, but named differently depending on the musical context. A well-labeled PDF will clearly indicate both possibilities.

Using a guitar fretboard PDF, practice identifying sharps and flats across all strings and frets. Pay attention to how they relate to the natural notes. Downloadable PDF charts help you quickly locate these altered notes, improving your ability to read music and improvise. Consistent practice with a PDF will solidify your understanding of sharps and flats on the guitar.

Locating Notes on the E String

The high E string is often the starting point for learning guitar notes, and a fretboard PDF is an invaluable tool. Open E (0 fret) is your reference. The first fret is F, the second is F#, or Gb, the third is G, and so on. A clear PDF diagram visually maps these notes.

Utilize a labeled PDF to quickly identify notes like A (5th fret), B (7th fret), and C (8th fret). Memorizing these positions builds a foundation for understanding the entire fretboard. Printable PDF charts allow for repeated practice without needing constant online access.

Focus on recognizing patterns. The distance between each fret represents a semitone. Download a PDF showing the E string notes and practice naming them rapidly. Consistent use of a guitar fretboard PDF will make locating notes on the E string second nature, accelerating your guitar learning journey.

Locating Notes on the A String

The A string, being the fifth string, presents a slightly different landscape of notes compared to the high E. A guitar fretboard PDF is crucial for visualizing these. The open A string is, naturally, A. The first fret yields A#, or Bb, followed by B on the second fret, and C on the third.

A labeled PDF diagram will clearly show you where to find D (5th fret), E (7th fret), and F (8th fret) on the A string. Utilize printable PDF charts for focused practice, reinforcing note recognition.

Remember the chromatic scale – each fret is a half-step. Download a dedicated PDF for the A string and practice naming notes quickly. Consistent use of a guitar fretboard PDF will solidify your understanding, enabling faster navigation and improved musicality on the A string.

Locating Notes on the D String

The D string, the fourth string, requires a guitar fretboard PDF for efficient note identification. The open D string produces a D note. Moving up, the first fret gives you D#, or Eb, followed by E on the second fret, and F on the third.

A detailed PDF diagram will visually map out G (5th fret), A (7th fret), and Bb (8th fret) on the D string. Printable PDF charts are excellent for focused practice, aiding in quick note recall.

Remember the consistent half-step progression of frets. Download a specific PDF focusing on the D string and dedicate time to naming notes without hesitation. Consistent use of a guitar fretboard PDF will build confidence and fluency, allowing for seamless transitions and enhanced musical expression on the D string.

Locating Notes on the G String

Utilizing a guitar fretboard PDF is crucial for mastering notes on the G string, the third string. The open G string yields a G note. Ascending the fretboard, the first fret presents G#, or Ab, followed by A on the second fret, and Bb on the third;

A comprehensive PDF diagram clearly illustrates B (5th fret), C (8th fret), and C# (9th fret) on the G string. Printable PDF charts are invaluable tools for targeted practice, accelerating note recognition.

Remember the consistent pattern of semitones. Download a PDF specifically designed for the G string and practice identifying notes rapidly. Consistent engagement with a guitar fretboard PDF will cultivate proficiency and fluidity, enabling effortless transitions and enriched musicality on the G string.

Locating Notes on the B String

The B string, the second string on your guitar, benefits greatly from a detailed guitar fretboard PDF for note identification. The open B string produces a B note. Moving up the fretboard, C (1st fret), C# (2nd fret), and D (3rd fret) become readily apparent with a PDF diagram.

Further along, you’ll find D# (4th fret) or Eb, E (5th fret), F (8th fret), and F# (9th fret) clearly marked on labeled fretboard PDF resources. These PDF charts are designed to help beginners quickly visualize and memorize note positions.

Consistent practice with a guitar fretboard PDF focusing on the B string will build muscle memory and improve your ability to navigate the neck. Utilize printable PDF versions for convenient, focused learning, enhancing your overall guitar playing skills.

Locating Notes on the High E String

The high E string, the thinnest string, is often the first string guitarists learn. A guitar fretboard PDF is invaluable for mastering its notes. The open string produces an E note. Ascending the fretboard, F (1st fret), F# (2nd fret), and G (3rd fret) are easily identified using a labeled PDF diagram.

Continuing upwards, you’ll encounter G# (4th fret) or Ab, A (5th fret), B (7th fret), and C (8th fret) – all clearly displayed on comprehensive fretboard PDF resources. These PDF charts simplify note recognition for beginners.

Regular practice with a guitar fretboard PDF specifically focused on the high E string will accelerate your learning. Printable PDF versions offer convenient, focused study, improving your speed and accuracy in locating notes across the entire neck.

Types of Fretboard Diagrams

Guitar Fretboard PDF resources include blank diagrams for practice, labeled 12-fret charts for note learning, and 24-fret diagrams for advanced players.

Blank Fretboard Diagrams

Blank fretboard diagrams, often found as PDF downloads, represent a cornerstone for guitarists seeking to deeply internalize note positions. These diagrams provide an empty guitar neck representation, devoid of pre-printed notes, compelling the user to actively recall and fill in each note’s location.

Websites like unlocktheguitar.net offer these resources, facilitating a personalized learning experience. The benefit lies in forcing active recall – a proven learning technique. Instead of passively observing notes, you’re challenged to reconstruct the entire fretboard from memory. This is particularly useful when combined with ear training exercises.

Using a blank diagram encourages understanding of intervals and scale patterns, as you visually map them onto the neck. It’s an excellent tool for building a strong mental map of the guitar, ultimately enhancing improvisation skills and overall musical fluency. They are a fundamental building block for any serious guitar student.

Labeled Fretboard Diagrams (12 Fret)

Labeled fretboard diagrams, specifically those covering the first 12 frets, are immensely popular resources, frequently available as PDF downloads. These charts visually display all the notes on the guitar neck, providing an immediate reference for beginners and experienced players alike. They clearly illustrate the notes on each string and fret, eliminating the need for constant calculation.

Resources like Yourguitarbrain.com offer these diagrams for free download, often in PDF format, making them easily accessible. A 12-fret diagram is often sufficient for learning common chords, scales, and song positions. They are invaluable for quickly identifying notes during practice or performance.

These diagrams serve as a visual aid for understanding the relationship between notes, frets, and strings. They are a fantastic starting point for memorizing note locations and building a solid foundation in guitar fretboard knowledge, accelerating the learning process.

Labeled Fretboard Diagrams (24 Fret)

Labeled fretboard diagrams extending to the 24th fret cater to guitarists exploring higher registers and more complex playing techniques. These comprehensive charts, commonly found as PDF downloads, visually map every note across the entire neck, offering a complete reference guide. They are particularly useful for players of extended-range guitars or those frequently utilizing higher positions.

While a 12-fret diagram is sufficient for many, a 24-fret version provides a broader perspective, aiding in understanding patterns and intervals across the entire instrument. Resources offering these diagrams often include both 12 and 24-fret options in PDF format, allowing players to choose the most suitable chart for their needs.

These diagrams are essential for advanced players, composers, and anyone seeking a thorough understanding of the guitar fretboard. They facilitate improvisation, songwriting, and the exploration of more intricate musical ideas, unlocking the full potential of the instrument.

Using a Fretboard PDF for Learning

Guitar fretboard PDFs aid in memorizing note positions, understanding scale patterns, and learning chord shapes for effective practice and musical growth.

Memorizing Note Positions

Utilizing a guitar fretboard PDF is a highly effective method for solidifying note positions within your memory. These diagrams, available for free download, visually represent the entire neck, allowing you to repeatedly reference and internalize where each note resides.

Begin by focusing on a single string, like the low E string, and systematically learn the notes at each fret. Then, expand to other strings, cross-referencing the PDF to confirm accuracy. Consistent practice with the diagram will build muscle memory and reduce reliance on constant visual checking.

Consider creating flashcards based on the PDF, quizzing yourself on note identification. Labeled fretboard diagrams, particularly those covering 12 or 24 frets, are ideal for this purpose. The goal is to instantly recall note names without hesitation, enabling faster improvisation and a deeper understanding of music theory.

Understanding Scale Patterns

A guitar fretboard PDF becomes an invaluable tool when learning and visualizing scale patterns. By overlaying scale shapes onto the diagram, you can clearly see how notes connect and form specific scales across the neck. This visual representation aids in memorization and understanding the underlying theory.

Start with a simple scale like the major scale and identify all its occurrences on the fretboard using your PDF. Notice how the patterns repeat in different positions, shifted by intervals. Labeled diagrams are particularly helpful for this, as they display the note names within each scale shape.

Experiment with different scales – minor, pentatonic, etc. – and map them onto the PDF. Understanding these patterns unlocks improvisation skills and allows you to navigate the fretboard with greater confidence and musicality. Consistent practice with the diagram will solidify these connections.

Learning Chord Shapes

A guitar fretboard PDF significantly simplifies learning chord shapes by visually connecting the notes within each chord. Instead of memorizing finger positions in isolation, you can see why those notes create a specific chord. This understanding fosters a deeper connection to the instrument.

Begin with basic chords like G, C, and D. Locate each note of the chord on the PDF and observe the pattern it forms on the fretboard. Labeled diagrams are especially useful here, clearly displaying note names.

Explore different voicings of the same chord – inversions and variations. The PDF allows you to quickly identify alternative fingerings and understand how they alter the chord’s sound. By relating chord shapes to the underlying notes, you’ll accelerate your learning and develop a more intuitive grasp of harmony.

Finding Intervals

Utilizing a guitar fretboard PDF is incredibly effective for mastering musical intervals – the distance between two notes. Understanding intervals is crucial for building chords, scales, and melodies. The PDF visually represents these distances across the fretboard.

Start with simple intervals like major and minor thirds. Locate a root note on the PDF, then visually identify the note a third above or below. Labeled diagrams make this process straightforward.

Practice identifying all intervals – seconds, fourths, fifths, sevenths, and so on; The PDF allows you to quickly see how intervals change as you move up and down the neck. This visual reinforcement solidifies your understanding and improves your ear training. Relating intervals to the fretboard unlocks a deeper comprehension of music theory.

Resources for Guitar Fretboard PDFs

Numerous websites offer free guitar fretboard PDF downloads, including Yourguitarbrain.com and Unlocktheguitar.net, providing labeled and blank diagrams.

Paid resources often include more detailed charts and supplemental learning materials for enhanced fretboard mastery.

Websites Offering Free Downloads

Several online platforms generously provide free guitar fretboard PDF resources, catering to learners of all levels. Yourguitarbrain.com stands out, offering printable diagrams for both 12 and 24-fret guitars, readily available for download as PDF files. These resources are perfect for quick reference and practice.

Unlocktheguitar.net is another excellent source, specializing in blank fretboard diagrams in PDF format. These are ideal for self-testing and actively memorizing note positions across the neck. Additionally, many guitar instruction websites and forums frequently share free PDF charts as part of their learning materials.

A simple web search for “guitar fretboard PDF” yields a wealth of options, including labeled charts displaying all notes. These downloadable resources empower guitarists to visualize the fretboard and accelerate their understanding of music theory and note relationships. Remember to always verify the source and quality of the PDF before downloading.

Paid Fretboard Diagram Resources

While numerous free guitar fretboard PDF options exist, investing in paid resources can unlock more comprehensive and specialized learning tools. These often feature higher resolution, detailed annotations, and supplementary materials designed to accelerate your progress.

Many online guitar education platforms, such as TrueFire or JamPlay, include interactive fretboard diagrams as part of their subscription packages. These platforms frequently offer downloadable PDF charts alongside video lessons and exercises, providing a holistic learning experience.

Specialized PDF workbooks focusing solely on fretboard mastery are also available for purchase on platforms like Etsy or Gumroad. These resources often include targeted drills, scale diagrams, and chord voicings, catering to specific learning goals.

Consider exploring resources from established guitar method authors; their accompanying PDF charts often provide a structured and pedagogically sound approach to fretboard visualization and note memorization.

comptia security+ sy0-601 exam questions and answers pdf

CompTIA Security+ SY0-601 Exam Questions and Answers PDF: A Comprehensive Study Guide

CompTIA SY0-601 exam preparation benefits from utilizing practice questions available in PDF and online formats, aiding efficient study and knowledge retention.

Resources like Pass4Success and P2PCerts offer SY0-601 exam questions, while study guides, such as the Second Edition, provide 650 practice questions.

Successfully passing requires dedicated preparation, and comprehensive materials are crucial for achieving a high score on the SY0-601 certification exam.

Understanding the SY0-601 Exam

The CompTIA Security+ SY0-601 exam validates foundational skills in cybersecurity, covering essential concepts for professionals seeking to enter the field. Preparing effectively requires understanding the exam’s scope and utilizing available resources. Practice questions, often found in PDF format, are vital for self-assessment and identifying knowledge gaps.

Numerous platforms, including Pass4Success and P2PCerts, provide SY0-601 exam questions designed to mirror the actual test environment. These resources help candidates familiarize themselves with question types and time constraints. A passing score, while not explicitly published, generally requires around 750-800 out of 900, as indicated by successful test-takers.

Comprehensive study guides, coupled with consistent practice, are key to success on this challenging exam.

Exam Objectives and Domains

The SY0-601 exam assesses knowledge across five key domains: Attacks, Threats, and Vulnerabilities (24%); Architecture and Design (21%); Implementation (25%); Operations and Incident Response (16%); and Governance, Risk, and Compliance (14%). Effective preparation using practice questions in PDF format should align with these percentages.

Resources offering SY0-601 exam questions, like those from CompTIA and third-party providers, often categorize questions by domain, allowing focused study. Mastering these areas is crucial for achieving a passing score. Understanding the weighting of each domain helps prioritize study efforts and maximize efficiency.

Utilizing comprehensive study materials and consistent practice is essential for success.

Importance of Practice Questions

Practice questions are vital for SY0-601 exam success, reinforcing learned concepts and identifying knowledge gaps. Utilizing PDF-based question sets and online platforms simulates the exam environment, building confidence and familiarity. Resources like P2PCerts and CompTIA offer extensive question banks.

Consistent practice helps refine time management skills, crucial for the timed exam. Analyzing incorrect answers reveals areas needing further study. High-quality SY0-601 exam questions accurately reflect the exam’s difficulty and format, providing realistic preparation.

Effective preparation demands dedicated practice and review.

Resources for SY0-601 Exam Preparation

CompTIA provides official study materials, while third-party resources like Pass4Success and P2PCerts offer SY0-601 practice questions in PDF format.

Official CompTIA Study Materials

CompTIA offers a robust suite of official resources designed to thoroughly prepare candidates for the SY0-601 exam. These materials, directly from the source, ensure alignment with the latest exam objectives and domains. While specific PDF question sets aren’t always explicitly highlighted as standalone products, they are often integrated within broader study guides and learning platforms.

Candidates can access official study guides, which frequently include practice questions and exam simulations. CompTIA CertMaster Learn and CertMaster Labs provide interactive learning experiences, supplementing traditional study methods. These platforms often feature a substantial question bank, allowing for focused practice and identification of knowledge gaps. Investing in official resources guarantees exposure to the type of questions and scenarios encountered on the actual SY0-601 exam.

Third-Party Practice Exams and Dumps

Numerous third-party providers offer SY0-601 exam questions and practice tests in PDF and online formats. Platforms like P2PCerts and Pass4Success specialize in providing exam dumps and comprehensive question banks to aid in preparation. However, caution is advised when utilizing these resources. The quality and accuracy of exam dumps can vary significantly, and relying solely on them is not recommended.

While these resources can supplement official CompTIA materials, they should be used strategically. Focus on understanding the underlying concepts rather than memorizing answers. Reputable providers offer updated question sets reflecting the current SY0-601 objectives. Always verify the source’s credibility before purchasing or utilizing any third-party practice materials.

SY0-601 Exam Question Formats (PDF & Online)

CompTIA Security+ SY0-601 exam questions are widely available in two primary formats: PDF and online practice tests. PDF versions offer portability and offline access, allowing study anytime, anywhere. Online platforms, like those offered with the Second Edition study guide, provide a simulated exam environment with immediate scoring and detailed feedback.

Web-based practice exams often include a vast question bank – exceeding 650 questions – and customizable tests. Both formats present multiple-choice questions, mirroring the actual exam. Utilizing a combination of both PDF study guides and interactive online tests maximizes preparation, reinforcing knowledge and identifying areas needing further attention for the SY0-601 certification.

Key Exam Topics & Areas of Focus

SY0-601 exam success requires mastering key objectives, including threats, attacks, architecture, and implementation – all reinforced through practice questions and study guides;

Threats, Attacks, and Vulnerabilities

CompTIA Security+ SY0-601 heavily emphasizes understanding modern threats, attacks, and vulnerabilities. Effective preparation necessitates a deep dive into malware types, social engineering tactics, and common network attacks like DDoS and phishing.

Practice questions focusing on identifying and mitigating these risks are essential. Candidates should be proficient in recognizing vulnerability exploitation techniques and implementing appropriate security controls.

Resources like study guides and PDF question sets should cover topics such as ransomware, man-in-the-middle attacks, and the importance of regular security assessments. Mastering these concepts is crucial for passing the exam and demonstrating practical security knowledge.

Architecture and Design

The CompTIA Security+ SY0-601 exam assesses knowledge of secure system architecture and design principles. Practice questions should cover network segmentation, cloud security models, and the implementation of secure protocols like TLS/SSL and VPNs.

Understanding the importance of the CIA triad – Confidentiality, Integrity, and Availability – is fundamental. PDF study materials and online resources should detail secure network topologies and the principles of least privilege.

Candidates must demonstrate an ability to design and implement secure solutions, considering factors like risk assessment and compliance requirements. Thorough preparation with relevant exam resources is key to success.

Implementation

CompTIA Security+ SY0-601 exam preparation necessitates a strong grasp of security technology implementation. Practice questions should focus on configuring firewalls, intrusion detection/prevention systems (IDS/IPS), and endpoint security solutions.

PDF resources and online platforms should cover secure configuration management, vulnerability scanning, and patch management processes. Understanding how to deploy and manage security controls is crucial.

Candidates must demonstrate practical knowledge of implementing security best practices, including access control lists (ACLs) and multi-factor authentication (MFA). Mastering these concepts through dedicated study is vital for exam success.

Exam Strategies and Techniques

SY0-601 exam success relies on effective time management and careful question dissection, utilizing practice questions from PDF resources to build confidence.

Time Management During the Exam

Effective time management is paramount when tackling the CompTIA Security+ SY0-601 exam. The exam features a variety of question types, demanding strategic pacing. Prioritize questions, quickly identifying those you can answer confidently and addressing them first.

Don’t dwell excessively on challenging questions; flag them for review later if time permits; Utilizing practice questions in PDF format and online simulations helps build a sense of timing.

Familiarize yourself with the exam’s structure and the approximate time allocated per question. A well-rehearsed strategy, honed through consistent practice, will maximize your chances of completing the exam within the allotted timeframe and achieving a passing score.

Question Dissection and Analysis

Successful completion of the CompTIA Security+ SY0-601 exam hinges on meticulous question dissection and analysis. Carefully read each question, identifying key terms and the core concept being tested. Pay close attention to negative phrasing (“NOT,” “EXCEPT”) which can easily lead to incorrect answers.

Utilize practice questions in PDF and online formats to refine this skill. Break down complex scenarios into smaller, manageable parts; Eliminate obviously wrong answers, narrowing your focus to the most plausible options.

Understanding why an answer is correct – or incorrect – is crucial for reinforcing your knowledge and improving future performance.

Understanding CompTIA Scoring

CompTIA’s scoring for the SY0-601 exam is psychometrically analyzed, meaning the passing score isn’t a fixed percentage. It adapts based on your performance, making it difficult to pinpoint an exact equivalent score. A score of 789 out of 900, as reported by some test-takers, roughly equates to 88%, but this is an approximation.

Focus on mastering the exam objectives rather than chasing a specific score. Utilizing practice questions in PDF format and online platforms helps gauge your understanding. Remember, consistently answering questions correctly demonstrates competency, which is what CompTIA assesses.

Utilizing PDF Question Resources

PDF study guides offer convenient, offline access to SY0-601 practice questions, enabling focused preparation and efficient review of key exam concepts.

Benefits of PDF Study Guides

PDF resources for the CompTIA Security+ SY0-601 exam provide several distinct advantages for candidates. Their portability allows studying anytime, anywhere, without needing an internet connection – a crucial benefit for those with busy schedules or limited access.

PDFs facilitate focused learning; you can annotate, highlight key information, and create personalized notes directly within the document. This active engagement enhances comprehension and retention. Furthermore, SY0-601 practice questions in PDF format often mimic the actual exam’s question style, building familiarity and reducing test anxiety.

These guides are cost-effective and readily available from various sources, offering a comprehensive and accessible pathway to exam success. They are an invaluable tool for reinforcing knowledge and identifying areas needing further attention.

Identifying Reliable PDF Sources

When sourcing SY0-601 exam questions in PDF format, prioritizing reliability is paramount. Not all resources are created equal, and inaccurate or outdated materials can hinder your preparation. Opt for official CompTIA study materials whenever possible, as these guarantee accuracy and alignment with exam objectives.

Reputable third-party providers, like those offering comprehensive study guides with practice questions, can also be valuable. However, exercise caution with “dumps” or illegally obtained materials – these are often inaccurate and may violate CompTIA’s terms.

Look for sources with positive reviews and a proven track record. Cross-reference information and verify the content’s currency to ensure you’re studying with trustworthy resources.

Maximizing PDF Practice Effectiveness

To truly benefit from SY0-601 exam questions in PDF format, adopt a strategic approach. Don’t simply read through the questions; actively engage with the material. Simulate exam conditions by timing yourself and minimizing distractions. After each practice session, meticulously review your answers, focusing on both correct and incorrect responses.

Understand why an answer is right or wrong, referencing the CompTIA objectives. Utilize the PDF’s search function to quickly locate relevant concepts.

Regular, focused practice, combined with thorough analysis, will significantly enhance your knowledge retention and boost your confidence for the SY0-601 certification exam.

Online Practice Exam Platforms

Online practice tests simulate the SY0-601 exam environment, offering immediate feedback and performance reports to refine your preparation strategy.

These platforms complement PDF resources, providing a dynamic way to assess your readiness for the CompTIA Security+ certification.

Features of Online Practice Tests

Online practice tests for the SY0-601 exam boast several key features designed to maximize your learning and exam readiness. They often include a vast question bank, mirroring the breadth of the actual CompTIA Security+ exam. These platforms deliver instant scoring, allowing for immediate identification of knowledge gaps.

Detailed explanations accompany each answer, reinforcing understanding of core concepts. Many platforms offer customizable quizzes, enabling focused study on specific exam domains. Furthermore, they simulate the timed exam environment, building crucial time management skills. Integration with PDF study guides enhances a holistic approach to preparation, ensuring a comprehensive grasp of the SY0-601 objectives.

Simulating the Exam Environment

Online practice tests excel at replicating the real SY0-601 exam experience. This includes adhering to the same time constraints, question formats, and overall structure. This realistic simulation is vital for reducing test-day anxiety and optimizing performance under pressure.

By practicing within these constraints, candidates develop effective time management strategies, learning to prioritize questions and avoid getting bogged down. Utilizing practice questions in a simulated setting allows for a more accurate assessment of readiness. Combining this with PDF study materials provides a well-rounded preparation, ensuring familiarity with both content and exam conditions for the CompTIA Security+ certification.

Analyzing Performance Reports

Online practice exam platforms offer detailed performance reports, a crucial component of effective SY0-601 exam preparation. These reports pinpoint areas of strength and weakness, allowing candidates to focus study efforts strategically. Reviewing incorrect answers, alongside explanations, clarifies misunderstandings and reinforces knowledge.

Analyzing these reports, in conjunction with PDF-based practice questions, reveals patterns in errors. This data-driven approach helps refine study plans, targeting specific domains where improvement is needed. Understanding scoring trends, as seen with a 789/900 score example, provides insight into CompTIA’s evaluation criteria and boosts confidence before the actual exam.

Passing Score and Certification

SY0-601 exam success requires a passing score, though CompTIA’s exact weighting remains undisclosed; a score of 789/900 indicates proficiency.

Certification validates IT security skills and opens career opportunities.

What is a Passing Score on SY0-601?

Determining a definitive passing score for the CompTIA Security+ SY0-601 exam proves elusive, as CompTIA employs a scaled scoring system rather than a fixed threshold. While the exam consists of a maximum of 900 points, the actual passing score fluctuates based on the difficulty of the questions encountered during a specific test administration.

However, anecdotal evidence suggests a score around 750 out of 900 is generally considered safe, with some individuals reporting successful passes with scores in the 700s. One candidate shared achieving a 789/900, roughly equating to 88%, indicating a strong performance. Focusing on mastering the exam questions and understanding core security concepts, rather than fixating on a specific score, is the most effective preparation strategy.

Maintaining Your Security+ Certification

CompTIA Security+ certification requires ongoing commitment to maintain its validity, reflecting the dynamic nature of the cybersecurity landscape. Certified professionals must earn 75 Continuing Education Units (CEUs) within a three-year period to demonstrate continued learning and skill development.

These CEUs can be acquired through various activities, including completing CompTIA-approved courses, attending industry webinars, and earning vendor-specific certifications. Regularly engaging with updated practice questions and staying current on emerging threats are vital for successful recertification. Proactive preparation ensures professionals remain knowledgeable and capable in the ever-evolving field of IT security.

Career Paths with Security+ Certification

CompTIA Security+ certification opens doors to a wide range of IT security careers, validating foundational skills sought by employers. Common roles include Security Analyst, Network Security Engineer, Cybersecurity Specialist, and Information Security Manager.

Possessing this credential demonstrates competence in areas like threat analysis, secure network architecture, and vulnerability management, enhancing job prospects. Mastering SY0-601 exam questions and concepts provides a strong base for advanced certifications like CISSP or CISM. The Security+ certification is a valuable asset for individuals seeking to establish or advance their careers in the rapidly growing cybersecurity field.