tws earbuds manual pdf

TWS Earbuds Manual PDF: A Comprehensive Guide

TWS Earbuds Manuals offer vital PDF downloads for optimized use, covering pairing, safety, and troubleshooting.
These manuals detail TWS connection procedures and earbud operation.

Download instructions and safety guidelines are included, ensuring proper earphone usage and FCC compliance.
Understanding LED indicators and power controls is also essential.

Understanding TWS Earbuds

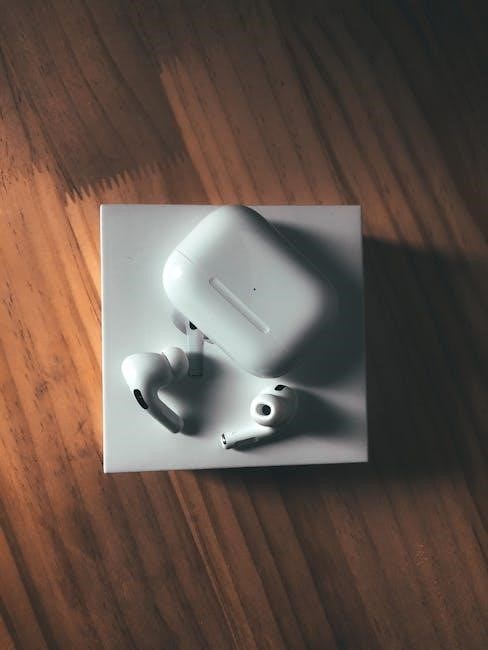
TWS, or True Wireless Stereo, earbuds represent a significant leap in audio technology, eliminating physical connections between the left and right channels.
These earphones utilize Bluetooth for wireless audio transmission, offering complete freedom of movement.

Unlike traditional Bluetooth headphones with a connecting wire, TWS earbuds rely on synchronized wireless technology for audio distribution.
Many models, like those from Vivo, feature automatic TWS pairing before leaving the factory, simplifying initial setup.

Understanding the core principles of TWS technology, as detailed in the manual PDF, is crucial for optimal performance and troubleshooting potential issues.

What is a TWS Earbuds Manual PDF?

A TWS Earbuds Manual PDF is a digital document providing comprehensive instructions for your wireless earphones.
It’s a downloadable resource, often available from the manufacturer’s website, detailing everything from initial pairing to advanced features.

These PDF manuals cover essential aspects like charging procedures, understanding LED indicators, and troubleshooting common problems such as pairing failures or lack of sound.

The manual also includes crucial safety instructions and FCC compliance information.
Accessing the PDF ensures you have a readily available guide for maximizing your TWS earbud experience.

Importance of the User Manual

The TWS Earbuds User Manual is critically important for optimal device performance and longevity. It provides detailed guidance on pairing, charging, and safely operating your earbuds.
Ignoring the manual can lead to improper use, potentially damaging the device or voiding the warranty.

Understanding the manual’s instructions ensures you utilize all features, including multifunction button controls and digital audio signal processing (DSP).

Furthermore, it offers vital troubleshooting steps for common issues, saving time and frustration.
Always refer to the PDF for safety instructions and FCC compliance details.

Initial Setup and Pairing

TWS setup involves manual power-on, TWS pairing of left/right earbuds, and Bluetooth connection.
The manual guides through these steps for seamless device integration.

TWS Pairing: Left and Right Earbuds

TWS (True Wireless Stereo) pairing establishes a connection between the left and right earbuds for synchronized audio. Many earbuds complete this TWS pairing at the factory, simplifying initial setup. However, if re-pairing is needed, the manual details specific procedures.

Typically, this involves placing both earbuds inside the charging case, then initiating the pairing process through a button press or sequence. The manual will specify the exact method for your model. Successful TWS pairing is indicated by LED signals or audible cues, confirming the earbuds are communicating before Bluetooth connection to a device.

Manual Power On/Off Procedures

TWS earbuds often feature both automatic and manual power control. To manually power on, the manual typically instructs users to press and hold the multifunction button on each earbud simultaneously for a specified duration – often around three seconds. LED indicators confirm activation.

Powering off usually involves a similar process: holding the button on each earbud until the LEDs signal shutdown. Some models power off automatically when returned to the charging case. The manual provides precise instructions, as procedures vary between manufacturers and models, ensuring correct operation and battery conservation.

Bluetooth Pairing with Devices

TWS earbuds connect via Bluetooth, and the manual details the pairing process. Typically, after powering on, the earbuds enter pairing mode – often indicated by a flashing LED. Users then enable Bluetooth on their smartphone or device and select the earbuds from the available device list.

Some manuals explain initial TWS pairing between the left and right earbuds, which may occur automatically or require a manual step. The PDF often includes troubleshooting tips for pairing issues, like ensuring the earbuds are close to the device and not already connected elsewhere.

Charging and Battery Life

TWS Earbuds Manuals detail charging procedures for both earbuds and the charging case, often using LED indicators to show power status.
Understanding battery life expectations is crucial.

Charging the Earbuds

TWS Earbuds Manuals consistently emphasize placing the earbuds inside the charging case to initiate the charging process.
Many manuals specify that if the case lacks charge, the earbuds can be manually powered on and then placed within the case for charging.

LED indicators on both the earbuds and the case provide visual cues regarding the charging status.
A solid or blinking light typically signifies charging, while a different color indicates a full charge.
Refer to your specific manual for detailed LED interpretations. Ensure proper contact between the earbuds and the charging pins within the case for efficient charging.

Charging the Case

TWS Earbuds Manuals universally recommend using a compatible USB cable and power adapter to charge the case.
The manual will specify the correct voltage and amperage for optimal charging, preventing damage to the battery.
LED indicators on the case display the charging progress, often showing separate indicators for each charging slot.

Charging times vary depending on the model, but most manuals estimate a full charge takes between one to three hours.
It’s crucial to consult your specific PDF manual for accurate charging durations. Avoid using fast chargers unless explicitly supported, as they can reduce battery lifespan.

Understanding LED Indicators

TWS Earbuds Manuals dedicate sections to deciphering LED light patterns on both the earbuds and the charging case.
Typically, a solid light indicates charging, while a blinking light signifies pairing mode or low battery.
Different colors – red, blue, green – often represent distinct statuses, detailed within the PDF.

The manual will explain what a rapidly blinking LED means versus a slow pulse.
Understanding these signals is vital for troubleshooting and confirming successful charging or connection.
Refer to your specific model’s manual for precise interpretations of the LED behavior.

Operation and Controls

TWS Earbuds Manuals detail multifunction button controls for volume, calls, and playback.
PDF guides explain how to answer/end calls and adjust volume using these controls.

Manuals also cover specific touch or button gestures for optimal earbud operation and feature access.

Multifunction Button Controls

TWS Earbuds Manuals extensively cover multifunction button operations, detailing how a single button manages various features. Typically, a single press answers or ends calls, while a double-press skips tracks.

Holding the button often activates voice assistants or redials the last number. PDF guides illustrate these controls, emphasizing that functions can vary between models. Understanding these controls is crucial for seamless operation.

Some manuals specify different actions for left and right earbuds, enhancing control options. The manual will also explain how to reset the earbuds using the button if needed.

Volume Adjustment

TWS Earbuds Manuals detail volume adjustment methods, which often differ by model. Some utilize touch controls directly on the earbuds, while others rely on the paired device’s volume settings.

PDF guides frequently illustrate swipe gestures for increasing or decreasing volume. Certain earbuds employ the multifunction button – a series of presses can control volume levels.

The manual clarifies if volume control is available on both earbuds or only one. It’s important to consult the manual for specific instructions, as methods vary significantly between brands and models.

Answering and Ending Calls

TWS Earbuds Manuals comprehensively explain call handling procedures. Typically, a single press of the multifunction button answers an incoming call, while a double-press often ends the current call.

PDF guides detail how to reject calls – usually a press and hold of the button. Some models support voice assistant activation during calls, outlined in the manual.

The manual clarifies call quality features, like noise cancellation. It also specifies if call controls are available on both earbuds or just one. Always refer to your specific earbud’s manual for accurate instructions.

Troubleshooting Common Issues

TWS Earbuds Manuals provide solutions for pairing failures, sound problems, and charging difficulties. PDF guides offer step-by-step fixes for common earbud malfunctions.

Refer to the manual for specific troubleshooting steps related to your earbud model and resolve connectivity issues quickly.

Earbuds Not Pairing

TWS Earbuds Manuals frequently address pairing issues as a primary concern. If your earbuds won’t connect, ensure both are adequately charged; a low battery can hinder the TWS pairing process. The manual instructs to verify Bluetooth is enabled on your device and that the earbuds aren’t already connected to another source.

Attempt resetting the earbuds by following the PDF guide’s instructions – often involving holding the multifunction buttons. If the left and right earbuds haven’t completed initial TWS pairing (factory setting), the manual details how to initiate this process. Repeated attempts and checking for firmware updates (via the app, if applicable) are also recommended.

No Sound Output

When experiencing no sound, your TWS Earbuds Manual PDF advises checking the volume level on both your connected device and the earbuds themselves. Confirm the correct audio output device is selected in your device’s Bluetooth settings. The manual also suggests verifying the earbuds are securely positioned in your ears for optimal sound transmission.

If the issue persists, try disconnecting and reconnecting the earbuds. Some manuals detail a reset procedure for the earbuds, which can resolve software glitches. Check for potential interference from other wireless devices. Digital Signal Processing (DSP) issues, though rare, might be addressed through firmware updates detailed in the PDF.

Charging Problems

Your TWS Earbuds Manual PDF outlines troubleshooting steps for charging issues. First, ensure the charging cable and adapter are functioning correctly. Verify the earbuds are properly seated within the charging case, making firm contact with the charging pins. Check the LED indicators on both the earbuds and the case to understand the charging status.

If the case isn’t charging, try a different USB port or adapter. Some manuals suggest cleaning the charging contacts. A fully discharged case may require extended charging time. Refer to the manual for specific battery life expectations and optimal charging practices to avoid damaging the earbuds.

Safety Instructions and Warnings

TWS Earbuds Manuals PDF emphasize FCC compliance and basic safety. Avoid exposure to extreme temperatures and moisture.
Always follow the provided safety instructions for optimal use.

Prioritize responsible usage and heed all warnings detailed within the manual to prevent potential hazards or device damage.

FCC Compliance

TWS Earbuds Manuals PDF clearly state that this device adheres to Part 15 of the Federal Communications Commission (FCC) Rules.
Operation is contingent upon two crucial conditions: first, the device must not generate any harmful interference, and second, it must accept any interference received,
including interference that may cause undesired operation.

Manufacturers emphasize that changes or modifications not explicitly approved by the party responsible for compliance could void the user’s authority to operate the equipment.
These manuals often include detailed FCC statements to ensure users understand their responsibilities regarding interference and regulatory adherence.

Compliance ensures safe and legal operation within the United States.

General Safety Guidelines

TWS Earbuds Manuals PDF prioritize user safety with crucial guidelines. Before use, carefully read all instructions to avoid potential hazards.
Avoid using the earbuds at excessively high volumes for prolonged periods, as this could lead to hearing damage. Keep the device dry and away from extreme temperatures.

Do not disassemble or attempt to repair the earbuds yourself; contact qualified personnel for assistance. If passing the device to others, include the manual.
Avoid dropping or subjecting the earbuds to strong impacts. Proper care extends the lifespan and ensures safe operation. Always follow these precautions.

Advanced Features & Specific Models

TWS Earbuds Manuals PDF detail DSP, model-specific features like Vivo TWS, and semi-in-ear fit.
They explain digital audio signal processing and optimized comfort.

Vivo TWS Earbuds Models

Vivo offers a diverse range of TWS earbuds, each with a specific manual PDF detailing its unique features. Current models include the Vivo TWS 4 HiFi version, the standard TWS 4, TWS 3, and TWS Air 2.

These earbuds commonly support pop-up pairing, streamlining the connection process with Vivo devices. However, the manuals emphasize that initial pairing with non-Vivo phones may require multiple attempts with both earbuds inside the charging case.

The manuals also provide troubleshooting steps if the earbuds aren’t recognized by the Vivo app during the initial setup, ensuring a smooth user experience.

Earbud Fit and Comfort (Semi-In-Ear Designs)

Semi-in-ear designs, like those found in some TWS earbuds, prioritize comfort for a wider range of users. Manuals often address fit, noting these designs suit most ears, unless issues like slippage or discomfort arise.

These manuals acknowledge that individuals with particularly sensitive ears or those prone to earwax buildup might experience challenges. Proper fit is crucial for optimal audio quality and noise isolation.

PDF guides may include tips for selecting the correct ear tip size (if applicable) to achieve a secure and comfortable fit, maximizing the listening experience.

Digital Audio Signal Processing (DSP)

TWS Earbuds Manuals increasingly detail Digital Audio Signal Processing (DSP) capabilities. DSP enhances audio quality by reducing noise, improving clarity, and optimizing sound profiles. PDF guides explain how DSP algorithms work within the earbuds.

Some manuals highlight specific DSP features like environmental noise cancellation (ENC) or voice enhancement for clearer calls. Understanding DSP allows users to maximize their audio experience.

Manuals may also explain how DSP interacts with the earbuds’ microphone system, improving voice pickup and reducing background interference during communication.

the goal book summary pdf

The Goal Book Summary PDF: A Comprehensive Guide

Numerous online resources offer comprehensive summaries of Eliyahu Goldratt’s influential novel, often available in convenient PDF format for easy access and offline reading.

These PDFs distill the core principles of the Theory of Constraints, presented through the compelling narrative of Alex Rogo’s plant turnaround journey.

Readers can find detailed analyses of throughput, inventory, and operational expense, alongside the five focusing steps crucial for continuous improvement initiatives.

Published in 1984, “The Goal” by Eliyahu M. Goldratt isn’t a traditional business textbook; it’s a captivating novel that revolutionized management thinking. The story centers around Alex Rogo, a plant manager facing imminent closure of his manufacturing facility, UniCo. This narrative approach makes complex concepts accessible, drawing readers into the challenges and triumphs of turning around a struggling business.

The book’s enduring popularity stems from its focus on the Theory of Constraints (TOC), a methodology for identifying and eliminating bottlenecks. Summaries, often found in PDF format, highlight how Rogo, guided by his former physics professor Jonah, learns to redefine the goal of the company – not simply making money, but maximizing throughput.

These summaries provide a digestible overview of the book’s core message: continuous improvement through focused problem-solving.

About Eliyahu M. Goldratt

Eliyahu M. Goldratt (1947-2011) was an Israeli physicist and business management guru, best known as the developer of the Theory of Constraints (TOC). His approach challenged conventional wisdom, advocating for a focus on identifying and overcoming the most significant limiting factor within a system.

Before becoming a management thought leader, Goldratt held a doctorate in physics. This scientific background heavily influenced his problem-solving methodology, emphasizing logical reasoning and systemic thinking. “The Goal,” his most famous work, exemplifies his unique style – a novel designed to teach business principles.

PDF summaries of “The Goal” often acknowledge Goldratt’s innovative approach to presenting complex ideas in an engaging and memorable format.

The Core Concept: Theory of Constraints (TOC)

The Theory of Constraints, central to “The Goal,” posits that every system has at least one constraint limiting its performance. PDF summaries highlight TOC’s focus on identifying this bottleneck and systematically improving it, rather than attempting to optimize all areas simultaneously.

Goldratt’s approach emphasizes that improving a non-constraint has no impact on overall throughput. Instead, efforts should concentrate on exploiting the constraint to maximize its output.

Summaries often detail the five focusing steps: identify, exploit, subordinate, elevate, and prevent inertia, providing a roadmap for implementing TOC principles within organizations.

The Novel’s Narrative: Alex Rogo’s Challenge

“The Goal” unfolds as a compelling narrative following Alex Rogo, a plant manager facing imminent closure of his manufacturing facility, UniCo. PDF summaries emphasize this urgent backdrop, illustrating the pressure Alex feels to drastically improve performance.

He’s given three months to turn things around, prompting a desperate search for solutions. The story isn’t a traditional management textbook; it’s a relatable struggle, making the concepts accessible.

Summaries highlight Alex’s journey of self-discovery, guided by Jonah, as he learns to redefine productivity and focus on the true goal of the organization.

Understanding the Plant’s Crisis

PDF summaries of “The Goal” detail the severe crisis at Alex Rogo’s plant: dwindling profits, mounting inventory, and consistently missed delivery deadlines. The plant is hemorrhaging money, and corporate is threatening closure if immediate improvements aren’t seen.

These summaries emphasize the chaotic environment, with work-in-progress piling up and orders constantly late. Traditional cost accounting methods are shown to be misleading, masking the true bottlenecks.

The crisis isn’t simply a matter of hard work; it’s a systemic problem requiring a fundamental shift in thinking, as the book’s narrative powerfully demonstrates.

Key Characters and Their Roles

PDF summaries highlight Alex Rogo, the plant manager, and Jonah, his enigmatic mentor, as central figures driving the story’s exploration of TOC principles.

Bill Peach represents the conventional, financially-focused management style challenged throughout the novel’s compelling narrative.

Alex Rogo: The Struggling Plant Manager

PDF summaries consistently portray Alex Rogo as a dedicated, yet overwhelmed plant manager facing imminent closure of his manufacturing facility, UniCo.

He is depicted as a practical engineer grappling with declining performance, mounting pressures from corporate, and a personal life strained by his work-related anxieties.

Rogo’s journey, as detailed in these summaries, centers on his desperate search for solutions, ultimately leading him to the guidance of Jonah and the principles of the Theory of Constraints.

His character arc embodies the challenges faced by many managers and the transformative power of adopting a new, holistic approach to operational improvement.

Jonah: The Mysterious Physicist and Mentor

PDF summaries characterize Jonah as an enigmatic former physics professor who serves as Alex Rogo’s unconventional mentor throughout the novel.

He doesn’t offer direct solutions but instead challenges Rogo with thought-provoking questions, forcing him to re-evaluate his assumptions about productivity and efficiency.

Jonah’s guidance, as highlighted in these summaries, is rooted in the scientific method and a focus on identifying and overcoming the core constraint limiting the plant’s performance.

His mysterious nature and indirect approach are key elements of the narrative, emphasizing the importance of self-discovery and critical thinking.

Bill Peach: The Divisional Controller

PDF summaries portray Bill Peach as the pragmatic, results-oriented divisional controller who constantly pressures Alex Rogo to improve the plant’s performance.

He represents the traditional management mindset focused on cost reduction and achieving short-term financial targets, often without understanding the underlying operational complexities.

Peach’s skepticism towards Rogo’s unconventional methods and his looming threat of plant closure create significant tension throughout the story, as detailed in these summaries.

He embodies the challenges of implementing new management philosophies within established corporate structures and the resistance to change.

Identifying the Goal of the Company

PDF summaries emphasize that the true goal isn’t merely making money, but consistently improving throughput – the rate at which the system generates money.

Beyond Profit: Defining True Organizational Success

Summaries of “The Goal” consistently highlight a critical distinction: profit isn’t the ultimate objective, but rather a result of achieving the true goal.

The core principle, as detailed in PDF resources, centers on maximizing throughput – the rate at which a system generates money through sales.

This involves not just increasing sales, but also managing inventory and operational expenses effectively, as outlined in the book’s core concepts.

True success, therefore, is measured by the organization’s ability to generate more money through sales, not simply by accumulating profits.

PDF analyses emphasize this shift in perspective as fundamental to applying the Theory of Constraints.

Throughput, Inventory, and Operational Expense

“The Goal”, as explained in numerous PDF summaries, introduces three key metrics for measuring organizational performance: throughput, inventory, and operational expense.

Throughput represents the rate at which the system generates money from sales, while inventory signifies all the money invested in things the organization intends to sell.

Operational expense encompasses all the money an organization spends to turn inventory into throughput.

PDF resources emphasize that increasing throughput while simultaneously decreasing inventory and operational expense is the path to profitability.

Understanding these interconnected metrics is crucial for applying the Theory of Constraints effectively, as detailed in the book.

The Five Focusing Steps of TOC

PDF summaries highlight Goldratt’s five focusing steps: identify constraints, exploit them, subordinate everything, elevate constraints, and prevent inertia for continuous gains.

Step 1: Identify the Constraint

PDF summaries emphasize that the initial step in the Theory of Constraints, as detailed in “The Goal,” is pinpointing the primary bottleneck limiting the system’s performance.

This isn’t necessarily a physical machine; it could be a policy, process, or even a skill gap within the organization.

Alex Rogo, in the novel, discovers his constraint is a series of machines, but the principle applies broadly.

Accurate identification, often through observation and data analysis, is crucial, as focusing efforts elsewhere will yield minimal improvement.

Summaries stress that misidentifying the constraint is a common and costly mistake.

Step 2: Exploit the Constraint

“The Goal” book summaries highlight that once the constraint is identified, the next step is to maximize its output without immediate capital investment.

This involves ensuring the constraint is never idle, optimizing its scheduling, and providing it with everything it needs to operate efficiently.

PDF resources explain that this might mean prioritizing work for the constraint, reducing setup times, or improving maintenance schedules.

The focus is on getting the most out of the existing resource before considering expensive upgrades or additions.

Exploitation is about squeezing every drop of potential from the bottleneck.

Step 3: Subordinate Everything Else

“The Goal” book summaries emphasize that after exploiting the constraint, all other processes must align to support its optimal function.

PDF guides detail how non-constraint resources should adjust their pace to the constraint’s, avoiding overproduction that creates excess inventory.

This means resisting the urge to improve efficiency in non-bottleneck areas if it doesn’t directly benefit the constraint’s throughput.

The key is to ensure the entire system works in harmony, prioritizing the flow of materials to and from the constraint.

Subordination prevents wasted effort and resources elsewhere in the system.

Step 4: Elevate the Constraint

“The Goal” book summaries highlight that once exploited and subordinated, the constraint may still require increased capacity.

PDF resources explain this step involves investing in additional resources – machines, personnel, or time – to physically increase the constraint’s output.

This could mean purchasing new equipment, outsourcing work, or improving maintenance schedules to minimize downtime.

However, summaries caution against investing in non-constraints before elevating the primary bottleneck, as it won’t improve overall throughput.

Elevation is a deliberate investment focused solely on removing the system’s biggest limitation.

Step 5: Prevent Inertia

“The Goal” book summaries emphasize that improving a system is not a one-time fix; it’s a continuous process.

PDF guides detail how, once a constraint is broken, inertia can set in, leading to complacency and a return to previous inefficiencies.

This final step urges organizations to constantly re-evaluate their processes and identify new constraints that emerge as improvements are made.

Summaries highlight the importance of ongoing monitoring and a commitment to the five focusing steps to sustain gains.

Preventing inertia ensures continuous improvement and prevents the system from reverting to its prior, limited state.

Applying TOC to Manufacturing Processes

PDF summaries illustrate how TOC identifies bottlenecks, impacting overall flow, and advocates for the Drum-Buffer-Rope system to synchronize production effectively.

Bottlenecks and Their Impact

PDF summaries of “The Goal” consistently emphasize the critical role bottlenecks play in limiting a manufacturing plant’s throughput. These resources explain how identifying these constraints – machines or processes with limited capacity – is the first step towards improvement.

The book, and its summaries, demonstrate that focusing on increasing the capacity of these bottlenecks, rather than optimizing non-constraints, yields the most significant gains. Ignoring bottlenecks leads to increased work-in-process inventory and extended lead times, ultimately hindering the plant’s ability to achieve its goal.

PDF guides highlight how TOC principles help managers understand and address these issues, maximizing efficiency and profitability.

Drum-Buffer-Rope System

“The Goal” book summary PDFs thoroughly explain the Drum-Buffer-Rope (DBR) system as a core component of the Theory of Constraints. The “drum” represents the bottleneck, setting the pace of production. A “buffer” is strategically placed before the bottleneck to ensure it’s never starved of work.

The “rope” manages the release of materials, preventing excessive inventory buildup ahead of the bottleneck. These summaries detail how DBR synchronizes production flow, minimizing inventory and lead times. PDF resources illustrate how this system optimizes throughput by focusing on constraint management.

Implementing DBR, as described in the summaries, is crucial for achieving significant improvements.

The Importance of Dependent Events

PDF summaries highlight how “The Goal” emphasizes recognizing and managing dependent events to synchronize production flow and avoid bottlenecks, boosting overall efficiency.

Understanding Flow and Synchronization

“The Goal”, as detailed in numerous PDF summaries, powerfully illustrates the critical link between flow and synchronization in manufacturing and beyond. Goldratt’s work demonstrates that maximizing throughput isn’t about speeding up individual processes, but about ensuring a smooth, uninterrupted flow of materials.

PDF resources emphasize how dependent events – where one process relies on the completion of another – must be carefully managed. Synchronization, achieved through techniques like the Drum-Buffer-Rope system, prevents bottlenecks from halting production and ensures resources are available when needed.

These summaries reveal that understanding these dependencies is paramount to achieving the company’s ultimate goal, as defined within the novel.

“The Goal” and Continuous Improvement

PDF summaries highlight how the book champions a shift towards ongoing improvement, not just quick fixes, fostering a lasting impact on business management philosophies.

A Shift in Management Philosophy

“The Goal” fundamentally challenges traditional cost accounting and efficiency metrics, advocating for a focus on throughput as the primary measure of success. PDF summaries emphasize this paradigm shift, illustrating how Goldratt’s work encourages managers to redefine productivity.

Instead of simply reducing costs, the book promotes identifying and exploiting constraints to maximize the flow of value. Summaries reveal how this novel encourages a holistic view of the organization, recognizing that optimizing individual departments doesn’t necessarily improve overall performance.

The core message, readily available in PDF format, is a move from local optimization to global optimization, fostering a culture of continuous improvement and systemic thinking within businesses.

The Book’s Lasting Impact on Business

“The Goal”, as detailed in numerous PDF summaries, has profoundly impacted business management since its 1984 publication, becoming a cornerstone of operations improvement. The novel’s accessible narrative popularized the Theory of Constraints (TOC), influencing industries globally;

PDF versions of summaries highlight how TOC provides a practical framework for identifying and resolving bottlenecks, leading to increased throughput and profitability; Its influence extends beyond manufacturing, impacting project management and supply chain optimization.

The book’s enduring legacy lies in its ability to challenge conventional wisdom and inspire a continuous improvement mindset, readily accessible through concise PDF resources.

Finding a “The Goal” Book Summary PDF

Reliable sources online provide accessible “The Goal” summaries in PDF format, offering a convenient way to grasp the core concepts of TOC and its applications.

Reliable Sources for Summaries

Numerous websites and platforms offer well-structured summaries of “The Goal,” catering to diverse learning preferences. GetAbstract and Blinkist are popular choices, providing concise, professionally-written overviews in text and audio formats, often requiring a subscription.

Websites dedicated to business book summaries, like QuickRead, frequently feature “The Goal,” offering downloadable PDFs or accessible online versions. Academia.edu and similar platforms may host student-created summaries, though quality can vary.

Searching directly on Google with terms like “The Goal book summary PDF” yields a range of results, but verifying the source’s credibility is crucial to ensure accuracy and completeness.

Utilizing PDF Formats for Accessibility

PDF formats offer significant advantages for accessing “The Goal” summaries, primarily their portability and offline availability. They maintain formatting across various devices – computers, tablets, and smartphones – ensuring a consistent reading experience.

PDFs also support features like search functionality, allowing quick location of specific concepts or keywords within the summary. Accessibility features, such as text-to-speech compatibility, can benefit visually impaired readers.

However, PDF quality varies; ensure the document is clear, properly formatted, and not a scanned image lacking searchable text for optimal usability and comprehension.

Criticisms and Limitations of TOC

While impactful, TOC isn’t universally applicable; implementation can be challenging, requiring significant organizational change and a deep understanding of dependencies.

Potential Challenges in Implementation

Successfully applying the Theory of Constraints, as detailed in “The Goal,” isn’t always straightforward. Organizations may encounter resistance to change, particularly from individuals accustomed to traditional management approaches. Identifying the true constraint requires honest assessment, which can be difficult due to internal politics or flawed data.

Furthermore, subordinating everything else to exploit the constraint demands discipline and a shift in priorities, potentially disrupting established workflows. Elevating the constraint often necessitates capital investment or process redesign, requiring justification and approval. Finally, preventing inertia demands continuous monitoring and adaptation, ensuring the solution remains effective over time.

esame guida

What is the “Esame Guida” (Driving Exam) in Italy?

The “Esame Guida” represents Italy’s comprehensive driving assessment, encompassing both theoretical knowledge and practical skills․ It’s a crucial step, mirroring a global shift towards responsible driving and sustainability, with evolving regulations as of December 20, 2025․

Overview of the Italian Driving Exam System

The Italian driving exam system, known as the “Esame Guida,” is a two-phase process designed to ensure road safety and responsible driving․ Initially, candidates must pass a theory exam (“Esame di Teoria”), evaluating their understanding of traffic laws, road signs, and safe driving practices․ Successful completion allows progression to the practical driving exam (“Esame di Guida”)․

This practical assessment evaluates a candidate’s ability to operate a vehicle safely and competently in real-world traffic conditions․ The system is categorized by vehicle type – Category B for cars, Category A for motorcycles, and Category C for trucks – each with specific exam variations․ Recent updates, as of December 20, 2025, emphasize environmental awareness and digitalization, reflecting a broader commitment to sustainability and modernizing the process․ Passing both phases is mandatory to obtain a valid Italian driving license․

The Importance of Passing the “Esame Guida”

Successfully completing the “Esame Guida” is paramount for legal vehicle operation within Italy and signifies a commitment to road safety․ Beyond legal requirements, passing demonstrates a driver’s comprehensive understanding of traffic regulations and their ability to navigate diverse driving scenarios competently․ This proficiency is increasingly vital given the evolving road conditions and a growing emphasis on environmental awareness, as highlighted by recent regulatory changes effective December 20, 2025․

Furthermore, a valid Italian driving license facilitates personal mobility, employment opportunities, and integration into Italian society․ The exam’s rigor, encompassing both theoretical and practical assessments, ensures drivers possess the necessary skills to contribute to a safer and more responsible driving environment․ It’s a foundational element for responsible citizenship and participation in the nation’s transportation network․

Phase 1: Theory Exam (“Esame di Teoria”)

The “Esame di Teoria” assesses foundational driving knowledge through a multiple-choice format․ It’s a critical initial hurdle, demanding comprehension of rules and responsible driving practices․

Registration for the Theory Exam

Registering for the “Esame di Teoria” initiates the licensing process, typically done through an authorized “Scuola Guida” (driving school) or directly at a “Motorizzazione Civile” (Civil Motorization) office․ Applicants must provide necessary documentation, including identification, a fiscal code (“codice fiscale”), and a medical certificate confirming fitness to drive․ The driving school assists with paperwork, streamlining the process for many learners․

A registration fee is required, covering exam administration costs․ It’s essential to verify current fee structures as they are subject to change․ Upon successful registration, candidates receive confirmation and details regarding the exam date, location, and any specific instructions․ Digital registration options are increasingly available, reflecting the ongoing digitalization of the “Esame Guida” process as of December 20, 2025, offering convenience and efficiency․ Prompt registration is advised, as exam slots can fill quickly, particularly in high-demand areas․

Study Materials and Resources

Comprehensive study materials are vital for success on the “Esame di Teoria”․ Driving schools typically provide textbooks, practice question banks, and access to online learning platforms․ These resources cover Italian traffic laws, road signs, safe driving practices, vehicle mechanics, and first aid procedures․

Official materials published by the “Motorizzazione Civile” are also available, ensuring alignment with the exam content․ Numerous online resources, including websites and mobile apps, offer practice tests and quizzes, simulating the exam environment․ Focus on understanding the reasoning behind correct answers, not just memorization․ Given the increased focus on environmental awareness (as of December 20, 2025), expect questions related to eco-driving and vehicle emissions․ Utilizing a variety of resources maximizes comprehension and boosts confidence for the exam․

Exam Format and Question Types

The “Esame di Teoria” consists of a multiple-choice questionnaire, presented on a computer․ The exam features 40 questions, with five possible answers for each․ Candidates have 40 minutes to complete the test․ Questions assess knowledge of traffic regulations, road signs, safe driving techniques, vehicle maintenance, and first aid;

Question types include image-based questions (identifying road signs), scenario-based questions (assessing appropriate responses to driving situations), and direct knowledge questions․ A significant portion now addresses environmental awareness, reflecting updated regulations as of December 20, 2025․ Incorrect answers result in penalty points, so careful consideration is crucial․ Familiarity with the exam format through practice tests is highly recommended to manage time effectively and minimize errors․

Passing Score and Validity

To pass the “Esame di Teoria”, candidates must achieve a score of at least 28 correct answers out of 40․ Incorrect answers deduct points, meaning simply answering a minimum number correctly isn’t sufficient; strategic accuracy is vital․ Upon successful completion, the theoretical exam result is valid for 12 months․

This validity period provides ample time to schedule and complete the practical driving exam (“Esame di Guida”)․ However, it’s advisable to proceed promptly, as regulations are subject to change, particularly with recent updates as of December 20, 2025, emphasizing road safety and environmental responsibility․ Failing to complete the practical exam within the 12-month window necessitates retaking the theory test․

Phase 2: Practical Driving Exam (“Esame di Guida”)

The “Esame di Guida” assesses real-world driving competence, evaluating maneuver execution, adherence to traffic laws, and overall safe driving practices on designated routes․

Scheduling the Practical Exam

Successfully completing the theory exam is the first step towards scheduling the practical “Esame di Guida․” This process typically involves your “Scuola Guida” (driving school) submitting your request to the local “Motorizzazione Civile” – the Italian civil motorization department․ Availability can vary significantly depending on the region and demand, potentially leading to waiting periods․

It’s crucial to maintain consistent practice with your driving instructor during this waiting time to refine your skills and address any areas needing improvement․ The driving school will usually handle the administrative aspects of booking the exam, but proactive communication with them is essential to understand the estimated timeframe․ Be prepared to provide necessary documentation, including your theory exam pass certificate and identification․ Digitalization efforts, as of December 20, 2025, aim to streamline this scheduling process, potentially offering online booking options in some areas, but traditional methods remain prevalent․

Vehicle Requirements for the Exam

The vehicle used for the practical “Esame di Guida” must meet specific criteria set by the “Motorizzazione Civile․” Generally, you will use a car provided by your registered “Scuola Guida․” The vehicle must be properly registered, insured, and in full working order, with all safety features functioning correctly – including lights, brakes, indicators, and seatbelts․

It’s essential the car is equipped with dual controls (a second set of pedals for the instructor), a legal requirement for driving school vehicles․ The examiner will conduct a brief inspection before the exam to ensure compliance with these standards․ Any deficiencies discovered could lead to immediate disqualification․ Increasingly, with new regulations focusing on environmental awareness (as of December 20, 2025), vehicles with lower emissions may be favored, though this isn’t yet a strict requirement․ Ensure your driving school’s vehicle meets all current legal and safety standards before your exam date;

The Driving Route and Maneuvers

The practical “Esame di Guida” route is determined by the “Motorizzazione Civile” and is typically designed to assess your driving skills in various real-world scenarios․ Expect a mix of urban roads, extra-urban roads, and potentially highways, depending on the category of license you’re pursuing․ The route will include designated areas for specific maneuvers, such as parallel parking, three-point turns, and reversing․

Examiners evaluate your ability to navigate traffic, obey traffic laws, demonstrate proper lane discipline, and react safely to unexpected situations․ Increasingly, with a heightened focus on road safety (as of December 20, 2025), expect scenarios testing your hazard perception skills․ The route’s complexity varies by location and examiner, but a calm, confident, and legally compliant driving style is crucial for success․

Common Mistakes to Avoid During the Exam

During the “Esame di Guida”, seemingly minor errors can lead to failure․ Frequent mistakes include insufficient mirror checks, failing to signal properly, incorrect speed adjustments for road conditions, and poor lane positioning․ Hesitation at intersections, especially when yielding or merging, is also a common downfall․

Furthermore, neglecting blind spots, improper execution of maneuvers (like parking), and a lack of awareness of surrounding traffic are critical errors․ With the increased focus on environmental awareness (as of December 20, 2025), avoid unnecessary acceleration or harsh braking․ Maintain composure, follow instructions precisely, and demonstrate a proactive approach to safety․ Nervousness can amplify mistakes, so practice and confidence are key to a successful outcome․

The Examiner’s Evaluation Criteria

The “Esame di Guida” examiner assesses a candidate’s overall driving competence, prioritizing safety and adherence to traffic regulations․ Evaluation encompasses vehicle control – steering, braking, acceleration – and the correct application of driving techniques․ Demonstrating awareness of surroundings, anticipating potential hazards, and reacting appropriately are crucial․

Beyond technical skill, examiners look for responsible driving behavior, including respecting speed limits, maintaining a safe following distance, and proper use of signals․ As of December 20, 2025, increased emphasis is placed on eco-friendly driving habits․ A calm demeanor, clear decision-making, and the ability to handle unexpected situations positively contribute to a favorable assessment․ Ultimately, the goal is to prove you’re a safe and conscientious driver․

Specific Vehicle Categories and Exam Variations

The “Esame Guida” adapts to vehicle type; Category B (cars) is common, while Category A focuses on motorcycles, and Category C assesses truck operation, each with unique requirements․

Exam for Category B (Cars)

The Category B “Esame Guida,” for standard cars, is the most frequently undertaken assessment in Italy․ This practical exam rigorously evaluates a candidate’s ability to safely operate a vehicle in diverse real-world traffic scenarios․ Expect a route designed to test maneuvering skills – parallel parking, three-point turns, and navigating intersections are standard․

Examiners prioritize adherence to traffic regulations, proper use of signals, and maintaining a safe following distance․ Increasingly, as of December 20, 2025, examiners will assess awareness of environmentally conscious driving practices, such as smooth acceleration and anticipating traffic flow to minimize fuel consumption․ A key focus is demonstrating responsible behavior and a proactive approach to road safety․ Candidates must also exhibit confidence and control throughout the examination, showcasing a comprehensive understanding of vehicle operation and traffic laws․ Preparation through a reputable “Scuola Guida” and ample practice are crucial for success․

Exam for Category A (Motorcycles)

The “Esame Guida” for Category A, covering motorcycles, presents unique challenges compared to car examinations․ This assessment heavily emphasizes balance, coordination, and hazard perception, crucial for motorcycle safety․ Expect maneuvers like slalom courses, emergency braking drills, and precise control at low speeds․ Examiners will meticulously observe the candidate’s ability to handle the motorcycle’s weight and respond effectively to unexpected situations․

Beyond basic control, the exam assesses awareness of motorcycle-specific road risks and appropriate protective gear usage․ As of December 20, 2025, increased scrutiny will be placed on defensive riding techniques and anticipating potential hazards from other vehicles․ Demonstrating a thorough understanding of traffic laws, coupled with confident and controlled riding, is paramount․ Thorough preparation with a specialized “Scuola Guida” and extensive practice are essential to navigate the complexities of the Category A exam successfully and safely․

Exam for Category C (Trucks)

The “Esame Guida” for Category C, focusing on trucks, is significantly more demanding than tests for smaller vehicles․ It assesses not only driving proficiency but also a deep understanding of vehicle dimensions, weight restrictions, and load securing protocols․ Expect complex maneuvers like reversing into tight spaces, coupling and uncoupling trailers, and navigating challenging road conditions with a large vehicle․

Examiners prioritize safety and awareness of the truck’s limitations․ As of December 20, 2025, regulations emphasize environmental awareness, including efficient driving techniques to minimize fuel consumption and emissions․ Candidates must demonstrate a comprehensive grasp of professional driver responsibilities, including pre-trip inspections and adherence to strict regulations regarding driving hours and rest periods․ Successful completion requires extensive training at a specialized “Scuola Guida” and substantial practical experience to confidently handle the unique demands of operating a large goods vehicle․

Preparing for the “Esame Guida”

Effective preparation involves selecting a reputable “Scuola Guida”, completing required lessons, and engaging in rigorous mock exams․ Consistent practice builds confidence and familiarity with exam procedures․

Choosing a Driving School (“Scuola Guida”)

Selecting the right “Scuola Guida” is paramount for success on the “Esame Guida․” Not all driving schools are created equal; thorough research is essential․ Consider factors like the school’s reputation, pass rates (though these aren’t always publicly available, inquire directly), and the qualifications of their instructors․ A good school will offer a structured curriculum covering both the theoretical and practical aspects of driving, aligning with the latest regulations as of December 20, 2025․

Look for schools that provide modern vehicles and offer flexible scheduling options to accommodate your needs․ Read online reviews and ask for recommendations from friends or family who have recently obtained their licenses․ Don’t hesitate to visit several schools, speak with instructors, and observe a lesson before making a decision․ A supportive and patient learning environment is crucial, especially given the increasing focus on road safety and environmental awareness within the exam itself․ Ensure the school offers comprehensive preparation for all potential exam routes and maneuvers․

Number of Required Driving Lessons

The number of mandatory driving lessons for the “Esame Guida” isn’t fixed and varies based on individual learning pace and prior experience․ Italian law doesn’t specify a minimum number, but a practical approach dictates sufficient training to demonstrate competence and confidence․ Typically, most learners require between 15-20 hours of practical instruction, though this can increase significantly for those with limited or no prior driving experience․

The “Scuola Guida” will assess your skills and recommend a personalized learning plan․ Factors influencing the required hours include your ability to grasp driving concepts, coordination, and comfort level behind the wheel․ Remember, the exam emphasizes safe and responsible driving, incorporating new regulations regarding environmental awareness as of December 20, 2025․ Investing in extra lessons is advisable if you feel unprepared, prioritizing quality instruction over simply meeting a minimum hour count․

Mock Exams and Practice Sessions

Engaging in mock exams and frequent practice sessions is paramount for success on the “Esame Guida․” These simulations replicate the real exam environment, reducing anxiety and building confidence․ Your “Scuola Guida” will likely offer mock practical exams, mirroring the driving route and maneuvers you’ll encounter during the official assessment․ Utilize these opportunities to identify weaknesses and refine your technique․

Consistent practice is key, focusing on areas where you struggle․ Beyond scheduled lessons, independent practice (with a qualified supervising driver, where legally permitted) can reinforce learned skills․ Furthermore, utilize online resources and practice question banks for the theory exam․ Remember, the exam now incorporates increased focus on road safety and new regulations as of December 20, 2025, so ensure your practice reflects these updates․ Thorough preparation significantly increases your chances of passing․

Post-Exam Procedures

Following the “Esame Guida,” results are communicated, potentially leading to a provisional license․ Subsequently, obtaining a full driving license requires completing any remaining administrative steps and fulfilling all requirements․

Receiving Your Results

The process of receiving your “Esame Guida” results is a pivotal moment for aspiring drivers in Italy․ Typically, the examiner will verbally communicate the outcome immediately after the practical exam’s completion․ This initial feedback provides a preliminary understanding of your performance․ However, this verbal notification isn’t the official result․

The official results are usually published within a few days, often accessible online through the website of the Motorizzazione Civile (the Italian Department of Motor Vehicles) or via the driving school (“Scuola Guida”) where you enrolled․ Your driving school will likely inform you when the results are available and may even assist you in accessing them․

It’s crucial to retain any documentation provided during the exam, as it may be required when checking your results or proceeding with subsequent steps․ If you pass, you’ll receive instructions regarding obtaining your provisional license․ If you fail, you’ll be informed about the specific areas where improvement is needed and the procedures for rescheduling the exam․

Obtaining Your Provisional Driving License

Following a successful “Esame Guida”, obtaining your provisional driving license (“foglio rosa”) is the next crucial step in Italy․ This document allows you to legally drive while supervised, preparing you for the full license․ The process typically involves returning to your driving school (“Scuola Guida”) with the necessary documentation, including your identification and exam results․

Your driving school will then handle the administrative procedures with the Motorizzazione Civile, submitting your paperwork and paying the required fees․ The provisional license is usually issued within a few days to a couple of weeks․ It’s essential to carry this document with you whenever you are driving․

Remember, the provisional license comes with restrictions – you must be accompanied by a licensed driver who is at least a certain age (typically 21 or older) and seated in the passenger seat․ This period allows for supervised practice before taking the final step towards a full, unrestricted driving license․

Getting Your Full Driving License

After a period of supervised driving with your provisional license (“foglio rosa”), you can apply for your full Italian driving license․ Typically, a waiting period of at least six months must pass after successfully completing the practical exam before eligibility․ This allows for sufficient real-world driving experience under supervision․

Your driving school will again assist with the application process, submitting the required documentation to the Motorizzazione Civile․ This includes proof of completion of the waiting period, your provisional license, and any additional paperwork requested by the authorities․ Further fees will also be applicable․

Once approved, your full driving license will be mailed to your registered address․ This license grants you the freedom to drive independently throughout Italy and within the European Union․ It’s a significant achievement, representing the successful completion of the “Esame Guida” process and demonstrating your competence as a safe and responsible driver․

Recent Changes and Updates to the “Esame Guida” (as of 12/20/2025)

Updates prioritize environmental awareness and road safety, reflecting a global trend․ Digitalization streamlines the exam process, aligning with modern technological advancements and increased efficiency․

New Regulations Regarding Environmental Awareness

Recent modifications to the “Esame Guida” significantly emphasize environmental responsibility, mirroring a broader societal shift towards sustainability․ The updated exam now incorporates questions assessing candidates’ understanding of eco-friendly driving practices, including fuel efficiency techniques and the impact of vehicle emissions․

Expect increased scrutiny on knowledge of electric and hybrid vehicle technologies, as well as awareness of regulations concerning low-emission zones within Italian cities․ The practical exam will likely include evaluations of driving behavior that minimizes environmental impact, such as smooth acceleration and deceleration, and appropriate gear selection․

These changes reflect Italy’s commitment to reducing its carbon footprint and promoting a more sustainable transportation system․ Candidates are encouraged to familiarize themselves with current environmental policies and best practices to ensure success on the revised exam․ This focus aligns with global ESG (Environmental, Social, and Governance) principles gaining prominence in investment and corporate responsibility․

Increased Focus on Road Safety

The “Esame Guida” as of December 20, 2025, demonstrates a heightened commitment to road safety, reflecting a global trend towards minimizing accidents and protecting vulnerable road users․ Expect more complex scenarios in both the theory and practical components, designed to test a candidate’s ability to anticipate and react to hazardous situations․

The practical exam will likely place greater emphasis on defensive driving techniques, hazard perception, and adherence to traffic regulations, particularly those concerning speed limits and safe following distances․ Examiners will be looking for a proactive approach to risk management and a clear understanding of pedestrian and cyclist safety․

The theoretical portion will include more in-depth questions on road signs, traffic laws, and the consequences of reckless driving․ This intensified focus aligns with broader ESG (Environmental, Social, and Governance) considerations, prioritizing social responsibility and public well-being․ Preparation should prioritize comprehensive knowledge and practical application of safe driving principles․

Digitalization of the Exam Process

As of December 20, 2025, the “Esame Guida” is undergoing significant digitalization, streamlining procedures and enhancing efficiency․ This transformation includes online registration for both theory and practical exams, reducing administrative burdens and providing greater convenience for candidates․

The theory exam is increasingly administered via computer-based testing, offering immediate results and eliminating paper-based assessments․ Expect interactive simulations and multimedia elements to assess understanding of road rules and hazard perception․ The practical exam may incorporate digital tools for route planning and performance evaluation․

This shift towards digitalization aligns with broader ESG (Environmental, Social, and Governance) principles, reducing paper consumption and promoting sustainability․ Access to online resources, mock exams, and digital study materials will become more prevalent, supporting candidate preparation․ This modernization aims to create a more transparent and accessible examination experience․

laudate dominum mozart pdf

Laudate Dominum by Mozart: A Comprehensive Guide (PDF Focus)

Mozart’s Laudate Dominum, a celebrated piece, is readily available as PDF sheet music. Resources like the icking-music-archive offer access, facilitating performance and study of this sacred work.

Historical Context of the Composition

Mozart’s Laudate Dominum, K. 124, originates from a fascinating period in his career and the broader landscape of 18th-century sacred music. Composed in 1779, it forms part of a larger set of Vespers, specifically written for the chapel of the Archbishop of Salzburg, Hieronymus Colloredo. This commission reflects Mozart’s often-strained relationship with his employer, a recurring theme throughout his life.

The Vespers were not intended for grand liturgical celebrations but rather for the regular services within the Archbishop’s chapel. This context explains the relatively modest scoring and the focus on vocal performance. The piece itself is based on Psalm 100, a text of praise and thanksgiving, and embodies the spirit of the Enlightenment’s emphasis on reason and clarity.

Interestingly, the complete Vespers were not performed in their entirety during Mozart’s lifetime, and the Laudate Dominum gained prominence as a standalone piece due to its exceptional beauty and accessibility. The availability of PDF scores today allows for widespread access to this historically significant work, enabling both amateur and professional choirs to experience and share Mozart’s genius.

Mozart’s Vespers and its Place in Sacred Music

Mozart’s Vespers, of which Laudate Dominum is a celebrated component, occupy a unique position within the tradition of sacred music. Composed during a period of transition, they blend elements of the Baroque and Classical styles. While adhering to the formal structure of Vespers – a series of psalms, hymns, and prayers – Mozart infuses the work with his characteristic melodic grace and harmonic sophistication.

Unlike the grand, dramatic sacred works of Bach or Handel, Mozart’s Vespers are more intimate in scale, reflecting their intended use in the Archbishop of Salzburg’s chapel. However, this does not diminish their artistic merit. Laudate Dominum, in particular, stands out for its soaring soprano line and joyful expression of faith.

The increasing availability of PDF sheet music has broadened access to these Vespers, allowing choirs and musicians worldwide to explore Mozart’s contribution to sacred choral music. This accessibility fosters a deeper appreciation for the work’s historical context and enduring beauty, solidifying its place in the repertoire.

The Text of Laudate Dominum: Psalm 100

Laudate Dominum, meaning “Praise the Lord,” sets Psalm 100 to music. This psalm is a call to worship, urging all nations to rejoice and give thanks to God for His goodness and everlasting mercy. The text’s simplicity and directness contribute to the piece’s universal appeal and accessibility.

The Latin text, used by Mozart, emphasizes themes of gratitude, joy, and divine providence. Key phrases like “Laudate Dominum omnes gentes” (“Praise the Lord, all ye nations”) and “Confitemini Domino” (“Give thanks to the Lord”) are repeated throughout, reinforcing the psalm’s central message.

The availability of PDF scores often includes both the musical notation and the Latin text, allowing singers to understand the meaning behind the notes. Some editions also provide English translations, further enhancing comprehension and facilitating a more meaningful performance. Access to these resources allows for a deeper connection with the psalm’s spiritual content, enriching the musical experience.

Musical Analysis: Key, Tempo, and Form

Laudate Dominum is primarily in the key of D major, lending it a bright and celebratory character. The tempo is generally marked as Allegro maestoso, indicating a brisk and majestic pace, fitting for a hymn of praise. This contributes to the piece’s uplifting and joyful atmosphere.

The work is structured in a relatively simple form, largely driven by the text of Psalm 100. It features distinct sections corresponding to different verses of the psalm, often employing a homophonic texture where all voices sing the same rhythm. This clarity enhances the text’s intelligibility.

PDF scores readily available online allow detailed examination of Mozart’s compositional choices. Analysis reveals skillful use of ornamentation and melodic phrasing. The piece showcases Mozart’s mastery of vocal writing, creating a work that is both technically demanding and emotionally resonant. Studying these scores provides insight into the piece’s structure and harmonic language.

Vocal Ranges and Choir Requirements

Laudate Dominum is typically scored for SATB choir – Soprano, Alto, Tenor, and Bass. The soprano line generally extends to a high D or E, requiring agile and skilled singers. Alto parts comfortably sit within a moderate range, while tenor and bass lines demand solid vocal support and clarity in the lower register.

A well-balanced choir is crucial for a successful performance. Each voice part should be adequately populated to achieve a full and resonant sound. The piece isn’t excessively difficult technically, making it accessible to many competent choirs, but precision and blend are essential.

PDF sheet music often includes indications of vocal ranges, aiding in choir selection. Examining these scores allows conductors to assess the suitability of the piece for their ensemble. A choir with strong sight-reading skills will find learning the work relatively straightforward, enhancing the overall performance quality.

Availability of PDF Sheet Music Online

PDF versions of Mozart’s Laudate Dominum are widely accessible online, catering to diverse needs and budgets. The icking-music-archive.sunsite.dk is a prominent source, offering a readily available digital score. This archive provides a convenient starting point for choirs and individuals seeking free access to the music.

Numerous other websites host PDF sheet music, ranging from dedicated choral music retailers to general music score databases. A simple online search using keywords like “Laudate Dominum PDF score” yields a plethora of results. However, it’s crucial to verify the legality and quality of the source before downloading.

Many publishers also offer digital downloads of Laudate Dominum in PDF format, often as part of larger choral collections. These paid options typically provide higher-quality editions with detailed markings and accurate transcriptions. Checking reputable music stores online is recommended for these resources;

Free PDF Sources for Laudate Dominum

Several online platforms offer free PDF sheet music for Mozart’s Laudate Dominum, making it accessible to a wider audience. The icking-music-archive.sunsite.dk stands out as a reliable source, providing a digital score readily available for download. This archive is a valuable resource for choirs and individuals on a budget.

IMSLP (International Music Score Library Project) is another excellent option, though availability can vary. While not always consistently stocked, it’s worth checking for different editions and arrangements. Public domain scores are often found here, ensuring legal access.

Various choral music websites and forums occasionally share free PDF versions of Laudate Dominum. However, caution is advised when downloading from less established sources to ensure the score’s accuracy and legality. Always prioritize reputable websites and verify copyright information before use. Remember to respect copyright laws when utilizing freely available resources.

Paid PDF Sheet Music Options & Publishers

For high-quality, professionally prepared PDF scores of Mozart’s Laudate Dominum, several music publishers offer reliable options. Musicnotes.com is a popular platform providing digitally downloadable sheet music, often with various arrangements and voicing options available for purchase.

Sheet Music Plus is another significant retailer, boasting an extensive catalog including choral works like Laudate Dominum. They frequently offer different editions, including those specifically arranged for various choir sizes and skill levels. These paid options generally ensure accuracy and clarity.

Hal Leonard Corporation and Shawnee Press are established music publishers that also carry Mozart’s compositions. Their PDF offerings often include accompaniment tracks and detailed performance notes. While requiring a purchase, these resources provide a more comprehensive musical experience. Consider the specific needs of your choir or performance when selecting a publisher and edition.

Different Arrangements and Editions (PDF)

Numerous PDF arrangements of Mozart’s Laudate Dominum cater to diverse choral ensembles and performance contexts. Beyond the standard SATB voicing, arrangements exist for SSA, SAB, and even two-part choirs, simplifying the piece for less experienced groups.

Accompaniment variations are also prevalent. While the original score calls for orchestra, many PDF editions provide piano reduction, making the work accessible to choirs with limited orchestral resources. Some arrangements feature simplified piano accompaniments for beginner pianists.

Furthermore, publishers offer editions with differing levels of difficulty. Some PDF scores include detailed dynamic markings and phrasing suggestions, while others present a more streamlined version for quicker learning. Exploring the icking-music-archive and commercial sites reveals editions tailored to specific performance needs. Consider the skill level of your choir and the desired aesthetic when choosing an arrangement. Digital platforms often allow previewing before purchase, ensuring the edition suits your requirements.

Using Laudate Dominum in Church Services

Laudate Dominum, with its uplifting text from Psalm 100, is a frequent choice for inclusion in church services. Its inherent reverence and melodic beauty lend themselves beautifully to liturgical settings, particularly during seasons of celebration or thanksgiving. Obtaining a PDF version simplifies preparation for church choirs.

The piece often serves as an introit, offertory anthem, or a concluding choral response. Its relatively short duration makes it easily integrated into various service structures. When selecting a PDF edition, consider the vocal capabilities of your choir and the desired accompaniment – orchestral or piano.

Many churches utilize piano accompaniment PDFs due to budgetary or logistical constraints. The accessibility of digital scores allows for quick printing and distribution to choir members. Ensure the chosen arrangement aligns with the liturgical style of your church. The clear and joyful nature of Laudate Dominum consistently enhances worship experiences, making it a beloved selection for sacred music programs.

Performance Considerations for Choirs

Successfully performing Laudate Dominum requires careful attention to several key elements. Choirs should prioritize achieving a balanced vocal blend, particularly during the intricate interplay between soprano and alto lines. A clear understanding of Mozart’s phrasing and dynamics, readily available in PDF scores, is crucial.

The piece demands precise articulation and a light, agile vocal technique. Encourage singers to maintain consistent breath support to navigate the melodic runs effectively. Utilizing a high-quality PDF edition ensures accurate notation and facilitates rehearsal. Pay close attention to the tempo marking – typically Allegro ma non troppo – to maintain a joyful yet controlled pace.

Consider the acoustic properties of your performance space. Adjust the volume and balance accordingly. A well-rehearsed choir, armed with a reliable PDF score, can deliver a truly captivating rendition of this Mozart masterpiece, showcasing both technical skill and expressive artistry.

Accompaniment Options: Orchestra vs. Piano (PDF Scores)

Laudate Dominum offers flexibility in accompaniment, traditionally scored for orchestra but frequently performed with piano reduction. Obtaining a quality PDF score is paramount for either option. Orchestral PDFs provide the full richness of Mozart’s original intent, demanding a skilled ensemble for a truly immersive experience.

However, piano accompaniment is a practical and accessible alternative for many choirs. Numerous PDF arrangements are available, ranging from simple reductions to more elaborate versions. When selecting a piano PDF, prioritize clarity and accuracy of the transcription. Ensure the pianist is comfortable with the technical demands of the accompaniment.

Consider the strengths of your ensemble. If a full orchestra isn’t feasible, a well-executed piano accompaniment, sourced from a reliable PDF, can still deliver a beautiful and moving performance. Both options, when utilizing accurate PDF scores, honor Mozart’s compositional brilliance.

Common Performance Challenges and Solutions

Performing Laudate Dominum presents specific challenges, even with readily available PDF scores. Maintaining consistent intonation throughout the soprano’s extended high notes is crucial; regular vocal warm-ups focusing on breath support are essential. Ensemble balance can also be tricky, ensuring the choir doesn’t overpower the accompaniment – whether orchestral or piano (sourced from a PDF).

Another common issue is rhythmic precision, particularly in the melismatic passages. Careful rehearsal, utilizing a clearly marked PDF score, is vital. Articulation must be crisp and unified. For choirs using a piano reduction PDF, coordinating with the pianist to achieve a seamless blend is paramount.

Addressing these challenges requires diligent preparation and a focus on musicality. Utilizing high-quality PDF editions with clear markings aids in accurate interpretation. Remember, a successful performance hinges on both technical proficiency and a deep understanding of Mozart’s expressive intent.

Copyright and Licensing Issues for PDF Usage

When utilizing PDF sheet music of Laudate Dominum, copyright considerations are paramount. While Mozart’s compositions are in the public domain, specific editions and arrangements available as PDFs may be protected. Downloading from unofficial sources carries risks of copyright infringement.

Many websites offering free PDF scores may not have the necessary licenses, potentially leading to legal issues for users. Purchasing from reputable publishers ensures compliance with copyright laws. Licensing is particularly important for performance; even with a legally obtained PDF, public performances often require licensing from performance rights organizations.

Always check the terms of use associated with any PDF download. Some PDFs may be licensed for personal use only, prohibiting distribution or performance. Understanding these regulations protects both performers and organizations. Prioritize legal acquisition of PDF scores to support composers and publishers.

Related Mozart Sacred Works (PDF Availability)

Exploring Mozart’s broader catalog of sacred music alongside Laudate Dominum enriches appreciation for his compositional style. Several other works are frequently available as PDF sheet music, offering choirs and vocalists diverse repertoire.

Notable examples include the Requiem (often found in various editions), the Coronation Mass, and numerous individual motets and offertories. Websites like the icking-music-archive, while offering Laudate Dominum, may also host selections from these larger works. However, availability varies significantly.

Commercial music retailers and publishers typically provide complete scores and individual movements in PDF format. Investigating these sources expands access to a wider range of Mozart’s sacred compositions. Consider exploring his vespers settings beyond Laudate Dominum for a comprehensive understanding of his sacred output. Utilizing PDF scores facilitates study and performance of these masterpieces.

micromaster 440 user manual

Micromaster 440 User Manual: A Comprehensive Guide

This comprehensive guide assists users in successfully operating and maintaining the Siemens Micromaster 440, offering detailed instructions for installation and commissioning․

It provides essential information regarding features, quick commissioning with SDP/BOP, and motor temperature storage (r0034/r0035) for related Siemens drives․

The Siemens Micromaster 440 is a versatile and cost-effective motor starter designed for a wide range of applications, offering precise control and efficient operation․ This user manual serves as your reliable companion, guiding you through the successful implementation and maintenance of your device․

It’s engineered for quick commissioning utilizing the Simple Drive Parameters (SDP) and Basic Operator Panel (BOP), streamlining the setup process․ The MM440 provides detailed information on its features, installation procedures, and commissioning steps․ Furthermore, it’s important to note that modern versions automatically store crucial motor temperature data (identified as r0034 for SINAMICS G110 and r0035 for SINAMICS G110D and MM430/MM440), aiding in preventative maintenance and optimal performance․ This manual ensures you harness the full potential of your Micromaster 440․

Safety Precautions and Warnings

Prior to installing or operating the Micromaster 440, carefully review these crucial safety precautions to prevent potential hazards․ Incorrect handling can lead to equipment damage, personal injury, or even fatal accidents․ Always ensure the device is disconnected from the power supply during installation and maintenance procedures․

Qualified personnel, familiar with motor control systems and safety regulations, should perform all work․ Siemens retains all rights, including those related to patents or registered designs․ Never operate the drive with damaged cables or enclosures․ Adhere strictly to local and national electrical codes․ Improper modifications void the warranty and compromise safety․ Remember, this manual is a guide; responsible operation is paramount for a safe working environment․

Unpacking and Initial Inspection

Upon receiving your Siemens Micromaster 440, carefully inspect the packaging for any signs of damage incurred during transit․ If damage is evident, immediately file a claim with the carrier․ Gently unpack the drive and verify that all components listed on the packing list are present․ This includes the drive itself, any optional accessories, and the documentation package․

Visually inspect the drive for any physical damage, such as cracks, dents, or loose components․ Check the cooling fan for obstructions and ensure it rotates freely․ Confirm that all terminals are secure and undamaged․ Retain the packaging materials for potential future returns or servicing․ Report any discrepancies or damage to your supplier immediately․

Installation and Wiring

Proper installation and wiring are crucial for safe and reliable operation of the Micromaster 440, encompassing mounting, power connections, motor wiring, and control signals․

Mounting the Micromaster 440

Securely mounting the Micromaster 440 is paramount for optimal performance and longevity․ Ensure the chosen location provides adequate ventilation to dissipate heat generated during operation, preventing potential overheating and component damage; The unit should be mounted on a flat, stable surface, free from excessive vibration or shock․

Consider the weight of the drive when selecting mounting hardware and ensure it can adequately support the load․ Maintain sufficient clearance around the unit for easy access to connections and for maintenance purposes․ Adhere to recommended mounting orientations, typically vertical or horizontal, as specified in the detailed installation guidelines․

Proper grounding is essential for safety and electromagnetic compatibility (EMC); connect the drive to a reliable earth ground․ Avoid mounting near sources of strong electromagnetic interference, which could affect operation․

Power Supply Connections

Establishing correct power supply connections is crucial for safe and reliable operation of the Micromaster 440․ Verify the incoming voltage matches the drive’s specified voltage range before connecting․ Use appropriately sized conductors, adhering to local electrical codes, to handle the current demands․

Ensure a dedicated circuit breaker protects the drive from overcurrents and short circuits․ Connect the power supply phases (L1, L2, L3) to the designated terminals, and securely connect the ground wire to the grounding terminal․ Double-check all connections for tightness and proper insulation․

Before energizing the drive, verify the DC bus voltage is within acceptable limits․ Improper connections can lead to immediate damage; consult the wiring diagrams for accurate guidance․

Motor Wiring and Configuration

Correct motor wiring and configuration are essential for optimal performance and protection of both the drive and the motor․ Before connecting, verify the motor’s voltage and current ratings match the Micromaster 440’s capabilities․ Connect the motor phases (U, V, W) to the corresponding output terminals on the drive, ensuring secure connections․

Properly configure the drive’s parameters to match the motor’s specifications, including rated voltage, frequency, current, and speed․ Incorrect parameter settings can lead to reduced performance, overheating, or even motor damage․

Utilize the drive’s auto-tuning function to optimize motor control parameters; Always refer to the motor’s nameplate data and the drive’s manual for accurate configuration․

Control Signal Connections

The Micromaster 440 offers versatile control signal connections for diverse applications․ Digital inputs allow for start/stop, direction control, and fault reset functionality․ Configure these inputs according to your specific requirements using parameter settings․ Analog inputs enable speed control via voltage or current signals, providing precise adjustments․

Analog outputs can transmit feedback signals, such as frequency or current, for monitoring or integration with external systems․ Ensure proper wiring and termination of all control signals to minimize noise and interference․

Refer to the manual for detailed wiring diagrams and parameter configurations․ Correct signal connections are crucial for reliable and responsive drive operation․

Commissioning and Parameterization

Initial startup requires basic settings and careful parameterization of the Micromaster 440, including motor data, ramps, and protection functions for optimal performance․

Initial Startup and Basic Settings

Before powering on the Micromaster 440, verify all wiring connections are secure and correct, adhering to the installation guidelines․ Upon initial startup, the drive performs a self-test; observe the display for any error indications․

Essential basic settings include setting the motor nominal voltage, frequency, and current, which are crucial for proper operation․ Configure the drive’s display settings for optimal readability and language preference․

Parameter P0700-P0720 (motor data) must be accurately entered․ Ensure the correct motor parameters are programmed to prevent damage and ensure efficient performance․ Finally, confirm the drive’s operating mode selection aligns with the application requirements, typically starting with V/f control․

Parameter Groups Overview (P0010 ⎼ P1000)

Parameter groups P0010 to P1000 encompass fundamental drive settings within the Micromaster 440․ P0010 defines drive parameters and display settings, influencing overall functionality․ P0200-P0210 manages motor control parameters, dictating speed and torque characteristics․

P0700-P0720, as previously noted, configures crucial motor data, while P1000-P1010 controls ramp parameters – acceleration and deceleration times – impacting dynamic performance․ These settings are vital for smooth starts and stops․

Understanding these groups allows for tailored drive behavior․ Careful adjustment of these parameters optimizes performance for specific applications, ensuring efficient and reliable motor control․ Refer to the detailed parameter list for comprehensive descriptions of each setting․

Motor Data Parameters (P0700 — P0720)

Parameters P0700 to P0720 are critical for accurately configuring the Micromaster 440 to match the connected motor’s specifications․ P0700 sets the motor nominal voltage, while P0701 defines the nominal current․ Correct values ensure optimal performance and protection․

P0702 configures the nominal frequency, aligning the drive’s output with the motor’s design․ P0703 specifies the motor nominal speed, and P0704 sets the number of motor poles․ Accurate pole configuration is essential for correct speed control․

These parameters, alongside others in the group, enable the drive to efficiently control the motor, maximizing efficiency and preventing damage․ Precise motor data input is fundamental for reliable operation․

Ramp Parameters (P1000 ⎼ P1010)

Parameters P1000 to P1010 govern the acceleration and deceleration behavior of the Micromaster 440, significantly impacting application dynamics and smoothness․ P1000 defines the acceleration time, controlling how quickly the motor reaches the set speed․

P1001 sets the deceleration time, influencing the stopping behavior․ Shorter times yield faster responses, while longer times provide smoother stops․ P1002 configures the jerk, limiting abrupt changes in acceleration, reducing mechanical stress․

Fine-tuning these ramp parameters is crucial for optimizing performance, minimizing stress on the mechanical system, and preventing unwanted oscillations․ Careful adjustment ensures controlled and efficient motor operation․

Protection Functions (P3000 ⎼ P3020)

Parameters P3000 through P3020 within the Micromaster 440 are dedicated to safeguarding the drive and connected motor from potential damage․ P3000 enables/disables various fault responses, while P3001 sets the motor overload protection level, preventing overheating․

P3002 configures short-circuit protection, immediately halting operation in case of a phase-to-phase or phase-to-ground fault․ P3003 manages overvoltage and undervoltage protection, ensuring stable power supply conditions․

Proper configuration of these protection functions is vital for reliable operation and extended equipment lifespan․ Adjusting these parameters based on the application’s specific requirements is highly recommended․

Operation and Control

The Micromaster 440 supports versatile control modes like V/f and sensorless vector control, utilizing digital and analog inputs/outputs for seamless operation․

Operating Modes (V/f, Sensorless Vector Control)

The Micromaster 440 offers flexible operation through various control modes, primarily focusing on Volts per Hertz (V/f) and Sensorless Vector Control․ V/f control provides a simple and robust method for applications requiring variable speed with basic performance․ It maintains a constant ratio between voltage and frequency, ensuring stable motor operation․

Sensorless Vector Control, however, delivers enhanced performance without requiring a speed feedback sensor․ This mode utilizes the motor model and advanced algorithms to estimate the rotor position, enabling precise torque and speed control․ It’s ideal for applications demanding dynamic response and improved efficiency․ Selecting the appropriate mode depends on the specific application requirements, balancing complexity with performance needs․

Understanding these modes is crucial for optimizing the drive’s functionality and achieving desired results․

Digital Inputs and Outputs

The Micromaster 440 utilizes digital inputs and outputs for versatile control and monitoring capabilities․ Digital inputs allow external signals to control drive functions like start, stop, direction, and fault reset․ These inputs can be configured to respond to various trigger types, offering flexibility in system integration․

Digital outputs provide status signals reflecting the drive’s operational state, such as ready, running, fault, and frequency reached․ These outputs can be used to interface with external devices, enabling comprehensive system monitoring and control․ Customization of these I/O signals is achieved through parameterization, tailoring the drive’s behavior to specific application needs․

Proper configuration of digital I/O is essential for seamless integration and reliable operation․

Analog Inputs and Outputs

The Micromaster 440 features analog inputs and outputs, enabling precise control and feedback mechanisms․ Analog inputs typically accept signals like 0-10V or 4-20mA, allowing for variable speed control, setpoint adjustment, and external reference commands․ These inputs provide a continuous range of values, offering smoother and more nuanced control compared to digital signals․

Analog outputs can provide feedback signals proportional to drive parameters like frequency, current, or speed․ These outputs are valuable for monitoring drive performance and integrating with external control systems or PLCs․ Parameterization allows scaling and adjustment of analog signals to match specific application requirements․

Careful calibration and configuration are crucial for optimal analog I/O performance․

Troubleshooting and Diagnostics

This section details common faults, error codes, and diagnostic functions for the Micromaster 440, including procedures for resetting to factory settings․

Common Faults and Error Codes

Identifying issues with the Micromaster 440 often begins with understanding its error code system․ These codes provide crucial diagnostic information, pinpointing the source of malfunctions within the drive or connected systems․ Common faults include overcurrent, overvoltage, undervoltage, and motor overload conditions, each triggering a specific error message displayed on the drive’s control panel․

Furthermore, issues related to wiring, parameter settings, or external devices can also generate error codes․ The manual provides a comprehensive list of these codes, detailing their meaning and suggested corrective actions․ Properly interpreting these codes is essential for efficient troubleshooting and minimizing downtime․ Referencing the error code list allows technicians to quickly isolate the problem and implement the appropriate solution, restoring the drive to operational status․

Diagnostic Functions and Monitoring

The Micromaster 440 incorporates robust diagnostic functions for comprehensive system monitoring․ These features allow users to observe critical parameters in real-time, aiding in proactive maintenance and fault prediction․ Monitoring capabilities include displaying motor current, voltage, frequency, and speed, providing a clear picture of drive performance․

Additionally, the drive offers diagnostic tools to assess motor temperature (using parameters r0034/r0035 for compatible SINAMICS drives), identify potential wiring issues, and evaluate the overall health of the system․ Utilizing these functions enables technicians to detect anomalies before they escalate into major failures, reducing downtime and extending the lifespan of the equipment․ Regular monitoring and analysis are key to optimizing performance and ensuring reliable operation․

Resetting to Factory Settings

The Micromaster 440 provides a method to restore all parameters to their original factory settings․ This function is useful for troubleshooting, preparing the drive for a new application, or resolving configuration errors․ However, it’s crucial to understand that this process will erase all user-defined settings, including motor data, ramp parameters, and protection settings;

Before initiating a factory reset, it is strongly recommended to document all custom parameters for potential re-entry․ The reset procedure typically involves accessing a specific parameter group and activating a reset command․ Carefully follow the outlined steps in the manual to avoid unintended consequences․ After the reset, the drive will require complete re-parameterization before operation․

Technical Specifications

This section details the Micromaster 440’s dimensions, weight, performance data, and compliance with relevant industry standards, ensuring proper application․

Dimensions and Weight

Understanding the physical characteristics of the Micromaster 440 is crucial for proper mounting and integration into your system․ The unit’s compact design facilitates flexible installation options, even within constrained spaces․ Precise dimensions are essential for enclosure planning and ensuring adequate ventilation to maintain optimal performance and longevity․

Specific dimensions vary slightly depending on the model and cooling method (e․g․, fan or heatsink)․ However, typical frame sizes range from approximately 120mm to 170mm in height, 75mm to 110mm in width, and 180mm to 230mm in depth․

Weight also fluctuates based on configuration, generally falling between 0․7kg and 1․5kg․ Always consult the detailed technical documentation accompanying your specific Micromaster 440 model for the most accurate and up-to-date dimensional and weight specifications․

Performance Data

The Micromaster 440 delivers robust performance characteristics suitable for a wide array of motor control applications․ Its output current ranges typically from 1․5A to 12A, accommodating motors up to several kilowatts in power․ The drive operates across a broad voltage range, commonly 230V or 400V, single or three-phase, ensuring compatibility with diverse power infrastructures․

Switching frequencies extend up to 16 kHz, enabling precise speed control and reduced motor noise․ Overload capacity is a key feature, often supporting 150% or 200% of rated current for short durations․

Efficiency is optimized through advanced control algorithms, minimizing energy consumption․ Detailed performance curves and specifications are available in the product documentation, providing comprehensive data for application-specific requirements․

Compliance and Standards

The Siemens Micromaster 440 is engineered to meet stringent international safety and electromagnetic compatibility (EMC) standards․ It generally complies with Low Voltage Directive 2006/95/EC and EMC Directive 2004/108/EC, ensuring safe operation and minimal interference․

Furthermore, it adheres to relevant UL, cUL, and CE markings, validating its suitability for global markets․ The drive’s design incorporates provisions for compliance with environmental regulations, such as RoHS (Restriction of Hazardous Substances)․

Siemens retains all rights, including those arising from patent applications or registered designs․ Detailed compliance documentation and test reports are available upon request, confirming adherence to specific industry standards and regulatory requirements․

children’s services award pay guide

Children’s Services Award Pay Guide: A Comprehensive Overview

Navigating childcare compensation requires understanding award stipulations‚ qualifications‚ and entitlements for both employers and dedicated early childhood educators nationwide․

The Children’s Services Award is a legally binding document outlining the minimum employment terms and conditions for individuals working in the Australian early childhood education and care sector․ This award‚ regulated by the Fair Work Commission‚ ensures fair compensation and working conditions for those dedicated to nurturing and educating young children․

It covers a diverse range of roles‚ from educators and teachers to cooks and administrative staff within childcare centres‚ preschools‚ and family day care services․ Understanding this award is crucial for employers to maintain legal compliance and for employees to know their rights regarding pay rates‚ allowances‚ and other entitlements․ This guide provides a detailed overview to help navigate the complexities of the Children’s Services Award․

Who Does the Children’s Services Award Cover?

The Children’s Services Award applies to employees in the early childhood education and care sector‚ but its coverage isn’t universal․ Generally‚ it encompasses staff working in long day care centres‚ preschools‚ kindergarten programs‚ and registered family day care schemes across Australia․

This includes roles such as early childhood educators‚ teachers‚ centre directors‚ cooks‚ assistants‚ and administrative personnel directly involved in the operation of these services․ However‚ coverage depends on the employer and the nature of the employment relationship․ Determining eligibility requires careful consideration of specific job duties and the employer’s industry classification‚ as some employees may be covered by alternative awards or agreements․

Eligible Employees

Employees directly involved in delivering education and care to children are typically eligible under the Children’s Services Award․ This includes qualified early childhood educators holding relevant certificates or diplomas‚ as well as those undertaking traineeships or apprenticeships in the sector․

Centre cooks preparing meals for children‚ assistants supporting educators with classroom activities‚ and administrative staff whose primary duties relate to the centre’s childcare operations also generally qualify․ Eligibility extends to both full-time and part-time employees‚ as well as casual staff‚ provided they fall within the scope of covered work as defined by the award․

Excluded Employees

Certain roles within a children’s service are specifically excluded from coverage under the Children’s Services Award․ This typically includes managerial personnel who exercise significant decision-making authority‚ and employees covered by a different modern award or enterprise agreement․

Employees engaged in administrative work that is entirely separate from the core childcare functions‚ such as corporate head office staff‚ are also generally excluded․ Similarly‚ individuals undertaking work experience or unpaid volunteer positions are not covered․ Employees earning above a specified high income threshold may also be exempt‚ as determined by Fair Work Australia guidelines․

Understanding Pay Rates – Current as of [Date ー e․g․‚ July 1‚ 2024]

Understanding Pay Rates – Current as of July 1‚ 2024

Pay rates under the Children’s Services Award are determined by a combination of factors‚ primarily the employee’s qualifications and their designated classification level․ As of July 1‚ 2024‚ minimum wage rates vary significantly based on these criteria․

Employees without formal qualifications will receive the lowest base rate‚ while those holding a Certificate III‚ Diploma‚ or Bachelor’s degree in Early Childhood Education and Care are entitled to progressively higher rates․ It’s crucial for employers to accurately classify employees and apply the correct pay rate according to the award stipulations and current national minimum wage․

Base Rate of Pay – Qualification Levels

As of July 1‚ 2024‚ the base rate varies․ Employees without qualifications start at $23․23 per hour․ Holding a Certificate III elevates the rate to $25․02 hourly․ A Diploma commands $27․87 per hour‚ reflecting increased skills․

Those with an Advanced Diploma or Bachelor’s Degree achieve the highest base rate of $30․80 per hour․ These figures are minimums; employers can offer higher wages․ Regular review of award updates is vital‚ as rates are subject to change with Fair Work Commission decisions and national wage adjustments․ Accurate record-keeping of qualifications is essential for compliant payroll․

Qualification Requirements & Recognition

The Children’s Services Award links pay rates directly to formal qualifications․ Recognition requires providing employers with certified copies of diplomas and certificates․ Assessments must be current and from a registered training organisation (RTO)․

Qualifications are crucial for career progression and increased earning potential within the sector․ Employers are responsible for verifying qualification validity․ Recognition of prior learning (RPL) is accepted‚ offering a pathway for experienced educators without formal credentials․ Maintaining up-to-date qualifications is vital for compliance and professional development․

Certificate III in Early Childhood Education and Care

Holding a Certificate III is often the entry point into the early childhood sector․ This qualification enables individuals to work as assistants in childcare centres‚ supporting qualified educators․ Pay rates under the Children’s Services Award are significantly higher with a Certificate III compared to no formal qualification․

The course covers essential skills in child development‚ safety‚ and providing quality care․ Completion typically takes 6-12 months of full-time study․ It’s a nationally recognised qualification‚ vital for career advancement․ Employers often prioritize candidates with this credential‚ ensuring a baseline level of competence․

Diploma of Early Childhood Education and Care

The Diploma represents a substantial step up in qualifications and responsibilities within the childcare industry․ Holders are often capable of taking on more leadership roles and planning educational programs․ The Children’s Services Award reflects this increased skill level with a corresponding pay increase․

This qualification builds upon the Certificate III‚ delving deeper into pedagogy‚ child psychology‚ and inclusive practices․ It typically requires 18-24 months of full-time study․ Many centres require or strongly prefer Diploma-qualified educators to meet regulatory standards and deliver high-quality care․ It’s a pathway to becoming a lead educator․

Advanced Diploma/Bachelor Degree Recognition

Holding an Advanced Diploma or Bachelor Degree in Early Childhood Education and Care signifies the highest level of formal qualification within the sector․ The Children’s Services Award acknowledges this expertise with the highest pay rates available under the award․

These degrees provide comprehensive knowledge of child development‚ curriculum design‚ educational leadership‚ and research methodologies․ Graduates are well-equipped for roles such as centre directors‚ educational leaders‚ or specialist educators․ Employers often prioritize these qualifications to ensure exceptional program quality and compliance with the National Quality Framework․ Further studies may unlock career advancement․

Allowances Included in the Award

The Children’s Services Award provides several allowances to compensate employees for specific responsibilities or working conditions beyond their standard duties․ These allowances are designed to acknowledge extra effort or inconvenience․

Common allowances include sleepover allowance for overnight care‚ and on-call allowance when employees are required to be available outside of regular hours․ Other potential allowances may cover responsibilities like acting in a higher-level position or using a personal vehicle for work purposes․ Employers must accurately track and pay these allowances in addition to base rates‚ ensuring fair compensation for all additional duties performed․

Sleepover Allowance

The Sleepover Allowance applies when an employee is required to reside at the children’s service overnight‚ providing care and supervision during non-operational hours․ This allowance acknowledges the responsibility of being available throughout the night‚ even with limited active childcare duties․

The current rate for a sleepover allowance is specified within the Children’s Services Award and is paid for each night an employee is required to sleep at the premises․ It’s crucial to note that the allowance isn’t simply for being present; it’s for the availability to provide care if needed․ Accurate record-keeping of sleepover shifts is essential for compliant payroll processing․

On-Call Allowance

The On-Call Allowance is payable to employees who are required to be available to return to work outside of their ordinary hours of work‚ typically to cover unexpected staff shortages or emergencies․ This differs from a sleepover allowance as it doesn’t necessarily involve residing at the service․

The Award outlines specific conditions for claiming this allowance‚ including a defined period of availability and a requirement to be contacted and return to work if needed․ Employers must clearly communicate on-call expectations and ensure the allowance is correctly applied․ Detailed records of on-call periods are vital for accurate wage calculations and compliance․

Penalty Rates – Working Outside Standard Hours

The Children’s Services Award mandates penalty rates for work performed outside standard hours‚ recognizing the disruption to employees’ personal lives․ These rates are percentages added to the base rate of pay․

Penalty rates apply to work undertaken on weekends‚ public holidays‚ and outside the typical Monday to Friday‚ 7am to 6pm timeframe․ The specific percentage varies depending on the day and time․ Accurate timekeeping and payroll systems are crucial for correctly calculating and applying these penalty rates‚ ensuring fair compensation for employees working outside standard hours and full compliance with the Award․

Weekend Penalties

The Children’s Services Award specifies distinct penalty rates for weekend work‚ acknowledging the impact on employees’ leisure time․ Saturday work generally attracts a penalty rate of 25% above the base rate of pay․ This means an employee earns 125% of their usual hourly rate for hours worked on a Saturday․

Sunday work and public holidays incur higher penalties․ Employers must meticulously track weekend hours and apply the correct penalty rates to ensure accurate payroll calculations․ Failing to do so can result in significant penalties and legal repercussions․ Consistent application of these rates demonstrates respect for employee work-life balance․

Public Holiday Penalties

The Children’s Services Award mandates increased penalty rates for work performed on gazetted public holidays․ Typically‚ employees working on a public holiday receive a penalty rate of 250% of their ordinary hourly rate․ This substantial increase recognizes the sacrifice of spending the holiday with family and friends․

However‚ specific conditions apply; working on a public holiday often requires reasonable notice and agreement․ Employers must accurately identify public holidays and ensure correct payment․ Accurate record-keeping is crucial to avoid underpayment claims․ Understanding these regulations is vital for compliant payroll management and fostering positive employee relations․

Overtime Provisions

The Children’s Services Award outlines specific conditions for overtime payment․ Overtime generally applies to hours worked beyond the standard 38-hour work week‚ or a daily average of 10 hours․ Overtime is compensated at a rate of time-and-a-half (150%) of the employee’s ordinary hourly rate․

However‚ overtime must be authorized by the employer‚ and reasonable limits may apply․ Accurate timekeeping is essential for calculating overtime correctly․ Employers should maintain detailed records of all overtime worked‚ including dates‚ times‚ and rates paid․ Compliance with overtime provisions ensures fair compensation and avoids potential disputes․

Annual Leave Loading

The Children’s Services Award mandates an annual leave loading payment to eligible employees․ This loading is calculated as 17․5% of the employee’s ordinary time earnings during their period of annual leave․ It’s designed to compensate employees for the disruption to their normal work patterns during leave․

To be eligible‚ employees must have completed at least one year of continuous service․ The loading is paid in addition to the employee’s regular pay for the annual leave period․ Employers must accurately calculate and include this loading in the employee’s pay during their approved annual leave․

Superannuation Contributions

Employers are legally obligated to make superannuation contributions on behalf of eligible employees covered by the Children’s Services Award․ The current superannuation guarantee rate is 11% (as of July 1‚ 2023‚ and increasing to 12% from July 1‚ 2025) of an employee’s ordinary time earnings․

Contributions must be made to a complying superannuation fund chosen by the employee․ Employers must ensure timely and accurate payments‚ adhering to the Superannuation Guarantee (Administration) Act 1992․ Failure to comply can result in significant penalties․ Detailed record-keeping of contributions is essential for audit purposes․

Record Keeping Requirements for Employers

Employers must maintain meticulous records relating to employee pay and conditions under the Children’s Services Award․ These records should include timesheets detailing all hours worked‚ including start and finish times‚ and any overtime․ Accurate wage records‚ demonstrating compliance with pay rates and allowances‚ are crucial․

Superannuation contribution records‚ leave accruals‚ and any deductions made from wages must also be preserved․ Records should be retained for at least five years and be readily available for inspection by Fair Work Ombudsman․ Digital record-keeping systems are acceptable‚ provided they meet legislative requirements․

Recent Changes to the Children’s Services Award

The Children’s Services Award undergoes periodic reviews and amendments to reflect evolving industry standards and economic conditions․ A significant recent change involved adjustments to minimum wage rates‚ effective from July 1‚ 2024‚ impacting all qualification levels․

Updates also clarified provisions regarding annual leave loading calculations and superannuation guarantee contributions․ Employers must stay informed about these changes through official sources like the Fair Work Ombudsman website․ Failure to comply with updated award conditions can result in penalties․ Regular monitoring of award updates is essential for maintaining legal compliance․

Resources and Where to Find More Information

For comprehensive and up-to-date information regarding the Children’s Services Award‚ several key resources are readily available․ The Fair Work Ombudsman website provides detailed award summaries‚ pay rate calculators‚ and guidance on employer obligations․

Additionally‚ industry associations like Early Childhood Australia (ECA) offer resources‚ training‚ and advocacy support․ State and territory-based early childhood regulatory authorities also provide relevant information․ Consulting with a payroll professional or employment lawyer specializing in the children’s services sector is highly recommended for complex queries․

Common Employer Mistakes to Avoid

Employers in the children’s services sector frequently make errors regarding correct award interpretation․ Misclassifying employees’ qualifications‚ leading to underpayment‚ is a common issue․

Failing to accurately record and pay penalty rates for weekend‚ public holiday‚ or overtime work is another frequent mistake․

Incorrectly applying allowances‚ neglecting superannuation obligations‚ and inadequate record-keeping also pose significant risks․ Regularly updating payroll systems with award changes and seeking professional advice can prevent costly compliance breaches and ensure fair treatment of employees․ Proactive diligence is key to avoiding penalties․

Employee Rights and How to Seek Assistance

All employees covered by the Children’s Services Award are entitled to fair wages‚ correct superannuation‚ and appropriate allowances as outlined in the award; You have the right to request a copy of the award and your pay slips․

If you believe your rights are being violated‚ first attempt to discuss the issue with your employer․ If unresolved‚ contact the Fair Work Ombudsman (FWO) for confidential advice and assistance․

Union membership can also provide support and representation․

The FWO website offers detailed information and resources‚ and you can lodge a complaint online or by phone․

Impact of National Quality Framework (NQF) on Pay

The National Quality Framework (NQF) indirectly influences pay within the Children’s Services Award․ Higher quality ratings under the NQF often correlate with services investing in qualified educators․

Increased demand for educators holding Diploma or Bachelor level qualifications‚ driven by NQF requirements‚ impacts pay scales․ Services striving for higher ratings are more likely to attract and retain staff by offering competitive wages aligned with qualifications․

Furthermore‚ the NQF’s focus on professional development encourages ongoing training‚ potentially leading to higher pay brackets as educators upskill and meet quality standards․

Future Trends in Children’s Services Award Pay

Several factors suggest potential upward pressure on Children’s Services Award pay in the coming years․ Increasing demand for early childhood education‚ coupled with workforce shortages‚ will likely drive wage growth․

The ongoing focus on quality improvement‚ spurred by the NQF‚ will continue to incentivize services to invest in highly qualified educators‚ commanding higher salaries․

Advocacy for better pay for early childhood professionals‚ recognizing the vital role they play‚ may lead to future award revisions․ Consideration of a living wage and parity with school teachers are ongoing discussions that could shape future pay trends․

This Children’s Services Award Pay Guide is intended as general information only and does not constitute legal or professional advice․ Award interpretations can be complex‚ and specific circumstances may vary․

Employers should always consult the official Fair Work Ombudsman resources and seek independent legal counsel to ensure full compliance with the Children’s Services Award and relevant legislation․

We disclaim any liability for actions taken based on the information provided herein․ Pay rates and allowances are subject to change; always verify current details with official sources․ Reliance on this guide is at your own risk․

dash rice cooker instructions pdf

Dash Rice Cooker Instructions PDF: A Comprehensive Guide

Discover a detailed resource for your Dash Mini Rice Cooker! This guide provides access to the official PDF manual, recipes, and troubleshooting tips for optimal use․

Understanding Your Dash Mini Rice Cooker

The Dash Mini Rice Cooker simplifies cooking, offering versatility beyond just rice – enjoy oatmeal, soups, stews, and more! Its compact 2-cup capacity is ideal for individuals or small households․

This appliance features a straightforward design with an automatic keep-warm function, ensuring your food remains at the perfect temperature․ The included PDF manual details operation, safety precautions, and a variety of recipes to explore․

Familiarizing yourself with the cooker’s parts and functions, as outlined in the manual, will unlock its full potential for convenient and delicious meals․

Accessing the Official PDF Manual

Locating the official PDF manual for your Dash Mini Rice Cooker is straightforward․ A quick online search for “Dash DRCM200 instruction manual PDF” will yield direct download links from various sources, including the manufacturer’s support website and manual databases․

The comprehensive 40-page PDF, approximately 4․18MB in size, contains detailed instructions, safety guidelines, and recipe ideas;

Downloading and saving this manual ensures you always have access to essential information regarding your appliance’s operation and maintenance, even without an internet connection․

Key Features of the Dash DRCM200

The Dash DRCM200 Mini Rice Cooker boasts several convenient features․ Its compact 2-cup capacity is ideal for individuals or small households․ Versatility extends beyond rice, enabling cooking of oatmeal, soups, stews, quinoa, and even pasta․

A standout feature is the automatic Keep Warm function, maintaining food quality after cooking․ The simple control panel ensures ease of use, while the included measuring cup guarantees accurate rice-to-water ratios․

Its dream blue finish adds a touch of style to any kitchen countertop, making it both functional and aesthetically pleasing․

Important Safety Precautions

Prioritize safety when using your Dash Mini Rice Cooker․ As an electrical appliance, avoid immersing the cooker base in water or other liquids․ Never attempt to repair the appliance yourself; seek professional assistance․

Ensure the cooker is placed on a stable, heat-resistant surface during operation․ Always unplug the cooker when not in use and before cleaning․ Keep the power cord away from hot surfaces to prevent damage․

Exercise caution when handling the hot inner pot and steam vent to avoid burns․

Electrical Safety Guidelines

To ensure safe operation, always use a grounded electrical outlet․ Never operate the Dash Mini Rice Cooker with a damaged cord or plug․ Avoid using extension cords; if necessary, use a heavy-duty extension cord rated for the appliance’s wattage․

Do not operate the cooker outdoors or in damp environments․ Ensure your hands are dry before handling the plug or cooker․ Never attempt to modify the plug in any way․

Regularly inspect the cord for damage and discontinue use if any issues are found․

Preventing Damage to the Appliance

Avoid dropping or subjecting the Dash Mini Rice Cooker to strong impacts․ Do not immerse the appliance, cord, or plug in water or other liquids․ Always ensure the inner pot is properly seated before operation․

Never force the lid open during cooking; allow the steam to release naturally․ Refrain from using abrasive cleaners or scouring pads, as they can damage the non-stick coating․ Proper storage is crucial – keep it in a dry, safe place․

Regular cleaning and maintenance will extend the lifespan of your cooker․

Parts Identification

Familiarize yourself with the Dash Mini Rice Cooker’s components․ Key parts include the outer housing, securely holding everything together; The lid features a steam vent for releasing pressure during cooking․ Inside, you’ll find the removable inner pot, essential for holding and cooking your ingredients․

A measuring cup is typically included, aiding in precise rice-to-water ratios․ Understand the function of each part for safe and efficient operation․ Refer to the PDF manual for a detailed diagram illustrating each component’s location․

Lid and Steam Vent

The lid securely seals the Dash Mini Rice Cooker during operation, trapping steam for efficient cooking․ Crucially, the steam vent allows excess steam to escape, preventing pressure buildup and potential hazards․ Never obstruct the steam vent while the cooker is in use․

Ensure the lid is properly aligned and locked before starting a cooking cycle․ Refer to the PDF manual for specific instructions on lid operation and safety precautions․ Proper lid function is vital for consistent cooking results and safe appliance use․

Inner Pot and Measuring Cup

The non-stick inner pot is essential for cooking within the Dash Mini Rice Cooker, ensuring easy food release and cleanup․ Always use the provided measuring cup to accurately portion rice and water, following the recommended ratios in the PDF manual․

Accurate measurements are key to achieving perfectly cooked rice․ The measuring cup is specifically calibrated for optimal performance with this appliance․ Refer to the manual for guidance on measuring other grains like quinoa or oatmeal․

Getting Started: First-Time Use

Before your first use, thoroughly clean the inner pot, lid, and steam vent with warm, soapy water․ Rinse all components and dry completely․ This removes any manufacturing residue and ensures a fresh start․ Familiarize yourself with the control panel, as detailed in the PDF manual․

A brief test run without rice is recommended to burn off any initial appliance odor․ Consult the instruction manual for specific first-time use instructions and safety precautions before operation․

Cleaning Before Initial Use

Prior to the very first cooking cycle, a meticulous cleaning process is essential․ Remove all packaging materials and wash the inner pot, lid, and steam vent with warm, soapy water․ Ensure a thorough rinse to eliminate any residual manufacturing substances․

Dry all components completely before reassembling․ This initial cleaning safeguards food quality and prevents unwanted odors․ Refer to the PDF manual for dishwasher-safe part confirmation and detailed cleaning guidelines․

Understanding the Control Panel

The Dash Mini Rice Cooker features a simple, one-touch operation control panel․ Locate the “Cook/Warm” button; pressing it initiates the cooking cycle, and it automatically switches to “Keep Warm” afterward․

The PDF manual details indicator lights signifying cooking and warming modes․ Familiarize yourself with these visual cues for seamless operation․ Note that some models may have a slightly different layout, so consulting the manual is crucial for accurate understanding․

Cooking Rice: Step-by-Step Instructions

Begin by rinsing your rice under cold water until the water runs clear․ Then, add the rinsed rice to the inner pot, using the provided measuring cup for accurate portions․ Refer to the PDF manual for the correct rice-to-water ratio – typically 1:1 for white rice․

Secure the lid, ensuring a proper seal, and press the “Cook” button․ The cooker will automatically switch to “Warm” once cooking is complete․ Allow the rice to rest for 10 minutes before fluffing and serving․

Rice to Water Ratio

Achieving perfectly cooked rice hinges on the correct water ratio․ The Dash Mini Rice Cooker PDF manual details specific ratios for various rice types․ Generally, white rice requires a 1:1 ratio – one cup of rice to one cup of water․

For brown rice, a 1:2 ratio is recommended․ Adjustments may be needed based on rice grain length and personal preference․ Always consult the manual for optimal results and experiment to find your ideal consistency․

Cooking White Rice

To cook white rice using your Dash Mini Rice Cooker, begin by rinsing the rice until the water runs clear․ Then, add the rinsed rice and the appropriate amount of water (typically a 1:1 ratio) to the inner pot․

Secure the lid and press the “Cook” button․ The cooker will automatically switch to “Keep Warm” once the rice is cooked․ Allow the rice to rest for 10 minutes before fluffing with a fork․ Refer to the PDF manual for detailed instructions․

Beyond Rice: Versatile Cooking Options

The Dash Mini Rice Cooker isn’t limited to just rice! Explore diverse cooking possibilities, including preparing delicious oatmeal and porridge for a comforting breakfast․ You can also create hearty soups and stews directly within the cooker, simplifying meal preparation․

The PDF manual details instructions for cooking quinoa, pasta, and other grains․ Its 2-cup capacity is ideal for individual portions or small side dishes․ Discover a world of culinary creativity beyond traditional rice cooking!

Cooking Oatmeal and Porridge

Utilize your Dash Mini Rice Cooker for a quick and easy oatmeal or porridge breakfast! The manual provides specific water-to-oatmeal ratios for perfect consistency․ Simply combine rolled oats and water, then select the cook function․

For creamier porridge, consider adding a splash of milk during the final minutes of cooking․ The cooker’s keep-warm function is ideal for maintaining the desired temperature until serving․ Enjoy a warm, wholesome breakfast with minimal effort!

Making Soups and Stews

Expand your culinary options with soups and stews using your Dash Mini Rice Cooker! The manual details how to adapt recipes for this versatile appliance․ Combine your ingredients – vegetables, broth, and protein – directly in the inner pot․

Select the cook function and allow the cooker to simmer your creation․ Remember to stir occasionally to prevent sticking․ The keep-warm function is perfect for maintaining a comforting temperature until mealtime․ Enjoy hearty, homemade soups and stews effortlessly!

Using the Keep Warm Function

The Dash Mini Rice Cooker’s keep-warm function automatically activates after cooking completes, maintaining food at an optimal serving temperature․ This feature is ideal for ensuring meals stay warm for extended periods without overcooking․ The manual specifies the duration of the keep-warm mode, typically several hours․

To maintain food quality, avoid leaving food on keep-warm for excessively long durations․ Regularly check the consistency and moisture levels, adding a splash of liquid if needed․ Enjoy perfectly warmed meals whenever you’re ready!

Duration of Keep Warm Mode

The Dash Mini Rice Cooker’s keep-warm function typically maintains food temperature for several hours, though the exact duration isn’t always explicitly stated in all versions of the PDF manual․ Generally, it can reliably keep rice and other cooked foods warm for up to 2-3 hours without significant quality degradation․

However, prolonged use beyond this timeframe may lead to drying or changes in texture․ It’s recommended to consume the food within a reasonable period for the best taste and safety․ Always refer to your specific model’s manual for precise details․

Maintaining Food Quality

To ensure optimal food quality while using the keep-warm function, it’s best to keep the Dash rice cooker lid closed as much as possible․ This helps retain moisture and prevents the food from drying out․ Stirring occasionally can also distribute heat evenly and prevent sticking․

Avoid leaving food on keep-warm for extended periods, as this can affect texture and flavor․ For best results, consume within a few hours, and always check the food’s temperature before serving to guarantee it remains safe and palatable․

Cleaning and Maintenance

Proper cleaning ensures the longevity of your Dash Mini Rice Cooker․ Many parts, including the inner pot and steam vent, are dishwasher safe for convenient cleaning․ However, always check the PDF manual for specific component instructions․ Avoid abrasive cleaners that could damage the non-stick coating․

For proper storage, ensure all parts are completely dry before reassembling and storing in a cool, dry place․ Regular cleaning prevents buildup and maintains optimal performance, guaranteeing delicious results every time you cook․

Dishwasher Safe Parts

Fortunately, the Dash Mini Rice Cooker offers convenient cleaning options! The inner pot, crucial for cooking, is confirmed to be dishwasher safe, simplifying cleanup after each use․ Additionally, the steam vent is also designed for dishwasher compatibility․ However, always consult the official PDF manual for the most accurate and up-to-date information regarding specific model variations․

Remember to place these parts on the top rack to prevent potential damage during the washing cycle, ensuring their longevity and continued performance․

Proper Storage Techniques

To maximize the lifespan of your Dash Mini Rice Cooker, proper storage is essential․ Ensure the unit is completely cool and dry before storing it in a clean, dry location․ Avoid storing it in damp environments or stacking heavy items on top, which could cause damage․

The inner pot and accessories can be neatly stored inside the cooker itself when not in use․ Refer to the PDF manual for specific guidance on cord storage to prevent tangling and potential hazards․

Troubleshooting Common Issues

Encountering problems with your Dash Mini Rice Cooker? The PDF manual offers solutions to frequent issues․ If rice is too mushy or hard, adjust the water-to-rice ratio as detailed in the instructions․ For a cooker that won’t turn on, verify the power cord connection and outlet functionality․

Consult the manual’s troubleshooting section for further assistance and safety precautions․ Remember to never attempt to repair the appliance yourself; contact customer support for professional help․

Rice is Too Mushy or Too Hard

Experiencing inconsistent rice texture? The Dash Mini Rice Cooker PDF manual addresses this common issue․ Mushy rice typically indicates too much water; reduce the liquid slightly in your next attempt․ Conversely, hard rice suggests insufficient water – increase the amount incrementally․

Precise measurement using the included cup is crucial․ Refer to the manual’s rice-to-water ratio guide for different rice types․ Experimentation may be needed to achieve your preferred consistency․

Cooker Not Turning On

If your Dash Mini Rice Cooker fails to power on, the PDF manual suggests several checks․ First, ensure the power cord is securely plugged into both the cooker and a functioning outlet․ Verify the outlet is receiving power by testing with another device․

Secondly, confirm the inner pot is correctly positioned․ The cooker has a safety mechanism preventing operation without proper pot placement․ Consult the manual’s troubleshooting section for further assistance and safety guidelines․

Recipe Ideas Included in the Manual

The Dash Mini Rice Cooker PDF manual isn’t just about rice! It features a dedicated recipe guide, inspiring users beyond basic white rice․ Discover quick and easy recipes for oatmeal, porridge, soups, and even stews․ Explore cooking options for quinoa and pasta, expanding your culinary possibilities․

The manual unlocks the cooker’s versatility, demonstrating how to utilize its ‘Keep Warm’ function effectively․ These recipes cater to diverse tastes and skill levels, making meal preparation simple and enjoyable․

Quick and Easy Recipes

The Dash Mini Rice Cooker manual boasts a selection of remarkably simple recipes, perfect for busy weeknights․ Expect straightforward instructions for perfectly cooked rice, requiring minimal effort and time․ Beyond rice, find easy oatmeal recipes for a quick breakfast, or simple soup preparations․

These recipes prioritize convenience, utilizing the cooker’s one-touch operation․ The manual’s focus is on delivering delicious meals with minimal fuss, ideal for beginner cooks or anyone seeking a streamlined cooking process․

Exploring Different Grain Options

The Dash Mini Rice Cooker isn’t limited to just white rice; the manual encourages experimentation with various grains․ Discover how to cook quinoa, a protein-rich alternative, or try preparing hearty pasta dishes directly in the cooker․ The guide provides specific water-to-grain ratios for optimal results with each type․

Unlock the versatility of your appliance by venturing beyond traditional rice․ The manual offers guidance on adjusting cooking times and water levels to achieve perfectly cooked grains, expanding your culinary possibilities․

Where to Find Additional Support

For further assistance beyond the PDF manual, Dash provides comprehensive support resources․ Explore their official website for frequently asked questions, troubleshooting guides, and helpful video tutorials; Contact Dash customer service directly via email or phone for personalized assistance with any issues․

Additionally, online communities and forums dedicated to Dash products offer a platform to connect with other users, share tips, and find solutions to common problems․ Utilize these resources to maximize your cooking experience․

round cake serving guide

Round Cake Serving Guide: An Overview

Planning a celebration? This guide details round cake sizes and servings, from intimate gatherings to large parties, ensuring everyone enjoys a delightful slice!

Understanding Cake Serving Sizes

Determining appropriate cake serving sizes involves considering several factors beyond simply the number of guests. Traditional slices are typically around 1.5 x 2 inches, offering a generous portion, but modern trends lean towards smaller, more manageable dessert portions.

The density of the cake significantly impacts serving counts; a light and airy angel food cake will yield more servings than a dense chocolate fudge cake of the same diameter. Furthermore, if a buffet includes other desserts, reducing cake slice sizes is advisable.

Understanding these nuances ensures you order or bake a cake that comfortably accommodates your guests without excessive waste, creating a satisfying and enjoyable experience for all attendees. Careful planning prevents dessert disappointment!

Determining Cake Size Based on Guest Count

Selecting the right cake size hinges on your guest list; 6-inch cakes suit small groups, while 12-inch cakes are ideal for larger celebrations.

6-Inch Round Cake: Ideal for Small Gatherings

A 6-inch round cake is perfectly suited for intimate celebrations, typically serving 8 to 12 guests. This size is excellent for small families, close friends, or a cozy couple’s anniversary. It’s a manageable size for bakers who are newer to cake decorating, offering a less daunting canvas for creative designs.

Consider a 6-inch cake when you’re aiming for a personal touch without excessive leftovers. It’s also a fantastic option if you’re serving other desserts alongside the cake, ensuring a balanced spread. This size allows for a beautiful presentation without being overwhelming, and it’s often a cost-effective choice for smaller events. Don’t underestimate the impact of a perfectly crafted, smaller cake!

8-Inch Round Cake: A Popular Choice for Medium-Sized Parties

The 8-inch round cake strikes a wonderful balance, making it a consistently popular choice for medium-sized gatherings. It comfortably serves 12-16 people, ideal for family birthdays, office celebrations, or casual get-togethers with friends. This size offers ample space for decorative elements, allowing for more elaborate frosting designs and personalized touches.

An 8-inch cake is versatile enough to accommodate various flavors and fillings, from classic vanilla to rich chocolate. It’s a practical size that provides enough cake for everyone to enjoy a generous slice without creating excessive waste. It’s also a great option if you anticipate a few extra guests, offering a little buffer in serving size.

10-Inch Round Cake: Serving Larger Groups

When hosting a sizable event, a 10-inch round cake is an excellent choice, comfortably serving 20-24 guests. This size is perfect for milestone birthdays, larger family reunions, or more substantial parties where a generous dessert offering is desired. The increased surface area allows for more intricate cake decorations and stunning visual presentations.

A 10-inch cake provides a substantial centerpiece and ensures there’s enough to go around, even with second helpings! It’s a practical solution for avoiding the need for multiple smaller cakes. Consider this size when you know you’ll have a crowd eager for a sweet treat, offering a delightful experience for all attendees.

12-Inch Round Cake: For Big Celebrations

For truly grand occasions and exceptionally large guest lists, a 12-inch round cake is the ultimate choice, typically serving 32-40 people. This impressive size is ideal for weddings, large corporate events, or any celebration where a significant dessert centerpiece is desired. It makes a bold statement and provides ample servings for a crowd.

A 12-inch cake allows for elaborate designs, multiple tiers (if desired), and a truly show-stopping presentation. It’s a fantastic option when you want to make a lasting impression and ensure everyone has a chance to indulge in a delicious slice. Planning for leftovers is also wise with this generous size!

Cake Serving Chart: Detailed Breakdown

Explore our comprehensive charts outlining suggested serving sizes for 6, 8, 10, and 12-inch round cakes, ensuring perfect portions for your event!

6-Inch Round Cake Serving Chart

A 6-inch round cake is wonderfully suited for smaller, more intimate celebrations – think family dinners, cozy gatherings with close friends, or a special occasion for just a few. Generally, a 6-inch cake will comfortably yield between 8 to 12 servings, depending on how generously each slice is cut.

For standard dessert portions, aiming for 12 servings is a safe bet. However, if you anticipate guests having larger appetites or enjoying a more substantial slice, planning for 8 servings is more realistic. Consider the overall dessert spread; if other sweets are available, smaller cake portions are perfectly acceptable. This size is also ideal for a small birthday celebration or a quiet anniversary.

Remember to factor in potential seconds!

8-Inch Round Cake Serving Chart

An 8-inch round cake strikes a delightful balance, making it a popular choice for medium-sized parties and gatherings. This versatile size typically serves between 12 and 16 guests, offering a sweet treat for a comfortable group. The exact number of servings depends, of course, on the desired slice size.

If you’re aiming for standard dessert portions, 16 servings are achievable with careful cutting. However, for more generous slices, or if the cake is particularly rich and decadent, planning for 12-14 servings is more practical. Consider the context of the event – a casual birthday party might warrant larger slices than a formal afternoon tea.

This size is perfect for office celebrations or family get-togethers!

10-Inch Round Cake Serving Chart

A 10-inch round cake is an excellent choice when catering to larger groups, comfortably serving between 20 and 24 people. This size provides ample cake for a substantial gathering, ensuring there’s enough to go around for seconds – or for those with a particularly sweet tooth! As with other sizes, serving counts are estimates.

Standard dessert portions allow for 24 servings, while more generous slices will yield around 20. Consider the overall menu; if other desserts are available, guests may opt for smaller cake portions. A beautifully decorated 10-inch cake also makes a stunning centerpiece.

It’s ideal for milestone birthdays or moderately sized celebrations!

12-Inch Round Cake Serving Chart

A 12-inch round cake is truly designed for big celebrations! This substantial size typically serves a generous 28 to 32 guests, making it perfect for weddings, large birthday parties, or any event with a significant headcount. It’s a statement piece that’s sure to impress.

Similar to other sizes, serving estimations depend on portion size. Standard dessert portions allow for 32 servings, while larger, more indulgent slices will yield around 28. If a buffet of desserts is offered, guests may choose smaller portions of cake.

This size is a fantastic choice when you want to ensure everyone gets a piece and potentially have leftovers!

Serving Styles & Portion Sizes

Consider traditional slices versus smaller dessert portions; serving size is affected by other treats offered, influencing how much cake guests will consume.

Traditional Slice vs. Smaller Dessert Portions

Historically, cake has been served in generous, triangular slices, a classic presentation for celebrations. However, modern dessert trends often favor smaller, more manageable portions. This shift accommodates guests who may want to sample multiple desserts or prefer a lighter indulgence.

A traditional slice typically measures around 1.5 to 2 inches wide at the base, offering a substantial serving. Conversely, smaller portions, like those seen with dessert buffets or alongside other sweets, might be 1 to 1.5 inches wide.

Choosing between these styles depends on the event’s formality and the overall dessert spread. A formal wedding might warrant traditional slices, while a casual party could benefit from varied, smaller portions, allowing guests to explore different flavors without overindulging. Ultimately, consider your audience and the desired experience.

Factors Affecting Serving Size (e.g., other desserts)

Determining appropriate cake serving sizes isn’t solely about the cake itself; several factors influence how much each guest will consume. If a dessert buffet features numerous options – cookies, pastries, fruit, and other sweets – guests will naturally take smaller cake portions.

Conversely, if cake is the sole dessert offering, larger slices are expected. The time of day also matters; afternoon teas often feature dainty portions, while evening celebrations may call for more substantial servings.

Consider the preceding meal; a heavy dinner might reduce appetite for a large dessert. Finally, guest demographics play a role – children typically require smaller portions than adults. Adjusting serving sizes based on these factors ensures minimal waste and maximum enjoyment.

Cake Layers and Serving Adjustments

Multi-layered cakes, with fillings and increased height, may yield slightly fewer servings compared to single-layer cakes of the same diameter, so plan accordingly.

Single-Layer Cakes: Simpler Serving

Single-layer round cakes present the most straightforward serving calculations. Because there’s no filling to account for, the serving size is directly related to the cake’s diameter and desired slice size. Generally, a standard serving is considered to be a wedge with a point angle of approximately 45 degrees. This allows for neat, even slices and ensures a reasonable portion for each guest.

For example, a 6-inch single-layer cake typically yields 8-12 servings, while an 8-inch cake can comfortably serve 12-16 people. Remember that these are estimates, and actual servings may vary based on individual appetites and how generously the slices are cut. When serving, a sharp knife and a rotating cake stand can greatly assist in achieving clean, professional-looking slices. Consider marking the cake beforehand to ensure consistent portion sizes.

Multi-Layer Cakes: Adjusting for Height & Filling

Multi-layer round cakes require a slight adjustment to serving estimations. The addition of filling and increased height significantly impacts the overall volume and potential servings. While the base diameter remains a key factor, you must consider the cumulative effect of each layer. A general rule is to increase the serving count by 20-30% compared to a single-layer cake of the same diameter.

For instance, an 8-inch three-layer cake with generous filling could easily serve 18-24 people. The type of filling also matters; denser fillings like buttercream will yield smaller servings than lighter mousses. Precise serving counts are challenging, but careful slicing – ensuring each slice includes a proportionate amount of cake and filling – is crucial for guest satisfaction.

Cake Density & Serving Counts

Cake density dramatically affects portion sizes; light, airy cakes allow for larger servings, while dense cakes, like pound cake, require smaller, richer portions.

Light & Airy Cakes (Angel Food, Chiffon)

Angel food and chiffon cakes, celebrated for their delicate textures and ethereal lightness, present unique serving considerations. Due to their airy structure, these cakes naturally yield more servings per cake size compared to denser varieties. A 6-inch round can comfortably serve 12-16 people, while an 8-inch expands to 16-20.

The substantial volume created by whipped egg whites and minimal fat allows for generous portions without feeling overly rich. However, remember that these cakes often pair beautifully with fresh fruit and light sauces, which can influence individual serving sizes. Consider offering smaller slices if accompanied by other desserts or a full meal. Their delicate nature also means they are often enjoyed as a lighter dessert option.

Dense Cakes (Pound Cake, Chocolate Fudge)

Dense cakes, like rich chocolate fudge or classic pound cake, require a different approach to serving size estimations. Their substantial weight and intense flavors mean smaller portions are generally preferred to avoid overwhelming the palate. A 6-inch round typically serves 8-10 people, while an 8-inch yields 10-14 servings.

These cakes are incredibly satisfying, so guests often require less to feel content. Consider the richness of the cake when planning alongside other desserts; a smaller slice allows room for variety. Dense cakes also hold up well to accompaniments like whipped cream or berries, which can enhance the overall experience without drastically increasing portion sizes. Remember, quality over quantity is key!

Special Considerations: Wedding Cakes

Wedding cakes, often tiered, demand careful planning! Serving counts must account for potential favors, leftovers, and the celebratory nature of the event.

Wedding Cake Serving Guide – Tiered Cakes

Tiered wedding cakes present a unique serving challenge, requiring a slightly different approach than single-layer round cakes. Generally, a three-tiered cake can comfortably serve 100-150 guests, assuming standard 1×1 inch slices. However, this is a broad estimate, heavily influenced by tier sizes and desired portion generosity.

Consider the overall dessert spread; if multiple options are available, smaller cake portions are acceptable. A common guideline suggests 1-2 servings per guest, factoring in potential second slices or those who prefer other treats. Accurately calculating servings ensures a delightful experience for all attendees, avoiding shortages or excessive waste; Remember to consult with your baker for personalized recommendations based on your specific cake design and guest count.

Accounting for Favors & Leftovers

Beyond guest servings, factor in potential wedding favors involving cake – small boxed slices are a popular choice. Allocate approximately 5-10% of the total cake for these favors, depending on your guest list and favor plans. Don’t forget to anticipate leftovers! Many couples desire to keep the top tier for their first anniversary, requiring a dedicated portion.

Adding an extra 5-10% to your initial serving estimate accommodates unexpected guests or those wanting second slices. Careful planning minimizes waste and ensures a memorable experience. Consider donating any significant remaining cake to a local charity or shelter, spreading the joy beyond the celebration.

Beyond the Slice: Alternative Serving Methods

For variety, consider charming cake pops or mini desserts alongside the round cake, or opt for individually portioned cupcakes for easy enjoyment!

Cake Pops & Mini Desserts

Elevate your dessert spread by incorporating delightful cake pops and miniature desserts alongside your round cake. These bite-sized treats offer a playful alternative, providing guests with variety and portion control. Cake pops, crafted from crumbled cake and frosting, coated in chocolate, are visually appealing and easy to handle.

Mini desserts, such as cheesecakes, tarts, or mousse cups, add sophistication and cater to diverse preferences. They’re particularly useful for guests who prefer smaller indulgences or want to sample multiple flavors. Utilizing these options complements the main cake, reducing potential waste and enhancing the overall dessert experience. A well-rounded dessert table ensures there’s something for everyone to savor!

Cupcakes as a Serving Alternative

Considering cupcakes as an alternative to a traditional round cake offers convenience and individual portion control. Cupcakes eliminate the need for cutting, simplifying serving and minimizing mess. They also allow for a wider range of flavor combinations, offering guests more choices without requiring multiple cake layers.

Decorated cupcakes can be visually stunning, mirroring the aesthetic of a layered cake. They’re especially practical for events with varying guest counts, as you can easily adjust the number of cupcakes baked. Furthermore, cupcakes are portable and easy for guests to enjoy while mingling. This approach provides a delightful and fuss-free dessert option, perfectly suited for casual gatherings or larger celebrations.

intimate apparel play pdf

Intimate Apparel Play: A Comprehensive Overview

Finding a readily available “Intimate Apparel Play PDF” can be challenging, often requiring purchase through theatrical publishers or digital book retailers like Amazon.

Historical Context of the Play

“Intimate Apparel” is deeply rooted in the socio-economic realities of early 20th-century New York City, specifically 1905. The play vividly portrays the lives of African American women navigating a landscape of limited opportunities and pervasive racial discrimination. Esther’s profession as a seamstress highlights the common employment avenues available to Black women at the time – largely confined to domestic service and garment work.

The play’s setting within the Tenderloin district, a notorious red-light district, underscores the precariousness and vulnerability faced by many women seeking economic survival. Simultaneously, the presence of immigrant communities, like George Armstrong’s arrival from Barbados, reflects the broader immigration patterns reshaping the city’s demographics. Accessing a “Intimate Apparel Play PDF” allows for deeper study of these historical nuances woven into Nottage’s narrative.

Lynn Nottage: The Playwright

Lynn Nottage is a Pulitzer Prize-winning playwright celebrated for her insightful portrayals of marginalized communities, particularly African American women. Her work frequently explores themes of identity, race, and economic disparity with remarkable sensitivity and nuance. Nottage’s dedication to research and authentic representation is evident in “Intimate Apparel,” meticulously crafted to reflect the historical realities of its setting and characters.

She skillfully blends dramatic storytelling with social commentary, creating plays that are both emotionally resonant and intellectually stimulating. Finding an “Intimate Apparel Play PDF” provides access to her original script, revealing her masterful use of dialogue and character development. Nottage’s ability to adapt “Intimate Apparel” into an opera demonstrates her versatility as a storyteller.

The Genesis of “Intimate Apparel” ─ From Play to Opera

“Intimate Apparel” initially gained recognition as a critically acclaimed play, lauded for its poignant narrative and compelling characters. However, its journey didn’t end there. Composer Ricky Ian Gordon envisioned the story’s potential for operatic adaptation, recognizing an “epic and expansive” quality within Esther’s life. He invited Nottage to collaborate, resulting in her first libretto.

Accessing an “Intimate Apparel Play PDF” allows a comparative study of the original script and the operatic libretto, highlighting Nottage’s adaptation process. The transition from spoken word to song amplified the emotional depth and thematic resonance. Gordon’s musical interpretation, guided by Nottage, transformed the play into a powerful operatic experience, expanding its reach and impact.

Setting and Time Period: 1905 New York City

The play is vividly set in 1905 New York City, a period of significant immigration and social stratification. Esther’s world encompasses both the opulent Fifth Avenue and the notorious Tenderloin district, a landscape of stark contrasts. Finding an “Intimate Apparel Play PDF” provides a textual immersion into this historical context, revealing details about the era’s social fabric.

The Tenderloin, depicted in the play, was a red-light district, offering a glimpse into the lives of marginalized women. Simultaneously, Esther caters to wealthy clientele, highlighting economic disparity. Studying the play’s setting, aided by a PDF version, illuminates the challenges and opportunities faced by immigrants and women during this transformative period in American history.

Characters in “Intimate Apparel”

Accessing an “Intimate Apparel Play PDF” allows detailed character study – Esther, Mr. Marks, George, and Mrs. Watson – and their interwoven narratives.

Esther: The Protagonist and Seamstress

Exploring Esther’s character is significantly aided by access to the “Intimate Apparel Play PDF.” This allows for a close reading of her dialogue and stage directions, revealing her quiet strength and yearning for connection. The PDF showcases her profession as a seamstress in 1905 New York, crafting intimate garments for diverse clientele – from wealthy socialites to those in the Tenderloin district.

Her internal struggles, her shyness, and her dreams of owning a beauty salon are all vividly portrayed within the text. The PDF facilitates understanding her complex relationships with Mr. Marks, George Armstrong, and Mrs. Watson, and how these interactions shape her journey towards self-discovery and empowerment. It’s through the script itself that Esther’s nuanced personality truly comes alive, offering a profound insight into a woman navigating societal constraints and personal desires.

Mr. Marks: The Jewish Fabric Merchant

Analyzing Mr. Marks’ character benefits greatly from studying the “Intimate Apparel Play PDF.” The script reveals his complex nature – a successful businessman, a recent immigrant, and a man grappling with loneliness. The PDF allows detailed examination of his interactions with Esther, showcasing his initial practicality and eventual vulnerability.

His proposal of marriage, and the cultural and religious differences that underpin it, are clearly presented within the text. Access to the PDF illuminates his motivations and internal conflicts, demonstrating how he represents a different facet of the immigrant experience in early 20th-century New York. It’s through the dialogue and stage directions that his character’s depth and contradictions are fully realized, offering a nuanced understanding of his role in Esther’s life and the play’s broader themes.

George Armstrong: The Barbadian Immigrant

Examining George Armstrong’s portrayal requires close reading of the “Intimate Apparel Play PDF.” The script details his charm and allure, contrasted sharply with the revelation of his hidden life. The PDF provides access to his letters to Esther, revealing a carefully constructed persona designed to win her affection.

Analyzing these communications within the full context of the play, as presented in the PDF, exposes the deception at the heart of their relationship. It highlights the dangers faced by women seeking connection through correspondence and the vulnerabilities exploited by men like George. The PDF allows for a thorough understanding of his motivations and the tragic consequences of his choices, solidifying his role as a cautionary figure within the narrative.

Mrs. Watson: The Prostitute and Esther’s Friend

Accessing the “Intimate Apparel Play PDF” is crucial for understanding the complex character of Mrs. Watson. The script, available in PDF format, reveals her as a pragmatic and worldly woman offering Esther a contrasting perspective on intimacy and survival. The PDF showcases her sharp wit and surprisingly tender friendship with Esther, despite their vastly different lives.

A detailed reading of the PDF demonstrates how Mrs. Watson serves as a foil to Esther’s naiveté, providing a realistic, often harsh, view of relationships and societal expectations. The PDF’s dialogue highlights her resilience and agency within a restrictive environment. Her story, fully realized within the play’s text, challenges conventional notions of morality and female empowerment.

Themes Explored in the Play

The “Intimate Apparel Play PDF” illuminates themes of race, class, and female empowerment in early 20th-century New York, offering rich textual analysis.

Empowerment of Women in the Early 20th Century

Accessing the “Intimate Apparel Play PDF” provides a crucial lens through which to examine the nuanced portrayal of female empowerment during a restrictive era. Esther’s journey, as detailed within the text, showcases a woman navigating societal constraints while striving for economic independence through her seamstress business.

The play powerfully depicts Esther’s quiet resilience and determination to control her own destiny, despite facing limitations imposed by race, class, and gender. The PDF allows for close study of how Nottage illustrates Esther’s internal conflicts and her gradual assertion of agency. It highlights the limited options available to women at the time, and Esther’s attempts to carve out a space for herself within those boundaries.

Furthermore, the text reveals how Esther’s craft – creating intimate apparel – ironically becomes a source of both vulnerability and strength, symbolizing her own desires and the complexities of female sexuality.

Race and Identity in New York City

Studying the “Intimate Apparel Play PDF” reveals a vivid depiction of early 20th-century New York City, a melting pot of cultures grappling with racial prejudice and evolving identities. The play intricately portrays the experiences of African American, Jewish, and Barbadian immigrant communities, highlighting their distinct struggles and shared vulnerabilities.

Through the text, Nottage explores the complexities of racial dynamics within the Tenderloin district, a neighborhood characterized by both opportunity and exploitation; The PDF allows for detailed analysis of how characters navigate racial barriers in their personal and professional lives, revealing the pervasive impact of discrimination on their aspirations and relationships.

Esther’s identity as a Black woman in a segregated society is central to the narrative, and the play’s text illuminates the challenges she faces in asserting her dignity and agency within a racially biased system.

The Complexities of Intimacy and Relationships

Examining the “Intimate Apparel Play PDF” unveils a nuanced exploration of intimacy, revealing its multifaceted nature beyond mere physical connection. Nottage masterfully portrays relationships built on longing, loneliness, and the search for genuine connection in a restrictive societal context.

The play’s text dissects the power dynamics inherent in Esther’s relationships with Mr. Marks and George Armstrong, exposing the vulnerabilities and expectations that shape their interactions. The PDF allows for close reading of dialogue and stage directions, revealing the unspoken desires and emotional complexities driving each character.

Furthermore, the play challenges conventional notions of intimacy, showcasing the unconventional bond between Esther and Mrs. Watson, a testament to female solidarity and shared experiences.

Social Class and Economic Disparity

Analyzing the “Intimate Apparel Play PDF” reveals a stark depiction of social stratification and economic hardship in early 20th-century New York City. Nottage highlights the vast chasm between the affluent clientele Esther serves and her own precarious economic existence as a seamstress.

The play’s text meticulously illustrates how class dictates access to opportunity, agency, and even intimacy. Esther’s aspirations for independence are constantly thwarted by her limited financial resources and societal expectations. The PDF allows for detailed examination of how characters navigate these constraints.

Moreover, the play exposes the exploitative labor practices prevalent at the time, particularly for immigrant women and domestic workers, underscoring the systemic inequalities of the era.

Plot Summary and Key Events

The “Intimate Apparel Play PDF” details Esther’s journey, from building a lingerie business to navigating complex relationships and ultimately, self-discovery in 1905 NYC.

Esther’s Lingerie Business

The “Intimate Apparel Play PDF” vividly portrays Esther’s entrepreneurial spirit as a skilled seamstress in 1905 New York City. She meticulously crafts exquisite lingerie, catering to a diverse clientele – from the opulent ladies of Fifth Avenue to the women of the Tenderloin district’s bordellos.

This duality highlights the social stratification of the era and Esther’s unique position within it. The play, accessible through the PDF, demonstrates how her craft isn’t merely a profession, but a source of pride and independence.

Esther’s business represents her attempt to create a life of dignity and financial stability, a stark contrast to the limited opportunities available to African American women at the time. The PDF reveals how her intimate creations become symbolic of the desires and vulnerabilities of her customers.

The Arrival of George Armstrong and the Correspondence

The “Intimate Apparel Play PDF” details the pivotal moment when George Armstrong enters Esther’s life, initiating a long-distance courtship through letters. He’s a Barbadian immigrant working on the Panama Canal, and their correspondence blossoms, fueled by shared loneliness and a longing for connection.

The PDF showcases how these letters become Esther’s escape, offering a vision of romance and a potential future beyond her solitary existence. However, the play subtly foreshadows the complexities and potential deception within this relationship.

The intimacy built through words contrasts sharply with the physical distance, creating dramatic irony. The PDF reveals how Esther invests her hopes and dreams into George, unaware of the truths he conceals.

Mr. Marks’ Proposal and Esther’s Dilemma

The “Intimate Apparel Play PDF” vividly portrays the contrasting proposals Esther receives, creating a central conflict. Mr. Marks, the Jewish fabric merchant, offers a practical, stable marriage – a business partnership as much as a romantic union. He represents security and a place within the established New York community.

However, Esther grapples with her feelings for George Armstrong, fueled by the passionate letters detailed within the PDF. This presents a profound dilemma: choose the safe, predictable path with Mr. Marks, or risk everything for a potentially illusory romance with George?

The PDF highlights Esther’s internal struggle, showcasing her desire for both love and independence, caught between societal expectations and personal longing.

The Revelation of George’s Past

The “Intimate Apparel Play PDF” dramatically unveils George Armstrong’s hidden life, shattering Esther’s idealized vision of him. The discovery of his existing wife and children in Barbados is a devastating blow, meticulously detailed within the script available in the PDF format.

This revelation exposes the deception at the heart of their correspondence, highlighting the vulnerability Esther experienced while opening her heart. The PDF emphasizes the power imbalance and the exploitation of her trust.

The play, as presented in the PDF, uses this moment to explore themes of illusion versus reality, and the dangers of seeking intimacy based on incomplete information, leaving Esther heartbroken and disillusioned.

Analyzing the Play’s Structure and Style

The “Intimate Apparel Play PDF” allows close study of Nottage’s use of dramatic irony, symbolism—particularly lingerie—and nuanced dialogue to build character depth.

Dramatic Irony and Foreshadowing

Accessing the “Intimate Apparel Play PDF” facilitates a detailed examination of Nottage’s masterful employment of dramatic irony and foreshadowing. The audience often possesses knowledge that Esther lacks, creating tension as we anticipate the consequences of her choices. For instance, hints about George Armstrong’s past are subtly woven into their correspondence, creating a sense of unease.

This technique heightens the emotional impact of the revelations later in the play. The symbolic weight of the lingerie Esther creates also foreshadows the complexities of intimacy and the potential for both fulfillment and disappointment. Studying the text directly, through a PDF version, allows for careful tracking of these subtle cues and a deeper understanding of Nottage’s dramatic craft. The play’s structure deliberately builds suspense, relying on the audience’s awareness to amplify the tragic elements of Esther’s journey.

Symbolism in “Intimate Apparel” (Lingerie as a Motif)

A “Intimate Apparel Play PDF” reveals the central role of lingerie as a powerful and multifaceted motif. Esther’s craft isn’t merely a profession; it’s a symbolic representation of her own desires for intimacy and connection. She creates beautiful garments for others, yet struggles to find fulfillment in her own life.

The lingerie embodies both vulnerability and empowerment, reflecting the complex position of women in 1905 New York. Each piece she sews carries a story, mirroring the hidden lives and longings of her clientele. Access to the full text allows for tracing how the motif evolves, becoming increasingly poignant as Esther navigates her relationships. The play cleverly uses this symbol to explore themes of sexuality, social class, and the search for identity.

The Use of Dialogue and Language

Examining an “Intimate Apparel Play PDF” highlights Nottage’s masterful use of dialogue to reveal character and social context. Each character speaks with a distinct voice, reflecting their background and status. Esther’s reserved language contrasts sharply with Mrs. Watson’s bluntness and George’s poetic pronouncements.

The play’s language is richly textured, incorporating period vernacular and subtle nuances of class and race. Nottage skillfully employs dialect to create authenticity and deepen our understanding of the characters’ inner lives. A close reading of the text, facilitated by a PDF version, reveals how language functions as a tool of both connection and alienation, shaping the characters’ interactions and ultimately, their destinies.

“Intimate Apparel” as a Reflection of American History

Accessing an “Intimate Apparel Play PDF” allows study of how the work portrays early 1900s immigration, domestic work, and the Tenderloin District’s social realities.

Immigration Patterns in Early 1900s New York

The play vividly reflects the diverse immigration landscape of 1905 New York City, a period marked by significant influxes from various regions. Finding an “Intimate Apparel Play PDF” facilitates deeper analysis of how Nottage portrays these patterns through characters like George Armstrong, a Barbadian immigrant.

His presence highlights the experiences of Caribbean newcomers seeking opportunities in America. Simultaneously, Mr. Marks, the Jewish fabric merchant, represents the established Eastern European Jewish community. The play doesn’t merely present immigration as a backdrop; it explores the challenges, hopes, and cultural clashes experienced by these individuals.

Access to the play’s text, through resources like a PDF, allows for detailed examination of dialogue and stage directions revealing the socio-economic conditions that shaped immigrant lives during this transformative era.

The Role of Seamstresses and Domestic Workers

“Intimate Apparel” powerfully illuminates the often-overlooked contributions and struggles of seamstresses and domestic workers in early 20th-century New York; Esther, the protagonist, embodies this workforce, crafting intimate garments for women across the social spectrum. Locating an “Intimate Apparel Play PDF” allows for focused study on how Nottage depicts the economic realities faced by these women.

Their labor was essential yet undervalued, offering limited opportunities for advancement. The play showcases the precariousness of their employment and the societal expectations placed upon them. Accessing the full text reveals nuanced portrayals of their resilience and quiet dignity.

Furthermore, it highlights the intersection of race, class, and gender within this labor force, providing a critical lens on American history.

The Social Landscape of the Tenderloin District

Nottage’s “Intimate Apparel” vividly portrays the complex social landscape of New York City’s Tenderloin District in 1905 – a notorious area known for its brothels and diverse immigrant population. A readily available “Intimate Apparel Play PDF” facilitates a deeper understanding of this setting and its impact on the characters’ lives.

The district represented a confluence of opportunity and exploitation, attracting those seeking a new life alongside those forced into marginalized circumstances. The play doesn’t shy away from depicting the realities of prostitution and the economic forces driving women into it.

Studying the play reveals the district’s unique blend of cultures and the challenges faced by newcomers navigating a harsh urban environment;

Resources for Studying the Play

Locating an “Intimate Apparel Play PDF” proves difficult; consider purchasing editions from theatrical publishers or exploring digital book platforms for access.

Finding the “Intimate Apparel Play PDF”

Securing a free, legal “Intimate Apparel Play PDF” can be surprisingly elusive. While a quick internet search yields numerous results, many links lead to subscription services, previews, or potentially unauthorized copies. Obtaining the play text often necessitates a purchase.

Reputable sources include Samuel French (Concord Theatricals), a primary publisher of plays, and major online booksellers like Amazon, where both physical copies and digital editions (eBooks) are available. University libraries with extensive drama collections may also offer access. Be cautious of websites promising free downloads, as these can pose security risks or violate copyright laws.

Exploring academic databases through educational institutions might uncover scholarly articles referencing the play, potentially including excerpts. Remember to prioritize legal and ethical access when researching and studying Lynn Nottage’s compelling work.

Available Editions of the Play (Book Format)

Numerous editions of Lynn Nottage’s “Intimate Apparel” are readily available in book format. Theatre Communications Group (TCG) publishes a standard edition, frequently used in academic settings and by theatre companies. Amazon.com offers both new and used copies, alongside Kindle eBook versions for digital access.

A combined edition featuring “Intimate Apparel” alongside another Nottage play, “Fabulation,” is also published by TCG, providing excellent value for those interested in exploring her broader body of work. These editions typically include insightful forewords and critical analyses, enhancing the reading experience.

Checking with local bookstores and library systems can reveal further availability. Consider exploring used book retailers for more affordable options. The ISBN-13 for the combined edition is 978-1559362795, aiding in specific searches.

Critical Essays and Scholarly Articles

While a direct “Intimate Apparel Play PDF” of critical analyses is less common, extensive scholarship exists. Databases like JSTOR, Project MUSE, and academic search engines provide access to numerous scholarly articles dissecting the play’s themes. These often explore the empowerment of women, racial identity, and socio-economic disparities depicted within the narrative.

Essays frequently analyze Nottage’s masterful use of dramatic irony and symbolism, particularly the significance of lingerie as a central motif. Research often contextualizes the play within the historical landscape of early 20th-century New York City, examining immigration patterns and the lives of seamstresses.

University libraries and online academic resources are invaluable for locating these critical perspectives, offering in-depth interpretations beyond the play’s text itself.

scag manuals

Scag Manuals: A Comprehensive Guide

Scag power equipment demands proper care, and authentic manuals – operator’s, service, and parts – are crucial for maintenance, repair, and optimal performance.

Scag Power Equipment has established itself as a leading manufacturer of professional-grade, high-quality outdoor power equipment. Renowned for durability and performance, Scag specializes in zero-turn riding mowers, stand-on mowers, walk-behind models, and even mini skid steers. Understanding your Scag machine begins with familiarizing yourself with its specific documentation.

These machines are engineered for demanding applications, requiring diligent maintenance and, occasionally, skilled repairs. Accessing the correct manual – whether for operation, servicing, or identifying parts – is paramount to ensuring longevity and maximizing the investment in your Scag equipment. Proper use and care, guided by official resources, are essential.

Why Use Official Scag Manuals?

Official Scag manuals are indispensable for several critical reasons. They provide detailed, accurate instructions specific to your model, ensuring safe and effective operation. Utilizing these resources minimizes the risk of damage to your equipment and potential injury. Furthermore, official documentation outlines precise maintenance schedules and procedures, preserving your machine’s performance.

Attempting repairs or maintenance without the correct manual can lead to costly mistakes and void warranties. Authentic Scag resources guarantee access to the correct parts lists and diagrams, streamlining repairs. Investing in understanding your equipment through official manuals translates to enhanced longevity and optimized functionality.

Types of Scag Manuals Available

Scag offers three primary manual types: operator’s guides for basic use, service manuals for in-depth repairs, and parts manuals for component identification.

Operator’s Manuals: Understanding Basic Operation

Operator’s manuals are your first point of reference for safely and effectively using your Scag equipment. These guides provide essential instructions on starting, operating, and stopping the machine, covering pre-operation checks and routine procedures.

They detail critical safety precautions and warnings to prevent accidents and ensure user well-being. Understanding the controls, adjustments, and proper techniques outlined in the manual is paramount.

Scag emphasizes reading the manual completely, alongside any accompanying documentation, before initial use. These manuals are designed to familiarize operators with the specific features and functionalities of their mower, promoting responsible and efficient operation.

Service Manuals: In-Depth Repair Procedures

Service manuals unlock the complexities of Scag equipment repair, offering detailed, step-by-step instructions for diagnosing and resolving mechanical issues. These comprehensive guides are intended for qualified technicians, providing in-depth information on disassembly, repair, and reassembly procedures.

They include detailed diagrams, specifications, and torque values to ensure accurate and safe repairs. Scag service manuals cover a wide range of maintenance tasks, from engine overhauls to hydraulic system repairs, empowering skilled users to maintain peak performance.

Access to these manuals is vital for professional service and ensuring the longevity of your Scag machine.

Parts Manuals: Identifying Components

Scag parts manuals are essential resources for identifying specific components within your Scag power equipment. These manuals utilize detailed exploded-view diagrams and comprehensive parts lists, enabling accurate identification of every nut, bolt, and assembly.

Whether you’re ordering replacement parts for routine maintenance or undertaking a complex repair, a parts manual ensures you obtain the correct components. They streamline the ordering process and minimize downtime, crucial for professional landscaping operations;

Proper part identification, guided by these manuals, contributes to efficient repairs and extends the life of your Scag equipment.

Locating Your Scag Manual

Scag manuals are readily accessible through the model and serial number, Scag’s official website, and various third-party online manual databases.

Using the Model and Serial Number

Locating the correct Scag manual hinges on having your equipment’s complete model and serial number. This information is vital for downloading the precise operator’s, service, or parts manual tailored to your specific machine. Typically, you’ll find this data on a plate affixed to the mower’s frame, often near the engine or within the operator’s compartment.

Without the complete model and serial number, identifying the correct manual becomes significantly more challenging. Scag emphasizes the importance of this detail to ensure users access accurate instructions and diagrams for their particular mower. A parts list is often included at the rear of the manual, further highlighting the need for precision.

Scag’s Official Website Resources

Scag’s official website serves as a primary hub for accessing authentic manuals and resources. The site offers a dedicated section for manuals and parts lists, allowing users to filter by product type – including zero-turn mowers, stand-on mowers, and walk-behind models. You can find operator’s manuals, service manuals, and parts manuals readily available for download.

Beyond manuals, Scag provides valuable resources like maintenance tips, product recalls, and brochures. These online resources enhance equipment longevity and ensure optimal mower performance. Utilizing the official website guarantees access to the most current and accurate documentation for your Scag power equipment.

Third-Party Manual Databases

While Scag’s official website is the preferred source, several third-party databases host Scag manuals. Platforms like ManualsBase and ManualsLib offer collections of user manuals, including those for Scag power equipment. These databases can be useful when searching for older or less readily available documentation. However, verifying the accuracy and version of the manual is crucial.

Users should exercise caution when utilizing these resources, as manuals may not always be up-to-date or complete. Always cross-reference information with Scag’s official resources whenever possible to ensure proper maintenance and safe operation of your mower.

Understanding Manual Sections

Scag manuals detail vital safety precautions, comprehensive maintenance schedules, and effective troubleshooting steps for common issues, ensuring optimal equipment lifespan.

Safety Precautions and Warnings

Scag manuals prominently feature critical safety precautions and warnings to prevent injury during operation and maintenance. These sections emphasize the importance of reading the entire manual before use, understanding potential hazards, and wearing appropriate personal protective equipment.

Specific warnings cover topics like blade safety – always disconnecting the spark plug before working near the blades – fuel handling, and hydraulic system pressures. Manuals also detail safe operating procedures, emphasizing the need to avoid bystanders and maintain a safe operating speed. Ignoring these warnings can lead to severe injury or equipment damage, highlighting the necessity of diligent adherence to all safety guidelines provided within the manual.

Maintenance Schedules

Scag manuals provide detailed maintenance schedules, crucial for preserving equipment longevity and performance. These schedules outline tasks based on operating hours or time intervals, ensuring proactive care. Common items include regular engine oil and filter changes, blade inspections and sharpening, and hydraulic system checks.

Manuals specify lubrication points, recommended fluid types, and torque specifications. Adhering to these schedules prevents premature wear, identifies potential issues early, and minimizes costly repairs. Consistent maintenance, as outlined in the manual, guarantees optimal cutting quality and extends the life of your Scag power equipment, maximizing your investment.

Troubleshooting Common Issues

Scag manuals dedicate sections to troubleshooting frequent problems, empowering owners and technicians to diagnose and resolve issues efficiently. These guides cover symptoms like engine starting difficulties, uneven cutting, hydraulic system malfunctions, and blade engagement problems.

Detailed diagnostic steps, accompanied by diagrams, help pinpoint the root cause. Manuals often include flowcharts to guide users through the process, suggesting potential solutions and necessary repairs. Utilizing these troubleshooting resources minimizes downtime, reduces repair costs, and ensures your Scag equipment operates reliably. Always prioritize safety and consult a qualified technician for complex issues.

Scag Mower Specific Manuals

Scag provides dedicated manuals for each mower type – Zero-Turn (Turf Tiger, Cheetah), Stand-On, Walk-Behind, and Mini Skid Steers – ensuring precise guidance.

Zero-Turn Riding Mowers Manuals (Turf Tiger, Cheetah)

Scag’s Zero-Turn Riding Mower manuals, specifically for models like the Turf Tiger and Cheetah, are essential resources for owners and technicians. These comprehensive guides detail operation, maintenance schedules, and in-depth repair procedures tailored to these high-performance machines.

Operators will find clear instructions on safely operating the mower, understanding controls, and performing routine checks. Service manuals provide detailed breakdowns for troubleshooting, diagnostics, and component replacement. Parts manuals assist in accurately identifying and ordering replacement parts, maximizing efficiency during repairs. Accessing the correct manual, using the model and serial number, ensures compatibility and accurate information for your specific mower.

Stand-On Mowers Manuals

Scag Stand-On Mower manuals are vital for ensuring the longevity and peak performance of these professional-grade machines. These resources cover a broad spectrum of information, from initial setup and safe operation to detailed maintenance and complex repair procedures.

Operators will benefit from clear guidance on utilizing the stand-on platform, understanding control functions, and adhering to safety precautions. Service manuals offer step-by-step instructions for diagnosing issues and performing repairs, while parts manuals simplify component identification and ordering. Utilizing the correct manual, identified by the mower’s model and serial number, is crucial for accurate and effective servicing.

Walk-Behind Mowers Manuals

Scag Walk-Behind Mower manuals provide essential guidance for owners and technicians alike, ensuring safe and efficient operation and maintenance. These manuals detail everything from pre-operational checks and starting procedures to detailed troubleshooting and repair instructions.

Operator’s manuals emphasize safe operating practices, while service manuals offer in-depth procedures for engine repair, blade maintenance, and drive system adjustments. Parts manuals are invaluable for identifying and replacing components. Accessing the correct manual, using the mower’s specific model and serial number, guarantees accurate information for optimal performance and extended equipment life.

Stand-On Mini Skid Steers Manuals

Scag Stand-On Mini Skid Steer manuals are vital resources for maximizing the performance and longevity of these versatile machines. These comprehensive guides cover everything from initial setup and safe operation to detailed maintenance and repair procedures.

Operator’s manuals clearly outline safety precautions and operating instructions, while service manuals provide in-depth troubleshooting and repair information for hydraulic systems, engines, and other critical components. Parts manuals simplify component identification and replacement. Utilizing the correct manual, identified by the machine’s model and serial number, ensures accurate guidance for efficient operation and upkeep.

Maintenance Procedures Based on Manuals

Scag manuals detail essential procedures like oil changes, filter replacements, blade sharpening, and hydraulic system checks, ensuring peak mower performance and longevity.

Engine Maintenance (Oil Changes, Filter Replacements)

Scag engine maintenance, as outlined in your operator’s manual, is paramount for reliable operation. Regular oil changes, using the manufacturer’s recommended grade, prevent wear and tear on critical components. The manual specifies intervals based on operating conditions – more frequent changes are needed in dusty or demanding environments.

Air filter replacements are equally vital, ensuring clean air intake for efficient combustion. A clogged filter restricts airflow, reducing power and increasing fuel consumption. Fuel filters should also be periodically replaced to prevent contaminants from reaching the engine. Always consult your specific Scag manual for detailed instructions and recommended parts, guaranteeing proper engine health and extending its lifespan.

Blade Maintenance (Sharpening, Replacement)

Scag mower blade maintenance, detailed in your manual, directly impacts cut quality and mower performance. Regularly sharpening blades ensures a clean, precise cut, preventing grass tearing and promoting healthier turf. Dull blades cause the engine to work harder, increasing fuel consumption and stress on the system.

Your manual provides guidance on sharpening angles and techniques. Inspect blades frequently for damage – cracks, bends, or excessive wear necessitate replacement. Always replace blades in sets to maintain balance, preventing vibration and potential damage to the mower deck. Following the manual’s instructions ensures safe and effective blade care, maximizing cutting efficiency and prolonging blade life.

Hydraulic System Maintenance

Scag mowers rely on robust hydraulic systems for smooth operation, and your manual outlines essential maintenance procedures. Regularly check hydraulic fluid levels, ensuring they are within the specified range. Inspect hoses and fittings for leaks or damage, addressing any issues promptly to prevent fluid loss and system failure.

The manual details recommended fluid types and change intervals. Filter replacement is crucial for maintaining fluid cleanliness and protecting hydraulic components. Proper maintenance extends the life of the hydraulic system, ensuring consistent performance and preventing costly repairs. Ignoring these steps can lead to decreased efficiency and potential downtime.

Scag Service and Support

Scag provides extensive support through authorized service dealers and direct customer support, ensuring access to expertise and assistance with manuals.

Finding Authorized Scag Service Dealers

Locating a qualified Scag service dealer is essential for professional maintenance and repairs, ensuring your equipment operates at peak efficiency. Scag’s official website features a comprehensive dealer locator tool, allowing you to search by zip code or location to find nearby authorized service centers.

These dealers possess the necessary expertise, genuine Scag parts, and access to the latest manuals and technical information. Utilizing an authorized dealer guarantees that your Scag equipment is serviced by trained technicians who understand the intricacies of your specific model. They can assist with everything from routine maintenance, like oil changes and blade sharpening, to more complex repairs guided by official service manuals.

Contacting Scag Customer Support

Scag provides multiple avenues for customers needing assistance with their equipment or manuals. Direct contact with Scag customer support can resolve questions regarding specific manual content, locating the correct documentation for your model, or understanding troubleshooting steps.

Their official website offers contact forms and phone numbers for various departments, including parts, service, and general inquiries. When reaching out, having your mower’s model and serial number readily available will expedite the process. Scag prioritizes customer satisfaction and aims to provide prompt and helpful support, ensuring you have the resources needed to maintain and operate your equipment effectively, referencing relevant manual sections.

Digital vs. Physical Manuals

Scag offers both digital and physical manuals; digital versions provide easy access and searchability, while physical copies offer offline convenience and durability.

Benefits of Digital Manuals

Digital Scag manuals offer numerous advantages for owners and technicians. Immediate access is a key benefit – no waiting for shipping or searching through piles of paper. These manuals are readily available on smartphones, tablets, and computers, providing convenience in the field or workshop.

Furthermore, digital formats enable powerful search functions, quickly locating specific information regarding maintenance, troubleshooting, or parts identification. Many digital manuals include interactive diagrams and schematics, enhancing understanding. Updates and revisions are easily implemented, ensuring users always have the most current information.

Environmentally friendly, digital manuals reduce paper consumption, contributing to sustainability. They also allow for easy backup and sharing, protecting against loss or damage. Accessing Scag’s official website provides a reliable source for authentic digital documentation.

Advantages of Physical Manuals

Despite the rise of digital resources, physical Scag manuals retain significant value for many users. A tangible copy provides a reliable resource independent of power or internet connectivity, crucial when working remotely. Some technicians prefer the tactile experience of flipping through pages and making handwritten notes directly in the manual.

Physical manuals often withstand harsh environments better than electronic devices, resisting damage from dust, moisture, or impacts. They offer a clear, uncluttered presentation of information, free from digital distractions. For those less comfortable with technology, a printed manual can be more accessible and user-friendly.

Having a dedicated, bound copy ensures the manual remains readily available and doesn’t get lost amongst digital files. It’s a dependable backup should digital access become unavailable.

Interpreting Diagrams and Schematics

Scag manuals utilize detailed parts illustrations and hydraulic schematics; understanding these visuals is vital for accurate repairs and efficient maintenance procedures.

Understanding Parts Illustrations

Scag parts manuals feature exploded views, meticulously detailing each component’s location and relationship to others. These illustrations aren’t just pictures; they are crucial for identifying the correct part number during repairs or maintenance. Each part is typically labeled with a reference number, corresponding to a detailed parts list.

Pay close attention to the orientation of parts in the illustration, as it mirrors the actual assembly; Familiarize yourself with common Scag terminology used in the diagrams. Understanding these illustrations minimizes errors, ensures you order the right replacement parts, and streamlines the repair process, ultimately extending the life of your Scag equipment. Proper interpretation saves time and money!

Decoding Hydraulic Schematics

Scag hydraulic schematics are essential for diagnosing and repairing hydraulic systems. These diagrams use standardized symbols to represent components like pumps, valves, cylinders, and hoses. Understanding these symbols is key to tracing fluid flow and identifying potential issues.

Lines indicate fluid pathways, with arrows showing direction. Different line types represent pressure, return, or pilot lines. Pay attention to valve positions and connections. A Scag service manual will explain the specific symbols used in their schematics. Mastering these schematics allows for efficient troubleshooting, accurate repairs, and prevents damage to the complex hydraulic system, ensuring optimal mower performance.

Manual Updates and Revisions

Scag consistently updates manuals for accuracy and to reflect product improvements; regularly check the official website for the latest versions and revisions.

Checking for Updated Manual Versions

Scag prioritizes providing users with the most current and accurate information regarding their equipment. To ensure you have the latest manual version, routinely visit Scag’s official website. The website features a dedicated section for manuals and parts lists, allowing you to search by model and serial number.

Regularly checking for updates is vital, as Scag releases revisions to address design changes, clarify procedures, or incorporate new safety information. Utilizing the correct manual guarantees proper maintenance, safe operation, and effective troubleshooting. Ignoring updates could lead to incorrect servicing or potential hazards. Scag’s commitment to accuracy means they continually refine their documentation.

Scag’s Commitment to Manual Accuracy

Scag Power Equipment demonstrates a strong dedication to the precision and reliability of its documentation. Recognizing the critical role manuals play in safe operation and effective maintenance, Scag invests in rigorous review processes. Updates are promptly issued to reflect engineering changes, address user feedback, and incorporate the latest safety standards.

This commitment extends beyond simply providing a manual; it’s about ensuring users have the correct information to maximize equipment lifespan and minimize potential risks. Scag understands that accurate manuals contribute directly to customer satisfaction and the longevity of their products. They strive for clarity and comprehensiveness in every document.