tarisland build guides

Tarisland Build Guides: A Comprehensive Overview (Updated 12/20/2025)

Tarisland offers diverse classes, each with unique builds for raids and open-world content. This guide details optimal builds, rotations, and performance insights, updated as of today!

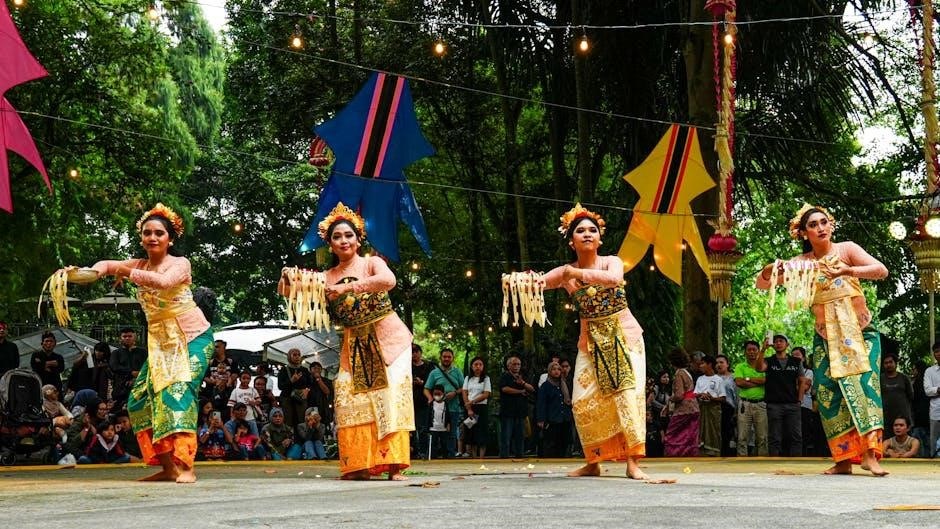
Tarisland presents a classic Massively Multiplayer Online Role-Playing Game (MMORPG) experience, featuring a robust selection of classes designed to cater to diverse playstyles. Players can choose from eight distinct classes: Barbarian Fighter, Bard, Mage, Paladin, Phantom Necro, Priest, Ranger, and Shadow Swordsman. Each class boasts unique abilities, strengths, and weaknesses, influencing their effectiveness in various game modes, including Player versus Environment (PvE) raids and large-scale activities.

Understanding these core differences is crucial for new players. Some classes excel in dealing high damage (DPS), while others specialize in tanking or providing healing support. The game encourages experimentation with different builds and specializations within each class, allowing players to fine-tune their characters to suit their preferred combat approach. The recent closed beta introduced two new classes, expanding the options available and adding further depth to the game’s class system. Mastering a class requires understanding its rotation and optimizing damage output.

Available Classes in Tarisland

Tarisland currently features eight playable classes, each offering a unique gameplay experience. The Barbarian Fighter excels in melee combat, focusing on strength and durability. The Bard provides support through buffs and debuffs, enhancing allies’ performance. Mages wield powerful arcane spells, dealing significant ranged damage. Paladins are versatile, capable of tanking, healing, and dealing moderate damage.

The Phantom Necro specializes in dark magic and summoning undead minions. Priests are dedicated healers, keeping allies alive in challenging encounters. Rangers are skilled marksmen, dealing consistent damage from a distance. Finally, the Shadow Swordsman utilizes stealth and agility for swift, precise attacks. These classes offer a diverse range of roles and playstyles, ensuring there’s a suitable option for every player preference. The game’s depth lies in mastering each class’s unique abilities and builds.

Barbarian Fighter

The Barbarian Fighter in Tarisland is a formidable melee class, renowned for its raw power and resilience. This class thrives in close-quarters combat, utilizing heavy weapons and armor to withstand significant damage. Players choosing this path can expect a robust playstyle focused on sustained damage output and battlefield control. The Fighter Barbarian excels as both a tank and a DPS, offering versatility in group content.

Effective builds for the Barbarian Fighter often prioritize strength and vitality, maximizing both damage potential and survivability. Mastering the class involves understanding its fluid builder-spender rotation, allowing for consistent damage application. While boasting strong single-target damage, its AOE capabilities are considered decent. It stands out as one of the better mixed tank and DPS options currently available in Tarisland.

Bard

The Bard class in Tarisland distinguishes itself as a vital support role, focusing on enhancing allies and controlling the battlefield through musical prowess. Unlike direct damage dealers, the Bard excels at buffing teammates’ stats, providing healing, and debuffing enemies. This makes them invaluable in raids and challenging group content where coordinated teamwork is paramount.

Bard builds typically emphasize intelligence and spirit, maximizing the effectiveness of their supportive abilities. Mastering the Bard requires a deep understanding of encounter mechanics and the ability to anticipate team needs. While not a primary damage source, a well-played Bard significantly amplifies the overall damage output of the group. Their utility extends beyond combat, offering valuable contributions to exploration and social interactions within Tarisland’s vast open world.

Mage

The Mage class in Tarisland embodies potent arcane power, specializing in dealing massive area-of-effect (AoE) damage and controlling the battlefield with elemental spells. Mages are renowned for their high burst potential and ability to quickly eliminate groups of enemies, making them highly sought-after for dungeon clearing and raid encounters. Successful Mage gameplay revolves around strategic positioning and precise timing of spells.

Builds for the Mage typically prioritize intelligence, maximizing spell damage and critical hit chance. Mastering the Mage requires understanding spell rotations and managing mana efficiently. While vulnerable at close range, Mages can maintain distance and unleash devastating attacks from afar. They are a cornerstone of any strong party composition, providing essential damage output and crowd control capabilities within the expansive world of Tarisland.

Paladin

The Paladin in Tarisland is a versatile class excelling as both a durable tank and a potent healer, making them invaluable in group content. Paladins utilize holy magic and divine power to protect allies, absorb damage, and deliver righteous strikes against foes. They are known for their strong survivability, capable of withstanding significant punishment while maintaining consistent support for the team.

Paladin builds often focus on maximizing health, armor, and healing power, depending on the desired role. Whether protecting allies as a dedicated healer or standing firm on the front lines as a stalwart tank, Paladins are adaptable and reliable. Mastering the Paladin involves understanding cooldown management and prioritizing targets effectively. They are a crucial asset in raids, dungeons, and PvP, offering both protection and offensive capabilities.

Phantom Necro

The Phantom Necro in Tarisland is a damage-focused class wielding dark magic and summoning spectral allies. This class specializes in dealing sustained damage over time, utilizing curses and shadowy energies to weaken and destroy enemies; Phantom Necros are known for their unique playstyle, revolving around managing soul energy and strategically deploying undead minions.

Currently, the Soul Snatch build is considered optimal for maximizing the Phantom Necro’s damage output. This build focuses on amplifying soul-draining abilities and enhancing the power of summoned creatures. Mastering the Phantom Necro requires careful resource management and understanding enemy vulnerabilities. They excel in both single-target and area-of-effect damage, making them a formidable force in various game modes, including raids and PvP encounters. Their versatility and high damage potential make them a popular choice among players.

Priest

The Priest class in Tarisland embodies the archetype of a dedicated healer and support character. Priests utilize divine magic to mend wounds, shield allies, and bolster their combat effectiveness. While primarily focused on healing, Priests also possess offensive capabilities, allowing them to contribute to damage dealing when necessary. They are indispensable in group content, ensuring the survival and success of their team.

Currently, specific Priest builds are still emerging as the meta develops, but builds focusing on maximizing healing output and providing crucial buffs are proving effective. Mastering the Priest requires a deep understanding of encounter mechanics and the ability to anticipate incoming damage. They excel in prolonged battles, consistently keeping their allies alive and functioning at peak performance. Their supportive role is vital for tackling challenging content like raids and dungeons, making them a highly valued asset in any party.

Ranger

The Ranger in Tarisland is a versatile ranged damage dealer, excelling at single-target and area-of-effect (AoE) combat. Rangers utilize bows and nature-based abilities to inflict consistent damage from a safe distance. They often employ traps and pets to control the battlefield and enhance their offensive capabilities. This class offers a blend of mobility and sustained damage, making them effective in various combat scenarios.

Ranger builds typically focus on maximizing damage output through critical strikes and elemental effects. Optimizing rotation and utilizing pet synergy are key to unlocking the Ranger’s full potential. They are particularly strong in open-world exploration and dungeon content, where their ranged attacks and mobility allow them to navigate challenging environments with ease. Mastering the Ranger requires precise aiming, strategic trap placement, and effective pet management to consistently deliver high damage and contribute to team success.

Shadow Swordsman

The Shadow Swordsman in Tarisland is a melee damage dealer specializing in swift attacks and shadowy techniques. This class excels at burst damage and utilizes stealth to reposition and surprise opponents. Shadow Swordsmen wield dual blades, weaving in and out of combat with agility and precision. They are masters of deception, employing illusions and shadow clones to confuse enemies and create openings for devastating attacks.

Builds for the Shadow Swordsman often prioritize critical hit chance and damage, alongside skills that enhance mobility and stealth. Mastering the class involves understanding optimal rotation for maximizing burst potential and effectively utilizing shadow abilities for both offense and defense. They thrive in player-versus-player (PvP) combat and challenging dungeons where quick reflexes and strategic positioning are crucial for success. A skilled Shadow Swordsman can quickly eliminate key targets and disrupt enemy formations.

Tarisland Class Tier List & Beginner Recommendations

Tarisland’s class tier list assesses performance across game modes. For newcomers, consider classes offering versatility and ease of play for a smooth start!

Understanding Class Roles and Strengths

Tarisland features a classic MMO trinity of roles: Tank, Healer, and Damage Dealer (DPS). Each class naturally leans towards one or more of these roles, though specialization can offer hybrid capabilities. Barbarian Fighters and Paladins excel as tanks, absorbing damage and controlling enemies. Priests are dedicated healers, keeping the party alive through sustained and burst healing.

DPS classes are diverse. Mages offer ranged magical damage, while Rangers specialize in physical ranged attacks. Phantom Necros and Shadow Swordsmen are melee DPS, with the Necro focusing on sustained damage and the Swordsman on burst potential. Bards provide support and damage, enhancing allies while contributing to the fight. Understanding these core roles is crucial for team composition and maximizing effectiveness in raids and other group content. Choosing a class that aligns with your preferred playstyle – whether you enjoy leading the charge, supporting allies, or unleashing devastating attacks – will greatly enhance your Tarisland experience.

Best Classes for New Players

For newcomers to Tarisland, several classes offer a smoother learning curve and strong overall performance. The Paladin is an excellent choice, providing a robust tanking experience with forgiving mechanics and strong survivability. Its healing capabilities also offer a taste of support roles. Similarly, the Priest is straightforward to learn, focusing on consistent healing and offering valuable party utility.

If you prefer dealing damage, the Ranger is a solid option. Its ranged attacks allow for safer positioning, and its mechanics are relatively simple to grasp. The Mage, while requiring more precise positioning, offers high damage output and a satisfying playstyle. Avoid initially tackling the more complex classes like Phantom Necro or Shadow Swordsman, as they demand a deeper understanding of rotations and positioning. These beginner-friendly classes will allow you to quickly acclimate to Tarisland’s core gameplay loops and enjoy the vast open world.

In-Depth Build Guides for Each Class

Tarisland’s classes boast diverse builds. Explore detailed guides for Barbarian Fighter, Phantom Necro, Mage, Paladin, and Ranger to maximize your potential!

Barbarian Fighter Builds

Barbarian Fighter excels as a potent damage dealer in Tarisland, offering a blend of tankiness and offensive capabilities. Currently, the Fighter Barbarian DPS Build stands out as a top choice for maximizing damage output. This build focuses on a fluid rotation, seamlessly transitioning between builder and spender abilities to maintain consistent damage.

The strength of this build lies in its strong single-target damage, making it ideal for boss encounters and challenging elite mobs. While its area-of-effect (AOE) damage is decent, it truly shines when focused on individual targets. Players utilizing this build will find it relatively straightforward to learn, yet rewarding to master.

Compared to other mixed tank and DPS classes, the Fighter Barbarian is considered among the best for the DPS role. Optimizing gear choices and understanding ability synergies are crucial for unlocking its full potential. Further guides will delve into specific talent allocations and stat priorities for this build.

Fighter Barbarian DPS Build

The Fighter Barbarian DPS Build in Tarisland centers around a “builder-spender” rotation, maximizing damage through efficient ability usage. Prioritize stats like Strength and Critical Hit Chance to amplify damage output. Key abilities include those that generate resource (the “builders”) and those that consume it for significant damage (the “spenders”).

Talent allocation should focus on enhancing both builder and spender effectiveness. Look for talents that increase resource generation, reduce cooldowns, or directly boost damage multipliers. Gear choices should mirror this focus, favoring items with Strength, Critical Hit, and potentially Haste to improve rotation speed.

Mastering this build requires understanding the optimal sequence of abilities to maintain consistent damage. Practice the rotation on training dummies to refine timing and maximize efficiency. This build excels in single-target scenarios, making it a strong choice for raiding and boss fights.

Phantom Necro Builds

Phantom Necro builds in Tarisland revolve around manipulating souls and dealing potent damage over time. This class offers versatility, capable of both sustained DPS and burst damage depending on the chosen specialization. Currently, the Soul Snatch build is considered top-tier, excelling in both single-target and AoE situations.

Core mechanics involve summoning spectral allies and utilizing soul-based abilities to weaken enemies. Stat priorities typically include Intelligence and Critical Hit Chance, enhancing both damage and resource generation. Talents should focus on amplifying soul-based effects and improving the efficiency of key abilities.

Phantom Necros require careful resource management and positioning to maximize effectiveness. Mastering the timing of soul-consuming abilities is crucial for sustained damage output. This class is a strong contender for players seeking a dynamic and rewarding DPS experience.

Soul Snatch Build for Phantom Necro

The Soul Snatch build for Phantom Necro in Tarisland prioritizes maximizing damage through consistent soul consumption and strategic ability usage. This build excels at dealing substantial damage while maintaining versatility for various combat scenarios. Key abilities include ‘Soul Reap’, ‘Phantom Strike’, and ‘Spectral Shift’, forming the core of the rotation.

Talent allocation should focus on enhancing soul-based damage, reducing cooldowns, and improving resource regeneration. Prioritize talents that amplify the effects of ‘Soul Snatch’ and its related abilities. Stat weights favor Intelligence, Critical Hit Chance, and Haste, optimizing damage output and ability frequency.

Rotation involves weaving ‘Soul Reap’ to generate souls, followed by ‘Phantom Strike’ for direct damage, and utilizing ‘Spectral Shift’ for mobility and burst potential. Mastering this cycle is crucial for sustained DPS. This build is ideal for players who enjoy a dynamic and engaging playstyle.

Mage Builds

Mage builds in Tarisland offer a variety of playstyles, ranging from burst damage specialists to sustained DPS casters. Currently, popular builds focus on maximizing elemental damage output, utilizing spells like ‘Frost Nova’, ‘Fireball’, and ‘Arcane Blast’ in synergistic combinations. Build customization allows players to tailor their Mage to specific content, such as raids or PvP.

Talent choices significantly impact a Mage’s effectiveness. Investing in talents that reduce mana costs, increase critical hit damage, and enhance spell range is highly recommended. Stat prioritization centers around Intelligence, Spell Power, and Critical Hit Chance, ensuring optimal damage scaling.

Effective Mage gameplay revolves around precise spell rotations and strategic positioning; Mastering the timing of crowd control abilities and utilizing mobility spells is crucial for survival and maximizing damage potential. Experimentation with different talent combinations is encouraged to discover personalized builds.

Paladin Builds

Paladin builds in Tarisland excel in both tanking and support roles, offering versatility for group content. Popular builds focus on maximizing healing output or bolstering defensive capabilities through Holy-focused talents. Alternatively, Retribution Paladins deliver consistent melee damage, utilizing abilities like ‘Hammer of Wrath’ and ‘Crusader Strike’.

Effective Paladin builds prioritize stats like Strength, Stamina, and Spell Power (for Holy Paladins). Talent choices should align with the desired role, with options to enhance healing efficiency, shield durability, or damage output. Mastering the use of Holy Light and other healing spells is vital for support Paladins.

Strategic use of defensive cooldowns and proper threat management are crucial for tanking Paladins. Retribution Paladins benefit from optimizing their rotation and utilizing buffs to maximize sustained damage. Adaptability is key to success with any Paladin build.

Ranger Builds

Ranger builds in Tarisland primarily focus on ranged physical damage, utilizing bows and traps to control the battlefield. A core build emphasizes maximizing damage output through talents enhancing critical strike chance and attack speed. Rangers excel at single-target damage, making them effective against bosses and elite enemies.

Key abilities for Rangers include ‘Aimed Shot’ for high-damage bursts and ‘Multi-Shot’ for clearing groups of enemies. Effective builds prioritize Dexterity and Critical Strike stats. Mastering kiting techniques and utilizing traps strategically are essential for maximizing Ranger effectiveness.

Talent choices allow for specialization in either sustained damage or burst damage, catering to different playstyles. Rangers also possess utility skills like snares and slows, providing valuable crowd control in group content. Adaptability and positioning are crucial for success.

Advanced Tarisland Gameplay Mechanics

Tarisland’s advanced mechanics involve optimizing rotations for maximum damage and understanding class performance across varied game modes, like raids and PvP encounters.

Rotation and Damage Optimization

Maximizing damage output in Tarisland hinges on mastering class-specific rotations. These aren’t simply ability sequences; they’re carefully choreographed cycles designed to capitalize on buffs, debuffs, and resource management. A fluid builder-spender rotation, as seen with the Fighter Barbarian, is crucial for sustained DPS.

Understanding ability cooldowns and prioritizing key skills is paramount. For example, the Phantom Necro’s Soul Snatch build benefits from precise timing to amplify damage. Damage optimization also extends to stat allocation – prioritizing appropriate stats based on your chosen build and class role.

Furthermore, positional awareness and movement during combat can significantly impact damage dealt. Learning to weave abilities while maintaining optimal positioning is a skill that separates good players from exceptional ones. Regularly reviewing combat logs and analyzing performance metrics will reveal areas for improvement and refine your rotation for peak efficiency.

Class Performance in Different Game Modes

Tarisland’s diverse game modes demand adaptable class performance. A build excelling in single-target raids might falter in large-scale PvP or open-world AoE farming. Understanding these nuances is vital for effective gameplay. Tier lists provide a general overview, but individual skill and build optimization remain crucial.

For instance, a Fighter Barbarian DPS build shines in sustained damage scenarios, making it suitable for raid bosses. Conversely, classes with strong burst potential may dominate PvP arenas. The effectiveness of each class also varies depending on the specific content – some builds are better suited for tackling specific dungeons or world bosses.

Constantly evaluating class performance across different modes and adjusting builds accordingly is key to maximizing efficiency. Staying informed about community feedback and patch notes will help you identify emerging trends and optimize your gameplay for the current meta.

12 step workbook pdf free

Understanding 12-Step Workbooks

What is a 12-Step Workbook?

12-Step workbooks, like Tony A’s for ACOA, aid recovery by structuring the 12 Steps, offering guidance and worksheets for self-reflection.

The Purpose of Using a Workbook

Workbooks enhance the 12-Step process, providing focused exercises and promoting deeper understanding of each step, often available as a PDF.

Target Audiences for 12-Step Workbooks

These resources benefit individuals in programs like AA, NA, and ACOA, offering a personalized path to recovery, with many free PDF options.

A 12-Step workbook is a companion resource designed to facilitate working through the principles of 12-Step programs like Alcoholics Anonymous (AA) or Adult Children of Alcoholics (ACOA). These workbooks, often available as a PDF for free download, provide a structured approach to each step, offering guidance, exercises, and reflection prompts.

Resources like Tony A’s ACOA workbook break down complex concepts into manageable sections; They aren’t replacements for meetings or sponsorship, but tools to deepen self-awareness and personal growth. Many are created to complement “The Big Book” and “Twelve Steps and Twelve Traditions”.

The primary purpose of a 12-Step workbook is to enhance and personalize the recovery journey. While meetings offer group support, workbooks provide dedicated space for individual reflection and honest self-assessment. Many are accessible as a free PDF, lowering barriers to entry.

They help translate abstract concepts into concrete actions, guiding users through each step with targeted exercises. Workbooks, like those based on AA’s “Big Book”, promote a deeper understanding of the program’s principles and facilitate lasting change.

12-Step workbooks cater to diverse audiences within recovery communities. Individuals participating in Alcoholics Anonymous (AA), Narcotics Anonymous (NA), and Adult Children of Alcoholics (ACOA) find them particularly beneficial. The availability of free PDF versions expands access for those facing financial constraints.

These resources also assist those new to the programs, offering a structured introduction to the 12 Steps. They’re valuable for individuals seeking deeper self-exploration and a more personalized recovery experience, regardless of program affiliation.

Popular 12-Step Programs & Corresponding Workbooks

Alcoholics Anonymous (AA) Workbooks

AA utilizes “The Big Book” and supplementary workbooks, with free PDF options available online, aiding members through the 12 Steps.

Narcotics Anonymous (NA) Workbooks

NA members benefit from workbooks complementing their program, and some resources are accessible as downloadable PDF guides.

Adult Children of Alcoholics (ACOA) Workbooks

ACOA programs frequently use Tony A.’s workbook, often found as a free PDF, addressing childhood trauma and recovery.

Alcoholics Anonymous relies heavily on “The Big Book,” but numerous workbooks supplement the 12 Steps for deeper exploration. Many individuals seek 12-Step workbook PDF versions for convenient access and portability. These resources often break down each step into manageable sections, offering daily reflections and exercises.

Workbooks based on “Twelve Steps and Twelve Traditions” are also popular, providing detailed interpretations of AA principles. While official AA literature isn’t freely distributed as PDFs, various independent workbooks are available online, offering alternative support. Remember to exercise caution when downloading from unverified sources to ensure safety and avoid malware.

Similar to AA, Narcotics Anonymous utilizes the 12 Steps as a core recovery framework, and supplemental workbooks are widely used. Searching for a “12-Step workbook PDF” often yields options designed specifically for NA members. These workbooks assist in applying the steps to addiction recovery, offering prompts for self-assessment and personal growth.

While official NA literature isn’t typically available as free PDF downloads, numerous independent resources exist online. These can provide additional support and guidance throughout the recovery journey. Always prioritize downloading from reputable sources to protect your device from potential security risks and malware.

Adult Children of Alcoholics frequently utilize workbooks to navigate the unique challenges stemming from dysfunctional family dynamics. A popular choice is “Tony A’s 12-Step Workbook for ACOA,” often found as a PDF through online searches. This resource focuses on the “Laundry List,” identifying common traits of adult children.

Many individuals seek a “12-Step workbook PDF free” for ACOA, and several options are available online. These workbooks aid in applying the 12 Steps to heal from childhood trauma and establish healthy boundaries, promoting emotional wellbeing and recovery.

Key Features of Effective 12-Step Workbooks

Step-by-Step Guidance

Effective workbooks, often available as a PDF, break down each 12 Step with clear instructions and exercises for focused recovery.

Worksheet Inclusion

Worksheets within a 12-Step workbook, including free PDF versions, facilitate self-reflection and honest assessment of personal progress.

Reflection Prompts

Thoughtful prompts encourage deeper exploration of emotions and experiences, enhancing the benefits of a 12-Step program and PDF workbook.

12-Step workbooks, frequently found as a free PDF download, excel by offering structured, sequential support through each step of the recovery process. They dismantle complex concepts into manageable sections, ensuring clarity and preventing overwhelm. This methodical approach is crucial, particularly for newcomers navigating the program.

These workbooks often include detailed explanations of each step’s purpose, alongside practical exercises designed to facilitate understanding and application. Resources like Tony A’s ACOA workbook exemplify this, guiding users through introspection and action. The availability of a PDF format enhances accessibility, allowing individuals to work through the steps at their own pace and in a comfortable setting.

A hallmark of effective 12-Step workbooks, often accessible as a free PDF, is the integration of dedicated worksheets. These aren’t merely filler; they’re designed to actively engage individuals in the recovery process. Worksheets prompt self-reflection, encourage honest self-assessment, and facilitate the articulation of personal experiences related to each step.

Examples include exercises for identifying character defects, exploring past traumas, and formulating amends lists. Resources like those complementing “The Big Book” frequently utilize this approach. The PDF format allows for easy printing and repeated use, fostering consistent engagement with the material.

Beyond worksheets, impactful 12-Step workbooks – readily found as a free PDF download – heavily utilize reflection prompts. These aren’t directives, but open-ended questions designed to stimulate introspection and deeper understanding of one’s journey. Prompts encourage exploration of feelings, motivations, and patterns of behavior related to addiction or codependency.

Examples might include “What fears prevent me from admitting powerlessness?” or “How has my past influenced my present relationships?”. Resources like Tony A’s ACOA workbook excel at this, guiding users toward self-discovery and lasting change.

Finding Free 12-Step Workbook PDFs

Online Resources for Free Downloads

Numerous websites offer 12-Step workbooks as free PDF downloads, including PrintFriendly, providing accessible recovery resources for all individuals.

PrintFriendly as a Download Source

PrintFriendly simplifies PDF access, allowing users to easily download and print 12-Step materials for convenient offline use and study.

Potential Risks of Downloading from Unverified Sources

Exercise caution when downloading PDFs; prioritize reputable sites to avoid malware and protect your personal information during the process.

Finding free 12-Step workbooks in PDF format is increasingly accessible thanks to numerous online platforms. Websites dedicated to recovery support frequently host downloadable workbooks for programs like Alcoholics Anonymous, Narcotics Anonymous, and Adult Children of Alcoholics. Resources such as PrintFriendly offer streamlined access, allowing users to easily convert and download materials.

However, it’s crucial to exercise discernment. Several online communities and forums also share these resources, but verifying the source’s legitimacy is paramount. Always prioritize websites known for reliability and safety to ensure the PDF is free from malware or compromised content. Exploring these avenues can significantly aid individuals seeking affordable recovery support.

PrintFriendly emerges as a valuable resource for obtaining 12-Step workbook PDFs. This web-based tool simplifies the process of converting web pages into clean, printable, or downloadable PDF documents. Specifically, it facilitates access to resources like Tony A’s 12-Step Workbook for ACOA, allowing users to easily download and utilize the material.

Its user-friendly interface removes clutter and ads, presenting a focused version of the workbook. By pasting a link to the online workbook, PrintFriendly creates a streamlined PDF, offering a convenient and accessible solution for those seeking free recovery resources.

Seeking free 12-Step workbook PDFs online carries inherent risks. Downloading from unverified sources exposes users to potential malware, viruses, and compromised personal information. These files may contain malicious code disguised as recovery materials.

Reputable sites are crucial; avoid suspicious links or websites promising free downloads without proper security measures. Always scan downloaded files with updated antivirus software before opening them. Prioritizing safety protects your device and sensitive data while accessing valuable recovery resources.

Specific Workbook Examples & Content

Tony A’s 12-Step Workbook for ACOA

Tony A’s workbook, often found as a PDF, focuses on Adult Children traits, utilizing the Laundry List and guiding users through each step.

Workbooks Based on “The Big Book” & “Twelve Steps and Twelve Traditions”

Many workbooks derive content from AA’s foundational texts, offering step-by-step interpretations and exercises for deeper understanding, some available free.

The Laundry List Tree in ACOA Workbooks

The Laundry List Tree visually represents ACOA characteristics, aiding self-identification and recovery, commonly featured in ACOA PDF workbooks;

Tony A’s 12-Step Workbook is a widely utilized resource for individuals navigating the Adult Children of Alcoholics (ACOA) program. Frequently available as a free PDF download through sites like PrintFriendly, it provides a structured approach to working through the 12 Steps specifically tailored to the unique challenges faced by adult children of alcoholics.

This workbook delves into identifying dysfunctional family patterns and their lasting impact. It emphasizes self-awareness and offers exercises to address core issues like abandonment, control, and low self-esteem. The workbook’s content is designed to complement ACOA meetings and sponsorship, fostering a deeper understanding of recovery principles.

Users often praise its clarity and practicality, making it an accessible tool for those new to the program or seeking a more focused approach to their recovery journey.

Many 12-Step workbooks are designed to accompany Alcoholics Anonymous’ foundational texts, “The Big Book” and “Twelve Steps and Twelve Traditions.” These resources break down the complex concepts within these books into manageable steps and exercises, often available as a free PDF. They aim to facilitate a deeper understanding of the program’s principles.

These workbooks typically include reading assignments from the core texts, followed by reflective questions and worksheets. They encourage individuals to personalize the 12 Steps and apply them to their own experiences. Some versions offer step-by-step guidance, while others focus on exploring the traditions.

Finding these resources online can support a more structured recovery process.

The “Laundry List Tree” is a central feature in Adult Children of Alcoholics (ACOA) workbooks, visually representing the traits common to those raised in dysfunctional families. This diagram, often found in free PDF versions of Tony A’s workbook, distinguishes between characteristics we inherited and those we’ve adopted as coping mechanisms.

It serves as a powerful tool for self-identification and understanding the impact of childhood experiences. The tree’s branches list behaviors and emotional patterns, prompting individuals to recognize and address these issues.

Using this visual aid supports the 12-Step process within ACOA.

Working Through the 12 Steps with a Workbook

Step One: Admitting Powerlessness

Workbooks, often available as a free PDF, guide users to honestly assess their inability to control their addiction or life situation.

Step Two: Belief in a Higher Power

These resources encourage exploration of spirituality, helping individuals define a power greater than themselves, even with a PDF download.

Step Three: Making a Decision to Turn Your Will Over

Workbooks facilitate surrendering control, promoting acceptance and trust in the process, accessible through a free PDF format.

Step One, foundational to recovery, requires honest self-assessment. 12-Step workbooks, frequently offered as a free PDF download, provide structured exercises to confront this challenging truth. They prompt reflection on life’s unmanageability, acknowledging the inability to control addictive behaviors or harmful patterns.

Worksheets within these PDF resources encourage detailed inventories of past actions and their consequences. This process isn’t about self-condemnation, but rather a crucial acceptance of personal limitations. Utilizing a free resource like a 12-Step workbook PDF can offer a safe space for this vulnerable exploration, paving the way for further growth.

Step Two centers on faith – believing a Power greater than oneself can restore sanity. 12-Step workbooks, often available as a free PDF, guide individuals through defining this Power, which needn’t be religious. Worksheets encourage exploration of concepts like group support, nature, or universal principles.

A free 12-Step workbook PDF helps dismantle preconceived notions, fostering a personalized understanding. It emphasizes that restoring sanity isn’t about achieving perfection, but accepting help. This step, facilitated by PDF resources, builds hope and prepares individuals for surrendering their will.

Step Three involves a conscious decision to surrender one’s will and life to the care of a Higher Power. 12-Step workbooks, frequently found as a free PDF download, assist in understanding this concept, often challenging deeply ingrained control issues.

A free 12-Step workbook PDF provides prompts to explore fears surrounding surrender and the benefits of relinquishing self-will. It emphasizes that this isn’t passive resignation, but active trust. Worksheets aid in identifying areas where control hinders recovery, paving the way for acceptance.

Digital vs. Physical Workbooks

Advantages of PDF Format

PDF workbooks offer portability and accessibility, enabling convenient use on devices, with many available as a free download.

Benefits of a Physical Workbook

Physical copies provide a tactile experience, minimizing distractions and allowing for handwritten notes and personal reflection.

Accessibility Considerations

Free PDF versions broaden access, but require a device; physical books suit those preferring a non-digital approach.

PDF versions of 12-Step workbooks present significant advantages, primarily revolving around accessibility and convenience. Downloading a 12-Step workbook PDF free of charge allows individuals immediate access to recovery tools, regardless of location or financial constraints. Portability is another key benefit; these digital resources can be easily stored on smartphones, tablets, or computers, facilitating consistent engagement with the program.

Furthermore, PDFs are easily printable, offering the option to create a physical copy if desired. Sites like PrintFriendly simplify this process. The digital format also supports features like searchability, enabling quick location of specific concepts or exercises within the workbook. This ease of use promotes a more efficient and effective recovery journey.

Despite the convenience of a 12-Step workbook PDF free download, physical workbooks offer distinct advantages. The tactile experience of writing directly in a workbook can enhance engagement and promote deeper processing of the 12 Steps. Many find the act of physically completing exercises more impactful than typing responses.

A physical copy minimizes distractions from digital devices and provides a dedicated space for recovery work. It also eliminates concerns about device compatibility or potential data loss. For those who prefer a tangible approach, a physical workbook fosters a stronger connection to the recovery process.

While a 12-Step workbook PDF free download offers broad reach, accessibility is crucial. PDFs may not be fully compatible with screen readers for visually impaired individuals. Ensure downloaded PDFs are tagged correctly for accessibility features.

Print-friendly options, like those from PrintFriendly, can sometimes improve readability and formatting; Consider the font size and contrast for those with visual impairments. Offering alternative formats, such as large print or audio versions, expands inclusivity. Prioritizing accessibility ensures everyone can benefit from these recovery resources.

Workbook Considerations for Different Recovery Needs

Workbooks for Specific Addictions

Specialized workbooks address unique challenges beyond general 12-Step programs, though free PDF options may be limited in scope.

Workbooks for Co-occurring Disorders

Resources integrating mental health support alongside addiction recovery are vital, often requiring professional guidance alongside a PDF.

Gender-Specific Workbooks

Tailored workbooks acknowledge gender-specific experiences in recovery, enhancing relevance and support, with some available as free PDFs.

While general 12-Step workbooks provide a foundational structure, individuals battling specific addictions often benefit from tailored resources. These focus on unique triggers, behaviors, and recovery challenges associated with substances like gambling, sex, or food.

Finding a 12-Step workbook PDF free download specifically addressing these areas can be more difficult. Many specialized workbooks are commercially available, offering in-depth exercises and insights. However, some organizations and recovery communities offer limited free PDF samples or introductory materials.

It’s crucial to supplement these resources with professional guidance and support groups focused on the specific addiction for optimal results.

Individuals facing both addiction and mental health challenges—co-occurring disorders—require specialized support. Standard 12-Step workbooks may not adequately address the complexities of these dual diagnoses. Resources integrating 12-Step principles with cognitive behavioral therapy (CBT) or dialectical behavior therapy (DBT) are beneficial.

Locating a 12-Step workbook PDF free download tailored for co-occurring disorders can be challenging. While some organizations offer limited free materials, comprehensive workbooks often require purchase.

Seeking guidance from a therapist experienced in dual diagnosis is vital when utilizing any workbook.

Recognizing the unique challenges faced by men and women in recovery, gender-specific 12-Step workbooks are increasingly available. These resources address issues like societal expectations, trauma, and emotional expression differently for each gender.

Finding a 12-Step workbook PDF free download specifically designed for a particular gender can be difficult. While general workbooks are plentiful, tailored options often require a purchase.

Resources focusing on women often explore relational trauma, while those for men may address emotional vulnerability.

Understanding Workbook Terminology

The “Big Book”

“The Big Book” is the foundational text for Alcoholics Anonymous, often referenced and utilized within 12-Step workbook PDF resources.

Traditions

Traditions are guiding principles for 12-Step groups, ensuring unity and effective functioning, explained in many free PDF workbooks.

Sponsorship

Sponsorship, a key element of recovery, is supported by workbooks offering guidance on finding and working with a sponsor.

Alcoholics Anonymous, commonly known as “The Big Book,” serves as the primary text for the AA program and a cornerstone for many 12-Step workbooks. Often referenced within PDF versions, it details the program’s foundational principles and the original stories of recovery. Many workbooks, including those available as a free PDF download, are structured around its chapters and concepts.

Understanding “The Big Book” is crucial for working through the 12 Steps effectively. Workbooks often provide interpretations and exercises to help individuals grasp its teachings. Resources like Tony A’s workbook utilize its framework, making it accessible for those new to the program or seeking deeper insight.

The Twelve Traditions of 12-Step programs, often explored within 12-Step workbooks, guide group function and maintain unity. These principles, detailed in “Twelve Steps and Twelve Traditions,” ensure program longevity and focus on primary purpose – helping members achieve sobriety. Many free PDF workbooks dedicate sections to understanding each Tradition.

Workbooks aid in applying Traditions to personal recovery and group dynamics. They encourage reflection on how these guidelines foster a supportive environment. Understanding Traditions is vital for responsible participation, and resources like Tony A’s workbook integrate them into the 12-Step process.

Sponsorship is a cornerstone of 12-Step programs, and 12-Step workbooks often dedicate sections to its importance. A sponsor, an experienced member, guides newcomers through the steps, offering support and accountability. Many free PDF workbooks include prompts to identify sponsor qualities and establish a healthy relationship.

Workbooks emphasize the sponsor’s role in sharing experience, strength, and hope. They encourage sponsees to actively participate in the process and utilize their sponsor’s guidance while working through the steps, enhancing recovery. Finding a suitable sponsor is crucial, and workbooks aid this search.

Latest Updates & Versions of Workbooks (as of 12/20/2025)

Current Availability of Updated Materials

New 12-Step workbooks are emerging, with updated materials available as PDF downloads, focusing on current program interpretations and accessibility.

Compatibility with Program Changes

Updated workbooks ensure alignment with evolving program guidelines, offering relevant exercises and insights, often found as free PDF resources.

New Workbook Features

Recent editions incorporate digital tools and enhanced worksheets, providing a more interactive experience, with many offered as convenient PDFs.

As of December 20, 2025, a surge in updated 12-Step workbook materials is noticeable, particularly in PDF format. Several resources, including those for ACOA and AA, have undergone revisions to reflect current program understandings.

Many individuals actively seek free PDF versions of these workbooks for convenient access and affordability. Websites like PrintFriendly are frequently utilized for downloading and printing.

However, it’s crucial to verify the source’s legitimacy to avoid malware or outdated content. Newer workbooks often feature enhanced worksheets and clearer guidance, making the recovery process more effective.

Maintaining compatibility with evolving 12-Step program interpretations is vital. Updated workbooks, often found as free PDF downloads, reflect these changes, ensuring alignment with current practices.

Older versions may contain outdated terminology or approaches, potentially hindering recovery. Resources like Tony A’s ACOA workbook are periodically revised to address program updates.

When seeking a 12-Step workbook PDF, prioritize recently published materials to guarantee relevance and accuracy, maximizing the benefits of the recovery process.

Contemporary 12-Step workbooks, increasingly available as free PDF downloads, incorporate innovative features to enhance the recovery journey. These include expanded reflection prompts, digital integration for tracking progress, and tailored exercises for co-occurring disorders.

Some newer editions offer compatibility with online 12-Step communities, fostering connection and support.

Features like interactive worksheets and downloadable audio guides are becoming common, providing a more engaging and accessible experience, particularly when utilizing a PDF format.

Safety and Privacy When Downloading PDFs

Checking for Malware

Scan free 12-Step workbook PDFs with antivirus software before opening, as unverified sources may contain malware, compromising your device’s security.

Protecting Personal Information

Avoid PDFs requesting personal details; legitimate resources won’t ask for this information during a free download.

Reputable Download Sites

Prioritize downloads from trusted websites like PrintFriendly to minimize risks associated with malicious PDF files.

Downloading a 12-Step workbook PDF free from unverified sources presents a significant risk of malware infection. Before opening any downloaded file, it’s crucial to scan it with reputable antivirus software. Many free and paid options effectively detect and remove malicious code embedded within PDF documents.

Malware can compromise your device, steal personal information, or disrupt its functionality. Always ensure your antivirus definitions are up-to-date for optimal protection. Consider using online PDF scanning tools as an additional layer of security, especially when sourcing materials from unfamiliar websites offering free resources.

Be vigilant and prioritize safety when accessing recovery materials online.

When seeking a 12-Step workbook PDF free, avoid sites requesting personal details like email addresses or requiring account creation for download. These requests are often phishing attempts to collect sensitive data. Reputable sources, such as official program websites or PrintFriendly, generally offer resources without such demands.

Be cautious about clicking on advertisements or links within download pages, as they may lead to malicious websites. Prioritize privacy by using a secure browser and considering a VPN to encrypt your internet connection. Protecting your information is vital during online recovery resource searches.

Finding a 12-Step workbook PDF free requires careful source selection. PrintFriendly is highlighted as a safe option for downloading and converting web pages to PDFs, including workbook content. Official program websites (AA, NA, ACOA) sometimes offer approved materials for free download.

Exercise caution with unfamiliar sites; prioritize those with clear privacy policies and secure connections (HTTPS). Avoid platforms known for hosting pirated content, as they pose malware risks. Always verify the source before downloading any PDF.

ctek battery charger manual

CTEK Battery Charger Manual: A Comprehensive Guide

This manual details CTEK’s innovative, safe, and user-friendly battery charging solutions, designed for various vehicles and battery types, ensuring optimal performance and longevity․

CTEK Sweden has become a global leader in battery charging solutions, renowned for its innovative and reliable products․ Originating from the challenging Nordic winters, CTEK technology is built to withstand extreme conditions and deliver consistent performance․

Their chargers are designed for a wide range of vehicles – cars, motorcycles, boats, and more – and cater to all lead-acid battery types․ CTEK’s commitment extends beyond simply charging; they focus on battery health, offering features like desulphation and conditioning to prolong battery life․

With a focus on safety and ease of use, CTEK chargers are fully automatic, spark-proof, and reverse polarity protected, making them accessible to both professionals and everyday users․ The CS ONE model exemplifies this with its APTO technology, simplifying the charging process․

Understanding Battery Types & Compatibility

CTEK chargers are versatile, supporting various lead-acid battery types including Wet, AGM, and Gel․ Understanding your battery type is crucial for optimal charging and longevity․ CTEK’s adaptive charging technology automatically detects the battery type and adjusts the charging process accordingly․

Compatibility extends to different vehicle applications, from cars and trucks to motorcycles and marine vessels․ CTEK designs chargers specifically for these needs, ensuring safe and efficient charging․ Incorrect charging can damage batteries, so selecting the appropriate mode is vital․

CTEK’s comprehensive range ensures a suitable charger for every battery, maximizing performance and lifespan․ Always refer to your battery’s specifications and the CTEK manual for compatibility guidance․

CTEK Charger Models: An Overview

CTEK offers a diverse range of chargers, catering to various needs․ The MXS series (like the MXS 5․0 and MXS 10) are popular, multi-step chargers for general battery maintenance․ The XS series (XS 0․8, XS 1․2) provides smaller, more compact options for trickle charging and maintenance․

The CS ONE stands out with its adaptive charging technology – APTO – simplifying the process by automatically detecting battery type and condition․ These models are fully automatic, spark-proof, and reverse polarity protected, ensuring safety․

Each series offers different amperage and features, allowing users to select the best charger for their specific battery and vehicle requirements․

CTEK MXS Series (MXS 5․0, MXS 10, etc․)

The CTEK MXS series represents a robust and versatile charging solution, featuring multi-step charging for optimal battery care․ Models like the MXS 5․0 and MXS 10 are fully automatic and suitable for a wide range of lead-acid batteries․ They include features like desulphation, which revitalizes aged batteries, and a special mode for cold weather․

These chargers are known for their reliability and ability to extend battery life․ They are spark-proof, reverse polarity protected, and offer a user-friendly interface with clear LED indicators displaying the charging process․

CTEK XS Series (XS 0․8, XS 1․2, etc․)

The CTEK XS series is designed for maintenance and conditioning of batteries, offering a more gentle and prolonged charging process․ Models like the XS 0․8 and XS 1․2 are ideal for maintaining fully charged batteries during periods of inactivity, preventing sulphation and extending their lifespan․

These compact chargers are perfect for motorcycles, scooters, and smaller vehicles․ They feature a pulse maintenance mode that keeps the battery topped up, ensuring it’s always ready for use․ Like the MXS series, they are safe and easy to use, with reverse polarity protection․

CTEK CS ONE – Adaptive Charging Technology

The CTEK CS ONE represents a leap forward in battery charging simplicity, utilizing innovative APTO (Adaptive Charging Technology)․ This technology automatically detects battery type and condition, selecting the optimal charging program without any user input․ It eliminates the need to manually choose settings, making it the easiest CTEK charger to use․

CS ONE is fully automatic, spark-free, and reverse polarity protected, ensuring safe and reliable operation․ Its adaptive charging process extends battery life and maintains optimal performance․ Simply connect the clamps, and the CS ONE handles the rest!

Safety Precautions & Warnings

Always prioritize safety when using your CTEK charger․ Ensure the charger is used in a well-ventilated area, as batteries can release explosive gases during charging․ Never smoke or allow sparks near the battery․ Wear appropriate eye protection to prevent acid contact․

Do not charge damaged batteries․ Inspect cables for damage before each use, and replace if necessary․ Avoid charging frozen batteries․ CTEK chargers are designed with safety features, but responsible use is crucial․ Disconnect the charger before connecting or disconnecting the battery terminals․

Charger Components & Features

CTEK chargers boast a robust design with key components for efficient charging․ These include durable connection cables and terminals ensuring a secure link to the battery․ LED indicators clearly display the charging status – from desulphation to maintenance․

Many models offer extension cables for convenient placement․ The CS ONE features APTO technology, simplifying the charging process․ CTEK prioritizes safety with features like spark-free operation and reverse polarity protection, guaranteeing a secure and reliable charging experience․

LED Indicators & Their Meanings

CTEK chargers utilize a multi-LED system to communicate the charging process․ Typically, a flashing red LED indicates a fault or error, requiring troubleshooting․ A solid red LED signifies the desulphation phase, attempting to recover a heavily sulphated battery․

A pulsing yellow LED shows the charging mode, while a solid yellow indicates absorption․ A green LED signals the battery is fully charged and in maintenance mode․ Understanding these indicators ensures proper monitoring and optimal battery care․

Connection Cables & Terminals

CTEK chargers come equipped with insulated connection cables featuring color-coded terminals – red for positive (+) and black for negative (-)․ These cables are designed for secure and spark-proof connections, enhancing safety during operation․ Ensure the terminals are clean and free from corrosion for optimal conductivity․

Proper connection is crucial; incorrect polarity can damage the charger and battery․ CTEK chargers are typically “polarity-protected”, but verifying the connections remains essential․ Regularly inspect cables for damage and replace if necessary․

Extension Cables & Accessories

CTEK offers robust and durable extension cables, allowing placement of the charger at a greater distance from the battery or vehicle․ These are ideal for hard-to-reach batteries, providing convenience and flexibility․ CTEK also provides a range of accessories, including carrying cases and eyelets for permanent connections․

When using extension cables, ensure they are of sufficient gauge to handle the charging current without voltage drop․ Genuine CTEK accessories are recommended to maintain charger performance and safety standards․ Avoid using incompatible or low-quality extensions․

Step-by-Step Charging Instructions

Begin by connecting the positive (red) clamp to the battery’s positive terminal, and the negative (black) clamp to the chassis or the battery’s negative terminal․ Ensure a secure connection to avoid sparking․ Next, plug the charger into a standard AC outlet․ Select the appropriate charging mode based on your battery’s condition – refer to the ‘Charging Modes Explained’ section․

Monitor the LED indicators to track the charging process․ The charger will automatically cycle through different stages, adjusting the voltage and current as needed․ Once fully charged, the charger will switch to maintenance mode․

Connecting to the Battery (Positive & Negative)

First, ensure the vehicle is switched off and that there are no flammable materials nearby․ Connect the red clamp to the positive (+) terminal of the battery – this is usually marked with a plus sign or a red cover․ Then, connect the black clamp to the vehicle chassis, a metal part of the engine, or the battery’s negative (-) terminal․

Avoid connecting directly to the negative terminal if the battery is venting gases․ Ensure clamps have a secure grip, preventing sparks․ Double-check polarity before plugging in the charger!

Selecting the Correct Charging Mode

CTEK chargers offer multiple modes for different battery conditions․ Normal mode is for standard charging, while Boost mode provides a quick charge for nearly discharged batteries – use cautiously․ Desulphation mode attempts to recover heavily sulphated batteries, a longer process․

Conditioning mode optimizes battery health after deep discharge․ The CS ONE utilizes APTO technology, automatically selecting the optimal mode․ Refer to your charger’s specific manual for detailed mode descriptions and recommendations․

Monitoring the Charging Process

CTEK chargers feature LED indicators displaying the charging stage: pulsing, charging, ready to use, and maintenance․ Observe the LEDs to understand the battery’s status․ A flashing LED may indicate an error – consult the troubleshooting section․

The CS ONE’s simple interface minimizes monitoring needs due to its adaptive charging․ Regularly check connections to ensure a stable charge․ Avoid interrupting the process unless necessary, allowing the charger to complete its cycle for optimal results․

Charging Modes Explained

CTEK chargers offer multiple modes tailored to different battery conditions․ Normal charging is for regularly used batteries, providing a full charge․ Boost mode delivers a quick charge for nearly depleted batteries, but shouldn’t be used routinely․

Desulphation mode attempts to recover sulphated batteries, while Conditioning mode optimizes battery performance after deep discharge․ The CS ONE’s APTO technology automatically selects the optimal mode, simplifying the process for users․

Normal Charging Mode

Normal charging is ideal for maintaining fully charged batteries or topping off batteries that have been recently used․ This mode provides a consistent, controlled charge, ensuring optimal battery health without overcharging․ It’s suitable for regular use, extending the battery’s lifespan and maintaining peak performance․

CTEK’s intelligent algorithms monitor the battery’s voltage and current, adjusting the charging process as needed․ This ensures a safe and efficient charge, preventing damage and maximizing battery capacity․ It’s the go-to mode for routine maintenance․

Boost Charging Mode

Boost charging delivers a higher voltage to quickly replenish a severely discharged battery․ This mode is designed for batteries that have been deeply drained and require a rapid charge to become usable again․ However, it’s crucial to use Boost mode cautiously, as prolonged use can potentially harm the battery․

CTEK’s intelligent technology limits the Boost charging duration to prevent overheating and damage․ Once the battery reaches a sufficient voltage, the charger automatically switches to Normal charging mode for a complete and safe recharge․

Desulphation Mode

Desulphation mode addresses the build-up of lead sulphate crystals on the battery plates, a common cause of reduced battery capacity and performance․ This mode applies a controlled, high-frequency, low-voltage pulse to break down these crystals, restoring the battery’s ability to accept and hold a charge․

CTEK’s desulphation process is gentle yet effective, extending battery life and preventing premature replacement․ It’s particularly beneficial for batteries that have been stored for extended periods or frequently subjected to deep discharges․

Conditioning Mode

Conditioning mode is a sophisticated process designed to optimize battery performance after desulphation or a prolonged period of inactivity․ It involves a controlled charge and discharge cycle, carefully calibrated to equalize the electrolyte levels within the battery cells․

This process helps to maximize battery capacity and ensures a more consistent voltage output․ CTEK’s conditioning mode is particularly useful for maintaining batteries in peak condition, especially those used seasonally or infrequently, ultimately prolonging their overall lifespan․

Troubleshooting Common Issues

Encountering problems with your CTEK charger? This section addresses frequent concerns․ If the charger doesn’t power on, check the mains connection and fuse․ Flashing LED error codes indicate specific issues – consult the manual for decoding․ A battery failing to charge could stem from incorrect connections, a faulty battery, or an inappropriate charging mode․

Ensure proper polarity (red to positive, black to negative) and a secure connection․ If issues persist, review the charger’s specifications and battery compatibility․

Charger Not Turning On

If your CTEK charger fails to power on, begin by verifying the AC power supply․ Ensure the power cord is securely connected to both the charger and a functioning wall outlet․ Check the fuse within the plug – a blown fuse is a common culprit․ Confirm the outlet is delivering power by testing it with another device․

Inspect the power cord for any visible damage․ If the issue persists, contact CTEK support, as internal component failure may require professional attention․

LED Flashing Error Codes

CTEK chargers utilize LED indicators to signal errors․ A flashing red LED often indicates a problem with the battery connection – ensure proper polarity (red to positive, black to negative) and a secure connection․ Other flashing patterns may signify a battery that won’t accept a charge, a sulphated battery requiring desulphation mode, or an internal charger fault․

Consult the CTEK website or your charger’s specific manual for a detailed explanation of each flashing code and recommended troubleshooting steps․ Ignoring these codes can lead to improper charging․

Battery Not Charging

If your battery isn’t charging, first verify the connection – ensure clamps are securely attached with correct polarity․ Check the battery’s voltage; a severely discharged battery might initially appear unresponsive․ Try selecting ‘Boost’ mode for a short period to initiate charging․ Confirm the charger’s LED indicators aren’t displaying error codes․

A sulphated battery may require desulphation mode․ If issues persist, the battery itself might be faulty and require replacement․ Always consult the manual for specific troubleshooting guidance․

Maintaining Your CTEK Charger

To ensure longevity, regularly clean your CTEK charger with a damp cloth, avoiding harsh chemicals․ Inspect the connection cables for any signs of damage – cracks, fraying, or corrosion․ Replace damaged cables immediately to maintain safe and efficient charging․ Store the charger in a dry, cool environment when not in use․

Proper storage prevents internal corrosion and ensures optimal performance․ Periodically check the terminals for cleanliness and tightness․ A well-maintained charger guarantees reliable battery care for years․

Cleaning & Storage

Regular cleaning extends your CTEK charger’s lifespan․ Use a soft, damp cloth to wipe down the casing, avoiding abrasive cleaners or solvents․ Ensure the charger is disconnected from the power source before cleaning․ For storage, choose a dry, cool location, protected from extreme temperatures and humidity․

Avoid storing near flammable materials or direct sunlight․ Proper storage prevents corrosion and maintains optimal functionality․ Keep the cables neatly coiled to prevent damage and tangling during prolonged inactivity․

Cable Inspection & Replacement

Regularly inspect the connection cables and terminals for any signs of damage, such as cracks, fraying, or corrosion․ Damaged cables can compromise charging efficiency and pose a safety risk․ If damage is detected, discontinue use immediately․ Replacement cables should be genuine CTEK accessories to ensure compatibility and safety․

Do not attempt to repair damaged cables; always replace them entirely․ Proper cable maintenance guarantees a secure connection and optimal charging performance․ Ensure the replacement cable is correctly sized and rated for your charger model․

CTEK Battery Care & Maintenance

Maintaining optimal battery health is crucial for vehicle reliability․ Understanding battery sulfation – the buildup of lead sulfate crystals – is key, as it reduces capacity․ CTEK chargers feature desulphation modes to reverse this process, extending battery life․ Regularly using a CTEK charger, even when not in use, prevents sulfation and keeps the battery conditioned․

Proper maintenance, alongside CTEK charging, significantly prolongs battery lifespan․ Avoid deep discharging and ensure secure connections․ A well-maintained battery ensures reliable starting and optimal performance․

Understanding Battery Sulphation

Battery sulfation occurs when lead sulfate crystals build up on the battery plates, hindering its ability to accept and deliver charge․ This process naturally happens during storage or infrequent use, but deep discharging accelerates it․ Sulphation reduces the battery’s capacity and starting power, ultimately shortening its lifespan․

CTEK chargers combat sulfation with specialized desulphation modes․ These modes use a controlled high-frequency pulse to break down the sulfate crystals, restoring some of the battery’s original capacity․ Regular desulphation prevents permanent damage and maximizes battery performance․

Prolonging Battery Life

To maximize your battery’s lifespan, consistent maintenance is crucial․ CTEK chargers offer conditioning modes that optimize battery health after periods of inactivity or deep discharge․ Regularly using a CTEK charger, even when a vehicle isn’t in use, prevents sulfation and maintains optimal charge levels․

Avoid deep discharging your battery whenever possible․ Consider using a CTEK charger as a ‘trickle charger’ during extended storage, ensuring the battery remains fully charged․ Proper maintenance significantly extends battery life, saving you money and reducing environmental impact․

CTEK Chargers for Different Vehicle Types

CTEK designs chargers adaptable to a wide range of vehicles․ For cars and trucks, models like the MXS 5․0 provide robust charging for larger batteries․ Motorcycle owners benefit from compact chargers like the XS 0․8, ideal for smaller battery capacities․

Boats and marine batteries require chargers resistant to harsh environments; CTEK offers specialized marine-grade options․ Regardless of the vehicle, CTEK ensures intelligent charging, optimizing battery health and performance․ Their versatility makes CTEK a reliable choice for all your charging needs․

Cars & Trucks

CTEK offers powerful charging solutions specifically tailored for car and truck batteries․ Models like the MXS 5․0 are ideal due to their ability to handle larger battery capacities and provide a robust charge․ These chargers feature automatic voltage detection, ensuring compatibility with various vehicle systems․

CTEK’s technology extends battery life and maintains optimal performance, even in extreme conditions; The chargers are fully automatic, spark-proof, and reverse polarity protected, guaranteeing safety and ease of use․ Investing in a CTEK charger ensures reliable starting power for your vehicle․

Motorcycles

CTEK provides specialized charging solutions for motorcycle batteries, addressing their unique needs․ Smaller, maintenance-free chargers like the XS 0․8 are perfect for motorcycles, offering a gentle yet effective charge․ These models prevent battery damage and extend lifespan, crucial for seasonal riders․

CTEK’s technology helps ensure your motorcycle starts reliably, even after prolonged storage․ The chargers are easy to connect and operate, with features like desulphation mode to revive neglected batteries․ Choosing a CTEK charger guarantees optimal battery health and peace of mind․

Boats & Marine Batteries

CTEK offers robust charging solutions specifically designed for the demanding marine environment․ Marine batteries require specialized care due to harsh conditions and frequent deep discharge cycles․ Models like the MXS 10 are ideal, providing powerful charging and desulphation capabilities․

CTEK chargers are built to withstand temperature fluctuations and corrosion, ensuring reliable performance on boats of all sizes․ Features include compatibility with various marine battery types and protection against overcharging․ Maintaining optimal battery health is crucial for boat safety and functionality․

CTEK and Electric Vehicle Charging Solutions

CTEK extends its expertise beyond traditional vehicles, offering complete charging solutions for electric vehicles (EVs)․ These solutions encompass both onboard and offboard chargers, catering to diverse EV charging needs․ CTEK’s innovative approach focuses on optimizing charging efficiency and extending battery lifespan․

The company provides smart charging infrastructure for homes, workplaces, and public spaces․ Their EV chargers are designed with safety and ease of use in mind, incorporating advanced features like load balancing and remote monitoring․ CTEK is committed to supporting the transition to sustainable transportation․

CTEK Charger Specifications & Technical Details

CTEK chargers are manufactured in China, leveraging Swedish technology to ensure high quality and reliability․ Models like the MXS 5․0 offer multi-stage charging, desulphation, and conditioning features․ Technical specifications vary by model, including charging voltage, current, and battery capacity compatibility․

All CTEK devices are fully automatic, spark-proof, and reverse polarity protected, guaranteeing safety․ The CS ONE utilizes APTO technology for adaptive charging․ Detailed specifications for each charger, including input/output voltages and efficiency ratings, are available on the CTEK website․

Frequently Asked Questions (FAQ)

Is CTEK a Chinese brand? No, CTEK is Swedish, but manufacturing occurs in China under strict quality control․ Can I leave a CTEK charger connected indefinitely? Yes, CTEK chargers automatically switch to maintenance mode․ What does APTO technology do? It adapts the charging process to the battery’s needs․

Why is my CTEK LED flashing? Consult the manual for error code meanings․ Are CTEK chargers safe for all battery types? Yes, they handle lead-acid, AGM, and gel batteries․ Where can I find detailed specifications? Visit the official CTEK website․

Warranty Information & Support

CTEK offers a limited warranty, typically two years from the purchase date, covering defects in materials and workmanship․ Warranty claims require proof of purchase and should be directed to the retailer or CTEK support․ For technical assistance, visit the CTEK website for FAQs, manuals, and troubleshooting guides․

Direct support is available via email or phone, with contact details listed on the CTEK website․ CTEK also provides a network of authorized service centers for repairs․ Register your product online to receive updates and extended support options․

Where to Purchase CTEK Chargers

CTEK chargers are widely available through various retail channels․ Major automotive parts retailers, like AutoZone and Advance Auto Parts, frequently stock CTEK products․ Online marketplaces, including Amazon and eBay, offer a broad selection and competitive pricing․ Specialty battery and marine supply stores are also excellent sources․

Visit the official CTEK website to find authorized dealers near you․ Direct purchase options may also be available through the CTEK online store․ Compare prices and shipping costs before making a purchase to ensure the best deal․

walton county schools calendar 23 24 pdf

Walton County Schools Calendar 23-24 PDF: A Comprehensive Overview

Walton County School District’s 2023-2024 academic calendar is readily available as a PDF document. Key dates include March 14-15 and 18-22, and May 27-29, 2024.

Walton County Schools prioritize a well-structured academic year, and the 2023-2024 calendar serves as the foundational document for students, parents, and staff. This comprehensive calendar details crucial dates, encompassing school days, holidays, breaks, teacher workdays, and important deadlines. It’s designed to facilitate effective planning and ensure everyone stays informed about the academic schedule.

The availability of the calendar in PDF format enhances accessibility, allowing for easy download, viewing, and printing on various devices. This digital format ensures that the information is readily available to the entire community, promoting transparency and efficient communication. Understanding the calendar is vital for coordinating family schedules, planning extracurricular activities, and maximizing student success.

Key elements within the calendar include the designated start and end dates for the school year, specific dates for school holidays, and scheduled breaks for students and staff. Furthermore, it outlines important dates for professional development for teachers, ensuring continuous improvement in educational practices. The calendar also highlights early release days and any modified schedules that may occur throughout the year, providing ample notice for necessary arrangements.

Accessing the Official 2023-2024 PDF Calendar

The official Walton County Schools 2023-2024 academic calendar in PDF format is readily accessible through the Walton County School District’s official website. Typically, it’s prominently featured on the homepage or within the “Academic” or “Calendar” sections. Direct links are often provided for quick and convenient downloading.

Navigating to the Board of Education (BOE) section of the website will also lead you to the calendar. Look for tabs labeled “Academic Calendar” or “School Calendar” to locate the PDF document. The website’s menu structure is designed for user-friendliness, ensuring easy access to important information.

Alternatively, a direct web search using keywords like “Walton County Schools 2023-2024 calendar PDF” will yield results linking directly to the official document. Once downloaded, the PDF can be saved to your device for offline viewing. Ensure you are downloading from the official school district website to guarantee the authenticity and accuracy of the information.

Key Dates: First and Last Days of School

According to the Walton County Schools 2023-2024 academic calendar, the school year commenced on August 10, 2023. This marked the official start of instruction for all students across the district. The calendar outlines a structured schedule with specific dates for various academic events and breaks.

Looking ahead, the calendar indicates the last day of school for the 2023-2024 academic year is May 29, 2024. This date signifies the conclusion of regular instructional days, paving the way for summer break. It’s crucial for parents and students to note this date for end-of-year planning.

Furthermore, the calendar details important milestones throughout the year, including early release days, teacher workdays, and holiday breaks. These dates are strategically placed to optimize the learning environment and provide necessary respite for both students and staff. Accessing the full PDF calendar provides a comprehensive overview of all key dates.

Important Holidays and Breaks – Fall 2023

The Walton County Schools 2023-2024 calendar details several important holidays and breaks during the Fall 2023 semester. Labor Day, observed on September 4, 2023, provided a well-deserved long weekend for students, staff, and families. This break offered a chance for rest and rejuvenation as the school year progressed.

Additionally, the calendar included a Fall Break from October 9-11, 2023, offering a three-day respite from classes. This break allowed students and teachers to recharge and prepare for the remainder of the fall semester. These scheduled breaks are vital for maintaining a positive learning environment.

The complete PDF version of the calendar outlines these dates clearly, alongside other important events. Parents and students can easily reference the calendar to plan ahead for these breaks and ensure adequate preparation. Understanding these dates is crucial for effective academic planning throughout the fall season.

Winter Break and Holiday Schedule – December 2023/January 2024

The Walton County Schools 2023-2024 calendar designates a significant winter break encompassing the December 2023 and January 2024 holidays. The break commenced on December 18, 2023, allowing students and staff ample time to enjoy the festive season with family and friends. This extended period provides a much-needed pause from academic routines.

Specifically, the calendar highlights the observance of Christmas and New Year’s Day within this break. Schools remained closed, fostering a time for celebration and relaxation. The return to classes was scheduled for January 8, 2024, allowing a sufficient period for recovery from holiday activities.

The detailed PDF version of the calendar clearly marks these dates, ensuring all stakeholders are informed. This extended break is a cornerstone of the academic year, promoting well-being and preparing everyone for the challenges of the upcoming semester. Accessing the calendar is essential for effective planning during this time.

Spring Break – March 2024

According to the Walton County Schools 2023-2024 calendar, Spring Break is scheduled for March 18-22, 2024. This provides students with a five-day respite from their studies, offering a valuable opportunity for rest, rejuvenation, and family time. The break falls conveniently within the academic year, serving as a mid-point recharge before the final push towards the end of the school year.

The calendar’s PDF format clearly indicates these dates, allowing families to plan vacations or other activities well in advance. This extended break is designed to alleviate stress and enhance student well-being, contributing to improved academic performance upon their return. It’s a crucial component of the district’s commitment to a balanced educational experience.

Furthermore, the calendar also notes March 14 and 15 as additional days off, potentially extending the break for some. Accessing the official PDF document is vital for confirming these details and ensuring accurate planning. Spring Break is a highly anticipated event for students and families alike;

Teacher Workdays and Professional Development

The Walton County Schools 2023-2024 calendar, available as a PDF, designates specific days for teacher workdays and professional development. These days are crucial for educators to collaborate, refine their teaching strategies, and stay current with best practices in education. They are not student attendance days, allowing teachers dedicated time for focused improvement.

The calendar outlines these dates to ensure teachers have ample opportunity for planning, grading, and participating in workshops designed to enhance their skills. Professional development is a cornerstone of the district’s commitment to providing high-quality education for all students. These sessions cover a wide range of topics, from curriculum updates to innovative teaching techniques.

Accessing the official PDF version of the calendar is essential for teachers to accurately plan their schedules around these mandatory workdays. The district recognizes the importance of investing in its educators, and these dedicated days reflect that commitment. They contribute directly to a more effective and engaging learning environment.

Early Release Days and Modified Schedules

The Walton County Schools 2023-2024 calendar, accessible in PDF format, incorporates several early release days throughout the academic year. These days typically involve a shortened school day, allowing for staff meetings, parent-teacher conferences, or other important school-related activities. The specific times for early release are clearly indicated on the official calendar.

Modified schedules may also be implemented on certain days for special events or circumstances. These alterations to the regular school day are communicated in advance to parents and students through various channels, including the school website and district notifications. Understanding these schedule changes is vital for effective planning.

The PDF calendar serves as the definitive source for all early release and modified schedule dates. Parents are encouraged to review it carefully to ensure students are aware of any adjustments to the typical school routine. These adjustments are designed to optimize the educational experience and facilitate important school functions.

Student and Staff Holiday Schedule – May 2024

The Walton County Schools 2023-2024 calendar, conveniently available as a PDF, details the holiday schedule for May 2024. Specifically, May 27th and May 29th are designated as student and staff holidays, marking the observance of Memorial Day. This extended weekend provides a time for remembrance and relaxation.

The PDF document clearly outlines these non-school days, allowing families to plan accordingly. It’s crucial to note that all school facilities will be closed on these dates, and regular school activities will not be held. The district emphasizes the importance of reviewing the complete calendar for a comprehensive understanding of all school-related dates.

These scheduled holidays are an integral part of the academic year, providing opportunities for students and staff to recharge and spend time with loved ones. The calendar’s accessibility ensures that everyone in the Walton County school community is well-informed about these important dates and breaks.

Graduation Dates for Walton County Schools – Class of 2024

The official Walton County Schools 2023-2024 PDF calendar provides crucial information regarding graduation dates for the Class of 2024. While specific dates for each high school aren’t explicitly detailed in the provided snippets, the calendar serves as a central resource for this vital information.

Families and students are encouraged to consult the complete PDF document, accessible through the Walton County School District website, to find the precise graduation dates and times for their respective schools. These dates are pivotal for planning celebrations and post-graduation activities.

The district understands the significance of graduation ceremonies and ensures the calendar accurately reflects these important milestones. It’s recommended to regularly check the official calendar for any potential updates or changes to the scheduled dates. Accessing the PDF version guarantees the most current and reliable information regarding the Class of 2024’s graduation ceremonies.

Make-Up Days for Inclement Weather

The Walton County Schools 2023-2024 PDF calendar addresses potential disruptions due to inclement weather by incorporating designated make-up days. These days are strategically built into the academic schedule to ensure students receive the required instructional time, even in the face of unforeseen closures.

While the provided information doesn’t specify the exact dates allocated for weather-related make-up days, the complete calendar document, available in PDF format on the district’s website, will outline these provisions. These built-in days allow for flexibility and minimize the impact of weather events on the academic year.

Parents and students should refer to the official PDF calendar for a comprehensive understanding of how inclement weather days are handled. The district prioritizes student safety and academic continuity, and the make-up day policy is a key component of this commitment. Regularly checking the calendar ensures awareness of any adjustments made due to weather conditions.

Understanding the Calendar Format and Symbols

The Walton County Schools 2023-2024 calendar, available as a PDF document, utilizes a clear and organized format to present crucial academic dates. While specific details regarding symbols aren’t explicitly stated in the provided context, a typical school calendar employs visual cues to differentiate between various event types.

Expect to find color-coding to distinguish between student attendance days, teacher workdays, holidays, and early release days. Symbols might indicate school closures, testing periods, or special events. The PDF format allows for easy navigation and printing, ensuring accessibility for all stakeholders.

A key or legend within the calendar itself will likely explain the meaning of each symbol and color used. Parents and staff are encouraged to familiarize themselves with this key to effectively interpret the calendar’s information. The district aims for transparency, and a well-defined format contributes to clear communication regarding important dates throughout the academic year.

Contact Information for Calendar-Related Inquiries

For specific questions regarding the Walton County Schools 2023-2024 academic calendar PDF, or to clarify any dates or events, direct communication with the school district is recommended. While the provided information doesn’t list specific contact details, the district website is the primary resource.

Navigate to the official Walton County School District website and look for a “Contact Us” or “Department Directory” section. Within these areas, you should find contact information for the relevant department, likely Curriculum and Instruction or Administrative Services.

Alternatively, contacting your child’s individual school directly may provide assistance. School secretaries and administrators can often answer calendar-related questions or direct you to the appropriate personnel. Expect a prompt and helpful response from district staff dedicated to ensuring clear communication regarding the academic schedule. The PDF calendar itself may also contain a contact email or phone number.

Walton County School District Overview

The Walton County School District is committed to providing a high-quality education to all students, and the 2023-2024 academic calendar is a crucial component of that commitment. The district strives for academic excellence, fostering a supportive learning environment for every child. Information regarding the calendar, available in PDF format, reflects this dedication to organization and transparency.

The district’s website features resources for parents, students, and staff, including detailed calendar information. It outlines important dates such as holidays, breaks, teacher workdays, and student attendance days. This calendar is designed to facilitate effective planning for families and educators alike.

Walton County schools prioritize student success and community engagement. The district’s strategic goals focus on improving student achievement, enhancing facilities, and fostering strong relationships with stakeholders. Accessing the PDF calendar is a simple way to stay informed about key dates and events throughout the school year, supporting a collaborative educational experience.

Walton Global and its Connection to the Community

While Walton Global is an international real estate asset management company focused on pre-development land, its presence indirectly supports the communities where Walton County Schools operate. The company’s investments in growth-driven areas contribute to economic development, potentially impacting local school funding and resources. Understanding the 2023-2024 school calendar, available as a PDF, is vital for families within these growing communities.

Walton Global manages substantial real estate assets – currently US $4.54 billion – and actively seeks capital to fuel further investment. This economic activity can translate into increased property tax revenues, benefiting local school districts. Access to the school calendar allows residents to plan around school events and breaks, fostering stronger community involvement;

Though distinct from the school district, Walton Global’s commitment to strategic land acquisition and development aligns with the long-term prosperity of the areas served by Walton County Schools. Staying informed about the academic schedule, conveniently found in PDF format, is a key aspect of community life.

color by number multiplication pdf

Color by Number Multiplication PDF: A Comprehensive Guide

Color by Number Multiplication PDFs offer a delightful blend of math practice and artistic expression, enhancing engagement for students learning times tables.

These printable resources combine multiplication fact fluency with the fun of coloring, providing a unique learning experience.

Explore free and paid options, seasonal themes, and targeted practice for specific times tables, all readily available online!

What are Color by Number Multiplication Worksheets?

Color by Number Multiplication Worksheets are engaging educational resources that cleverly integrate math practice with a creative coloring activity. These PDF documents present images divided into sections, each labeled with a multiplication problem.

Students solve the equations and then color the corresponding section based on a provided key – for example, a product of ‘6’ might be colored light green.

These worksheets typically focus on mastering multiplication facts, ranging from single-digit to double-digit problems, and are often themed around holidays or seasons for added appeal. They’re a fantastic way to reinforce skills!

The Educational Benefits of Using These Worksheets

Color by Number Multiplication Worksheets offer a multitude of educational advantages. They transform rote memorization into an enjoyable activity, boosting student engagement and motivation. Beyond multiplication fact fluency, these worksheets reinforce number recognition and build crucial problem-solving skills.

The act of coloring itself develops fine motor skills and hand-eye coordination.

These resources cater to diverse learning styles, providing a visual and kinesthetic approach to math. They’re excellent for independent practice, math centers, or even as a quick assessment tool, fostering a positive attitude towards mathematics.

Target Age Groups and Grade Levels

Color by Number Multiplication PDFs are exceptionally versatile, catering to a broad range of learners. Generally, these worksheets are most effective for students in 3rd, 4th, and 5th grade, typically aged 8 to 11 years old.

However, the complexity of the multiplication problems can be adjusted to suit different skill levels.

Simpler, single-digit multiplication worksheets are ideal for younger or struggling learners, while double-digit challenges are perfect for advanced students. Teachers can easily differentiate instruction using these resources, ensuring every child is appropriately challenged and supported.

Understanding the Core Concepts

Color by Number Multiplication PDFs reinforce essential math skills: mastering multiplication facts, recognizing numbers quickly, and developing crucial fine motor skills through coloring.

Multiplication Facts Practice

Color by Number Multiplication worksheets are exceptionally effective for drilling multiplication facts. Students solve multiplication problems and then color the corresponding areas based on the product.

This repetitive practice solidifies recall, moving facts from short-term to long-term memory. The worksheets cover a range of difficulty, from single-digit to double-digit multiplication, catering to various skill levels.

By associating answers with colors, students create a visual link that aids in memorization. This method transforms rote learning into an engaging activity, making multiplication practice less daunting and more enjoyable. Consistent use builds confidence and fluency.

Reinforcing Number Recognition

Color by Number Multiplication worksheets subtly reinforce number recognition skills alongside multiplication practice. Students repeatedly identify product numbers within the grid, strengthening their ability to quickly and accurately recognize numerals.

The color key demands careful attention to number-color associations, further solidifying number identification. This is particularly beneficial for younger learners or those needing extra support with number sense.

The visual nature of the activity helps connect the abstract concept of numbers to a concrete, colorful representation; This dual reinforcement – multiplication and number recognition – maximizes learning efficiency and builds a stronger mathematical foundation.

Developing Fine Motor Skills

Color by Number Multiplication worksheets aren’t just about math; they actively contribute to the development of fine motor skills. The act of coloring within the designated spaces requires precise hand-eye coordination and control.

Students practice manipulating crayons, colored pencils, or markers, strengthening the small muscles in their hands and fingers. This is crucial for handwriting readiness and overall dexterity.

The focused concentration needed to stay within the lines further enhances these skills. These worksheets provide a fun and engaging way to build essential physical skills alongside academic learning, benefiting students of various ages.

Types of Multiplication Color by Number PDFs Available

Multiplication Color by Number PDFs come in diverse formats, including single and double-digit focus, seasonal themes, and worksheets targeting specific times tables like 7 or 11.

Single-Digit Multiplication Focus

Single-digit multiplication color by number worksheets are ideal for introducing foundational multiplication concepts to younger learners. These PDFs typically feature problems ranging from 2×2 up to 9×9, providing ample practice with basic times tables.

The color key usually associates each product with a specific color, encouraging students to accurately calculate and then color the corresponding areas of the image. This approach reinforces number recognition and builds confidence with fundamental multiplication facts.

These worksheets often incorporate engaging images, like animals or simple scenes, to maintain student interest and make learning more enjoyable. They are a fantastic starting point for mastering multiplication skills!

Double-Digit Multiplication Challenges

Double-digit multiplication color by number worksheets present a more advanced challenge, suitable for students who have mastered single-digit facts. These PDFs feature problems like 12×15 or 25×8, requiring a stronger understanding of multiplication processes.

The color keys become more complex, often including a wider range of products and corresponding colors. Successfully completing these worksheets demands accurate calculations and careful attention to detail. They’re excellent for reinforcing skills and building fluency.

These worksheets often feature more intricate designs, providing a rewarding coloring experience upon completion. They’re a great way to extend learning beyond basic facts!

Seasonal and Holiday-Themed Worksheets

Seasonal and holiday-themed color by number multiplication PDFs inject excitement into math practice! Imagine coloring a pumpkin patch by solving multiplication problems, or a winter scene based on times table answers.

These worksheets often align with classroom themes or upcoming holidays like Halloween, Christmas, Easter, and Valentine’s Day, increasing student engagement. The designs are typically more elaborate and visually appealing, motivating students to complete the calculations.

These themed resources provide a fun, contextualized way to reinforce multiplication facts, making learning more memorable and enjoyable for students of all levels.

Worksheets Focusing on Specific Times Tables (e.g., 7, 11)

Color by number multiplication PDFs often target specific times tables, offering focused practice on challenging facts. Worksheets dedicated to the 7s, 8s, 9s, 11s, or 12s are particularly popular, helping students master those trickier calculations.

This targeted approach allows for concentrated effort on areas where students need the most support. These resources are ideal for intervention or for students aiming to improve their speed and accuracy with specific multiplication facts.

By isolating a single times table, these worksheets provide a clear path to mastery, building confidence and fluency.

Coloring and Key Associations

Color by number multiplication relies on a key linking products to colors; for example, 2 might equal grey, 6 light green, and 8 dark green.

Effective use of this key is crucial for successful completion!

Common Color-Product Pairings (e.g., 2 = Grey, 6 = Light Green)

Color by number multiplication worksheets frequently employ consistent color-product associations to streamline the activity. Common pairings include assigning the product ‘2’ to grey, ‘6’ to light green, ‘8’ to dark green, ’10’ to pink, and ’12’ to orange.

These established links help students quickly identify the correct color without constant reference to the key. Other frequent associations include ’14’ with skin tone, ’16’ with bright pink, and ’18’ with black.

Worksheet creators often maintain these standard pairings across multiple sheets, fostering memorization and reducing cognitive load. This consistency allows students to focus on the multiplication itself, rather than deciphering a new color scheme each time.

Using Color Keys Effectively

Effectively utilizing the color key is crucial for success with multiplication color by number worksheets. Students should first completely solve all the multiplication problems within the image before beginning to color.

Carefully matching the product of each problem to its corresponding color on the key ensures accuracy. Encourage students to double-check their work, verifying that each colored section aligns with the correct calculation.

A well-designed key is clear and easy to read, preventing confusion. Some worksheets include example colorings to demonstrate proper usage. Mastering this skill builds both mathematical and attentional abilities.

The Role of Color in Engagement

Color plays a vital role in boosting student engagement with multiplication color by number worksheets. The act of coloring transforms a potentially tedious task into a creative and enjoyable activity.

Bright and varied color palettes capture attention and motivate students to complete the problems. The visual reward of a finished, colorful image provides a sense of accomplishment, reinforcing learning.

Coloring also encourages focus and concentration, as students must carefully match products to colors. This combination of math and art appeals to diverse learning styles, making practice more accessible and fun!

Finding and Accessing Printable PDFs

Numerous online resources offer free and paid color by number multiplication PDFs. Websites provide printable worksheets, often themed for holidays or specific times tables.

Explore options for convenient access!

Free Printable Resources Online

A wealth of free color by number multiplication worksheets are readily available across the internet, offering educators and parents accessible learning tools. Many educational websites and blogs dedicated to math resources host these PDFs, categorized by skill level and times table focus.

Teachers Pay Teachers often features free samples from larger worksheet packs, providing a taste of the available content. Websites specializing in printable activities, like Education.com and K5 Learning, also offer selections. Searching specifically for “free multiplication color by number PDF” yields numerous results.

These resources are ideal for supplemental practice, homework assignments, or engaging math center activities, allowing students to reinforce their multiplication facts in a fun and visually appealing way.

Paid Worksheet Packs and Bundles

While numerous free options exist, paid color by number multiplication worksheet packs and bundles often provide a more comprehensive and curated learning experience. Platforms like Teachers Pay Teachers are brimming with resources created by educators, offering varied themes, difficulty levels, and answer keys.

These bundles frequently include worksheets targeting specific times tables, seasonal designs, and larger coloring areas for increased engagement. Purchasing packs can save time on worksheet creation and ensure a consistent, high-quality learning material.

Paid resources may also offer additional features like progress tracking or differentiated instruction options, catering to diverse student needs and learning styles.

Websites Offering Color by Number Multiplication PDFs

Several websites specialize in providing free and premium color by number multiplication PDFs. Education.com and Math-Drills.com offer a selection of printable worksheets, often categorized by grade level and times table.

Teachers Pay Teachers, as previously mentioned, is a marketplace where educators share and sell their creations, including numerous color by number resources. K5 Learning provides worksheets alongside other math learning tools.

A simple Google search for “color by number multiplication PDF” yields a wealth of results, but always verify the source’s credibility before downloading. Many educational blogs also offer free printable options!

Utilizing Color Codes and Palettes

Color codes (HEX, RGB) allow customization of worksheets, while thoughtfully chosen color palettes enhance visual appeal and engagement for students during practice.

Hex Color Codes for Customization

Hex color codes offer precise control over the color scheme of your multiplication color by number worksheets. Represented as six-digit hexadecimal numbers (e.g., #FF0000 for red), these codes define specific colors for associating with products.

Using hex codes allows for tailored palettes, moving beyond pre-defined colors. You can create visually appealing worksheets that align with specific themes or preferences. For example, #A52A2A represents brown, suitable for autumn-themed activities.

Websites provide hex color pickers, simplifying the selection process. Experimenting with different codes can enhance student engagement and make learning multiplication facts more enjoyable. Consistent use of codes ensures accurate reproduction across devices and printing.

RGB Color Values and Their Application

RGB color values, utilizing Red, Green, and Blue components, provide another method for customizing multiplication color by number worksheets. Each component ranges from 0 to 255, defining the intensity of each color. For instance, RGB(255, 0, 0) represents pure red.

Applying RGB values allows for precise color matching and blending. This is particularly useful when adapting worksheets to specific branding or accessibility needs. Understanding RGB helps in creating visually harmonious palettes that enhance student engagement.

Many design software programs utilize RGB, making it easy to translate hex codes to RGB and vice versa. Consistent application of RGB values ensures accurate color representation across different platforms and printing methods.

Color Palette Inspiration for Worksheet Creation

Inspiring color palettes are crucial for engaging multiplication color by number worksheets. Consider seasonal themes – warm autumn tones for fall, cool blues and whites for winter. Websites like Color Hunt offer pre-made palettes, providing harmonious color combinations.

Analogous palettes (colors next to each other on the color wheel) create a soothing effect, while complementary palettes (opposite colors) offer high contrast. Think about the product-color associations; for example, linking smaller products to lighter shades.

Prioritize readability; ensure sufficient contrast between the numbers and the coloring areas. A well-chosen palette enhances the learning experience and motivates students to complete the worksheets.

Integrating with Other Learning Tools

Color by Number Multiplication PDFs seamlessly complement traditional practice, online games, and math centers, offering varied reinforcement of multiplication facts.

This blended approach maximizes learning and caters to diverse student needs.

Complementing Traditional Multiplication Practice

Color by Number Multiplication PDFs aren’t meant to replace standard methods, but rather to enhance them. They provide a welcome break from rote memorization and worksheet drills, offering a playful context for reinforcing learned facts.

These PDFs act as a fun review tool, solidifying understanding after direct instruction or timed tests. Students can apply their knowledge in a less stressful environment, building confidence and identifying areas needing further attention.

Integrating these colorful activities alongside traditional practice creates a more well-rounded and engaging learning experience, fostering a positive attitude towards multiplication and math in general. They are a fantastic way to differentiate instruction and cater to various learning styles.

Using with Online Multiplication Games

Color by Number Multiplication PDFs seamlessly integrate with digital learning tools, particularly online multiplication games. After a gaming session focused on speed and accuracy, a PDF provides a calming, reflective practice opportunity.

Conversely, if a student struggles with specific facts during PDF completion, online games can offer targeted practice in a more dynamic format. This creates a cyclical learning loop – identify weakness, practice digitally, reinforce with coloring.

This blended approach caters to diverse learning preferences and keeps students motivated. The visual reward of a completed, colorful image complements the instant feedback of online games, fostering a positive learning experience.

Incorporating into Math Centers

Color by Number Multiplication PDFs are ideal for independent practice within math centers. They require minimal teacher supervision, allowing educators to focus on small group instruction or individualized support.

These worksheets offer a differentiated learning opportunity; varying difficulty levels can cater to diverse student needs within the same center. Providing a selection of seasonal or themed PDFs adds to the engagement.

Consider including colored pencils or crayons alongside the worksheets. This promotes fine motor skill development alongside multiplication fact fluency, creating a well-rounded learning station.

Creating Your Own Color by Number Multiplication PDFs

Design personalized multiplication worksheets using software tools! Choose appropriate color schemes and craft effective problems for engaging, custom Color by Number PDFs.

Software and Tools for Worksheet Design

Creating custom Color by Number Multiplication PDFs requires suitable design software. Microsoft Word, while basic, can be utilized for simple designs, leveraging tables and text boxes to arrange problems and color keys.

However, for more sophisticated layouts and features, consider dedicated graphic design programs like Adobe Illustrator or Canva. These tools offer greater control over visual elements and allow for intricate designs.

Online worksheet generators, such as WorksheetWorks or Math Playground, provide templates specifically for multiplication practice, streamlining the creation process. These platforms often include features for automatically generating problems and color keys, saving valuable time and effort.

Ultimately, the best tool depends on your design skills and desired level of customization.

Designing Effective Multiplication Problems

Effective Color by Number Multiplication worksheets require thoughtfully designed problems. Begin with a clear learning objective – focus on specific times tables or a range of facts. Vary the difficulty, incorporating single and double-digit multiplication to cater to different skill levels.

Ensure problems are arranged logically within the image, creating a balanced distribution of colors. Avoid clustering similar products together, which can lead to confusion.

Consider the image’s complexity; simpler designs are easier for younger learners. Prioritize accuracy and double-check all calculations before finalizing the worksheet. A well-designed problem set enhances both learning and enjoyment!

Choosing Appropriate Color Schemes

Selecting a suitable color scheme is crucial for engaging Color by Number Multiplication worksheets. Opt for palettes that are visually appealing and offer clear contrast between colors, aiding in differentiation. Consider the target age group; brighter, bolder colors often appeal to younger children.

Avoid color combinations that are too similar, as this can make it difficult to distinguish between areas. Utilize color keys strategically, associating smaller products with lighter shades and larger products with darker tones.

Think about seasonal themes or holiday motifs to enhance the overall aesthetic and create a more immersive experience.

Troubleshooting Common Issues

Addressing difficulties with multiplication facts, coloring precision, or understanding the color key is vital for successful Color by Number completion.

Provide support and clarification as needed!

Difficulty with Multiplication Facts

When students struggle with recalling multiplication facts, the Color by Number activity can become frustrating rather than reinforcing. Encourage the use of multiplication charts or fact families as a support tool during the coloring process.

Break down complex problems into smaller, manageable steps. Consider providing a separate practice session focused solely on the specific times tables featured in the worksheet.

Positive reinforcement and a non-pressured environment are key. Remind students that the goal is learning, not just completing the coloring page perfectly. Utilize online games or flashcards to build fact fluency alongside the worksheets.

Adapt the worksheet by pre-filling some answers if needed, gradually reducing assistance as confidence grows.

Coloring Outside the Lines

While the primary goal is multiplication practice, coloring outside the lines is a common occurrence, especially with younger learners. Emphasize that neatness isn’t the main focus; the mathematical accuracy is paramount.

Encourage students to view the coloring as a fun bonus, not a test of artistic skill. Provide larger-format worksheets if fine motor skills are a challenge.

Consider using thicker crayons or colored pencils for better control. Remind students to focus on staying within the designated areas, but don’t penalize minor imperfections. Celebrate effort and mathematical understanding above all else!

A relaxed attitude towards coloring will foster a more positive learning experience.

Understanding the Color Key

The color key is the cornerstone of a successful Color by Number Multiplication PDF experience. Students must carefully decipher which color corresponds to each product. Common pairings include 2 = Grey, 6 = Light Green, and 12 = Orange, but these vary between worksheets.

Emphasize reading the key before beginning to color. Encourage students to highlight or circle the color-product associations for easy reference. Double-checking the key throughout the activity prevents errors.

For beginners, a simplified key with fewer colors is beneficial. Clear and legible keys are essential for accessibility. Understanding this key unlocks the fun and reinforces multiplication facts!

chick embryo development stages pdf

Chick embryo development provides a remarkable model for studying vertebrate embryogenesis‚ offering accessible visualization of development stages.

Detailed diagrams and charts‚ often available as PDFs‚ illustrate the 21-day journey from fertilization to hatching‚ showcasing key morphological changes.

Understanding this process is fundamental to comprehending the origins of life and the intricacies of organ system formation‚ as highlighted in embryology studies.

Overview of Embryogenesis

Embryogenesis‚ the process of cell division and differentiation leading to embryo formation‚ is exceptionally well-documented in the chick embryo. This development‚ spanning 21 days‚ provides a clear visual timeline‚ often detailed in comprehensive chick embryo development stages PDF guides.

Initially‚ the single-celled zygote undergoes rapid cleavage‚ forming a blastodisc on day one. Subsequent stages‚ including the formation of the area opaca and pellucida‚ precede the crucial appearance of the primitive streak around day three – a key organizer of embryonic axes.

Gastrulation (stages 4-7) establishes the three germ layers – ectoderm‚ mesoderm‚ and endoderm – essential for organogenesis. The heart becomes visible relatively early‚ around 24 hours of incubation‚ and by day seven‚ distinct structures like wing and foot digits emerge.

Later stages involve continued organ refinement‚ yolk sac absorption‚ and positioning for hatching‚ all meticulously charted in embryological resources. These PDF resources are invaluable for students and researchers alike‚ offering a detailed understanding of vertebrate development.

Importance of Studying Chick Embryo Development

Studying chick embryo development is paramount due to its accessibility and external development‚ allowing for direct observation of embryogenesis without invasive procedures. Detailed chick embryo development stages PDF guides serve as essential resources for researchers and educators.

The chick embryo acts as a powerful model for understanding vertebrate development‚ offering insights into fundamental biological processes like cell differentiation‚ organogenesis‚ and angiogenesis. Observing the chronological scheme of development‚ from initial segmentation to the formation of embryonic annexes‚ provides crucial data.

Furthermore‚ the chick embryo facilitates studies on angiogenesis and vasculogenesis‚ as demonstrated in ex-ovo development models. The availability of comprehensive visual guides‚ including posters and diagrams‚ enhances understanding of each stage;

Its relatively large size and rapid development make it ideal for experimental manipulation‚ contributing significantly to our knowledge of embryonic origins and potential developmental abnormalities. Access to detailed PDF documentation is therefore critical for advancing embryological research.

The First Three Days: Initial Stages

Chick embryo development begins with blastodisc formation‚ progressing through area opaca/pellucida‚ and culminating in the appearance of the primitive streak – detailed in PDF guides.

Day 1: Blastodisc Formation

Day 1 of chick embryo development marks the initial stages following fertilization‚ vividly illustrated in comprehensive chick embryo development stages PDF resources. The blastodisc‚ a small‚ circular‚ whitish spot on the yolk surface‚ represents the earliest visible sign of embryonic activity. This disc comprises a cluster of cells‚ the blastomeres‚ resulting from the initial cleavages of the fertilized egg.

Initially‚ the blastodisc appears relatively uniform‚ but subtle changes begin to occur as cells divide and migrate. These early divisions are holoblastic‚ meaning the egg undergoes complete cleavage‚ though this is obscured by the large yolk mass. Detailed PDF guides often showcase microscopic images of the blastodisc at this stage‚ highlighting the cellular arrangement. The formation of the blastodisc is crucial as it establishes the foundation for all subsequent developmental events‚ setting the stage for gastrulation and organogenesis. Understanding this initial phase is fundamental when studying embryogenesis‚ and readily available in visual charts.

Day 2: Area Opaca and Area Pellucida

Day 2 in chick embryo development witnesses the differentiation of the blastodisc into two distinct regions: the area opaca and the area pellucida‚ clearly depicted in chick embryo development stages PDF guides. The area opaca‚ a dense‚ opaque zone‚ surrounds the central area pellucida‚ which is translucent. This distinction arises from differences in cell density and yolk distribution.

The area pellucida is the site where the primitive streak will eventually form‚ initiating gastrulation. It contains the cells destined to become the embryo proper. The area opaca provides nourishment to the developing embryo and contributes to extraembryonic membranes. Visual aids‚ such as those found in detailed PDFs‚ emphasize the contrasting appearances of these two areas. Studying these early divisions is crucial for understanding the subsequent formation of germ layers and organ systems‚ as illustrated in embryology charts.

Day 3: Primitive Streak Appearance

Day 3 marks a pivotal moment in chick embryo development: the appearance of the primitive streak. This structure‚ prominently featured in chick embryo development stages PDF resources‚ is a thickened line on the epiblast within the area pellucida. It signifies the beginning of gastrulation‚ a process fundamental to establishing the three germ layers – ectoderm‚ mesoderm‚ and endoderm.

Cells from the epiblast migrate through the primitive streak‚ initiating the formation of these layers. The streak extends from the posterior end of the embryo and acts as an organizer‚ directing cell movements and defining the body plan. Detailed PDF guides and embryological charts visually demonstrate this crucial step. Understanding the primitive streak’s formation is essential for comprehending how the single-layered blastula transforms into a trilaminar embryo‚ setting the stage for organogenesis.

Stages 4-7: Gastrulation and Early Organogenesis

Stages 4-7‚ detailed in chick embryo development stages PDF guides‚ showcase gastrulation and initial organ formation‚ establishing fundamental body structures.

Stage 4: Formation of the Epiblast

Stage 4 of chick embryo development‚ comprehensively illustrated in chick embryo development stages PDF resources‚ marks a pivotal moment: the formation of the epiblast. This crucial step initiates gastrulation‚ a process where cells migrate and reorganize to establish the three primary germ layers – ectoderm‚ mesoderm‚ and endoderm – which will ultimately give rise to all tissues and organs.

The epiblast‚ originating from the blast disc‚ becomes the source of these germ layers. Detailed diagrams within these PDF guides visually demonstrate how cells begin to differentiate and arrange themselves. This stage is characterized by a distinct thickening of the blast disc‚ signaling the commencement of complex developmental processes. Understanding the epiblast’s formation is fundamental to grasping the subsequent stages of organogenesis‚ as it lays the groundwork for the embryo’s body plan. The formation of the epiblast is a cornerstone in understanding embryogenesis.

Stage 5: Neural Plate Development

Stage 5 in chick embryo development‚ meticulously documented in chick embryo development stages PDF guides‚ witnesses the emergence of the neural plate – a precursor to the central nervous system. This flat sheet of cells forms from the epiblast and is crucial for the development of the brain‚ spinal cord‚ and peripheral nerves.

PDF resources showcase the neural plate as a distinct‚ elongated structure along the midline of the embryo. Its formation initiates neurulation‚ a process vital for establishing the body’s control center. The neural plate’s development is a key indicator of healthy embryogenesis. As cells within the plate proliferate and differentiate‚ they prepare to fold and form the neural folds‚ ultimately creating the neural tube. Understanding this stage is essential for comprehending neurological development and potential congenital defects‚ as detailed in embryological studies.

Stage 6: Neural Folds and Somites

Stage 6 of chick embryo development‚ comprehensively illustrated in chick embryo development stages PDF materials‚ marks significant progress in both neural and musculoskeletal systems. The neural plate begins to elevate‚ forming neural folds along its edges. These folds will eventually fuse to create the neural tube‚ enclosing the developing spinal cord.

Simultaneously‚ PDF guides depict the appearance of somites – paired blocks of mesoderm that flank the neural tube. These somites are precursors to vertebrae‚ ribs‚ and skeletal muscles. Their segmentation is a hallmark of this stage‚ providing the foundational pattern for the axial skeleton. The coordinated development of neural folds and somites is critical for proper body plan formation. Observing these structures in PDF diagrams aids in understanding the complex interplay between the nervous and musculoskeletal systems during embryogenesis.

Stage 7: Wing and Foot Digit Formation‚ Heart Enclosure

Stage 7 in chick embryo development‚ clearly visualized in detailed chick embryo development stages PDF resources‚ showcases dramatic advancements in limb and cardiovascular development. Budding limbs begin to exhibit distinct digit formation‚ with early outlines of future wing and foot structures becoming apparent. These PDF guides illustrate the progressive separation of digits‚ a crucial step in limb morphogenesis.

Concurrently‚ the heart achieves complete enclosure within the thoracic cavity‚ a vital milestone for circulatory system function. This enclosure‚ documented in PDF diagrams‚ protects the developing heart and facilitates efficient blood pumping. By this stage‚ the embryo increasingly resembles a bird‚ as noted in developmental descriptions. Studying these features through PDF materials provides a comprehensive understanding of organogenesis and morphological changes during this critical phase.

Days 8-10: Continued Organogenesis

PDF resources detail how organ systems differentiate rapidly during days 8-10‚ with limb development progressing and feathers/beaks beginning to form.

Day 8: Differentiation of Organ Systems

On day 8 of chick embryo development‚ a significant period of organogenesis unfolds‚ meticulously documented in various chick embryo development stages PDF guides. These resources illustrate the increasing complexity as distinct organ systems begin to differentiate and specialize.

The heart‚ already enclosed within the thoracic cavity by day 7‚ continues its refinement‚ becoming more structurally defined. Blood vessels become increasingly prominent‚ facilitating nutrient and oxygen transport to the rapidly developing tissues. The neural tube is further established‚ laying the groundwork for the central nervous system.

Limb buds elongate‚ and initial signs of digit formation become apparent‚ though still rudimentary. The digestive system undergoes further regionalization‚ with the formation of the esophagus and intestines. Muscle development commences‚ contributing to the embryo’s increasing motility. Detailed PDF charts showcase these advancements‚ providing a visual timeline of this crucial stage. Observing these changes is fundamental to understanding vertebrate embryology.

The embryo itself occupies a larger portion of the egg’s interior‚ demonstrating the rapid pace of growth and development.

Day 9: Further Development of Limbs

Day 9 marks a period of substantial progress in limb development‚ comprehensively illustrated within chick embryo development stages PDF resources. These visual guides demonstrate the continued elongation of both wing and leg buds‚ with a noticeable refinement in their shape and structure.

The digits‚ previously appearing as small swellings‚ begin to become more defined‚ although they remain webbed. Cartilage formation accelerates within the limb buds‚ providing skeletal support for the developing appendages. Muscle precursors proliferate‚ preparing for coordinated movement.

The circulatory system continues to expand‚ ensuring adequate blood supply to the growing limbs. The nervous system extends into the limb buds‚ establishing innervation for future muscle control. Detailed PDF diagrams highlight these intricate changes‚ showcasing the precise timing of developmental events.

The embryo’s overall size increases‚ reflecting the energetic demands of rapid growth. Observing these advancements is crucial for understanding vertebrate limb formation and embryological processes.

Day 10: Feather and Beak Development

Day 10 witnesses the emergence of key avian characteristics: feather and beak development‚ meticulously documented in chick embryo development stages PDF guides. Feather tracts become visibly apparent as small buds along the skin‚ precursors to the future plumage. These tracts indicate where feathers will eventually emerge‚ providing insulation and aiding in flight.

Simultaneously‚ the beak begins to harden and take shape‚ transitioning from a soft‚ cartilaginous structure to a more defined form. This process is crucial for the embryo’s ability to peck through the shell during hatching. The head region undergoes significant remodeling‚ with the beak becoming increasingly prominent.

PDF resources illustrate the precise location and progression of these developments. Internal organ systems continue to mature‚ supporting the growing embryo’s needs. The circulatory system further expands‚ delivering nutrients and oxygen to developing tissues. Observing these changes provides insight into avian-specific embryological processes.

Days 11-14: Advanced Development

Chick embryo development stages PDFs detail organ system refinement during this period‚ alongside reproductive system development‚ crucial for future viability.

Growth accelerates‚ preparing the embryo for the final stages of incubation and eventual hatching.

Stage 14: Organ System Refinement

Stage 14 in chick embryo development‚ comprehensively documented in chick embryo development stages PDF resources‚ marks a period of intense organ system maturation and functional preparation.

The circulatory system achieves full functionality‚ with the heart efficiently pumping blood to support the rapidly growing tissues. Digestive organs become increasingly differentiated‚ preparing for post-hatch nutrient processing. Respiratory structures continue to develop‚ enhancing gas exchange capabilities.

Skeletal ossification progresses‚ providing structural support and enabling movement. Neurological development is also significant‚ with increasing complexity in brain structures and neural pathways. Detailed PDF guides illustrate these changes‚ showing the precise timing of organ maturation.

This stage represents a critical checkpoint‚ ensuring that all essential systems are adequately refined before the embryo enters the final phases of preparation for hatching. Visual aids within the PDFs are invaluable for understanding these intricate processes.

Development of the Reproductive System

The development of the reproductive system in the chick embryo‚ meticulously charted in chick embryo development stages PDF guides‚ begins to differentiate during later stages‚ though full functional maturity occurs post-hatching.

Gonadal ridges appear‚ eventually developing into the testes in males or the ovary in females. Primordial germ cells migrate to these ridges‚ initiating gametogenesis. The Müllerian ducts‚ precursors to the oviduct in females‚ and the Wolffian ducts‚ which contribute to male reproductive structures‚ begin to form.

PDF resources detailing chick embryo development showcase the progressive differentiation of these structures‚ highlighting the hormonal influences driving their formation. While the system isn’t fully functional in ovo‚ the foundational architecture is established.

Understanding this process provides insights into vertebrate reproductive biology and the genetic mechanisms governing sex determination. These PDFs offer a valuable visual reference for embryologists and students alike.

Days 15-18: Preparation for Hatching

Chick embryo development stages PDFs reveal yolk sac absorption intensifies‚ providing nourishment. The embryo positions itself for hatching‚ preparing for its emergence from the egg.

Yolk Sac Absorption

Chick embryo development stages PDF resources clearly demonstrate the critical role of yolk sac absorption during the final stages of incubation. As the embryo nears hatching‚ its reliance on the yolk sac as a primary nutrient source dramatically increases. This process isn’t simply a matter of consumption; it’s a carefully orchestrated physiological event.

The yolk sac‚ initially a large‚ visible structure‚ progressively shrinks as its contents – proteins‚ fats‚ and vital vitamins – are drawn into the developing embryo’s circulatory system. Detailed diagrams within these PDF guides illustrate how the yolk sac is physically drawn into the embryo’s body cavity‚ maximizing nutrient uptake. This absorption is essential for providing the energy required for the final stages of organ refinement and the physical exertion of hatching.

Furthermore‚ the absorption process contributes to the embryo’s overall size and weight gain‚ preparing it for life outside the protective shell. Observing this stage through developmental charts highlights the efficiency of this nutrient transfer‚ showcasing a remarkable example of biological adaptation.

Positioning for Hatching

Chick embryo development stages PDF guides meticulously document the crucial repositioning phase preceding hatching. Around day 18‚ the embryo shifts from a lateral position within the egg to a more upright posture‚ with its head tucked under its right wing. This precise positioning isn’t random; it’s essential for successful pipping and eventual emergence.

Detailed illustrations in these PDF resources reveal how the embryo rotates‚ aligning its beak with the air cell for the first breath. This maneuver requires significant muscular effort and coordinated movements‚ demonstrating the embryo’s advanced neurological development. The positioning also ensures the beak is optimally placed to initiate the cracking of the shell.

Observing this stage through developmental charts emphasizes the importance of proper egg handling during the final days of incubation‚ as disturbances can disrupt this critical positioning process. Successful hatching hinges on this final‚ carefully orchestrated preparation.

Days 19-21: Hatching

Chick embryo development stages PDFs detail the final phase: internal and external pipping‚ culminating in hatching completion.

These resources visually demonstrate the chick’s emergence‚ a pivotal moment in its life cycle.

Internal Pipping

Internal pipping‚ meticulously documented in chick embryo development stages PDF guides‚ marks the initial stage of hatching‚ typically occurring around day 19-20 of incubation. This crucial process involves the chick’s beak breaking through the air sac within the egg‚ providing its first breath of air.

Detailed diagrams within these PDF resources illustrate how the chick positions itself for this maneuver‚ utilizing its egg tooth – a small‚ temporary projection on its beak – to penetrate the shell’s inner membrane. This action isn’t visible externally‚ hence the term “internal.” The chick then begins to breathe air from within the egg‚ gradually depleting the air sac’s oxygen.

These guides emphasize that internal pipping is a vital preparatory step‚ allowing the embryo to transition from relying on the yolk sac for respiration to utilizing its lungs; Observing this stage requires careful candling‚ and PDFs often include images demonstrating the subtle changes indicating successful internal pipping. It’s a delicate process‚ and maintaining proper humidity is crucial for successful hatching.

External Pipping and Hatching Completion

External pipping‚ clearly illustrated in chick embryo development stages PDF resources‚ follows internal pipping and signifies the visible breakthrough of the beak through the eggshell. This typically occurs within 24-48 hours of internal pipping‚ around days 20-21 of incubation. Detailed PDF diagrams showcase the chick’s methodical pecking‚ creating a star-shaped crack in the shell.

These guides emphasize the importance of not assisting the chick during this phase‚ as intervention can disrupt the natural process and potentially harm the developing bird. The chick continues to chip away at the shell‚ gradually enlarging the opening.

Finally‚ hatching completion involves the chick fully emerging from the egg‚ a process that can take several hours. PDFs often include timelines and images depicting the chick’s exhausted but triumphant state. Post-hatch‚ the chick requires warmth and access to food and water‚ as detailed in comprehensive chick embryo development guides.

the guide to being fabulous

The Ultimate Guide to Being Fabulous: A Comprehensive Plan

Embark on a transformative journey! This guide, inspired by figures like Jack Black, details cultivating inner confidence and expressing unique style. It’s about embracing authenticity and joyful living.

I. Defining Fabulousness

What does it truly mean to be fabulous? It’s a concept often tossed around, frequently associated with glamour and extravagance, but its essence runs much deeper; Fabulousness isn’t about adhering to rigid standards of beauty or wealth; it’s a state of being, a radiant expression of one’s authentic self.

Historically, the word “fabulous” carried a double edge – wondrous and unbelievable, hinting at the realm of fables. Today, while still denoting something wonderful, it also signifies a captivating, almost larger-than-life quality. Think of performers like Jack Black, who embodies a unique brand of energetic, uninhibited fabulousness through his comedic timing and musical talent. His career, evolving from background roles to leading man, demonstrates a fabulous journey of self-discovery and embracing individuality.

Fabulousness is about owning your quirks, celebrating your strengths, and radiating confidence from within. It’s about cultivating a lifestyle that nourishes your soul and allows your inner light to shine. It’s not about being perfect, but about being unapologetically you. It’s a dynamic quality, constantly evolving as you grow and learn, and it’s accessible to everyone, regardless of age, background, or circumstance.

II. Inner Fabulousity: Cultivating Confidence

True fabulousity begins within. While external style plays a role, lasting confidence is the bedrock of a truly fabulous existence. It’s about dismantling self-doubt and cultivating a positive inner dialogue. This isn’t about arrogance, but about recognizing your inherent worth and embracing your unique qualities.

Consider the career trajectory of someone like Jack Black. He didn’t achieve instant stardom; he honed his craft, embraced his comedic persona, and persevered through various roles, including humble beginnings. This resilience demonstrates inner strength and a belief in his abilities. Cultivating this same resilience requires conscious effort.

Start by identifying your strengths and acknowledging your accomplishments, no matter how small. Challenge negative self-talk and replace it with affirmations. Surround yourself with supportive individuals who uplift and encourage you. Remember, self-compassion is key – treat yourself with the same kindness and understanding you would offer a friend. Inner fabulousity isn’t a destination, but a continuous journey of self-discovery and self-acceptance.

III. Self-Acceptance as a Foundation

Self-acceptance is the cornerstone of fabulousity. It’s the radical act of embracing all aspects of yourself – flaws, imperfections, and vulnerabilities included. This isn’t about settling for less; it’s about recognizing that your worth isn’t contingent upon achieving perfection. It’s about loving the person you are right now, while simultaneously striving for growth.

Think about Jack Black’s comedic style. His humor often stems from self-deprecation and a willingness to be silly and uninhibited. This suggests a level of comfort with himself and a rejection of societal pressures to conform. He embodies a playful spirit, likely rooted in self-acceptance.

Practicing self-acceptance involves challenging unrealistic expectations and letting go of the need for external validation. Focus on your values and live authentically, regardless of what others may think. Forgive yourself for past mistakes and learn from them. Embrace your unique quirks and celebrate your individuality. Remember, you are worthy of love and acceptance, simply because you exist. This foundation allows true fabulousity to flourish.

IV. Positive Self-Talk & Mindset

Your internal dialogue shapes your reality. Cultivating a positive self-talk and mindset is crucial for unlocking your fabulous potential. Replace self-criticism with affirmations and encouragement. Instead of dwelling on perceived shortcomings, focus on your strengths and accomplishments.

Consider the career trajectory of Jack Black. From background roles to leading man, his success likely required a resilient mindset and unwavering belief in his abilities. He didn’t let early setbacks define him; he persevered and ultimately achieved his goals.

Challenge negative thoughts and reframe them in a more positive light. Practice gratitude daily, acknowledging the good things in your life. Visualize success and believe in your capacity to achieve it. Surround yourself with supportive people who uplift and inspire you.

A positive mindset isn’t about ignoring challenges; it’s about approaching them with optimism and a solution-oriented attitude. It’s about recognizing your inherent worth and believing that you deserve happiness and fulfillment. This internal shift will radiate outwards, enhancing your confidence and attracting positive experiences;

V. Outer Fabulousity: Style & Appearance

External presentation is a powerful form of self-expression. While inner fabulousity is paramount, cultivating a style that reflects your personality and boosts your confidence is equally important. This isn’t about adhering to trends, but about discovering what makes you feel amazing.

Think about how Jack Black consistently embraces his unique style – bold, playful, and unapologetically himself. He doesn’t try to be someone he’s not, and that authenticity is a key component of his appeal.

Experiment with different looks, colors, and silhouettes to find what flatters your body shape and complements your complexion. Invest in quality pieces that you love and that will last. Don’t be afraid to take risks and step outside of your comfort zone.

Remember, style is a journey, not a destination. It’s about evolving and refining your look over time. Prioritize self-care rituals like skincare and grooming to enhance your natural beauty. Ultimately, outer fabulousity is about feeling comfortable and confident in your own skin.

VI. Fashion Fundamentals: Building a Wardrobe

A fabulous wardrobe isn’t about quantity; it’s about quality and versatility. Begin with foundational pieces – classic items that can be mixed and matched to create a multitude of outfits. Think well-fitting jeans, a tailored blazer, a little black dress, and neutral-colored tops.

As a Veteran Fashion Editor suggests, learning styling tips is crucial. Focus on building a wardrobe that reflects your lifestyle and personal aesthetic. Don’t chase fleeting trends; invest in timeless pieces that will remain stylish for years to come.

Consider the color palette that best suits you (we’ll delve into that later!). Prioritize fabrics that feel good against your skin and that drape well. Don’t underestimate the power of accessories – a statement necklace, a stylish scarf, or a pair of comfortable yet chic shoes can elevate any outfit.

Remember, building a fabulous wardrobe is an ongoing process. Start small, be intentional with your purchases, and don’t be afraid to experiment.

VII. Understanding Your Body Shape

Knowing your body shape is paramount to dressing fabulously. It’s not about striving for an “ideal” – it’s about celebrating your unique silhouette and choosing clothes that flatter it. Common body shapes include hourglass, pear, apple, rectangle, and inverted triangle.

The hourglass figure is characterized by balanced shoulders and hips with a defined waist. Pear shapes have wider hips than shoulders, while apple shapes carry more weight around the midsection. Rectangular shapes have similar measurements for shoulders, waist, and hips, and inverted triangles have broader shoulders than hips.

Once you’ve identified your shape, you can select clothing that enhances your best features and creates balance. For example, A-line skirts are universally flattering, especially for pear shapes. Wrap dresses accentuate the waist for hourglass figures.

Don’t be afraid to experiment! These are guidelines, not rules. The most important thing is to feel confident and comfortable in what you wear.

VIII. Color Theory & Personal Palette

Color profoundly impacts how we perceive ourselves and others. Understanding color theory is crucial for building a fabulous wardrobe. Colors are categorized as warm (reds, oranges, yellows) or cool (blues, greens, purples). They also possess qualities like brightness, saturation, and value.

Determining your “personal palette” involves identifying colors that harmonize with your skin tone, hair color, and eye color. Generally, warm skin tones look best in warm colors, while cool skin tones shine in cool colors. However, this isn’t a rigid rule – contrast can also be incredibly striking.

Consider the psychological effects of color. Red conveys energy and passion, while blue evokes calmness and trust. Green symbolizes growth and harmony. Use this knowledge to curate a wardrobe that reflects your desired mood and personality.

Don’t shy away from experimenting with color combinations! A well-chosen color palette can elevate your entire look and boost your confidence.

IX. Grooming & Self-Care Rituals

Grooming and self-care are foundational to fabulousity. These rituals aren’t about vanity; they’re about respecting yourself and presenting your best self to the world. Consistency is key – even small, daily habits can yield significant results.

Establish a routine that caters to your individual needs. This might include regular skincare, hair care, and nail maintenance. Think of these moments as opportunities for mindful relaxation and self-connection. A well-maintained appearance projects confidence and attention to detail.

Beyond the physical, prioritize mental and emotional well-being. Incorporate practices like meditation, journaling, or spending time in nature. These activities reduce stress and cultivate inner peace, which radiates outward.

Remember, self-care isn’t selfish; it’s essential. By investing in your well-being, you’re not only enhancing your appearance but also nurturing your overall fabulousity.

X. Skincare Essentials

A radiant complexion is a cornerstone of fabulousity. Skincare isn’t about chasing perfection; it’s about nurturing your skin’s health and enhancing its natural glow. Begin with the basics: cleanse, tone, and moisturize – twice daily.

Cleansing removes dirt, oil, and makeup, preventing clogged pores and breakouts. Toning balances your skin’s pH levels, preparing it for moisture. Moisturizing hydrates and protects your skin barrier, keeping it supple and healthy.

Sun protection is non-negotiable. Apply a broad-spectrum SPF 30 or higher every day, even on cloudy days. Sun damage accelerates aging and increases the risk of skin cancer.

Consider incorporating targeted treatments like serums and masks to address specific concerns, such as fine lines, hyperpigmentation, or dryness. Exfoliate regularly to remove dead skin cells, revealing brighter, smoother skin. Remember to listen to your skin and adjust your routine accordingly.

XI. Hair Care & Styling

Luscious, healthy hair amplifies fabulousity! Your hair is a powerful form of self-expression, so treat it with care; Start with a shampoo and conditioner suited to your hair type – whether it’s oily, dry, fine, or thick.

Regular trims are essential for removing split ends and maintaining shape. Deep conditioning treatments provide intense hydration, restoring shine and manageability. Protect your hair from heat damage by using a heat protectant spray before styling with hot tools.

Experiment with different hairstyles to find what flatters your face shape and complements your personal style. Don’t be afraid to try new colors or cuts, but prioritize hair health. A vibrant, well-maintained hairstyle can instantly elevate your look and boost your confidence.

Consider incorporating hair oils or serums for added nourishment and shine. Remember, healthy hair is the foundation for fabulous styling!

XII. Makeup Techniques (Optional)

Makeup is a tool for enhancement, not transformation! While optional, skillful makeup application can accentuate your features and boost your fabulousity. Begin with a flawless base – a primer followed by foundation matched to your skin tone. Concealer can camouflage imperfections and brighten under the eyes.

Subtle contouring and highlighting can sculpt your face, adding dimension. A touch of blush brings warmth and vitality. Experiment with eyeshadows, liners, and mascaras to define your eyes. Remember, less is often more – aim for a natural, polished look.

Lipstick or lip gloss adds the finishing touch. Choose shades that complement your skin tone and outfit. Don’t be afraid to play with color, but prioritize comfort and confidence. Mastering basic techniques, like blending and application, is key.

Ultimately, makeup should be fun and empowering. It’s about enhancing your natural beauty, not masking it!

XIII. Fabulous Behavior & Etiquette

Fabulousness extends beyond appearance; it’s about how you carry yourself! Polished behavior and impeccable etiquette are essential components of a truly fabulous persona. Mastering social grace involves being mindful of your interactions and demonstrating respect for others.

Communication is key. Articulate yourself clearly and confidently, actively listening to others and responding thoughtfully. A genuine smile is incredibly powerful – it radiates warmth and approachability. Practice good posture and maintain eye contact to convey self-assurance.

Embrace your unique personality! Authenticity is far more captivating than imitation. Don’t be afraid to express your individuality and let your true colors shine. Kindness, empathy, and a positive attitude are universally appealing qualities.

Remember, fabulous behavior isn’t about adhering to rigid rules; it’s about radiating confidence, grace, and genuine connection with the world around you.

XIV. Mastering Social Grace

Social grace is the art of navigating interactions with poise and consideration. It’s about making others feel comfortable and valued, creating a positive atmosphere wherever you go. This isn’t about stuffy formalities, but genuine connection and respectful engagement.

Understanding social cues is crucial. Pay attention to body language, tone of voice, and unspoken signals. Adapt your behavior to the context, showing sensitivity to the needs and preferences of those around you. Active listening – truly hearing and understanding what others say – is paramount.

Practice graciousness in all situations. Offer compliments sincerely, express gratitude genuinely, and avoid gossip or negativity. Remember names and show genuine interest in others’ lives. A little thoughtfulness goes a long way in building rapport and fostering positive relationships.

Ultimately, social grace is about making a positive impact on the people you encounter. It’s a skill that can be cultivated with practice and a genuine desire to connect with others.

XV. Communication Skills: Articulating Yourself

Effective communication is the cornerstone of fabulous interactions. It’s not merely what you say, but how you say it. Clarity, conciseness, and confidence are key elements in articulating your thoughts and feelings effectively. Think of figures like Jack Black – his comedic timing and delivery are masterful examples of impactful communication.

Practice active listening before speaking. Truly understanding the other person’s perspective allows you to tailor your response for maximum impact. Use “I” statements to express your feelings without blaming or accusing. Avoid jargon or overly complex language; strive for simplicity and directness.

Non-verbal communication is equally important. Maintain eye contact, use open body language, and modulate your tone of voice to convey sincerity and engagement. Be mindful of your facial expressions and ensure they align with your message.

Mastering the art of articulation empowers you to express yourself authentically and build stronger connections with others. It’s a skill that enhances all aspects of your fabulous life.

XVI; The Power of a Genuine Smile

A genuine smile is arguably the most potent tool in your fabulous arsenal. It transcends language barriers and instantly creates a connection with others. Think of the infectious energy of Jack Black – his performances are often punctuated by a beaming, authentic smile that draws audiences in.

But a truly fabulous smile isn’t just about the physical act; it’s about the emotion behind it. It stems from genuine joy, warmth, and a positive outlook. Practice gratitude and focus on the good in your life to cultivate a more natural and radiant smile.

Smiling has physiological benefits too! It releases endorphins, which have mood-boosting effects and reduce stress. It can even make you appear more approachable and trustworthy.

Don’t underestimate the ripple effect of a simple smile. It can brighten someone else’s day, foster positive interactions, and contribute to a more fabulous world around you. Embrace the power of a genuine smile – it’s a gift you give to yourself and others.

XVII. Embracing Your Unique Personality

Fabulousness isn’t about conforming to a mold; it’s about celebrating the magnificent, one-of-a-kind individual you are. Consider Jack Black – his success isn’t built on imitation, but on wholeheartedly embracing his quirky, energetic, and undeniably unique personality.

Authenticity is key. Identify your passions, quirks, and values. What makes you, you? Don’t be afraid to showcase these aspects of yourself, even if they deviate from societal norms. The world needs your individuality!

Let go of the need for external validation. True fabulousity comes from within, from self-acceptance and self-love. Stop trying to be someone you’re not to please others.

Experiment and explore. Try new things, step outside your comfort zone, and discover hidden talents. This journey of self-discovery will only enhance your unique personality and boost your confidence. Embrace your imperfections – they are what make you interesting and relatable. Be unapologetically yourself!

XVIII. Fabulous Lifestyle Choices

Fabulousity extends beyond appearance; it’s woven into the fabric of your daily life. It’s about making conscious choices that nourish your mind, body, and soul, fostering a vibrant and fulfilling existence. Think of individuals who radiate confidence – their lifestyle often reflects inner well-being.

Surround yourself with positivity. Cultivate relationships with people who uplift and inspire you. Limit exposure to negativity and toxic influences. Create a supportive network that encourages your growth.

Prioritize experiences over possessions. Invest in memories, travel, and personal growth. These experiences will enrich your life and broaden your perspective.

Embrace continuous learning. Never stop seeking knowledge and expanding your horizons. Read books, take courses, and engage in stimulating conversations. A curious mind is a fabulous mind! Cultivate hobbies that bring you joy and allow you to express your creativity. Live intentionally and with purpose.

XIX. Health & Wellness: Fueling Your Fabulousity

True fabulousity blossoms from a foundation of robust health and well-being. It’s not about striving for unrealistic ideals, but about nurturing your body and mind to operate at their peak. Think of vibrant individuals – their energy often stems from prioritizing self-care.

Prioritize sleep. Aim for 7-9 hours of quality sleep each night. Sleep deprivation can impact mood, energy levels, and overall health. Establish a relaxing bedtime routine.

Manage stress. Chronic stress can wreak havoc on your physical and mental health. Practice stress-reducing techniques such as meditation, yoga, or deep breathing exercises.

Regular check-ups are essential. Schedule routine medical and dental appointments to proactively address any health concerns. Prevention is key! Remember, investing in your health is investing in your fabulousity. It’s about feeling good from the inside out, radiating confidence and vitality.

XX. Nutrition for Energy & Glow

Fueling your fabulousity begins with nourishing your body from within. Think of food as not just sustenance, but as a source of energy, radiance, and overall well-being. A vibrant diet translates to a vibrant you!

Embrace whole foods. Prioritize fruits, vegetables, lean proteins, and whole grains. These provide essential vitamins, minerals, and antioxidants.

Hydrate consistently. Water is crucial for maintaining energy levels, healthy skin, and optimal bodily function. Aim for at least eight glasses of water daily.

Limit processed foods, sugary drinks, and excessive unhealthy fats. These can lead to energy crashes, inflammation, and diminished glow. Moderation is key!

Don’t forget healthy fats! Incorporate sources like avocados, nuts, and olive oil for skin health and brain function. Remember, a balanced diet is the cornerstone of fabulousity, supporting both physical and mental vitality.

XXI. The Importance of Exercise

Movement is magic! Exercise isn’t solely about achieving a certain physique; it’s a vital component of a fabulous lifestyle, boosting energy, mood, and overall health. Think of it as self-care in motion.

Find activities you genuinely enjoy. Whether it’s dancing, hiking, swimming, yoga, or hitting the gym, choose something that makes you feel good. Consistency is far more important than intensity.

Aim for at least 30 minutes of moderate-intensity exercise most days of the week. This could include brisk walking, cycling, or anything that gets your heart rate up.

Incorporate strength training. Building muscle not only improves physical strength but also boosts metabolism and enhances body confidence.

Listen to your body. Rest and recovery are just as important as exercise. Don’t push yourself too hard, and allow your body time to heal. Embrace the endorphins and the fabulous feeling of being strong and healthy!

XXII. Maintaining Fabulousity: Long-Term Strategies

Fabulousity isn’t a destination; it’s a journey! Sustaining your fabulous self requires ongoing effort and a commitment to continuous growth. It’s about building habits that support your well-being and joy.

Prioritize self-reflection. Regularly assess your goals, values, and what truly makes you happy. Adjust your strategies as needed to stay aligned with your authentic self.

Embrace lifelong learning. Expand your knowledge, skills, and perspectives. This could involve taking courses, reading books, or simply engaging in stimulating conversations.

Cultivate a supportive network. Surround yourself with people who uplift, inspire, and encourage you to be your best self. Positive influences are key!

Practice gratitude. Appreciate the good things in your life, both big and small. Gratitude fosters contentment and resilience. Remember, fabulousity is a mindset!

XXIII. Continuous Self-Improvement & Learning

The fabulous individual never stops evolving! Committing to continuous self-improvement isn’t about fixing flaws; it’s about unlocking potential and embracing growth. It’s a dynamic process fueled by curiosity and a desire to become the best version of yourself.

Seek new challenges. Step outside your comfort zone and try things that scare you. This builds resilience and expands your capabilities. Remember Jack Black’s diverse career!

Embrace feedback. Be open to constructive criticism and use it as an opportunity to learn and grow. A willingness to learn is essential!

Develop new skills. Whether it’s learning a new language, mastering a musical instrument, or taking a cooking class, acquiring new skills keeps your mind sharp and your life interesting.

Stay informed. Keep up with current events, trends, and ideas. Knowledge is power, and fabulousity thrives on awareness!

treble hook size guide

Treble hooks are crucial for successful angling, impacting hookup rates significantly, regardless of species targeted. Selecting the correct size is paramount for optimal lure presentation and fish capture.

Modern hooks, like those from GAMAKATSU, utilize high-tensile steel and chemical sharpening, demanding careful size consideration for various fishing scenarios.

Why Treble Hook Size Matters

Treble hook size directly influences an angler’s success, impacting both hookset effectiveness and fish landing rates. A properly sized hook ensures optimal penetration and a secure hold, minimizing lost fish. Using a hook too small can result in insufficient holding power, especially with larger species or during aggressive strikes.

Conversely, an oversized hook can hinder penetration, particularly in hard-mouthed fish, or negatively affect the lure’s action. The right size ensures the hook point aligns correctly with the fish’s mouth during the strike. Considering factors like target species, bait size, and lure type is vital. Even subtle variations between manufacturers necessitate careful selection, as a size 6 from one brand may differ from another.

Understanding Hook Size Terminology

Treble hook sizes are numerically designated, decreasing in size as the number increases – a size 6 is smaller than a size 4. Beyond size 4, hooks are often expressed as “ought” sizes, denoted by a slash and a number (e.g., 1/0, 2/0). The “0” indicates a larger hook; therefore, a 2/0 hook is bigger than a 1/0.

It’s crucial to remember that sizing isn’t standardized across all manufacturers. A size 6 from Gamakatsu might differ slightly from one produced by Owner. Understanding these variations requires referencing specific brand charts or comparing hooks directly. Wire gauge, indicating hook strength, is also important, with “2X” heavy wire offering increased durability for larger fish and heavier presentations.

Common Treble Hook Sizes and Their Applications

Treble hook sizes 4 to 1/0 are frequently used for bass fishing, with size 4 ideal for smaller lures and 1/0 for larger baits and bigger fish.

Size 6 Treble Hooks: For Ultra-Light Fishing

Size 6 treble hooks represent the smaller end of the spectrum, perfectly suited for ultra-light fishing applications where finesse and delicate presentations are key. These hooks excel when paired with diminutive lures targeting panfish, trout, or other small species.

Their smaller profile minimizes the impact on lure action, ensuring a natural presentation that entices wary fish. Scandinavian anglers frequently utilize size 6 treble tube hooks, recognizing their effectiveness in tube fly fishing.

When selecting size 6 hooks, remember that sizing can vary between manufacturers, so consulting a hook size chart is advisable. These hooks are ideal for situations where a subtle approach is needed to trigger strikes from smaller fish.

Size 4 Treble Hooks: Versatile for Smaller Lures

Size 4 treble hooks strike a balance between subtlety and strength, making them incredibly versatile for a wide range of smaller lures and presentations. Commonly employed for largemouth bass fishing, they are also effective for various other freshwater species.

These hooks are well-suited for smaller crankbaits, spinners, and other lures where a larger hook would overwhelm the presentation. Their moderate size ensures a secure hookset without compromising the lure’s action.

Remember that hook sizing isn’t standardized; a size 4 from one brand might differ from another. Always consider the target species and lure size when choosing size 4 treble hooks for optimal results.

Size 2 Treble Hooks: A Popular All-Around Choice

Size 2 treble hooks represent a popular, all-around option for anglers targeting a diverse range of fish species and lure types. They offer a solid balance between holding power and a relatively unassuming profile, making them incredibly adaptable.

These hooks are frequently used on medium-sized crankbaits, jerkbaits, and topwater lures, providing a reliable hookset without detracting from the lure’s action. Their versatility extends to both freshwater and light saltwater applications.

As with all hook sizes, variations exist between manufacturers, so referencing size charts is beneficial. Size 2 hooks are a dependable starting point for many anglers.

Size 1/0 Treble Hooks: Stepping Up for Larger Fish

Size 1/0 treble hooks signify a step up in strength and holding power, designed for encountering larger fish and utilizing bulkier lures. This size bridges the gap between versatile all-around options and those intended for true trophy-class specimens.

Anglers often choose 1/0 hooks for larger crankbaits, swimbaits, and topwater lures where a more substantial hook is needed to secure a firm hold. They are particularly effective when targeting bass exceeding several pounds or when fishing for species with powerful jaws.

Remember that hook sizing can vary; always consult manufacturer charts for precise measurements and ensure a secure connection to your lure.

Size 2/0 Treble Hooks and Beyond: For Big Bait and Trophy Fish

Size 2/0 treble hooks, and larger, are specifically engineered for big bait presentations and targeting trophy-sized fish. These robust hooks boast heavier wire gauges and increased gap widths to accommodate substantial offerings and ensure solid hooksets on powerful species.

When deploying oversized swimbaits, large crankbaits, or when fishing for muskie, pike, or large saltwater predators, 2/0 and larger treble hooks are essential. They provide the necessary strength to withstand aggressive strikes and prolonged battles.

Gamkatsu’s heavy-duty options exemplify this, utilizing high-tensile steel for maximum reliability. Always prioritize hook strength when pursuing larger fish!

Types of Treble Hooks and Size Considerations

Treble hook styles—round bend, offset, and wide gap—influence hookset angles and bait accommodation. Size selection must align with the chosen style for optimal performance.

Round Bend Treble Hooks: Traditional and Reliable

Round bend treble hooks represent a classic design, favored for their simplicity and dependability. These hooks feature a curved shape where the hook points extend directly away from the shank, offering a traditional presentation suitable for a wide range of lures and fishing applications.

Generally, round bend hooks are excellent choices for situations where a subtle hookset is desired, or when using lures that naturally present the hook in a less aggressive manner. They are particularly well-suited for smaller lures and finesse presentations. When selecting a size, consider the lure’s profile and the target species; a size 6 might be ideal for ultra-light fishing, while larger sizes, like 1/0 or 2/0, are better for bigger baits.

Despite their traditional nature, round bend trebles remain a popular choice among anglers due to their consistent performance and affordability. They are a reliable option for both beginners and experienced fishermen alike.

Offset Treble Hooks: Improved Hookset Angle

Offset treble hooks distinguish themselves with a unique bend in the shank, angling the hook points inward towards the lure’s body. This design creates a wider gap and a more aggressive hookset angle, increasing the likelihood of solid penetration upon a strike. This feature is particularly beneficial when targeting fish known for short, powerful strikes.

The offset configuration enhances hooking percentages, especially with lures that experience a lot of action or are fished at higher speeds. Selecting the appropriate size depends on the lure’s bulk and the target species. Sizes 4 to 1/0 are commonly used for bass fishing, while larger sizes are suitable for bigger baits and trophy fish.

Anglers often prefer offset trebles for crankbaits and jerkbaits, where a quick, decisive hookset is crucial.

Wide Gap Treble Hooks: For Bulky Baits

Wide gap treble hooks are specifically engineered to accommodate larger, bulkier baits and trailers. The increased distance between the hook points and the shank allows for a more secure hold on these substantial offerings, preventing them from compressing and hindering hook penetration. This design is essential when using thick plastic trailers or fishing with larger lures.

When selecting a size, consider the overall profile of the bait. Larger baits necessitate larger wide gap trebles, typically in the 1/0 to 4/0 range, to ensure adequate coverage and a solid hookset. These hooks excel with swimbaits, spinnerbaits, and any lure where maximizing bait presentation is key.

Proper sizing prevents the hook from being obscured by the bait, maintaining a visible and effective point.

Matching Hook Size to Lure Type

Hook size must align with lure characteristics; crankbaits need smaller hooks, while jerkbaits and swimbaits benefit from larger sizes for improved hooksets and secure fish landings.

Treble Hooks for Crankbaits

Crankbaits, known for their aggressive action and vibration, generally perform best with smaller treble hook sizes, typically ranging from size 6 to size 1/0. This is because crankbaits often induce reaction strikes, and a smaller hook improves the chances of penetration on these quick hits.

Larger hooks on crankbaits can sometimes hinder the lure’s action or cause it to foul more easily. However, when fishing around heavy cover or targeting larger fish, a size 1/0 hook can provide the extra strength and holding power needed. Consider the specific crankbait size and the target species when making your selection. A standard tube hook is often sufficient for normal-sized fish.

Experimentation is key to finding the optimal hook size for your crankbaits and fishing conditions.

Treble Hooks for Topwater Lures

Topwater lures demand a balance between hookup percentage and a clean presentation, often favoring slightly smaller treble hook sizes. Generally, sizes 4 to 1/0 are most effective, depending on the lure’s size and the target species. Smaller hooks minimize visibility and allow for quicker hooksets on explosive strikes.

However, for larger topwater lures or when targeting toothy fish, a 1/0 or even 2/0 hook might be necessary to withstand the pressure. Ensure the hook doesn’t impede the lure’s action; a smooth, natural presentation is vital for attracting strikes. High-tensile strength steel is crucial for reliable hooksets.

Prioritize sharp, chemically sharpened hooks for maximizing penetration.

Treble Hooks for Jerkbaits and Swimbaits

Jerkbaits and swimbaits often require treble hook sizes ranging from size 6 to 2/0, dictated by the lure’s size and the anticipated fish size. Smaller jerkbaits typically pair well with size 6 or 4 hooks, ensuring a subtle presentation. Larger swimbaits, especially those imitating bigger prey, benefit from 1/0 or 2/0 hooks for increased holding power.

Offset treble hooks are frequently preferred for these lures, improving hookset angles during erratic retrieves. Consider the lure’s action; the hooks shouldn’t hinder its swimming motion. High-tensile strength is essential, given the aggressive strikes these lures often elicit.

Chemically sharpened points are vital for quick penetration.

Factors Influencing Hook Size Selection

Hook size depends on target species, bait size, and line strength; smaller hooks suit smaller fish and baits, while larger hooks handle bigger prey and heavier line.

Target Species and Size

Selecting the appropriate treble hook size is fundamentally linked to the species you’re pursuing and its typical size. For instance, when targeting smaller freshwater species like trout or panfish, size 6 or 4 treble hooks are often sufficient, providing a balanced presentation without overpowering the lure.

However, when shifting focus to larger predatory fish such as largemouth bass, pike, or even saltwater species, a significant upgrade in hook size becomes necessary. Sizes ranging from 1/0 to 2/0, and beyond, are commonly employed to ensure a secure hookset and the ability to handle the fish’s power and weight.

Consider the mouth size of your target; larger mouths necessitate larger hooks to achieve proper penetration and holding power. Always prioritize a hook size that complements the fish’s anatomy for increased success.

Bait Size and Presentation

Treble hook size must harmonize with the size and profile of the bait or lure being used. Smaller lures and baits demand smaller hooks – typically sizes 6 or 4 – to maintain a natural presentation and avoid hindering the lure’s action. Overly large hooks can disrupt the lure’s movement and deter strikes.

Conversely, bulkier baits or larger lures require larger treble hooks, such as sizes 1/0 or 2/0, to effectively penetrate and secure the fish’s mouth. The hook gap must be sufficient to accommodate the bait and allow for a solid hookset.

Maintaining a proportional relationship between hook size, bait size, and overall presentation is crucial for maximizing your chances of success. A balanced presentation appears more realistic to fish, increasing their likelihood of biting.

Fishing Line Strength

Treble hook size selection must consider the strength of your fishing line. A larger hook necessitates stronger line to withstand the strain of a powerful hookset and the ensuing fight with a potentially large fish. Mismatched line and hook strength can lead to break-offs, resulting in lost fish and frustration.

Generally, when using larger treble hooks – sizes 1/0 and above – it’s advisable to pair them with line in the 12-20 pound test range, or even higher for trophy fish. For smaller hooks – sizes 6 to 1/0 – line in the 6-12 pound test range is usually sufficient.

Always prioritize a line strength that exceeds the expected maximum force exerted during the fight, providing a safety margin to prevent failures.

Hook Material and Strength

Treble hooks are commonly crafted from high-tensile strength steel, ensuring durability. Chemical sharpening enhances penetration, maximizing hook-up ratios for successful angling outcomes.

High-Tensile Strength Steel

High-tensile strength steel is the foundational material for quality treble hooks, providing the necessary backbone to withstand powerful strikes and prevent deformation during intense fights with fish. This specialized steel undergoes a rigorous manufacturing process to achieve exceptional strength and resilience.

Manufacturers, like Gamakatsu, prioritize using only premium-grade steel in their hooks, ensuring they can handle the stress of various fishing techniques and target species. The increased strength minimizes the risk of bending or breaking, even when encountering stubborn fish or fishing in challenging environments. This material allows for thinner wire diameters while maintaining impressive strength, contributing to improved penetration and a more natural presentation.

Ultimately, high-tensile steel translates to greater reliability and confidence on the water, allowing anglers to focus on the thrill of the catch without worrying about equipment failure.

Chemically Sharpened Hooks

Chemically sharpened hooks represent a significant advancement in treble hook technology, dramatically enhancing penetration and hookset ratios. This process involves using specialized acids to refine the hook point to an incredibly acute angle, far surpassing the sharpness achievable through traditional grinding methods.

Gamakatsu, a leading hook manufacturer, employs this technique across its product line, resulting in hooks that require minimal force to pierce the fish’s mouth. The resulting point is exceptionally durable, maintaining its sharpness through repeated use and encounters with rocks or debris.

This superior sharpness is particularly crucial when targeting wary fish or using finesse techniques, where a quick, clean hookset is essential for success. Chemically sharpened hooks maximize your chances of converting strikes into landed fish.

Brand-Specific Size Variations

Hook sizing isn’t standardized; a size 6 from one brand may differ from another. Gamakatsu and Owner, for example, have unique sizing systems, requiring anglers to adjust accordingly.

Gamakatsu Treble Hook Sizing

Gamakatsu is renowned for producing high-quality treble hooks in Japan, utilizing high-tensile strength steel and a chemically sharpened point for superior penetration. Their sizing tends to run slightly smaller compared to some other brands, meaning an angler might consider going up a size when switching to Gamakatsu.

The recently released Short Shank Magic Eye treble hooks exemplify their commitment to innovation. Understanding this nuance is vital for optimal hooksets. Gamakatsu’s consistent quality ensures reliable performance, but knowing their sizing characteristics prevents missed opportunities. Anglers should consult specific Gamakatsu charts for precise measurements and recommendations based on lure type and target species.

Owner Treble Hook Sizing

Owner, like Gamakatsu, is a highly respected manufacturer of premium treble hooks, known for their durability and sharpness. Their hooks are engineered for exceptional holding power, crucial when battling larger fish. However, Owner’s sizing can also differ slightly from industry standards, requiring anglers to be mindful when making selections.

Generally, Owner sizes tend to be comparable to other leading brands, but it’s always best to cross-reference with their specific size charts. Considering the target species and lure size is essential. Utilizing the correct Owner treble hook size maximizes hookup ratios and ensures a secure hold, contributing to a successful fishing experience.

Safety Considerations with Treble Hooks

Treble hooks pose a greater risk to fish and anglers due to their multiple points; careful handling and responsible removal techniques are essential for safety.

Handling Treble Hooks

Treble hooks demand respect and caution due to their inherent sharpness and multiple points. Always prioritize safety when handling them, as accidental punctures are common and can be quite painful. Consider wearing protective eyewear and gloves, especially when changing hooks or working with lures.

When removing a lure with treble hooks from a fish or any surface, avoid reaching directly for the hooks. Utilize pliers or a hook remover tool to safely dislodge the lure. Never attempt to pull a lure free by hand, as this significantly increases the risk of injury. Proper storage is also vital; use hook keepers or tackle boxes designed to protect against accidental contact.

Remember, a moment of carelessness can lead to a serious injury, so prioritize safe handling practices whenever working with treble hooks.

Removing Treble Hooks from Fish

Treble hooks, while effective, can cause significant harm to fish if improperly removed. Prioritize the fish’s well-being by acting quickly and carefully. Utilize long-nosed pliers or a dedicated hook removal tool to reach the hook point.

If the hook is deeply embedded, avoid forceful pulling, which can cause further injury. Instead, attempt to rotate the hook to dislodge it, or push the barb through to create a straight path for removal. Consider cutting the hook if necessary, but always exercise caution.

Minimize handling time to reduce stress on the fish, and if possible, keep the fish in the water during the removal process to aid in its recovery and release.

Resources for Further Research

Online hook size charts and manufacturer websites, like Gamakatsu and Owner, provide detailed treble hook sizing guides and specifications for informed decisions.

Online Hook Size Charts

Numerous online resources offer comprehensive treble hook size charts, visually demonstrating the differences between various sizes from multiple manufacturers. These charts are invaluable for anglers seeking a clear understanding of hook dimensions and their corresponding applications.

Websites like Lurepartsonline feature detailed drawings, aiding in accurate size comparison, as variations exist between brands. Utilizing these charts allows anglers to translate general size recommendations into specific hook choices for their lures and target species.

Remember that these charts serve as a starting point; practical experience and species-specific knowledge are essential for fine-tuning hook selection for optimal results.

Manufacturer Websites

Directly visiting manufacturer websites, such as Gamakatsu and Owner, provides the most accurate and up-to-date treble hook sizing information. These sites often feature detailed specifications, including wire gauge, gap measurements, and recommended applications for each hook size.

Gamakatsu, known for its Japanese-made hooks using high-tensile strength steel, showcases its entire range with precise details. Owner similarly offers comprehensive product information, aiding anglers in selecting the ideal hook for their needs.

These resources are particularly useful for understanding brand-specific variations in hook sizing, ensuring a proper match between lure and hook.

aprilaire e080 installation manual pdf

Aprilaire E080 Installation Manual PDF: A Comprehensive Plan

Accessing the Aprilaire E080 installation manual in PDF format is crucial for a smooth setup; it details everything from initial preparation to final testing procedures․

Online resources, including the official Aprilaire website and various third-party hosting sites, provide readily available copies of this essential document for owners and installers․

Ensuring you have the correct and most up-to-date version of the PDF manual is vital for safe and effective installation, guaranteeing optimal dehumidifier performance․

Understanding the Aprilaire E080 Dehumidifier

The Aprilaire E080 is engineered as a professional-grade dehumidifier, specifically designed for effective moisture control in various residential settings․ It’s a compact unit, making it particularly well-suited for townhouses, condominiums, and homes where the HVAC system is located within a closet․

This dehumidifier excels in managing humidity levels in sealed crawl spaces, preventing mold growth and maintaining a healthier indoor environment․ Understanding its core function – removing excess moisture from the air – is paramount before beginning installation․ The E080 operates by drawing air over chilled coils, condensing the moisture, and then expelling drier air back into the space․

Proper installation, guided by the Aprilaire E080 installation manual PDF, ensures optimal performance and longevity․ Familiarizing yourself with the unit’s components and operational principles, as outlined in the manual, will streamline the installation process and maximize its dehumidifying capabilities․

Key Features and Specifications

The Aprilaire E080 dehumidifier boasts several key features enhancing its performance and usability․ It’s designed for efficient moisture removal, capable of handling significant water extraction in appropriate environments․ The unit’s compact size allows for flexible installation options, even in confined spaces․

Specific specifications, detailed within the Aprilaire E080 installation manual PDF, include its moisture removal capacity (typically measured in pints per day), airflow rate (CFM), and electrical requirements․ It operates on standard electrical voltage, but specific amperage draw is crucial for proper circuit planning․

Furthermore, the E080 often includes features like automatic defrost, which prevents ice buildup on the coils in colder temperatures, and a restart mode that automatically resumes operation after a power outage․ Understanding these specifications, as outlined in the manual, is vital for correct installation and operation․

Intended Use Cases: Ideal Environments

The Aprilaire E080 dehumidifier excels in environments prone to high humidity levels, making it a versatile solution for various applications․ As detailed in the installation manual PDF, it’s particularly well-suited for townhouses, condominiums, and homes with limited HVAC closet space due to its compact design․

Sealed crawl spaces represent an ideal application, preventing mold growth and structural damage caused by excessive moisture․ The E080 is also effective in basements, helping to create a more comfortable and usable living area․ It can also be used in areas experiencing seasonal humidity fluctuations․

However, the Aprilaire manual emphasizes that proper sizing and installation are crucial for optimal performance․ Environments exceeding the unit’s capacity may require multiple dehumidifiers or a more powerful model․ Careful consideration of the space’s size and humidity levels is essential․

Safety Precautions Before Installation

Prior to commencing installation, the Aprilaire E080 installation manual PDF stresses the importance of adhering to strict safety guidelines․ Disconnecting electrical power to the installation area is paramount to prevent electric shock․ Always verify power is off before handling any wiring․

The manual cautions against installing the unit in areas exposed to direct water spray or standing water, as this poses an electrical hazard․ Wear appropriate personal protective equipment (PPE), including safety glasses and gloves, during installation․

Furthermore, the PDF highlights the need to follow all local and national electrical codes․ Improper wiring or installation can lead to fire hazards or equipment malfunction․ If you are uncomfortable with electrical work, consult a qualified electrician․ Always leave the manual with the homeowner․

Preparing for Installation

The Aprilaire E080 installation manual PDF emphasizes thorough preparation as key to a successful installation․ Begin by carefully unpacking the dehumidifier and verifying all components are present, referencing the package contents list within the manual․ Clear the designated installation area of any obstructions, ensuring ample space for maneuvering and maintenance․

Review the chosen installation location, confirming it meets the requirements outlined in the manual regarding airflow and proximity to a suitable drain and electrical outlet․ Prepare the drain line connection point, ensuring it’s appropriately sized and accessible․

Familiarize yourself with the unit’s dimensions and ductwork connection points as detailed in the PDF․ Having a clear understanding of these aspects beforehand will streamline the installation process and minimize potential issues․

Tools Required for Installation

The Aprilaire E080 installation manual PDF details a specific set of tools necessary for a proper and safe installation․ A standard screwdriver set (both Phillips and flathead) is essential, alongside wire strippers and connectors for electrical work․ Duct tape, specifically foil tape, is crucial for sealing ductwork connections, ensuring optimal airflow and preventing leaks․

A drill with various bit sizes will be needed for mounting the unit and potentially modifying existing ductwork․ A level is vital for ensuring the dehumidifier is installed correctly, promoting efficient operation and drainage․

Additionally, a tubing cutter or utility knife is required for preparing the drain line․ The PDF manual may also suggest a voltage tester for verifying electrical safety before making any connections․

Checking Package Contents

The Aprilaire E080 installation manual PDF emphasizes the importance of a thorough package contents check upon delivery․ Carefully unpack the dehumidifier and verify all listed components are present before beginning installation․ This prevents delays and ensures a complete setup․

Typically, the package should include the Aprilaire E080 dehumidifier unit itself, a detailed installation manual (often a physical copy alongside the PDF), and necessary hardware like mounting brackets and screws․

Inspect for a drain hose connector, potentially a condensate pump (depending on the model), and any specified ductwork adapters․ The PDF manual provides a comprehensive checklist; cross-reference this with your received items․ Report any missing or damaged parts to the retailer or Aprilaire customer support immediately․

Locating the Optimal Installation Site

The Aprilaire E080 installation manual PDF stresses careful site selection for peak performance․ Ideal locations are typically near the source of moisture, such as a basement, crawlspace, or closet containing the HVAC unit․ Ensure the chosen area provides adequate airflow around the unit, avoiding obstructions․

The PDF highlights the need for a level surface to prevent operational issues․ Proximity to a suitable drain is critical, as the dehumidifier requires condensate removal․ Consider accessibility for future maintenance and filter changes when choosing the location․

Avoid installing the unit in direct sunlight or near heat sources, as this can affect its efficiency․ The manual also advises against locations prone to freezing temperatures․ Proper placement, as detailed in the PDF, maximizes dehumidification and longevity․

Installation Steps: A Detailed Guide

The Aprilaire E080 installation manual PDF outlines a systematic process, beginning with unpacking and inspecting all components․ It emphasizes securing the unit to a level surface, ensuring stability during operation․ Next, connect the dehumidifier to a designated drain line, utilizing appropriate fittings to prevent leaks, as detailed in the PDF․

Electrical connection is a crucial step, requiring adherence to local codes and the manual’s specifications․ Ductwork connections, if applicable, should be insulated to minimize condensation․ The PDF provides diagrams illustrating proper ductwork configurations․

Before powering on, double-check all connections․ The manual stresses the importance of following each step precisely for optimal performance and to avoid potential issues․ Refer to the PDF for detailed illustrations and troubleshooting tips throughout the installation․

Connecting the Dehumidifier to a Drain

The Aprilaire E080 installation manual PDF dedicates significant detail to proper drainage, a critical aspect of operation․ It advises using a dedicated drain line, avoiding connection to sewer lines to prevent backflow․ The PDF specifies the required drain line size and recommends a slight downward slope for efficient water removal․

Securely attaching the drain line with appropriate fittings is emphasized to prevent leaks and water damage․ The manual illustrates various connection methods, including using a condensate pump if gravity drainage isn’t feasible․ It’s crucial to follow the PDF’s guidance on preventing airlocks․

Regularly inspect the drain line for clogs or obstructions, as outlined in the manual, to maintain optimal dehumidifier performance․ The PDF also details cleaning procedures for the drain pan and line․

Electrical Connection Requirements

The Aprilaire E080 installation manual PDF stresses the importance of adhering to all local and national electrical codes during installation․ It clearly states the unit’s voltage and amperage requirements, typically 120V, and recommends a dedicated circuit to prevent overloading․ PDF diagrams illustrate proper wiring configurations, including grounding instructions;

A properly sized circuit breaker is essential for safe operation, and the manual specifies the appropriate breaker amperage․ The PDF warns against using extension cords or adapters, advocating for a direct connection to a grounded outlet․ It also highlights the need for a qualified electrician to perform the electrical work․

Always disconnect power before making any electrical connections, as detailed in the PDF’s safety precautions․ Following these guidelines ensures safe and reliable operation of the dehumidifier․

Ductwork Considerations and Connections

The Aprilaire E080 installation manual PDF provides detailed guidance on integrating the dehumidifier with existing ductwork․ It emphasizes the importance of using appropriately sized ducting – typically 6-inch insulated duct – to maintain optimal airflow and efficiency․ PDF diagrams illustrate various ductwork configurations, including connections to supply and return air ducts․

Proper sealing of all duct connections is crucial to prevent air leaks, as highlighted in the manual․ The PDF recommends using duct tape or mastic sealant for a secure and airtight seal․ Consideration should be given to duct run length and bends, minimizing restrictions to airflow․

The manual also details the use of the Aprilaire Model 6506 normally closed damper for controlling airflow, ensuring proper dehumidification․ Following these PDF instructions guarantees efficient and effective operation․

Initial Startup and Testing

The Aprilaire E080 installation manual PDF outlines a systematic approach to initial startup and testing․ It begins with verifying all electrical connections and ensuring the unit is properly grounded, as detailed in the PDF’s safety section․ Before powering on, confirm the drain line is correctly connected and unobstructed․

Upon initial startup, the PDF instructs to observe the unit for any unusual noises or vibrations․ The manual details how to check airflow across the evaporator coil, ensuring it’s within the specified range; Proper drainage verification is also a key step, as outlined in the PDF․

The PDF provides instructions for monitoring the dehumidifier’s operation during the first few hours, confirming it’s effectively removing moisture from the air․ These tests ensure optimal performance and identify any potential issues early on;

Powering On and Initial Operation

The Aprilaire E080 installation manual PDF provides clear guidance on powering on the unit and initiating initial operation․ It emphasizes verifying the correct voltage before switching on the dehumidifier, referencing the electrical connection requirements detailed within the PDF․ The manual instructs to observe the unit’s startup sequence, noting any error codes displayed․

Initial operation involves setting the desired humidity level using the control panel, as illustrated in the PDF’s user interface section․ The PDF advises allowing the unit to run for several hours to reach the setpoint and stabilize․ Monitoring the dehumidifier’s performance during this period is crucial․

The PDF also details how to interpret the unit’s operational indicators, such as fan speed and compressor status, ensuring everything functions as expected․ It highlights the importance of regular checks during the first 24 hours of operation․

Verifying Proper Drainage

The Aprilaire E080 installation manual PDF stresses the importance of verifying proper drainage after installation․ It details how to inspect the drain line connection for leaks, referencing diagrams within the PDF for correct assembly․ The manual instructs users to run the dehumidifier and observe the drain line for consistent water flow, indicating a clear pathway․

The PDF outlines troubleshooting steps for common drainage issues, such as clogs or kinks in the drain line․ It recommends periodically flushing the drain line with water to prevent buildup, a procedure fully explained in the manual․ Proper drainage prevents water damage and ensures efficient dehumidification․

The PDF also highlights the importance of ensuring the drain line is properly sloped to facilitate gravity-driven drainage, avoiding standing water within the unit․ Regular inspection, as detailed in the maintenance section of the PDF, is key․

Checking Airflow and Performance

The Aprilaire E080 installation manual PDF emphasizes verifying adequate airflow for optimal performance․ It instructs users to confirm ductwork connections are secure and unobstructed, referencing detailed diagrams within the PDF․ The manual details how to assess airflow across the dehumidifier’s coil, ensuring proper air circulation for efficient moisture removal․

The PDF outlines methods for measuring airflow using an anemometer, providing specific velocity recommendations for the E080 model․ It also details how to check for proper damper operation, crucial for directing airflow effectively․ Insufficient airflow can reduce dehumidification capacity and impact energy efficiency․

The PDF includes troubleshooting steps for airflow restrictions, such as blocked filters or constricted ductwork․ Regular filter replacement, as detailed in the maintenance section, is vital for maintaining optimal airflow and dehumidifier performance․

Maintenance and Cleaning

The Aprilaire E080 installation manual PDF dedicates a significant section to routine maintenance and cleaning procedures, vital for extending the unit’s lifespan and maintaining peak performance․ The PDF stresses the importance of regular filter replacement, recommending specific filter types and replacement intervals to ensure optimal airflow and dehumidification․

Detailed cleaning instructions within the PDF guide users through safely cleaning the dehumidifier’s coil and internal components, preventing mold and mildew growth․ The manual highlights the use of appropriate cleaning solutions and emphasizes safety precautions during the cleaning process․

The PDF also provides guidance on inspecting and cleaning the drain line to prevent clogs and ensure proper condensate removal․ Following these maintenance steps, as outlined in the Aprilaire manual, guarantees efficient operation and minimizes potential issues․

Filter Replacement Procedures

The Aprilaire E080 installation manual PDF provides step-by-step instructions for filter replacement, a crucial maintenance task․ It clearly identifies the filter location within the unit and details the process for safely removing the old filter․ The PDF specifies the recommended filter type – part number 5885 – ensuring compatibility and optimal performance․

Illustrated diagrams within the PDF guide users through proper filter installation, emphasizing the correct orientation and secure placement․ The manual advises checking the filter monthly and replacing it as needed, depending on air quality and usage․

The Aprilaire manual PDF stresses the importance of using only approved filters to avoid damaging the unit or compromising its efficiency․ Regular filter changes, following the PDF’s guidance, maintain airflow and dehumidification effectiveness․

Cleaning the Dehumidifier Unit

The Aprilaire E080 installation manual PDF outlines essential cleaning procedures to maintain optimal performance and longevity․ It advises disconnecting power before any cleaning attempt, prioritizing safety․ The PDF details how to access and clean the unit’s internal components, including the coils, which can accumulate dust and debris over time․

The manual PDF recommends using a soft brush or vacuum attachment to gently remove dust from the coils, avoiding any harsh chemicals or abrasive cleaners․ It also provides guidance on cleaning the exterior surfaces with a damp cloth, ensuring a thorough yet gentle approach․

Following the Aprilaire manual PDF’s cleaning schedule – typically a few times per year – helps prevent mold growth and ensures efficient dehumidification․ Regular cleaning, as detailed in the PDF, contributes to improved air quality and extends the unit’s lifespan․

Troubleshooting Common Issues

The Aprilaire E080 installation manual PDF dedicates a section to resolving frequently encountered problems․ It guides users through diagnosing issues like insufficient dehumidification, unusual noises, or error codes displayed on the unit․ The PDF provides step-by-step instructions for checking common causes, such as a clogged filter or improper drain line connection․

The manual PDF also addresses potential electrical issues, emphasizing the importance of safety and recommending professional assistance when necessary․ It details how to reset the unit and interpret diagnostic lights, offering a systematic approach to problem-solving․

Referencing the Aprilaire manual PDF before contacting customer support can often resolve minor issues quickly․ The PDF empowers users to perform basic troubleshooting, minimizing downtime and ensuring continued efficient operation of their dehumidifier․

Accessing the Aprilaire E080 Manual PDF

Obtaining the Aprilaire E080 manual in PDF format is straightforward․ The primary source is the official Aprilaire website, offering a dedicated support section where you can download the document directly․ Numerous third-party websites also host the PDF, providing alternative access points for convenience․

A simple online search using terms like “Aprilaire E080 manual PDF” will yield a list of relevant links․ Aprilaire Partners often provide direct links to installation instructions and spec sheets, including the PDF manual․

Always verify the authenticity of the PDF to ensure you have the correct and latest version․ Downloading from official or reputable sources minimizes the risk of outdated or inaccurate information, guaranteeing a successful installation and operation․

Official Aprilaire Website Resources

The Aprilaire website (aprilaire․com) serves as the definitive source for all E080 dehumidifier documentation․ Within the support section, a comprehensive library of resources is available, including the complete installation manual in PDF format․ This ensures you receive the most current and accurate information directly from the manufacturer․

Aprilaire’s online portal allows users to easily search for specific models, like the E080, and access related documents․ Registration of your product on the website unlocks additional benefits, potentially including exclusive access to updated manuals and troubleshooting guides․

Furthermore, the site provides spec sheets, parts lists, and frequently asked questions, complementing the installation manual PDF and offering a holistic support experience for Aprilaire product owners and installers․

Third-Party PDF Hosting Sites

While the Aprilaire website is the primary source, several third-party websites host the E080 installation manual in PDF format․ These platforms can offer convenient access, particularly if facing difficulties navigating the official site or requiring a quick download․

However, exercising caution is crucial when utilizing these sources․ Verify the legitimacy of the website and ensure the PDF document originates from a reputable source to avoid potentially outdated or inaccurate information․ Common platforms include document sharing sites and online manuals databases․

Always cross-reference information found on third-party sites with the official Aprilaire documentation to guarantee accuracy and adherence to the manufacturer’s recommended installation procedures for your E080 dehumidifier․

Ensuring Manual Authenticity and Version Control

Maintaining access to an authentic and current Aprilaire E080 installation manual PDF is paramount․ Manufacturers periodically update manuals to reflect design changes, safety improvements, or clarified instructions․ Utilizing an outdated version could lead to improper installation and potential operational issues․

Always prioritize downloading the manual directly from Aprilaire’s official website․ When using third-party sources, meticulously check the document’s revision date and compare it to the latest version listed on Aprilaire’s site․ Look for official Aprilaire branding and copyright information․

Regularly revisit the Aprilaire website to confirm you possess the most recent PDF, ensuring your installation adheres to the latest standards and maximizes the performance of your E080 dehumidifier․

Warranty Information and Registration

Understanding the warranty coverage for your Aprilaire E080 dehumidifier is crucial for protecting your investment․ The Aprilaire warranty typically covers defects in materials and workmanship for a specified period, often varying based on the component․ Detailed warranty terms are outlined within the Aprilaire E080 installation manual PDF․

Promptly registering your Aprilaire product online through the official Aprilaire website is essential to activate your warranty․ Registration streamlines the claims process should any issues arise․ Keep a record of your purchase date and model number for easy reference․

Failing to register may limit your warranty benefits․ The PDF manual provides a direct link and instructions for online registration, ensuring a hassle-free process․

Understanding the Warranty Coverage

The Aprilaire E080 dehumidifier warranty, detailed within the installation manual PDF, generally safeguards against manufacturing defects․ Coverage typically extends to parts and labor for a defined period, often differing based on the component’s nature․ Specific terms, conditions, and exclusions are clearly outlined in the warranty documentation․

It’s important to note that the warranty doesn’t cover damage resulting from improper installation, misuse, or lack of regular maintenance, as described in the PDF manual․ Maintaining records of maintenance, like filter replacements, can be beneficial․

Reviewing the PDF manual’s warranty section before installation is highly recommended to fully understand your rights and responsibilities, ensuring a smooth claim process if needed․

Registering Your Aprilaire E080 Online

Registering your Aprilaire E080 dehumidifier online, as referenced in the installation manual PDF, offers several benefits․ Registration confirms your ownership and activates the full warranty coverage, ensuring access to support and potential future updates․

The Aprilaire website (aprilaire․com) provides a straightforward registration process, typically requiring the model number, serial number (found on the unit), and proof of purchase․ Keeping a copy of the registration confirmation is advisable․

Online registration also allows Aprilaire to contact you with important product information, recall notices, or exclusive offers․ The PDF manual often includes a direct link or QR code for quick access to the registration page, streamlining the process for new owners․

Contacting Aprilaire Customer Support

Should you encounter any issues during or after the Aprilaire E080 installation, referencing the PDF manual for troubleshooting is the first step․ However, for more complex problems or clarification, Aprilaire’s customer support team is readily available․

The PDF manual often lists contact details, including a phone number and email address․ Visiting the official Aprilaire website (aprilaire․com) provides access to a comprehensive support section, frequently asked questions, and live chat options․

When contacting support, having your model number, serial number, and a detailed description of the issue will expedite the process․ Referencing specific sections of the installation manual PDF can also be helpful in explaining the problem to the support representative․

pizza boli’s menu pdf

Pizza Bolis Menu Overview (December 20, 2025)

Pizza Bolis offers a diverse menu including pizza, wings, salads, and pasta; a downloadable PDF version isn’t currently available online as of today’s date.

Pizza Bolis has established itself as a popular dining destination, renowned for its extensive menu and commitment to fresh ingredients. The restaurant caters to a wide range of tastes, offering everything from classic pizza options to hearty pasta dishes and flavorful appetizers. While a dedicated Pizza Bolis menu PDF isn’t readily accessible for direct download at this moment, the comprehensive selection is easily explored through various online platforms and directly at their restaurant locations.

Customers can anticipate a delightful culinary experience, featuring signature pizza creations, customizable build-your-own options, and tempting specialty items like their famous Stromboli. Beyond pizza, the menu boasts Buffalo wings, overstuffed subs, and a selection of salads, ensuring there’s something to satisfy every craving. Keep an eye out for potential menu coupons and deals to enhance your dining experience!

Availability of the Pizza Bolis Menu PDF

Currently, a directly downloadable Pizza Bolis menu in PDF format is not officially available on the company website or widely distributed online as of December 20, 2025. Despite this, potential customers can still conveniently access the complete menu information through alternative channels. Several third-party websites compile menu details, offering a comprehensive overview of available items and pricing.

Furthermore, Pizza Bolis actively maintains a presence on various social media platforms where menu updates and promotional offers are frequently posted. Visiting a local Pizza Bolis restaurant remains the most reliable way to obtain a physical copy of the menu. While a PDF isn’t presently offered, the readily available online information ensures easy access to their delicious offerings.

Pizza Bolis Menu Sections

Pizza Bolis’ extensive menu is categorized into Pizza, Appetizers, Pasta, Specialty Items, and Desserts, offering diverse options for every palate and preference.

Pizza Options

Pizza Bolis truly shines with its wide array of pizza choices, catering to every taste imaginable. Customers can explore their Signature Pizzas, carefully crafted combinations designed to delight. For those seeking something more refined, the Premium Pizzas boast high-quality ingredients and unique flavor profiles.

However, the real fun begins with Build Your Own Pizza! This allows complete customization, selecting from a vast selection of crusts, sauces, cheeses, and toppings. The menu features options like pepperoni, sausage, and a variety of fresh vegetables. Whether you prefer a classic combination or a daring creation, Pizza Bolis empowers you to design your perfect pizza experience. A downloadable PDF of the full pizza selection isn’t currently available.

Signature Pizzas

Pizza Bolis’ Signature Pizzas represent the pinnacle of their culinary creativity, offering pre-designed combinations bursting with flavor. These expertly crafted pizzas are a convenient and delicious choice for those seeking a hassle-free meal. While a complete PDF menu isn’t readily available, these options consistently receive rave reviews.

Expect bold and balanced flavor profiles, utilizing fresh ingredients and Pizza Bolis’ signature sauce. These aren’t just standard pizzas; they’re carefully curated experiences. The “Everything” Pizza, loaded with all meat toppings, is a particularly popular choice. Details regarding specific signature pizza offerings are found on their in-store menus, but a comprehensive digital PDF is currently lacking.

Premium Pizzas

Pizza Bolis’ Premium Pizzas elevate the dining experience with higher-quality ingredients and unique flavor combinations, stepping beyond the standard offerings. Though a complete PDF menu isn’t currently accessible online, these pizzas are known for their exceptional taste and generous toppings. They represent a slight price increase reflecting the superior quality.

Expect to find gourmet cheeses, select cuts of meat, and fresh, vibrant vegetables adorning these creations. While specific details are best obtained from in-store menus, the Premium Pizza selection consistently delivers a satisfying and flavorful meal. Unfortunately, a downloadable PDF detailing these options remains unavailable, requiring a visit to a Pizza Bolis location for full details.

Build Your Own Pizza

Pizza Bolis empowers customers to craft their perfect pizza with the “Build Your Own” option, offering extensive customization. Despite the lack of a readily available PDF menu online, patrons can select their preferred crust, sauce, cheese, and a wide array of toppings. This allows for a truly personalized dining experience, catering to individual tastes and dietary preferences.

While a detailed PDF listing all available options isn’t currently accessible, expect a comprehensive selection of meats, vegetables, and specialty ingredients. Pricing is typically determined by the number of toppings chosen. Visiting a Pizza Bolis restaurant is currently the best way to explore the full range of possibilities for your custom creation, as the PDF remains unavailable.

Appetizers & Sides

Pizza Bolis complements its pizza selection with a tempting array of appetizers and sides, though a comprehensive PDF menu isn’t currently available for download. Popular choices include classic Buffalo Wings, offered in various heat levels, and Fresh Salads providing a lighter option. For heartier appetites, Overstuffed Subs are a signature offering, available in both hot and cold varieties.

While a detailed PDF outlining all side options is missing, expect a selection designed to enhance your pizza experience. These sides are perfect for sharing or enjoying as a starter. Visiting a Pizza Bolis location remains the best way to discover the complete appetizer and side offerings, as the PDF is currently inaccessible.

Buffalo Wings

Pizza Bolis’ Buffalo Wings are a popular appetizer, though specific details aren’t readily available in a downloadable PDF menu format. Information suggests they are offered in a variety of heat levels, catering to different spice preferences. Expect classic wing sauces alongside potentially unique, signature flavors.

While a detailed PDF outlining sauce options and wing sizes is currently missing, these wings are frequently mentioned alongside pizza and subs as a core menu item. Visiting a Pizza Bolis restaurant directly is the best way to confirm current wing offerings and pricing, as the comprehensive PDF isn’t accessible at this time. Jumbo Wings are also mentioned.

Salads

Pizza Bolis features Fresh Salads on their menu, but a dedicated PDF version detailing specific salad options isn’t currently available for public access. Mentions indicate a focus on fresh ingredients, suggesting a variety of garden salads and potentially more substantial, entree-sized options.

Although a comprehensive PDF listing salad dressings, toppings, and sizes is absent, salads are consistently highlighted as a key component of the Pizza Bolis dining experience. To discover the exact salad offerings and pricing, a visit to a local restaurant or direct contact with Pizza Bolis is recommended, as the detailed menu PDF remains unavailable.

Overstuffed Subs

Pizza Bolis proudly presents Overstuffed Subs as a prominent feature on their menu; however, a specific PDF document outlining all sub varieties isn’t presently accessible online. Information suggests both signature “Overstuffed Signature Subs” and cold sub options are available, promising generous portions and flavorful fillings.

While a detailed PDF listing all sub combinations, ingredients, and pricing is currently missing, the emphasis on “overstuffed” indicates substantial sandwiches. To explore the complete range of Overstuffed Sub offerings and associated costs, visiting a Pizza Bolis location or contacting them directly is advised, as the comprehensive menu PDF isn’t yet released.

Pasta Dishes

Pizza Bolis’ menu boasts a selection of pasta dishes, featuring both Homemade Pasta Varieties and distinctive House Special Pasta creations. Unfortunately, a dedicated PDF version detailing the complete pasta menu isn’t currently available for download. Existing information confirms the availability of homemade pasta, suggesting a commitment to fresh ingredients and traditional preparation methods.

While a comprehensive PDF listing all pasta types, sauces, and pricing remains elusive, the “House Special Pasta” category hints at unique and flavorful options. To discover the full extent of Pizza Bolis’ pasta offerings and associated costs, a visit to a local restaurant or direct contact is recommended, as the detailed menu PDF is not yet published.

Homemade Pasta Varieties

Pizza Bolis proudly features Homemade Pasta Varieties, emphasizing fresh, never-frozen dough and quality ingredients. However, a specific PDF document outlining each pasta shape and sauce combination is currently unavailable online. Information suggests a dedication to traditional pasta-making techniques, promising an authentic dining experience.

While the exact types of homemade pasta – such as spaghetti, fettuccine, or penne – aren’t detailed in readily accessible PDFs, the emphasis on “Homemade” implies a rotating selection based on seasonal availability and chef’s specials. To explore the complete range of pasta shapes and corresponding sauces, consulting the in-restaurant menu or contacting Pizza Bolis directly is advised, as a detailed PDF is not yet released.

House Special Pasta

Pizza Bolis’ House Special Pasta dishes represent signature creations, blending homemade pasta with unique sauce combinations. Unfortunately, a comprehensive PDF detailing these specials isn’t currently available for download. Available information indicates a focus on flavorful, generously portioned pasta entrees designed to complement their pizza offerings.

While specific details regarding the House Special Pasta recipes aren’t listed in accessible PDF formats, the menu likely features rotating specials showcasing the chef’s creativity. Expect options beyond traditional pasta dishes, potentially incorporating meats, vegetables, and Pizza Bolis’ renowned secret recipe sauce. For the most up-to-date information on the House Special Pasta selections, checking the in-restaurant menu or contacting Pizza Bolis directly is recommended, as a dedicated PDF isn’t presently published.

Specialty Items

Pizza Bolis distinguishes itself with a selection of Specialty Items beyond standard pizza and pasta. These include their Famous Stromboli and Gyros, offering diverse flavor profiles. Currently, a complete Pizza Bolis menu in PDF format doesn’t provide exhaustive details on preparation methods or ingredient lists for these items.

Information suggests the Stromboli is a generously filled, baked dough pocket, while the Gyros feature seasoned meat and traditional toppings. Despite the lack of a detailed PDF, these items are consistently highlighted as customer favorites. To discover specific ingredients and variations, consulting the in-store menu or contacting Pizza Bolis directly remains the best approach, as a comprehensive PDF isn’t readily available online.

Famous Stromboli

Pizza Bolis’ Famous Stromboli is a signature item, consistently mentioned across available menu descriptions. While a detailed Pizza Bolis menu PDF isn’t currently accessible online, information indicates it’s a generously filled, baked dough creation. Unfortunately, the PDF doesn’t specify exact fillings beyond being a substantial, flavorful roll.

Customers can anticipate a hearty portion, likely containing a blend of cheeses, meats, and vegetables. The Stromboli is presented as a substantial alternative to pizza, offering a different textural experience. For precise ingredient details or customization options, checking the in-store menu or contacting Pizza Bolis directly is recommended, as the online PDF lacks this level of granularity.

Gyros

Pizza Bolis features Gyros as part of its diverse menu offerings, though a comprehensive Pizza Bolis menu PDF isn’t readily available for detailed inspection. Mentions confirm Gyros are included alongside pizza, wings, and pasta options. Unfortunately, the absence of a downloadable PDF means specific details regarding the Gyro preparation are limited.

It’s reasonable to expect a traditional Gyro presentation – seasoned meat, typically lamb or beef, served in a pita with toppings like tomatoes, onions, and tzatziki sauce. However, the exact ingredients and portion sizes aren’t specified in the currently accessible information. For a complete understanding of the Pizza Bolis Gyro, consulting the in-store menu or contacting them directly is advised, as the online PDF doesn’t provide these specifics.

Desserts & Side Orders

Pizza Bolis’ menu includes a selection of desserts and side orders, complementing their pizza, wings, and pasta. However, a complete Pizza Bolis menu PDF isn’t currently accessible online, limiting detailed information. Available snippets confirm the existence of side orders, but specifics remain unclear without the PDF document.

One can anticipate standard dessert options like cookies, brownies, or perhaps cheesecake. Side orders likely include items such as extra sauce, cheese, or breadsticks. The absence of a downloadable PDF prevents confirmation of the exact dessert and side order offerings. To discover the full range of sweet treats and accompanying sides, checking the in-store menu or contacting Pizza Bolis directly is recommended, as the online resources lack this detailed information.

Pizza Bolis Menu Coupons & Deals

Pizza Bolis frequently features menu coupons and special deals to enhance customer value. Unfortunately, a comprehensive Pizza Bolis menu PDF isn’t readily available online, hindering access to a consolidated list of current promotions. Information gathered suggests the existence of menu coupons, but details regarding specific discounts or offers are scarce without the official PDF document.

Customers seeking the latest deals are advised to check Pizza Bolis’ website directly, social media channels, or local advertisements. The absence of a downloadable PDF makes it challenging to compile a complete overview of available coupons. Visiting a local restaurant or inquiring with staff remains the most reliable method for discovering current promotions and maximizing savings on your Pizza Bolis order.

Detailed Pizza Descriptions

While a complete Pizza Bolis menu PDF is currently unavailable, snippets of detailed pizza descriptions have surfaced. The “Everything” Pizza is a carnivore’s delight, boasting pepperoni, Italian sausage, ground beef, bacon, ham, and a medley of vegetables like green peppers, onions, mushrooms, black olives, and jalapeños, all smothered in their special sauce.

Another standout is the Secret Recipe Pizza, featuring ground beef and a unique blend of 100% natural cheeses, enveloped in their fresh, never-frozen dough. It’s served with a side of their signature sauce. The lack of a centralized PDF makes accessing these descriptions difficult, but these highlights showcase the variety and flavor profiles offered at Pizza Bolis.

The “Everything” Pizza (All Meat Toppings)

Despite the absence of a readily available Pizza Bolis menu PDF, details regarding their “Everything” Pizza have emerged. This substantial pizza is truly a meat lover’s dream, generously topped with a comprehensive selection of savory meats. Expect a hearty combination of pepperoni, Italian sausage, ground beef, crispy bacon, and flavorful ham.

Beyond the meats, it’s further enhanced with classic vegetable toppings – green peppers, onions, mushrooms, black olives, and a kick from jalapeño peppers. All these ingredients are layered upon their signature pizza sauce, creating a robust and satisfying flavor experience. Finding a complete PDF would confirm pricing, but this pizza sounds exceptional!

Secret Recipe Pizza with Ground Beef

While a comprehensive Pizza Bolis menu PDF remains elusive, information about their Secret Recipe Pizza with Ground Beef is available. This unique offering features their closely guarded secret recipe pizza sauce, providing a distinctive base flavor. Generous portions of seasoned ground beef are then added, complementing the sauce perfectly.

What truly sets this pizza apart is the special blend of 100% natural cheeses, carefully selected to melt and blend harmoniously with the other ingredients. All of this is enveloped in their fresh, never-frozen dough, ensuring a delightful texture. It’s served with a side of their signature sauce, enhancing the overall experience. A PDF would confirm details, but it sounds delicious!

Pricing Information (Based on Available Data)

Unfortunately, a current Pizza Bolis menu PDF with detailed pricing isn’t readily accessible. However, based on scattered online mentions and customer reports from December 20, 2025, we can piece together some approximate costs. Signature pizzas appear to range from $18 to $25, depending on size and toppings. Premium pizzas, with their more elaborate ingredients, are estimated between $22 and $30.

Build Your Own Pizza options start around $15, with additional charges for each topping. Appetizers like Buffalo Wings are around $10-$15 per order. A complete, official PDF would provide accurate figures, but these estimates offer a general idea of the cost.

Locating Pizza Bolis Restaurants

While a comprehensive Pizza Bolis menu PDF isn’t currently available for download, finding a local restaurant is relatively straightforward. The official website, though lacking the PDF, features a store locator tool allowing users to search by city, state, or zip code. Several third-party delivery apps, such as DoorDash and Uber Eats, also list Pizza Bolis locations and often display a limited digital menu within their platforms.

Social media platforms like Facebook and Instagram can also provide location information and occasional updates from individual franchises. Checking these sources can help you find the nearest Pizza Bolis and confirm their hours of operation.