
Toro 521 Snowblower Manual: A Comprehensive Guide
This manual details operation, maintenance, and troubleshooting for the Toro 521 snowblower, covering engine specifics, drive systems, and component details.
The Toro 521 snowblower is a powerful and reliable machine designed for efficient snow removal. This manual serves as a comprehensive guide, providing essential information for safe operation and long-lasting performance. Understanding your snowblower’s features, from the engine specifications to the auger and impeller system, is crucial. Whether you’re a first-time user or an experienced operator, this resource will help you maximize its capabilities.
Proper assembly, operation, and maintenance, as detailed within, will ensure years of dependable service. Familiarize yourself with safety precautions and troubleshooting steps to address potential issues effectively. This guide also covers warranty information and locating replacement parts.
Safety Precautions and Warnings
Prioritize safety when operating the Toro 521 snowblower. Always disconnect the spark plug wire before performing any maintenance or adjustments to prevent accidental starting. Never operate the machine with missing or damaged parts. Keep hands and feet clear of the auger and impeller at all times – they can cause serious injury.
Be mindful of bystanders, pets, and objects in the operating area. Never allow children to operate the snowblower. Wear appropriate clothing, including eye protection and sturdy footwear. Avoid operating on steep slopes and be cautious of hidden obstacles. Review all warnings in this manual before each use.
Understanding the Snowblower Components
The Toro 521 snowblower comprises several key systems. The engine provides power, while the auger and impeller work in tandem to collect and discharge snow. A robust drive system, featuring traction control, ensures efficient movement across various snow conditions. The chute directs the snow stream, adjustable for distance and angle.
Familiarize yourself with the handle assembly, auger housing, and their respective adjustments. Understanding these components is crucial for proper operation, maintenance, and troubleshooting. Refer to detailed diagrams within this manual for precise locations and functions.
Engine Specifications and Overview
The Toro 521 snowblower is typically equipped with a powerful 4-cycle engine, designed for reliable cold-weather starting. Key specifications include displacement (typically around 208cc), fuel capacity (approximately 0.8 gallons), and oil capacity (around 18 ounces). This engine delivers sufficient power for handling substantial snowfall.
Regular maintenance, including oil changes and spark plug replacements, is vital for optimal performance. Always use the recommended oil type and follow the specified maintenance schedule. Understanding these engine details ensures longevity and efficient snow removal.
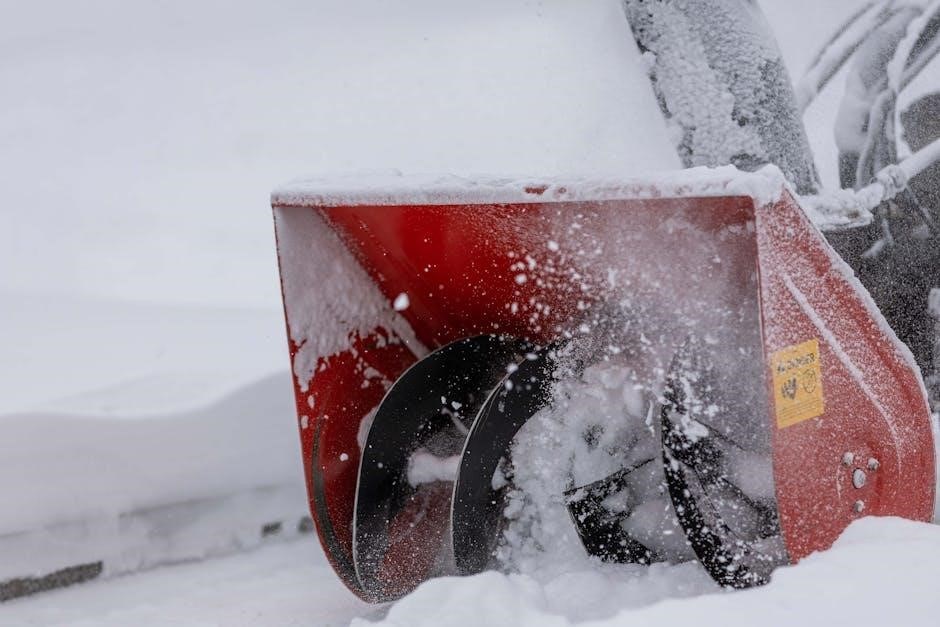
Auger and Impeller System Details
The Toro 521 utilizes a two-stage auger system, effectively breaking up and conveying snow. The auger, constructed from durable materials, pulls snow into the impeller housing. The high-speed impeller then forcefully discharges the snow through the chute. Shear pins protect the system from damage caused by obstructions.
Regular inspection of the auger blades and impeller for wear is crucial. Prompt replacement of worn components maintains optimal throwing distance and prevents strain on the engine. Proper maintenance ensures efficient snow removal and prolongs system life.

Drive System and Traction Control
The Toro 521 features a self-propelled drive system, simplifying operation on varied terrains. Utilizing a robust transmission, it provides ample power for navigating snowdrifts and inclines. Traction control is enhanced by tire tread design, maximizing grip on slippery surfaces.
The drive speed is adjustable, allowing users to match pace to conditions. Regular inspection of the drive belt and transmission fluid levels is essential for smooth operation. Maintaining proper tire pressure also contributes to optimal traction and maneuverability, ensuring efficient snow clearing.
Assembly Instructions
Before initial use, careful assembly is crucial for safe and effective operation of your Toro 521 snowblower. Begin by unpacking all components and verifying against the parts list. Attach the handle to the auger housing using the provided hardware, ensuring secure fastening.
Next, install the chute assembly, confirming proper rotation functionality. Double-check all bolts and connections for tightness. Refer to the diagrams for correct orientation of parts. Proper assembly guarantees optimal performance and longevity of your snow removal equipment.
Handle Assembly and Adjustments
Securely attaching the handle is the first step in Toro 521 assembly; Align the handle posts with the designated slots on the snowblower’s chassis and fasten using the supplied bolts and washers. Ensure a snug fit, but avoid over-tightening.
Adjust the handle height to a comfortable operating position for optimal control. Most models offer multiple height settings. Regularly check bolt tightness during use. Proper handle adjustment minimizes strain and maximizes maneuverability during snow removal, enhancing user comfort and efficiency.
Auger Housing Installation
Proper auger housing installation is crucial for efficient snow removal with the Toro 521. Carefully align the auger housing with the mounting points on the snowblower’s frame. Secure it using the provided hardware, ensuring all bolts are tightened to the manufacturer’s specified torque.
Verify the auger rotates freely within the housing before proceeding. Incorrect installation can lead to damage or reduced performance. Double-check all connections for stability before operation, guaranteeing safe and effective snow clearing capabilities.
Chute Installation and Rotation
Securely attaching the chute is vital for directing snow flow on your Toro 521. Align the chute with the designated mounting points on the auger housing. Fasten it using the provided hardware, ensuring a snug fit but allowing for rotational movement.
The chute should rotate smoothly through its full range of motion. Test this functionality before each use. Proper rotation enables you to control the snow’s trajectory, preventing obstructions and maximizing clearing efficiency. Regularly inspect the rotation mechanism for any binding or damage.
Operating Instructions
Before operation, ensure the area is clear of people and objects. Always check oil levels and fuel before starting. For a cold start, engage the choke and follow the starting sequence detailed in the manual. A warm start typically requires no choke.
Once running, adjust the snow throwing distance and angle using the designated controls. Be mindful of wind direction to avoid snow being blown back towards you. Operate the snowblower at a safe and comfortable pace, avoiding sudden maneuvers.
Starting the Engine – Cold Start Procedure
To initiate a cold start, ensure the fuel valve is open and the throttle is set to the ‘choke’ position. Firmly press the primer bulb several times until fuel is visible. Engage the safety bail and pull the starter rope with a smooth, consistent motion. If the engine doesn’t start after a few attempts, repeat the priming and pulling process.

Once the engine sputters, gradually reduce the choke setting until it runs smoothly. Allow the engine to warm up for a few minutes before engaging the auger.
Starting the Engine – Warm Start Procedure
For a warm start, verify the fuel valve is open and the throttle isn’t in the choke position. Engage the safety bail firmly, and pull the starter rope with a swift, deliberate motion. The engine should ignite with minimal effort due to retained heat. If it fails to start immediately, briefly attempt priming the bulb once or twice.
Avoid excessive priming, as it can flood the engine. Allow a short warm-up period before engaging the auger and commencing snow removal operations.
Adjusting Snow Throwing Distance and Angle
To modify throwing distance, utilize the distance adjustment lever located near the chute control. Moving the lever adjusts the impeller speed, impacting how far the snow is expelled. For angle adjustments, rotate the chute using the chute rotation knob. This allows directing the snow stream left or right.
Fine-tune these settings based on snow density and wind conditions. Experiment to achieve optimal performance and avoid unnecessary strain on the machine. Remember to disengage the auger before making significant adjustments.
Maintenance Schedule
Regular maintenance ensures optimal performance and extends the life of your Toro 521 snowblower. Key tasks include checking the oil level before each use and changing the oil after every 25 hours of operation, or annually. Inspect the spark plug annually, replacing it if necessary.
Shear pins should be checked before each use and replaced immediately if damaged. Periodically inspect the auger and scraper bar for wear, and tighten any loose bolts. Following this schedule prevents costly repairs and maintains efficiency.
Oil Change Procedures
To change the oil on your Toro 521, ensure the engine is warm but not hot. Locate the oil drain plug and position a suitable container underneath. Remove the plug, allowing the oil to drain completely. Replace the plug and tighten securely.
Next, remove the oil fill cap and add the recommended oil type and quantity, as specified in the manual. Check the oil level with the dipstick, adding more if needed. Properly dispose of the used oil at a recycling center.

Spark Plug Replacement
Replacing the spark plug on your Toro 521 is crucial for optimal engine performance. First, disconnect the spark plug wire; Using a spark plug socket, carefully remove the old spark plug. Inspect the new spark plug for damage and ensure it’s the correct type, referencing your manual.
Gap the new spark plug to the specified measurement. Thread the new plug in by hand to avoid cross-threading, then tighten with the socket. Reconnect the spark plug wire securely. This ensures proper ignition and efficient operation.

Shear Pin Replacement
Shear pins protect the auger and impeller from damage during obstructions. When a pin shears, the auger stops. Disconnect the spark plug wire for safety. Locate the shear pin(s) on the auger shaft – typically behind the auger housing.
Use a punch and hammer to drive out the broken pin remnants. Insert a new shear pin, ensuring proper alignment. Secure it with the retaining clip or bolt. Always carry spare shear pins, as they are consumable items. Replacing them promptly restores snow removal functionality.
Troubleshooting Common Issues
This section addresses frequent problems encountered with the Toro 521. If the engine won’t start, check fuel levels, the spark plug, and ensure the safety interlocks are engaged correctly. For an auger that won’t engage, inspect the shear pins and drive belt. Drive system issues often stem from belt slippage or a faulty drive cable.
Always disconnect the spark plug before performing any inspection or repair. Refer to the detailed sections for specific diagnostic steps and solutions to restore optimal performance.
Engine Won’t Start – Diagnosis
A non-starting engine requires systematic diagnosis. First, verify sufficient fuel and check the fuel shut-off valve. Inspect the spark plug for fouling or damage; a replacement may be necessary. Confirm the spark plug wire is securely connected. Ensure the safety interlock switches are fully engaged – these prevent starting if not properly activated.
If these checks don’t resolve the issue, examine the recoil starter mechanism for damage. A compression test can reveal internal engine problems. Consult a qualified technician if needed.
Auger Not Engaging – Solutions
If the auger fails to engage, initial checks are crucial. Verify the auger drive belt is intact and properly tensioned; a broken or slipped belt is a common cause. Inspect the shear pins – these are designed to break under excessive load, protecting the gearbox. Replace any broken shear pins with the correct type.
Examine the auger engagement cable for proper adjustment and functionality. Ensure no obstructions are preventing auger rotation. If issues persist, a gearbox inspection by a qualified technician is recommended.
Drive System Problems – Fixes
Addressing drive system issues starts with belt inspection. Check the drive belt for wear, damage, or slippage; replace if necessary. Verify proper belt tension – too loose or too tight can cause problems. Examine the drive clutch for engagement; a faulty clutch won’t transmit power.
Inspect the shear keys on the drive axle for damage. Confirm the drive control lever is functioning correctly and fully engaging. If self-propelled function is lost, a gearbox issue may require professional attention.
Belt Replacement Guide
Replacing the drive belt requires disconnecting the spark plug for safety. Begin by removing the auger housing and belt guards to access the belt. Note the belt routing before removal – diagrams are helpful! Carefully remove the old belt, ensuring no debris remains.
Install the new belt, following the original routing precisely. Verify proper alignment within the pulleys. Reinstall the belt guards and auger housing securely. Finally, reconnect the spark plug and test the drive system to confirm correct operation.
Scraper Bar Adjustment and Replacement
Maintaining the scraper bar ensures clean snow removal. Periodically check for wear and adjust its position for optimal contact with the surface. Loosen the adjustment bolts and lower the scraper bar until it lightly touches the ground when the auger is engaged.
For replacement, remove the auger housing bolts and carefully lift the housing. Detach the worn scraper bar and install the new one, securing it with the appropriate fasteners. Reassemble the auger housing and verify proper scraper bar function before operation.
Chute Cleaning and Maintenance
Regularly clear the snow chute to prevent clogging and maintain throwing performance. Always shut off the engine and disconnect the spark plug wire before attempting any chute cleaning. Use a sturdy, non-metallic tool to dislodge accumulated snow and ice.

Inspect the chute for damage and wear. Lubricate the chute rotation mechanism with a silicone-based lubricant to ensure smooth operation. Avoid using abrasive cleaners that could damage the chute’s finish. A clean chute maximizes throwing distance and prevents strain on the engine.
Storage and Winterization
Proper storage is crucial for extending the life of your Toro 521 snowblower. Before long-term storage, stabilize the fuel with a fuel stabilizer to prevent degradation and carburetor issues. Alternatively, drain the fuel tank completely. Disconnect the spark plug wire for safety.
Cover the snowblower with a waterproof cover to protect it from the elements. Store it in a dry, sheltered location. Inspect belts and shear pins before storage, replacing if necessary. A well-prepared snowblower ensures easy starting next winter.
Fuel Stabilization and Drain Procedures

To winterize your Toro 521, fuel stabilization is recommended. Add a fuel stabilizer to a full tank of fresh gasoline, then run the engine for approximately five minutes to circulate the treated fuel throughout the system. This prevents fuel breakdown and varnish formation during storage.
Alternatively, completely drain the fuel tank. Use a siphon or carefully tilt the snowblower. Dispose of the fuel responsibly. After draining, run the engine until it stalls to remove remaining fuel from the carburetor.

Snowblower Cover and Protection
Protecting your Toro 521 from the elements extends its lifespan. A properly fitted snowblower cover shields against moisture, dust, and UV rays during storage. Ensure the cover is breathable to prevent condensation buildup, which can lead to corrosion.
When storing outdoors, elevate the snowblower slightly off the ground to improve airflow. Regularly inspect the cover for tears or damage. Consider storing the snowblower indoors, in a dry shed or garage, for optimal protection against harsh weather conditions and potential animal interference.
Understanding the Toro 521’s Warranty
The Toro 521 snowblower warranty provides coverage against defects in materials and workmanship. Typically, a standard warranty covers the machine for a specified period from the original purchase date. This often includes parts and labor, but may vary based on the model and region.
Review your warranty documentation carefully to understand the specific terms, conditions, and exclusions. Proper maintenance, as outlined in this manual, is crucial for warranty validity. Keep your purchase receipt as proof of date and location of purchase for any warranty claims.
Locating Replacement Parts
Genuine Toro replacement parts are essential for maintaining the performance and longevity of your 521 snowblower. These parts ensure compatibility and uphold the quality standards of the original equipment.
You can locate replacement parts through several avenues: authorized Toro dealers, Toro’s online parts catalog (typically found on their official website), and select online retailers specializing in outdoor power equipment parts. When ordering, have your snowblower’s model and serial number readily available to ensure you receive the correct components.
Toro Customer Support Contact Information
For assistance with your Toro 521 snowblower, Toro offers multiple support channels. You can reach their customer support team via phone, typically available during standard business hours, for immediate assistance with questions or concerns.
Alternatively, Toro’s website provides a comprehensive support section, including FAQs, troubleshooting guides, and downloadable manuals. Email support is also often available for less urgent inquiries. Locate specific contact details – phone numbers, email addresses, and mailing addresses – on the official Toro website under their “Contact Us” or “Support” section.
Electrical System Overview
The Toro 521 snowblower’s electrical system powers the engine’s ignition and, potentially, headlight functionality. It comprises a battery, wiring harness, ignition switch, and fuses, all working in concert to initiate and sustain engine operation. Understanding this system is crucial for diagnosing starting issues or electrical malfunctions.
A detailed wiring diagram, typically found within the service manual, illustrates the connections between these components. Regular inspection of the wiring for damage and proper fuse operation is vital for safe and reliable performance. Always disconnect the spark plug before working on the electrical system.
Wiring Diagram Explanation
The Toro 521’s wiring diagram is a schematic representation of the electrical circuit, illustrating component connections and pathways. Symbols denote specific parts – batteries, switches, fuses, and the ignition coil. Tracing wires on the diagram corresponds to physical wires within the snowblower. Color-coding assists in identification.
Understanding the diagram allows for pinpointing shorts, open circuits, or faulty components. It’s essential for troubleshooting starting problems or electrical failures. Always refer to the diagram alongside physical inspection, and ensure the engine is off before any electrical work is undertaken for safety.
Fuse Replacement Procedures
Before replacing a fuse on your Toro 521, disconnect the spark plug wire to prevent accidental starting; Locate the fuse box, typically near the electrical components. Identify the blown fuse – it will have a broken filament or a darkened glass window.
Use a fuse puller (or insulated pliers) to remove the old fuse. Replace it with a new fuse of the exact same amperage rating. Never use a higher amperage fuse, as this can cause damage. Reconnect the spark plug wire and test the system. Repeated fuse failures indicate a larger electrical issue needing diagnosis.
Frequently Asked Questions (FAQ)
Q: Why won’t my Toro 521 start? A: Check fuel levels, spark plug condition, and ensure the shear pins are intact.
Q: How often should I change the oil? A: Refer to the maintenance schedule – typically every 50 hours or annually.
Q: What does it mean if the auger isn’t engaging? A: Inspect the shear pins and drive belt for damage.
Q: Where can I find replacement parts? A: Toro’s website or authorized dealers are the best sources. Contact Toro customer support for assistance.